
Home Gym Builds / $0-100 / apartment
Wrist Rehab Exercises at Home for Tennis Players
A structured four-phase wrist rehabilitation progression for recreational tennis players — from acute pain management to return-to-play — with specific exercise choices, weights, and rep ranges you can follow at home with minimal equipment.
- Budget tier
- $0-100
- Space type
- apartment
- Floor footprint
- Less than 2 sq ft
- Noise level
- Quiet
By Editorial Team
Itemized build and cost breakdown
- Total cost estimate
- Under $50
- Included equipment
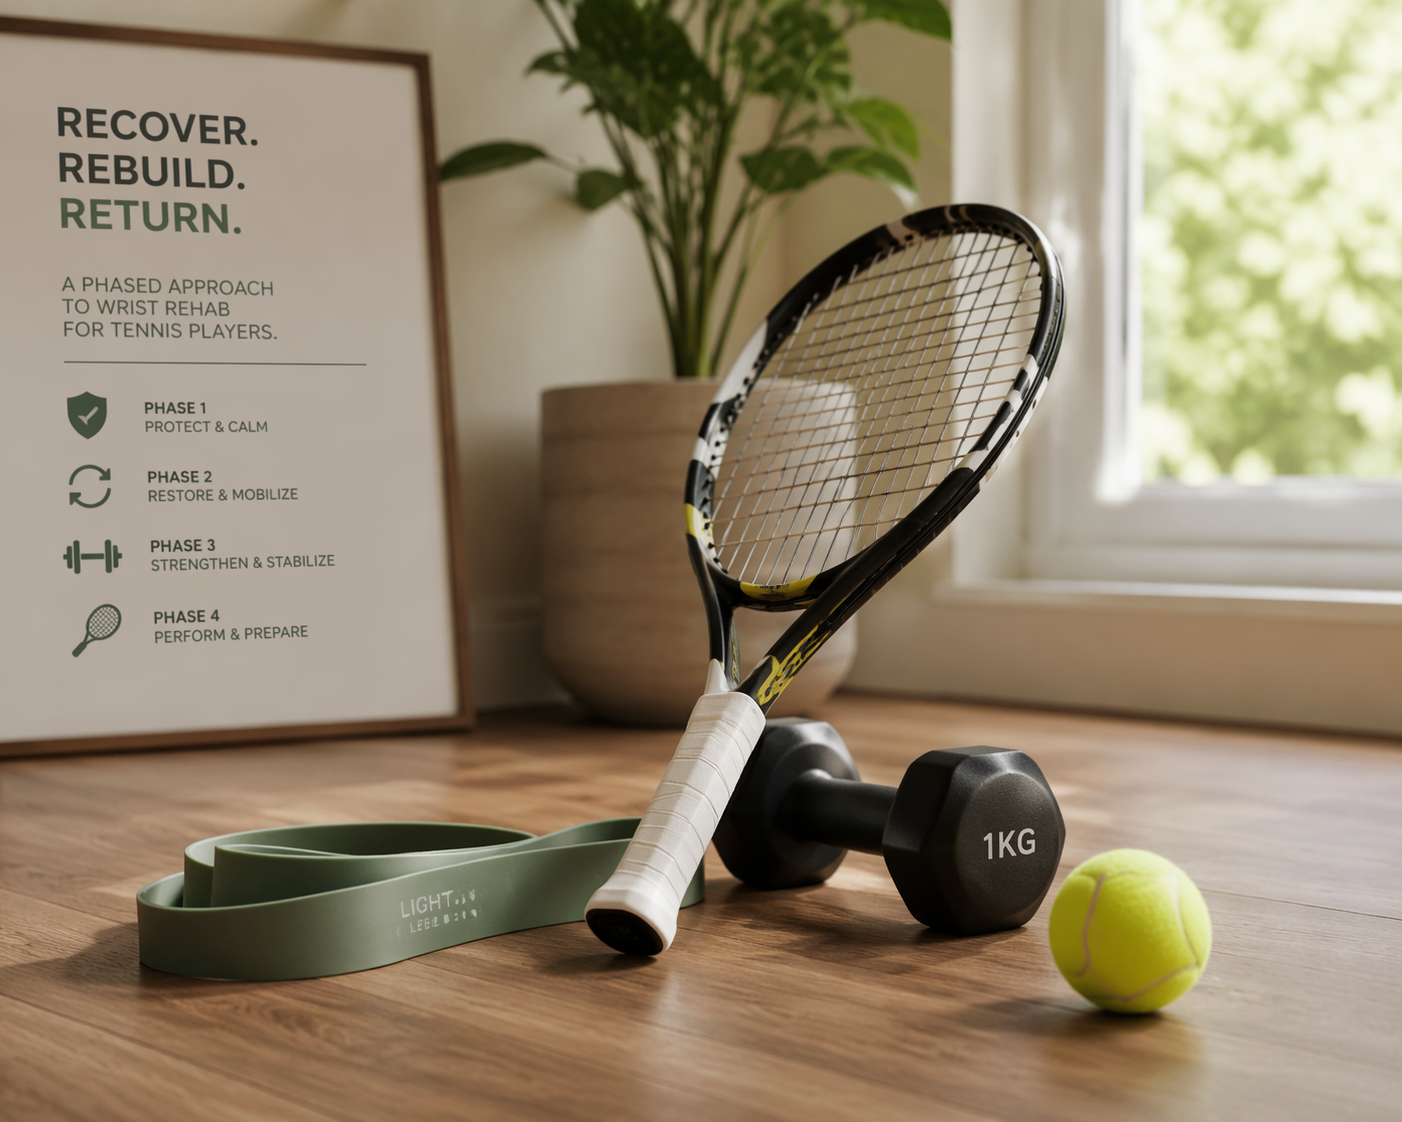
- Tennis racket, 1 kg dumbbell, resistance band, tennis ball
Prices and specs on this build are rechecked periodically — if something looks stale, flag it below.
Wrist rehab exercises at home for tennis players should start with one decision: which phase your wrist is actually ready for today. Not what week it is. Not how badly you miss doubles. If your wrist still complains when you pick up a coffee mug, you are not in the same phase as the player who can lift, rotate, and dribble a ball without a flare.
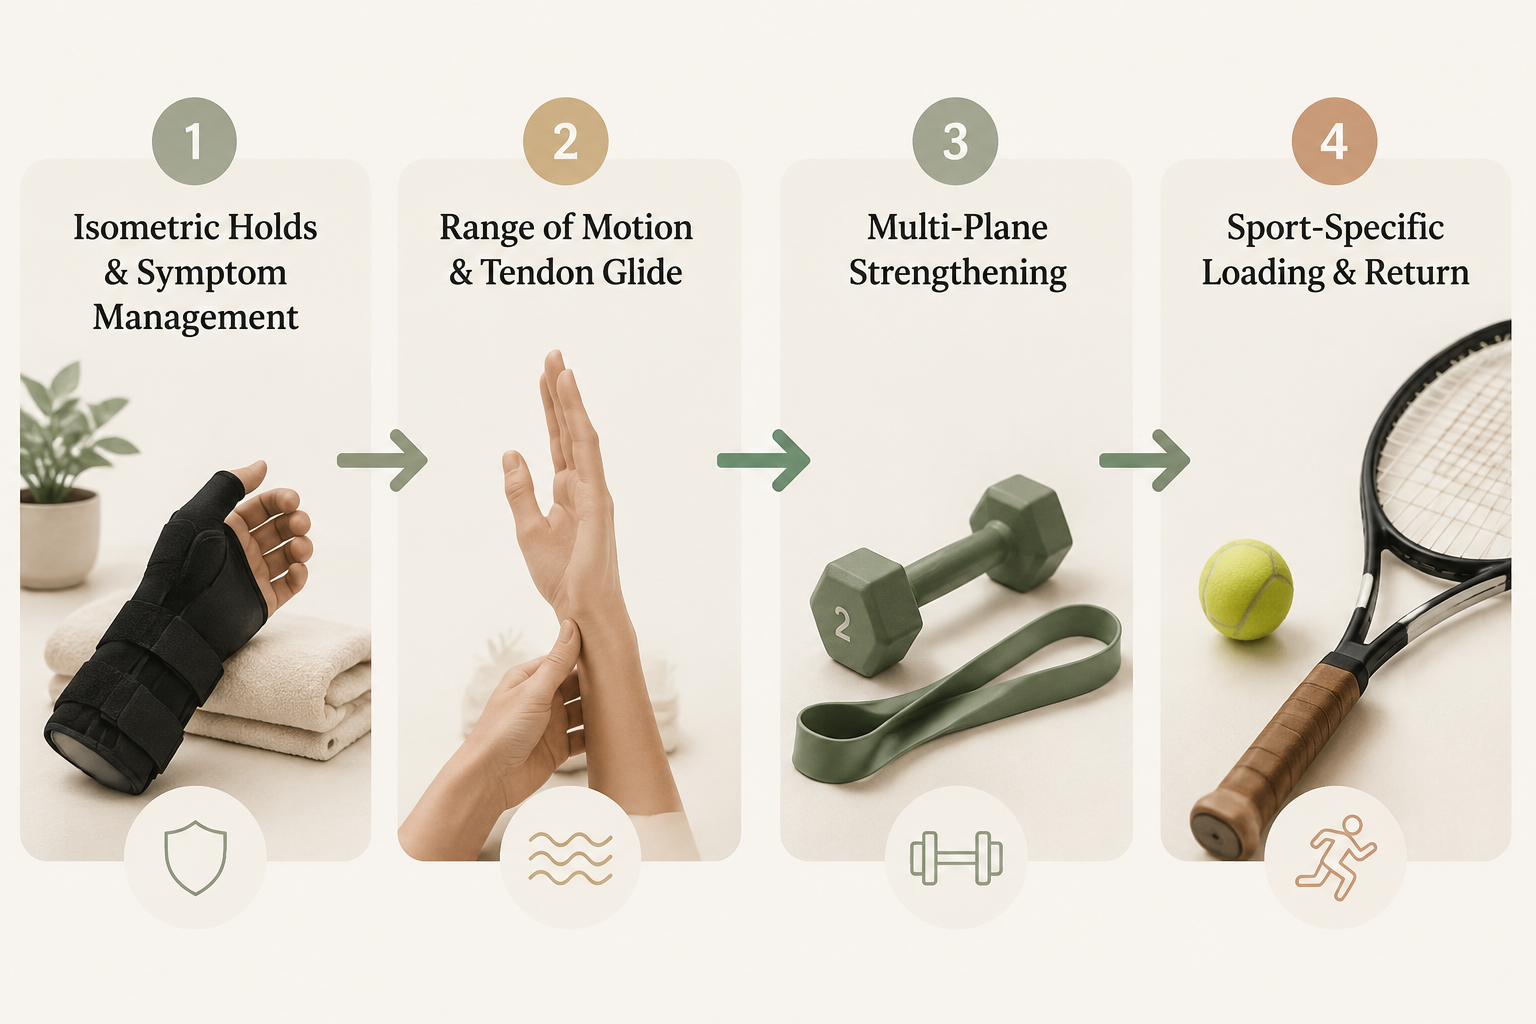
This is a four-phase home progression: calm symptoms, restore motion, rebuild strength across wrist and forearm planes, then test tennis-specific loading. It is general education, not a diagnosis. If your pain is severe, traumatic, persistent, worsening, visibly swollen, associated with numbness or weakness, or unclear enough that you are guessing, a physical therapist or sports medicine clinician should assess it before you try to rehab your way through it.
The point of phases is not to make rehab sound more formal than it is. Tennis wrists are messy. Grip pressure changes wrist load. Stroke style and grip pattern can shift which side of the wrist gets irritated. And imaging-type findings can show up even in players who feel fine, which is one reason self-diagnosing from pain location alone is a bad bet.
A review of tennis hand and wrist injuries reported that a very tight grip increased wrist extension torque by about 20% in a biomechanical simulation, which matters because grip tension is something a recreational player can actually change on court.[1] The same review discusses a study of 370 Italian non-professional players in which injured players using Western or semi-Western grips were more often associated with ulnar-sided patterns such as ECU problems, while Eastern-grip players were associated with more radial-sided problems; that is context, not a command to rebuild your forehand grip because your wrist hurts.[1]
One more caution before the exercises: the review also notes an ultrasound study in which 92% of 26 asymptomatic recreational tennis players showed ECU tendinosis or partial tears.[1] That is a small sample of players without symptoms, so it should make you careful, not panicked. A scary-sounding tendon finding does not automatically explain your pain, and a normal-feeling wrist is not always a perfectly blank scan.
Pick the Phase by Symptoms, Not the Calendar
Use this table as the handoff point. If two rows seem possible, choose the easier phase for a few sessions. The fastest way back is usually the one that does not keep restarting.
| Phase | You probably belong here if | Main job | Advance when |
|---|---|---|---|
| Phase 1: calm symptoms | Pain is recent, irritable, or shows up with daily tasks | Reduce aggravation and use pain-limited isometrics | Daily use is comfortable and gentle contractions do not flare symptoms |
| Phase 2: restore motion | Pain is calmer, but the wrist feels stiff or guarded | Recover comfortable range of motion and tendon glide | Motion is near the other side and light loading is tolerated |
| Phase 3: strengthen | You can move the wrist comfortably and want to rebuild capacity | Load flexion, extension, deviation, pronation, supination, and grip | Strength work causes no next-day flare and feels controlled |
| Phase 4: return to tennis | Gym-style wrist loading is tolerated, but hitting is not fully tested | Reintroduce racket, ball, grip, and stroke load gradually | Sport-specific drills and short hitting sessions do not provoke symptoms |
For the broader logic behind phase-based rehab, see how to structure home rehabilitation after a sports injury. This article narrows that framework to the wrist demands of tennis.
Phase 1: Calm the Wrist Without Letting It Go Completely Idle
In the first phase, the goal is not to stretch the pain away. It is to stop feeding the irritation while keeping the wrist connected to the rest of the arm. Relative rest means you reduce or pause the strokes, lifts, push-ups, heavy carries, and long phone-grip positions that provoke symptoms. It does not mean you freeze the hand for a week unless a clinician has told you to immobilize it.
USTA material from Dr. Michael Hausman notes that for more than three-quarters of tennis-related wrist pain patients, rest and anti-inflammatory medication resolve symptoms within about one week.[2] That statement is useful as a reminder that many mild irritations settle quickly. It is not permission to ignore pain that keeps returning every time you serve or hit a late forehand.
Start With Pain-Limited Isometrics
Isometrics let you contract the wrist and forearm without moving through a painful range. Hinge Health, Cleveland Clinic, and other PT-oriented sources include gentle wrist and forearm exercises as part of conservative wrist-pain management, while E3 Rehab uses staged loading based on symptom response rather than a fixed date.[3][4][5]
- Wrist extension isometric: Rest your forearm on a table, palm down, wrist neutral. Place your other hand over the back of the sore hand. Try to lift the sore hand into the top hand without letting it move. Hold 5–10 seconds. Do 5–10 reps.
- Wrist flexion isometric: Turn palm up. Press the sore hand upward into your other hand without movement. Hold 5–10 seconds. Do 5–10 reps.
- Radial and ulnar deviation isometric: Keep the thumb side up, as if you are shaking hands. Press gently toward the thumb side, then toward the pinky side, against your other hand. Hold 5–10 seconds each direction. Do 5–10 reps.
- Gentle grip isometric: Squeeze a towel or soft ball at low effort. Hold 5 seconds. Do 10 reps. Stop if gripping reproduces your tennis pain sharply.
Keep the effort around easy-to-moderate. A mild discomfort during the hold may be acceptable if it settles quickly and does not make the wrist worse later that day or the next morning. Sharp pain, spreading pain, or a next-day increase means the dose is too high or the exercise is wrong for the current problem.
You can also use the rest of your recovery time well: walk, train legs, do non-provocative cardio, or use general recovery work that does not load the wrist. The point is to keep your body moving without smuggling tennis wrist stress back in through “just one light hit.”
Phase 2: Restore Motion and Tendon Glide Before You Chase Strength
Phase 2 begins when daily use is mostly calm and the isometrics do not create a flare. This is where a lot of players get impatient. They can open a door and type again, so they jump straight to dumbbells or a basket of serves. The wrist may not be ready for that yet.
The job here is to make motion normal enough that strengthening does not happen on top of guarding. Keep the movements slow, easy, and boring. If you need pain to feel like you are “doing something,” you are probably overdoing this phase.
Range-of-Motion Drills
- Wrist flexion and extension: Forearm supported on a table, hand off the edge. Bend the wrist down and up through a comfortable range. Do 2–3 sets of 10–20 reps.
- Radial and ulnar deviation: Forearm supported, thumb up or palm down. Move the hand side to side like a slow windshield wiper. Do 2–3 sets of 10–20 reps.
- Pronation and supination: Elbow at your side, bent about 90 degrees. Turn the palm up, then down, staying in a comfortable range. Do 2–3 sets of 10–20 reps.
- Finger tendon glides: Start with fingers straight, then move into a hook fist, full fist, and straight fist. Move slowly rather than forcing end ranges. Do 5–10 cycles.
Cleveland Clinic and Hinge Health both include gentle wrist stretching and mobility work in conservative wrist-pain exercise guidance, while E3 Rehab frames range and loading around tolerance and progression.[3][4][5] That shared idea is more useful than any single favorite stretch: regain motion you can actually use.
Light Stretching, Only After Motion Warms Up
If active motion feels good, add gentle wrist flexor and extensor stretches. Keep the elbow straight but not locked. Use the other hand to guide the wrist into a mild stretch, not a forced bend. Hold 15–30 seconds, 2–4 times each direction. If stretching creates a sharper version of your tennis pain, skip it for now and stay with active motion.
Advance from Phase 2 when the sore wrist moves close to the other side, everyday use is not provoking symptoms, and unloaded motion does not create next-day soreness. You do not need a perfect wrist to begin strengthening. You do need a wrist that is not irritated by the basic movements you are about to load.
Phase 3: Strengthen the Wrist in the Directions Tennis Actually Uses
This is the center of the home program. Tennis does not ask the wrist to move in one tidy plane. It asks the forearm to rotate, the wrist to resist extension and deviation, the hand to grip without strangling the handle, and the whole chain to tolerate off-center contact. A good Phase 3 program loads those demands gradually instead of doing wrist curls and calling it done.
The starting-load range is pleasantly unheroic. USTA’s Todd Ellenbecker material recommends wrist exercises using 3–5 lb dumbbells for 3 sets of 15 reps; E3 Rehab commonly uses progressive wrist loading in the 10–20 rep range; Tennis Fitness and Cleveland Clinic also describe light dumbbell-based wrist strengthening; Hinge Health includes wrist-strengthening exercises in conservative care.[3][4][5][6][7] In practice, start with about 1 kg (2.2 lb) or a 3 lb dumbbell if you have one. A soup can or small water bottle works if it lets you control the motion.
| Exercise | How to do it | Starting dose | Progress when |
|---|---|---|---|
| Wrist extension curl | Forearm supported, palm down, lift the back of the hand toward you, lower slowly | 2–3 sets of 10–20 reps with 1 kg or 3–5 lb | Reps feel controlled and no next-day flare |
| Wrist flexion curl | Forearm supported, palm up, curl palm toward forearm, lower slowly | 2–3 sets of 10–20 reps with 1 kg or 3–5 lb | No sharp pain at the bottom or top |
| Radial deviation | Thumb up, hold a light weight like a hammer handle, lift thumb side upward | 2–3 sets of 10–15 reps | Side-to-side control feels even |
| Ulnar deviation | Thumb up, guide the hand gently toward the pinky side against light resistance | 2–3 sets of 10–15 reps | No ulnar-sided pinch or snapping sensation |
| Pronation/supination | Hold a hammer, light dumbbell end, or band; rotate palm down and up slowly | 2–3 sets of 10–20 reps | Rotation is smooth without guarding |
| Grip endurance | Squeeze a towel or soft ball at moderate effort | 2–3 sets of 10–20 squeezes or 5-second holds | Grip does not reproduce stroke pain |
Do the exercises three or four days per week at first, with at least a day between harder sessions. If you are very sensitive, begin with one set of each exercise and build volume before weight. If 3 lb is too much, use less. If 5 lb is easy but sloppy, it is still too much for rehab.
How to Progress the Load
Progress one variable at a time. First make the movement smooth. Then add reps. Then add a set. Then add a small amount of weight or move your hand farther from the heavy end of a hammer to increase leverage. The wrist tends to punish big jumps more than honest small ones.
- Acceptable response: mild effort or mild discomfort during exercise that settles quickly and is not worse the next morning.
- Too much: sharp pain, increasing pain across the set, pain that changes your motion, swelling, or soreness that clearly worsens the next day.
- Progression target: 2–3 sets of 10–20 controlled reps in each main direction before harder tennis-specific work.
- Technique target: the forearm stays supported for curls, the wrist does not collapse at end range, and the grip on the weight stays relaxed enough that you are not bracing through your whole arm.
Resistance bands can work well for pronation, supination, and deviation because they let you adjust tension in small increments. Anchor them safely and keep the motion slow. If you use a door anchor, read how to safely use a resistance band door anchor before pulling against a closed door.
Add the Rest of the Arm Before You Add Tennis
A wrist that is recovering well still needs help from the elbow, shoulder, and trunk. Add light rows, external rotations, scapular work, and general upper-body pulling if they do not provoke symptoms. For a broader home program that covers other tennis injury areas, use 3-phase injury recovery exercises for tennis players at home as the bigger map; keep this wrist progression as the more specific track.
Phase 4: Return to the Racket Before You Return to Playing Sets
Phase 4 starts when the wrist tolerates multi-plane strengthening, gripping, and daily use without a next-day flare. This is not the same as being match-ready. A racket adds leverage, vibration, timing mistakes, late contact, and the very human urge to hit harder because the ball is finally there.
Begin with the racket off court. Shadow swing at half speed. Check whether the wrist stays quiet during forehands, backhands, volleys, and serves without a ball. Then add ball-control work before rallying.
The 30-Second Ball-Dribble Check
USTA’s wrist management guidance includes a rapid ball-dribble test: dribble a tennis ball on the strings for 30 seconds as a functional readiness check.[6] It is simple, which is why I like it. You cannot hide much when the wrist has to make small, repeated corrections under racket weight.
- Hold the racket with normal posture and a relaxed grip.
- Dribble the ball continuously on the strings for 30 seconds.
- Stop if pain becomes sharp, grip tightens defensively, or the wrist feels unstable.
- Recheck symptoms later that day and the next morning before treating it as a pass.
Passing the dribble check does not mean play a league match tonight. It means the wrist has earned a small dose of hitting.
Build Hitting Back in Small Blocks
| Tennis dose | What to do | What to avoid at first | Advance when |
|---|---|---|---|
| Racket handling | Shadow swings, ball taps, 30-second dribble | Full-speed serves and late-contact swings | No symptoms during or next day |
| Mini-tennis | Short-court rallies at easy pace | Heavy topspin, sharp angles, competitive points | Grip stays relaxed and contact feels predictable |
| Baseline rally | Controlled groundstrokes, short duration | Max-effort forehands, mishit-heavy sessions | No flare after gradually longer sessions |
| Serve and return | Start with partial-speed serves and controlled returns | Kick serves, high-volume serving, return games under pressure | Wrist tolerates load during and after |
| Practice set | Low-stakes set after controlled hitting is tolerated | Tournament or ladder match as the first test | You can play without protecting the wrist |
Grip tension deserves special attention here. The biomechanical point from earlier—the roughly 20% increase in wrist extension torque with a very tight grip—shows up on court as a practical cue: hold the racket securely, not desperately.[1] A player coming back from wrist pain often squeezes harder because they are nervous. That can make the wrist work more, not less.
Do not turn this into blame. Western and semi-Western forehands, two-handed backhands, one-handed slices, late contact, and racket setup can all change wrist demands. The useful question is not “Which one is wrong?” It is “Which stroke, grip pressure, contact point, or volume makes symptoms appear?” That answer tells you what to reintroduce last and what a coach or clinician may need to watch.
What Timelines Can and Cannot Tell You
Players want dates because calendars feel less maddening than symptoms. Timelines can help set expectations, but they should not overrule the wrist in front of you.
Forever Fit PT describes mild tennis-related wrist injuries as typically improving in 4–6 weeks with conservative care.[8] That may fit a mild irritation that settles, loads, and returns cleanly. It does not describe every wrist injury a tennis player can have.
At the other end, the tennis hand and wrist injury review discusses a small report of elite players with complex ECU injuries treated with immobilization who required 5–6 months before return to play.[1] That is a different injury type and severity, not the scary version of every sore wrist. Mixing those two timelines into one generic recovery forecast would be useless.
A better return-to-sport question is covered in more detail in how long injury recovery takes when returning to sport: what can you do now, what happens after you do it, and what load comes next?
Stop Signs That Beat Another Exercise Variation
Home rehab works best when it has boundaries. If your wrist keeps failing the same step, the answer is not always a new stretch or a different band angle. Sometimes the answer is an exam.
- Get assessed if pain follows a fall, sudden pop, or clear traumatic moment.
- Get assessed if there is swelling, bruising, numbness, tingling, obvious weakness, locking, catching, or a feeling of instability.
- Get assessed if ulnar-sided pain comes with snapping or a sense that something is moving around the outside of the wrist.
- Get assessed if symptoms are not improving with a reasonable reduction in tennis load and a well-tolerated progression.
- Get assessed if you can pass daily tasks but flare every time you reintroduce the same stroke.
The practical gate back to tennis is straightforward: you can complete your wrist mobility, light strengthening, multi-plane loading, racket handling, and the 30-second ball-dribble check without a symptom flare; then you can resume hitting gradually. If you cannot clear that gate, the next step is clinical assessment, not a longer list of wrist rehab exercises at home.
References
- Hand and Wrist Injuries in Tennis Players — Current Reviews in Musculoskeletal Medicine
- Health Tip: Tennis Wrist Injuries & Support — USTA / Mount Sinai
- Tennis Wrist Pain: Causes, Exercises and Treatment — Hinge Health, updated May 2026
- Wrist Pain Rehab — E3 Rehab
- 11 Exercises and Stretches for Wrist Pain — Cleveland Clinic
- Sports Medicine: Wrist Management: Prevention of Wrist Injuries in Tennis Players — USTA Player Development, 2004
- Tennis Wrist Injuries | Arm Exercise | Stretches — Tennis Fitness
- Tennis-Related Wrist Pain? Find Relief With These 5 PT Exercises — Forever Fit PT, updated Sep 2025
Best for
Before you buy
Verify an item, or start using this build
Spot a stale price or spec?
Prices and stock change. If something in this build no longer matches what you found at checkout, let us know so we can recheck it.