
Calf Strain Recovery at Home: Phase-by-Phase Exercise Guide
This guide provides a complete at-home calf strain recovery program organized by injury grade (1–3) and healing phase. Learn the correct exercises in the correct order, and how to know when you're ready to return to activity — all without gym equipment.
- Citation source
- Sports Medicine - Open
- Evidence level
- general guideline
- Recommended frequency
- 2 sessions per week
If you strained your calf and can walk around the house, the tempting move is to start testing it every few hours: a little jog across the street, a few stairs two at a time, maybe one “easy” workout to see where things stand. That is exactly where a lot of calf strains go sideways. Re-injury rates have been reported at 19–31%, with the highest risk concentrated in the first two months after return to sport, so calf injury recovery exercises at home need to be organized by readiness, not by impatience.[1]
The useful question is simple: what can you do today without making tomorrow worse? For most Grade 1 and many Grade 2 calf strains, the answer is a phased home plan: protect the injury, restore pain-free motion, rebuild calf strength with both straight-knee and bent-knee heel raises, then prove readiness with hopping and running criteria. A Grade 3 tear, a suspected Achilles injury, or unexplained calf swelling is a different situation.
Start With Triage, Not Exercises
Before choosing exercises, sort the injury into a reasonable safety category. This does not require self-diagnosing every fiber of the calf, but it does mean knowing when a home plan is the wrong first step.
| Likely grade | What it often feels like | Home-rehab implication |
|---|---|---|
| Grade 1 | Tightness, mild pull, soreness during push-off, usually able to walk | Often appropriate for cautious home rehab if symptoms steadily improve |
| Grade 2 | Sharper pain, limp, bruising or swelling may appear, running usually stops | May be rehabbed at home if improving, but progress slower and consider evaluation |
| Grade 3 | Severe pain, major weakness, marked swelling or bruising, possible gap or pop | Get medical evaluation; do not treat this like normal soreness |
Also pause for a blood-clot check. Deep vein thrombosis can mimic a calf strain in a minority of cases, and Cleveland Clinic notes that up to 10% of people with calf pain may have DVT rather than a muscle injury. Unexplained swelling, warmth, redness, worsening calf pain, shortness of breath, or chest pain means you should seek medical care instead of starting exercises.[2]
If the injury happened during a sprint, jump, hill, court-sport push-off, or sudden change of direction and the red flags are absent, begin with the least heroic part of rehab: calm the area down enough that it can accept loading again.
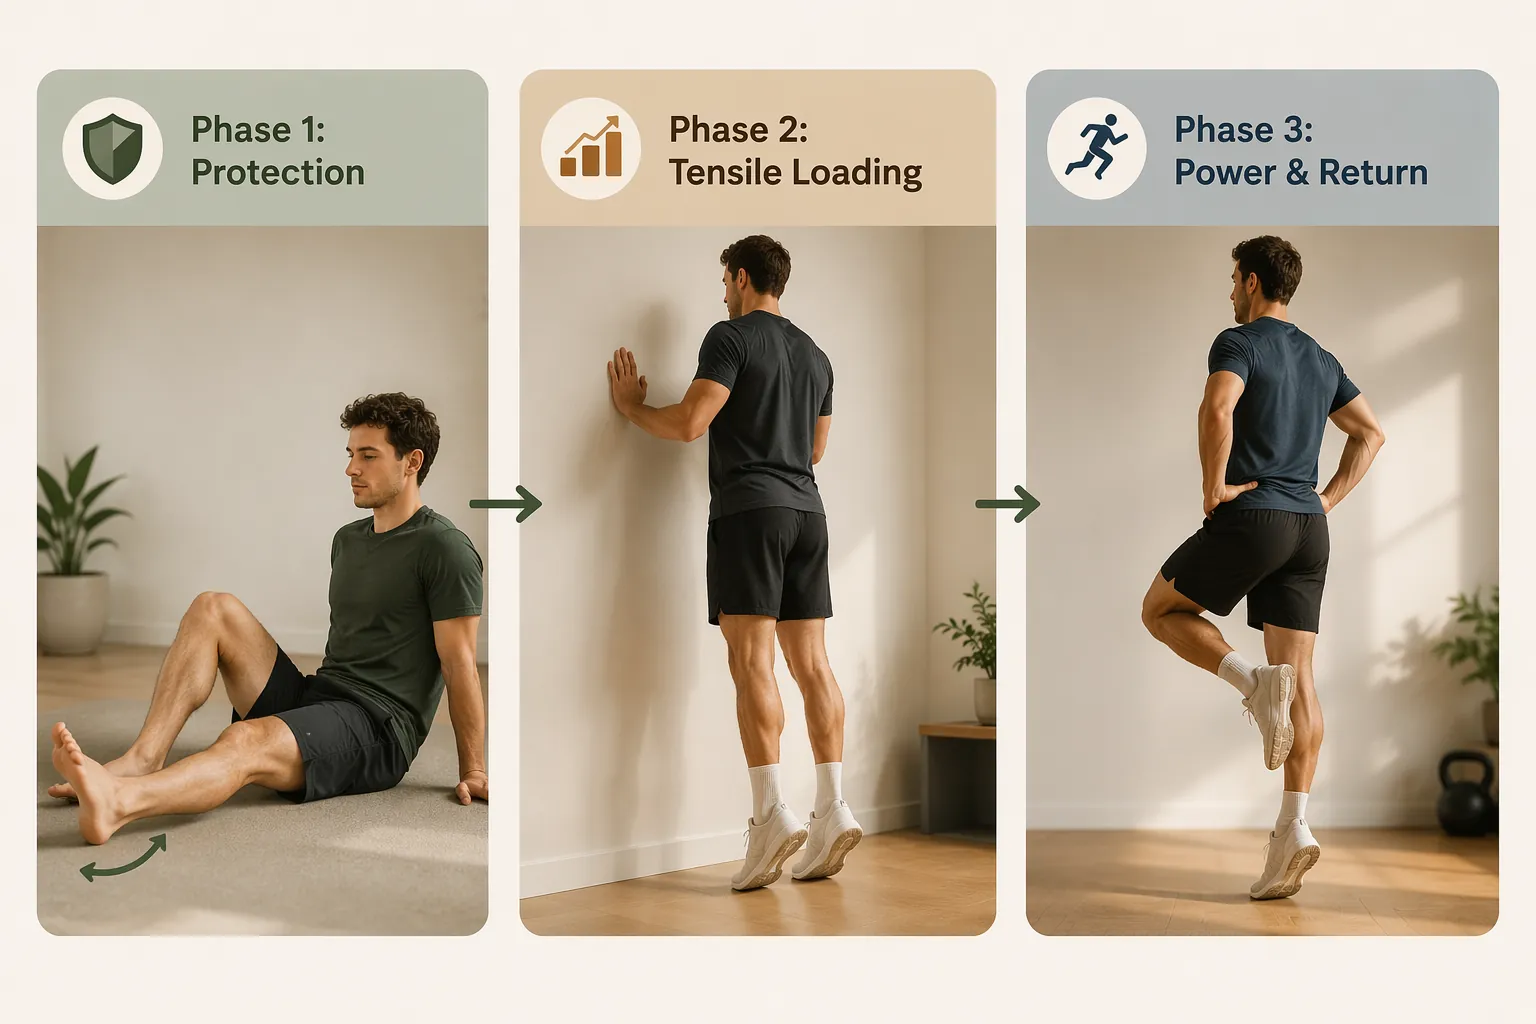
Phase 1: Protection and Pain-Free Motion
The first phase is not complete rest. It is protection from the movements that re-open the strain while keeping the ankle and calf from getting stiff. For many myotendinous calf strains, gentle loading may begin around days 3–5 if symptoms allow; intramuscular tendon injuries may need closer to about 10 days before similar loading is tolerated.[3] Those windows are not promises. If walking still makes you limp, your first job is to unload, not prove toughness.
Use pain as a traffic signal, but not as the only one. Mild discomfort during a drill can be acceptable if it settles quickly and does not increase the next day. Sharp pain, a sudden tug, increasing limp, or next-day worsening means the dose was too high.
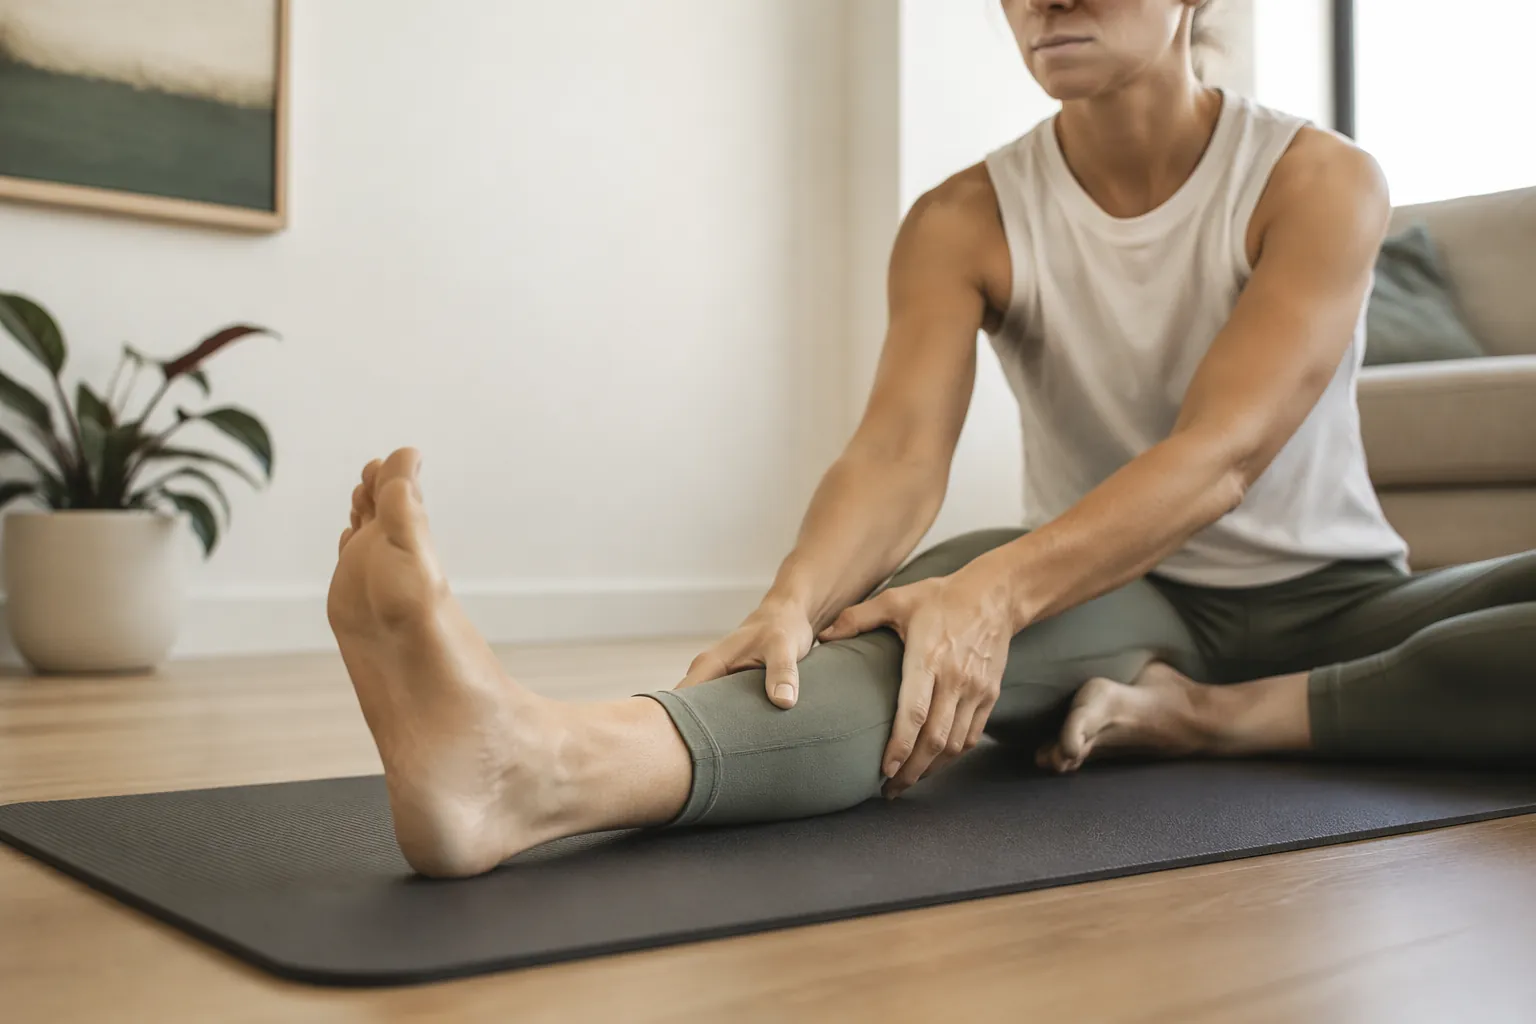
Early Home Exercises
- Pain-free ankle pumps: sit or lie down, point and flex the ankle through a comfortable range for 1–2 minutes, several times per day.
- Ankle circles: make slow circles in both directions without forcing the stretch at the end range.
- Gentle calf isometrics: press the ball of the foot lightly into the floor, a wall, or your other foot for 5–10 seconds, then relax.
- Easy walking only if gait is close to normal: shorten stride length and avoid hills, speed work, stair workouts, and loaded carries.
Do not chase a deep calf stretch in this phase. A newly strained calf usually needs tolerable contraction and circulation more than aggressive lengthening. If you need crutches or cannot walk without a clear limp, that is not a failure; it is useful information that the tissue is not ready for normal loading.
| Advance when | Stay here when |
|---|---|
| Walking around the house is nearly normal | You still limp or shorten every step |
| Ankle motion is comfortable and improving | Range of motion feels blocked by sharp calf pain |
| Light isometrics do not worsen symptoms later that day or the next morning | The calf feels worse after gentle contractions |
Phase 2: Tensile Loading With Heel Raises
This is the part most people either skip or rush. Walking can feel fine before the calf is ready to absorb repeated push-off. Running, jumping, hiking uphill, and court sports all ask the calf to handle repeated stretch-shortening loads. Heel raises are the bridge, but the details matter.
Use both straight-knee and bent-knee versions. Straight-knee heel raises bias the gastrocnemius, the more visible calf muscle that crosses the knee. Bent-knee or seated-style heel raises bias the soleus, which sits deeper and is heavily involved in endurance running. That distinction is not trivia: the gastrocnemius accounts for a large share of calf injuries in some sports medicine reports, while repeat calf strains are often linked to the soleus; one rehab review notes that about 90% of repeat calf strains occur at the soleus.[3]
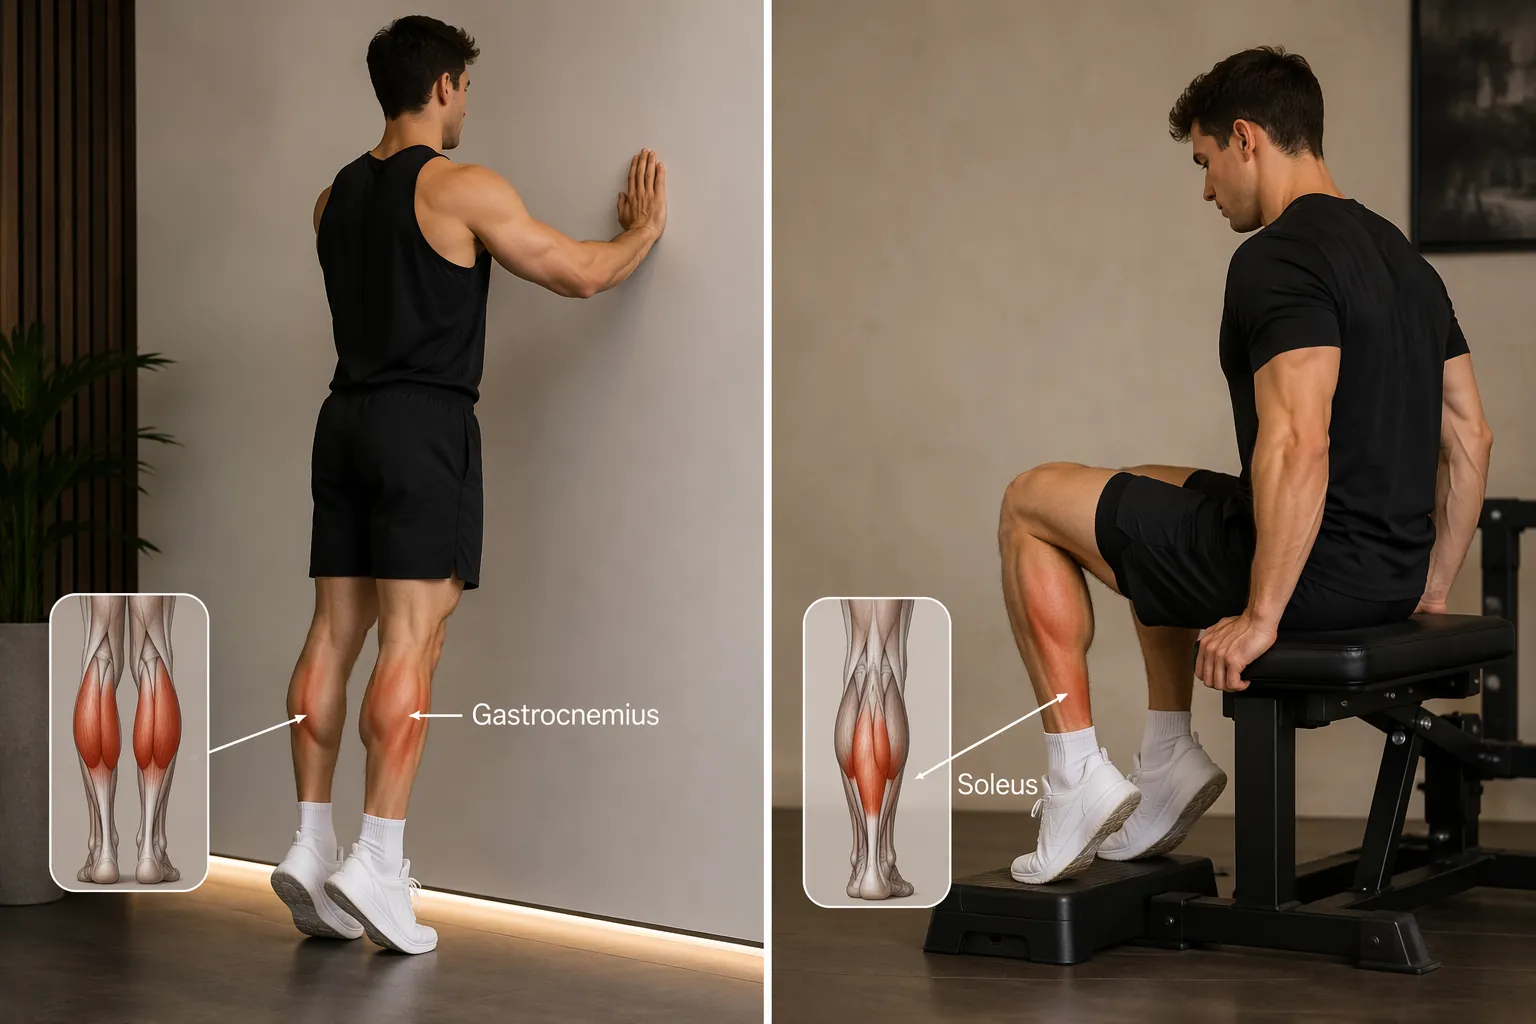
Two-Leg Heel Raise
Stand facing a wall or counter. Keep both feet hip-width apart. Rise onto the balls of both feet, pause briefly, then lower slowly. Start on flat ground before using a step. The first goal is control, not height.
- Start with 2–3 sets of 8–12 reps if symptoms stay calm.
- Use a 3–4 second lowering phase once the movement is comfortable.
- Keep pressure through the big toe and second toe rather than rolling to the outside of the foot.
- Stop the set if the injured side starts guarding, cramping sharply, or losing range.
Bent-Knee Heel Raise
For the soleus, bend the knees slightly while standing at a wall, then raise and lower the heels without letting the knees straighten. If standing is too irritable, sit in a chair with the feet flat, lift the heels, and lower slowly. Bodyweight seated work may feel easy at first, but it teaches the pattern before heavier loading is appropriate.
Runners should not treat this as optional. The soleus can face very high demands during running; one running-focused rehab source, citing Rich Willy’s loading data, describes soleus loads during running as roughly 6–8 times bodyweight.[4] A calf that passes casual walking but fails bent-knee endurance is not ready for much running volume.
Single-Leg Heel Raise Progression
Move to single-leg heel raises only after two-leg versions are smooth and the next day feels no worse. Use a wall for balance, but do not push yourself up with your hands. The calf should do the work.
- Two-leg up, two-leg down on flat ground.
- Two-leg up, injured-leg emphasis on the way down.
- Single-leg up and down on flat ground.
- Single-leg heel raise with a slow 3–4 second lowering.
- Single-leg heel raise from a step, only if full range is pain-free.
This phase often lands somewhere in weeks 2–4 for uncomplicated Grade 1 and some Grade 2 strains, but the calendar is less important than the response. Grade 2 injuries may need longer. If each new version causes a next-day ache that changes your walking, back up one level and rebuild.
Phase 3: Power, Hops, and Return to Activity
Strength work earns you the right to test faster movements. It does not automatically make you ready for them. The calf behaves differently when the ground contact gets quicker, which is why return-to-run plans that stop at slow heel raises leave a gap.
Start with low-amplitude double-leg pogo hops: small, quiet bounces with knees slightly soft and ankles doing most of the work. Then progress to single-leg pogo hops, forward hops, skipping, and short accelerations. These drills should feel springy, not protective.
| Drill | Use it when | Pass criteria |
|---|---|---|
| Double-leg pogo hops | Single-leg heel raises are controlled on flat ground | Light, symmetrical, no sharp tug |
| Single-leg pogo hops | Double-leg hopping is easy and next day is calm | 10–20 contacts without pain or guarding |
| Forward single-leg hops | Vertical hops feel controlled | Stable landing without calf pain |
| Skipping or walk-jog strides | Hops are pain-free and heel-raise test is close | No symptom flare later that day or the next morning |
For court sports, hiking, pickleball, and field sports, straight-line jogging is only one checkpoint. You also need to tolerate the kind of push-off your activity uses: lateral shuffles, small split steps, uphill walking, uneven ground, or short accelerations. Add those pieces gradually after basic hopping is quiet and pain-free.
The Return-to-Run Test: 25–30 Full-Range Single-Leg Heel Raises
The cleanest home benchmark is the single-leg heel raise test: 25–30 pain-free reps through full range before returning to running. Green and colleagues also include pain-free hopping benchmarks, such as 10–20 single-leg hops, in return-to-run decision-making after calf strain.[5]
Do the heel raise test when you are warmed up but not fatigued. Stand near a wall for balance. Rise as high as possible on the injured side, lower under control to the starting position, and repeat without bouncing, twisting, or stealing height from the knee or hip. Count only reps that match the first good rep’s range.
- Pass: 25–30 full-range reps, pain-free during the test, no next-day increase.
- Borderline: enough reps but shrinking height, cramping, or obvious compensation.
- Not ready: sharp pain, early fatigue, reduced range, or soreness that changes walking later.
Healthy-adult heel-rise norms can be useful context, but they are not a diagnosis and they do not overrule symptoms. An injured calf that reaches a normal-looking number with shortened range or a next-day flare has not passed in any practical sense.
A Simple Walk-Jog Return
Once the heel raise and hop tests are clean, begin with a run-walk session that feels almost too easy. The first run back is not fitness training; it is a tissue tolerance test.
| Session | Example structure | Rule for next session |
|---|---|---|
| First return | 1 minute easy jog / 2 minutes walk, repeated for 15–20 minutes | Advance only if symptoms stay calm the next day |
| Early build | Increase total easy jogging time gradually | Do not add hills, speed, or court play in the same week |
| Later build | Extend continuous easy running before faster work | Add strides or hills only after several calm easy runs |
Keep the first few runs flat and boring. Avoid testing pace on a downhill, sprinting for a crosswalk, or joining the faster group because the warm-up felt good. A calf re-strain often announces itself after the confidence comes back, not when you are still being careful.
Timelines Are Ranges, Not Permission Slips
Broad recovery timelines can help set expectations: Grade 1 strains may settle in about 1–3 weeks, Grade 2 strains often need about 4–8 weeks, and Grade 3 injuries can take 3 months or longer and usually deserve medical guidance.[2][6] Age, previous calf injury, training history, the exact tissue involved, and how well you tolerate loading can all move those timelines.
There is also a ceiling to a no-equipment home plan. Advanced rehab targets discussed in calf rehab protocols include external-load goals such as roughly 0.3–0.4 times bodyweight for single-leg standing calf raises and 1.0–1.5 times bodyweight for seated calf raises.[3] Those numbers are not realistic for everyone with only a wall and a step. If you are returning to competitive sport, repeated sprinting, loaded hiking, or a demanding running block, a gym or physical therapist may be the safer way to finish the job.
What to Keep Doing After the First Good Run
The mistake is stopping calf work once running feels normal. Calf strength deficits can persist for 4–6 months after return to sport, even when the athlete feels recovered.[3] That lingering gap matters because the re-injury window is front-loaded after return.[1]
Keep two short calf sessions per week for at least the next couple of months. Include straight-knee single-leg heel raises, bent-knee heel raises, and a small dose of hopping or skipping if your sport requires it. The volume does not need to be dramatic; it needs to be consistent enough that the calf does not lose the capacity you just rebuilt.
For most Grade 1 and Grade 2 strains, a reasonable at-home return path looks like this: normal walking, pain-free range of motion, controlled two-leg and single-leg heel raises, 25–30 full-range pain-free single-leg heel raises, 10–20 pain-free single-leg hops, then gradual running or sport exposure without a next-day flare. If one of those pieces fails, the answer is not to quit moving. It is to return to the last level your calf could actually handle.
References
- External workload and calf muscle strain injury, PMC
- Pulled Calf Muscle: Treatment, Symptoms & Recovery, Cleveland Clinic
- Calf injury rehab, Physio Network
- How to rehab calf strains in runners, POGO Physio
- A Framework for the Return to Sport Following Calf Muscle Strain Injuries, Sports Medicine - Open
- Physical Therapy Guide to Calf Strain, Choose PT
This is general fitness education, not medical advice. For diagnosis or treatment of pain or injury, consult a qualified clinician.
Pick your next session
Browse all routines to find an appropriately-spaced next session.
Spot something off?
This content sits adjacent to health guidance — tell us if a citation or figure needs a correction.