
Knee Surgery Recovery Workouts for Apartment Renters
Learn how to set up your rental apartment for safe, deposit-protecting knee surgery recovery workouts. This guide covers floor and noise protection, under-$100 compact gear picks, and a phased exercise plan that works in 50–100 square feet through week 12.
- Citation source
- American Academy of Orthopaedic Surgeons (AAOS)
- Evidence level
- general guideline
- Recommended frequency
- 20-30 minutes daily, or 2-3 shorter sessions
For total knee replacement recovery in a rental apartment, week one does not require a mini gym, a garage, or permission to install hardware. It usually requires something more ordinary and more important: a clear path from bed to bathroom, a stable chair that will not skate across vinyl plank, and a small exercise zone where the knee can bend without the rest of the apartment becoming a fall hazard.
This guide is built around total knee replacement, because the strongest sources here address TKR. ACL reconstruction, meniscus repair, cartilage procedures, and other knee surgeries can use different timelines, weight-bearing rules, and movement limits. If your surgeon or physical therapist gives instructions that differ from anything here, their plan wins.
The reassuring part is that the first six weeks can be handled in a space smaller than many yoga mats. A bed, a chair, and a fall-resistant floor setup can carry the early work. Equipment becomes more useful later, after range of motion is established and strength work starts to matter more.
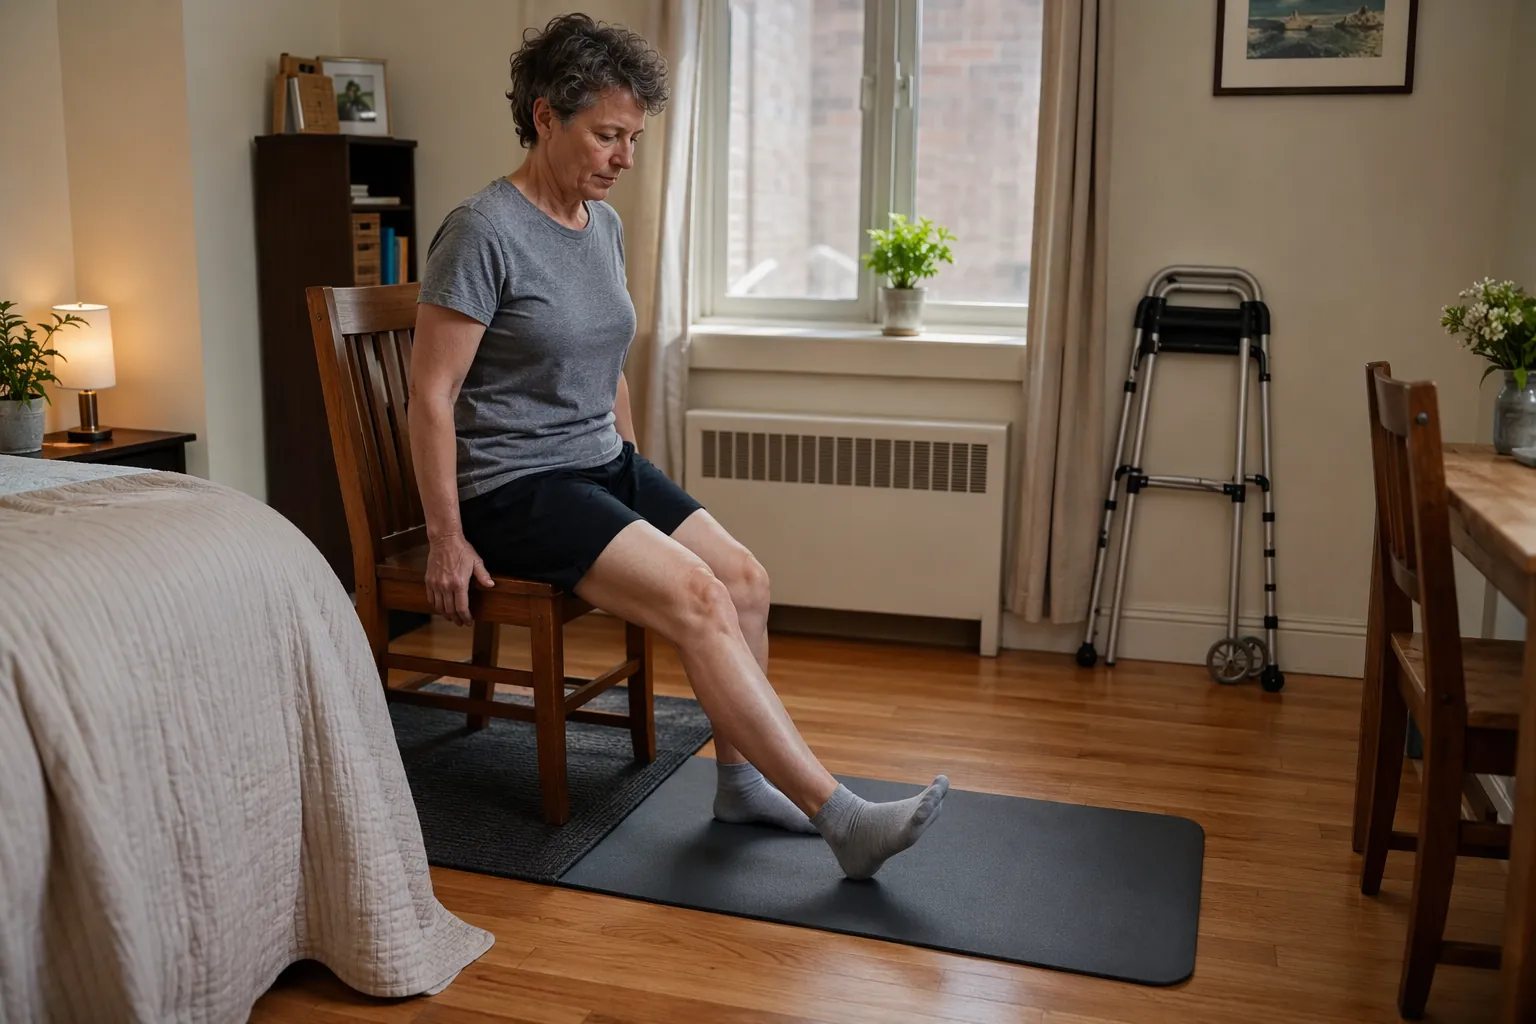
Why the first six weeks are mostly a space problem
Hospital for Special Surgery physical therapist Vincent Luppino describes knee replacement recovery as a progression: range of motion dominates the first six weeks, strength becomes the main project from about weeks 6 to 16, and goal-specific training comes after that foundation is in place.[1] That sequence is useful in an apartment because it keeps the early plan honest. You are not trying to recreate a clinic. You are trying to make bending, straightening, short walks, and basic daily movement safe enough to repeat.
Yale Medicine gives practical flexion markers for TKR recovery: about 80 degrees of knee bend by two weeks and about 100 degrees by seven weeks.[2] Those are orientation points, not a reason to force the knee or compare yourself with a neighbor who recovered faster. They explain why heel slides, seated knee bends, and careful walking deserve more attention early than bands, ankle weights, or machines.
The American Academy of Orthopaedic Surgeons recommends 20 to 30 minutes of exercise daily, or shorter sessions two to three times a day, along with walking for 30 minutes two to three times daily during early recovery.[3] In a rental, that does not have to mean a long route. It can mean five-minute hallway loops, laps from bedroom to kitchen, or several small sessions around the chair before fatigue makes form sloppy.
Set up the apartment before surgery, not after the first bad shuffle
The apartment setup should happen before surgery because the first days home are a poor time to discover that the bathroom rug slides, the chair shifts when you push up, or the walker catches on a charging cable. A renter also has a second job that homeowners do not always think about: recovery has to protect the body and the deposit.
Start with the route you will use half-awake: bed to bathroom, bed to chair, chair to kitchen, and back. Clear it wide enough for the walker or assistive device your care team expects you to use. Remove loose rugs, floor baskets, low stools, cords, pet toys, and anything that asks the recovering leg to dodge sideways. Side-stepping around clutter is exactly the kind of small apartment compromise that feels harmless until the knee is swollen and balance is worse than usual.
- Choose one recovery chair with arms if possible, a firm seat, and enough height that standing does not require a deep knee bend.
- Put non-slip furniture pads, rubber cups, or a grippy mat under the chair legs so the chair does not slide when you press through the arms.
- Keep the chair near the bed or sofa, but leave enough room in front for heel slides, seated knee bends, and walker turns.
- Place a small table within reach for medication, water, phone, charger, exercise sheet, and TV remote so standing is not required for every small need.
- Test the setup in shoes, socks, and bare feet before surgery. The floor that feels fine now may feel different when you are moving slowly.
A 4 by 6 ft clear zone is enough for most early TKR home exercises: seated knee bends at the chair, heel slides on the bed or mat, quad sets, ankle pumps, straight-leg raises if approved, and standing support work when your care team allows it. If you can clear 6 by 8 ft, the extra room helps with walker turns and a caregiver standing nearby, but it is not the price of admission.
Floor protection has to solve two problems at once
The mat under the recovery zone should not be a soft, squishy trip hazard. It should be dense enough to protect the floor from chair feet, walker tips, and light equipment, but stable enough that the walker does not sink or wobble. On hard floors, a thick exercise mat can protect finishes during heel slides and seated work. On carpet, a mat may wrinkle or creep, so test it with the walker before relying on it.
Avoid layering several rugs or mats to make the area feel cushioned. Layers shift. Edges curl. A renter-friendly setup should reduce surprises underfoot, not create a padded obstacle course. If you need cushioning for the non-surgical knee during any approved floor-based work later, use a dedicated pad only during that exercise and store it afterward.
Noise control is mostly about friction, not silence
There is no need to pretend that every apartment workout can be silent, and there is not good published decibel data here for specific home rehab gear. The practical target is quieter-by-design movement: no chair dragging, no dropped weights, no jumpy cardio, no metal-on-floor equipment, and no repeated walker scraping over bare hard flooring.
- Use felt or rubber protection under furniture that must stay in place, but do not make the recovery chair easier to slide.
- Keep exercise gear in one bin beside the chair so you are not dragging items across the room.
- Choose magnetic resistance over fan-style resistance when buying compact cardio gear, because it is generally quieter by design, even though model-specific noise should be checked before purchase.
- Schedule longer walking loops during reasonable daytime hours if your floors transmit sound easily.
The apartment recovery kit, by phase
Buying everything before surgery is tempting because it feels like control. For TKR recovery in a small rental, it is usually better to prepare the space first and add gear only when the timeline makes it useful. A drawer full of bands does not fix a chair that slides. A folding bike does not help if there is no safe route to the bathroom.
| Phase | Main job | Apartment setup | Gear |
|---|---|---|---|
| Before surgery | Remove hazards and protect floors | Clear bed-to-bathroom path, choose stable chair, create 4 by 6 ft zone | Non-slip pads, floor mat if stable |
| Weeks 0-2 | Bend, straighten, reduce stiffness, walk safely | Bed, chair, walker path, short loops | No exercise gear required |
| Weeks 3-6 | Increase walking tolerance and controlled range of motion | Hallway laps or room-to-room loops | Optional thicker mat; no heavy gear |
| Weeks 6-12 | Start building strength and low-impact conditioning if cleared | Same zone, better storage, quieter cardio corner | Bands, pedal exerciser, possibly compact bike |
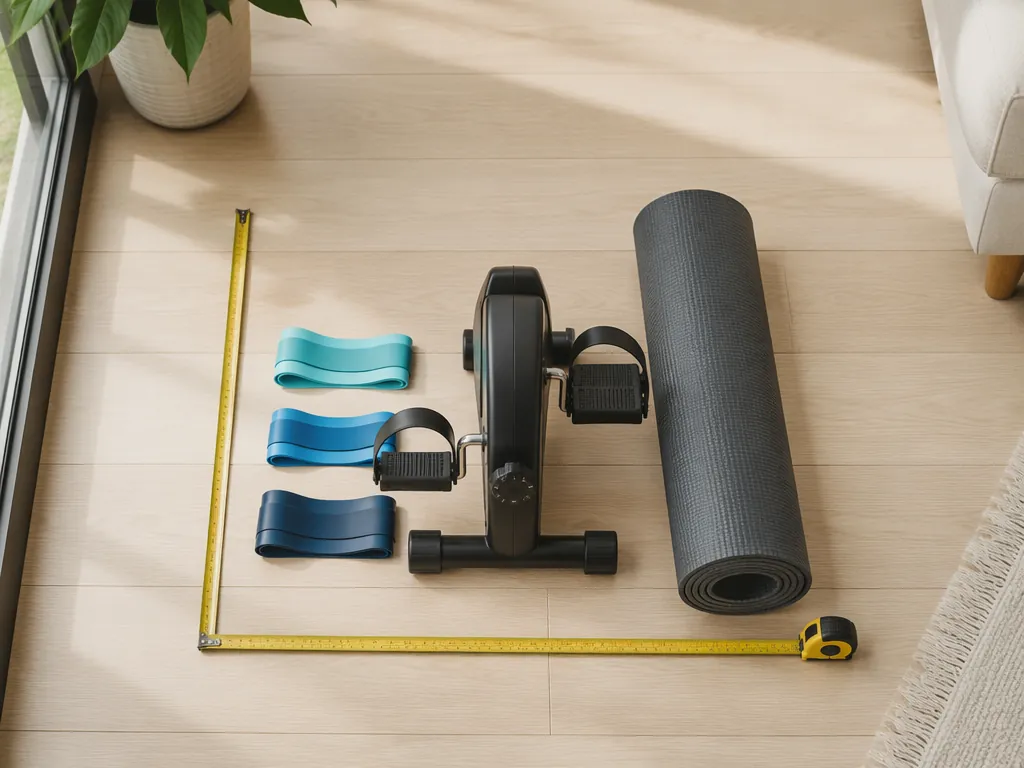
Weeks 0-2: bed, chair, clear floor
The first two weeks are not the moment for clever home gym substitutions. The apartment should make it easy to repeat the movements your care team gave you without negotiating furniture every time. AAOS includes early exercises such as ankle pumps, quadriceps sets, straight-leg raises, knee straightening, bed-supported knee bends, sitting-supported knee bends, and assisted knee bends in its total knee replacement exercise guide.[3]
In a rental, those exercises translate into three stations. The bed handles heel slides and rest breaks. The chair handles seated bends and sit-to-stand practice if approved. The clear floor zone handles walker positioning, short standing work, and safe turns. Keep ice, medication, and water outside the exercise surface so you do not have to step over them.
- Use the bed for early heel slides if getting to the floor is unsafe or not approved.
- Use the stable chair for seated knee bends, keeping the foot path clear so the heel can slide back without catching.
- Walk short routes several times rather than saving all walking for one exhausting lap.
- Stop a session before fatigue turns the walker path into a balance test.
If the knee is not near the Yale two-week flexion marker, that is a reason to talk with the care team, not a reason to force the joint against furniture or use a strap aggressively.[2] Apartment recovery should make prescribed movement repeatable; it should not turn the lease into a substitute clinic.
Weeks 3-6: walking becomes the main apartment cardio
By week three, many TKR patients are walking with a cane or without an assistive device and can stand for more than 10 minutes, though individual recovery varies and medical restrictions still matter.[4] This is when the apartment route starts to do more work. A straight hallway, a kitchen-to-bedroom loop, or a lap around the living area can become the low-impact conditioning plan.
The AAOS walking target can be broken into apartment pieces: several short walks that add up over the day, instead of one heroic session that leaves the knee irritated.[3] If your building hallway is clean, level, and well lit, it may be useful. If it has heavy doors, loose mats, pets, wet entry areas, or neighbors who leave packages in the corridor, your own cleared route is safer.
This is also the period when renters often start wanting equipment because the repetition feels boring. Boredom is real, but it is not the same as readiness. If range of motion is still the main project, a better chair setup, a smoother heel-slide surface, and a clearer walking route may matter more than adding resistance.
Weeks 4-6: when a pedal exerciser or compact bike starts to make sense
AAOS says an exercise bike may be added around four to six weeks after total knee replacement. Its guidance starts with backward pedaling at low resistance and builds toward 10 to 15 minutes twice a day.[5] That timing matters. A bike is not necessary for week one just because it appears in recovery videos.
For an apartment renter, a compact magnetic pedal exerciser is often easier to live with than a full exercise bike. It can sit in front of the recovery chair, move into a closet, and avoid taking over the room. The tradeoff is stability: the chair must not slide, the pedal unit must not creep forward, and the knee angle must feel controlled. If the setup shifts, it is not a bargain.
A folding magnetic-resistance bike can be useful if you have the floor space, predictable storage, and clearance from your PT or surgeon. Plan for more room than the footprint on the product page suggests, because mounting, dismounting, and turning with a stiff knee need space. In a tight studio, the safer purchase may be the smaller pedal unit plus a better mat.
Skip the elliptical in the first 12 weeks after TKR. HSS specifically advises staying off the elliptical during that period.[1] That is not just a medical caution; it is also a renter sanity check. An elliptical is expensive, large, difficult to store, and hard to justify when the recovery sequence has not reached that kind of loading.
Weeks 6-12: add strength without turning the apartment into storage
After the early range-of-motion phase, strength work starts to earn more space. This does not mean dragging in dumbbell racks or ankle weights that get left beside the bed. Resistance bands are the most renter-friendly upgrade because they are light, quiet, cheap relative to machines, and easy to store. They also let you change resistance without dropping metal on a neighbor's ceiling.
Use bands only for exercises your clinician has approved. In this phase, that might include controlled seated or standing work rather than improvised athletic drills. Anchor choices matter in rentals: avoid door setups that could damage trim, stress hinges, or fail under load. A band around the feet, around the thighs, or held by hand is often simpler and more lease-friendly than a no-drill anchor that still leaves marks.
- Choose loop or therapy bands before tube systems with hard handles if storage and noise are priorities.
- Inspect bands for cracks before use; a snapped band is not a harmless event when balance is still rebuilding.
- Keep one light, one medium, and one heavier option rather than buying a large set you will not use.
- Store bands in a visible bin near the chair so setup friction does not become an excuse to skip prescribed work.
Harvard Health frames return to fitness after total knee replacement as gradual and low-impact, which fits the apartment approach: add one useful tool at a time, keep the movements controlled, and let tolerance guide progress rather than equipment ambition.[6]
A realistic under-$100 renter setup
Prices move, and specific models should be checked before buying, but the useful low-budget kit is small: floor protection, resistance bands, and possibly a compact pedal exerciser. The point is not that every renter needs all three. The point is that most of the useful additions are compact and quiet enough to fit the medical timeline without taking over the apartment.
| Item | When it helps | Renter concern | Buy only if |
|---|---|---|---|
| Dense exercise mat | Before surgery through week 12 | Must not slide, curl, or make walker use unstable | It protects the floor without creating a trip edge |
| Resistance bands | Mostly after the range-of-motion phase | No drilling, no hard anchors, no door damage | Your PT has cleared band-based strength work |
| Compact pedal exerciser | Around weeks 4-6 or later if cleared | Chair and unit must stay put | You can pedal smoothly at low resistance without shifting the setup |
| Folding bike | Later option, not essential | Needs mounting space, storage, and neighbor-conscious use | You have enough room and a clinician says cycling is appropriate |
The item that looks most boring may be the one that saves the most trouble. A mat that keeps chair legs from scuffing the floor and makes heel slides smoother can support more daily recovery than a machine bought too early. In a rental, storage is part of safety; if equipment has to be stepped around between sessions, it has become clutter.
What not to solve with gear
Do not buy equipment to compensate for an unsafe apartment route. If the path to the bathroom is narrow, the rug slips, or the chair moves when you stand, fix that before thinking about cardio. The first injury risk in a small apartment is often not the exercise itself; it is the turn, reach, or tired walk immediately before or after it.
Do not install anything that violates the lease unless your landlord has approved it in writing. Wall-mounted grab bars can be excellent in the right home, but many renters cannot drill into studs, tile, or door frames. Suction handles and tension poles should be treated cautiously and discussed with a clinician or installer who understands fall risk. A product that feels secure in a listing photo is not the same as a medically appropriate support.
Do not turn general knee rehab advice into a surgical timeline. If you are looking for knee work after recovery or for a non-surgical knee issue, A Phased Approach to Knee Rehab Exercises at Home may be useful later. It should not replace the TKR-specific plan from your surgeon or physical therapist.
The week-12 apartment test
By week 12, the best apartment setup is usually still simple. The walking route is clear. The chair stays put. The mat protects the floor without becoming a hazard. Gear lives in one place instead of migrating into the path. The exercise plan has moved from early bending and walking toward approved strength and low-impact conditioning, but it has not ignored the medical order of recovery.
Most of the renter's success through this period comes from a prepared, quiet, fall-resistant zone and a phased plan that respects the TKR progression. Gear helps when it supports that plan. It gets in the way when it arrives before the apartment is safe enough to use it.
References
- Exercises After Knee Replacement, Hospital for Special Surgery, https://www.hss.edu/health-library/move-better/exercises-after-knee-replacement
- How Exercises After Knee Replacement Surgery Can Speed Your Recovery, Yale Medicine, https://www.yalemedicine.org/news/how-exercises-after-knee-replacement-surgery-can-speed-your-recovery
- Total Knee Replacement Exercise Guide, American Academy of Orthopaedic Surgeons, https://orthoinfo.aaos.org/recovery/total-knee-replacement-exercise-guide/
- Total Knee Replacement Surgery Rehabilitation Timeline, Healthline, https://www.healthline.com/health/total-knee-replacement-surgery/rehabilitation-timeline
- Activities After Total Knee Replacement, American Academy of Orthopaedic Surgeons, https://orthoinfo.aaos.org/recovery/activities-after-knee-replacement/
- How to return to fitness after total knee replacement, Harvard Health, https://www.health.harvard.edu/bones-and-joints/how-to-return-to-fitness-after-total-knee-replacement
This is general fitness education, not medical advice. For diagnosis or treatment of pain or injury, consult a qualified clinician.
Pick your next session
Browse all routines to find an appropriately-spaced next session.
Spot something off?
This content sits adjacent to health guidance — tell us if a citation or figure needs a correction.