
Meniscus Tear Recovery Timeline with Phase-by-Phase Home Exercises
Learn how long meniscus tear recovery takes and exactly which home exercises to do at each phase, based on the latest trial evidence and expert consensus.
- Citation source
- TeMPO trial
- Evidence level
- Clinical trial evidence and expert consensus
- Recommended frequency
- 4 times per week
A meniscus tear recovery timeline at home is useful only if it tells you two things: when to move forward, and when to stop pretending this is a home problem. For many stable or degenerative tears, the answer is not bed rest and it is not automatic surgery. It is a steady, symptom-guided exercise program that starts small, loads the knee gradually, and respects swelling more than optimism.
The strongest recent home-rehab signal comes from the TeMPO trial: 879 adults, mean age 59, with meniscal tear and osteoarthritis used a 25-minute home exercise program four times per week and had substantial pain reduction at 3, 6, and 12 months. Adding physical therapy visits gave only marginal extra benefit at 6 to 12 months and not at 3 months.[1] That does not prove every 32-year-old with a fresh twisting injury can rehab alone. It does show that a repeatable home dose can matter, especially for the older adult with a degenerative tear and an irritated knee that still moves.
First, sort yourself into the right lane
This timeline is for adults with a diagnosed or strongly suspected stable meniscus tear, a grade 1–2 tear, or a small degenerative tear who can walk, straighten the knee, and do gentle exercises without sharp catching pain. It also fits the person who has been told to try conservative care first and wants a serious home plan rather than a vague instruction to “strengthen the knee.”
Do not use this as your main plan if the knee locks, repeatedly catches, buckles, cannot fully straighten, swells sharply after a specific movement, or gives sharp pain that changes how you walk. Those signs deserve medical evaluation. Home rehab is not a character test; it is a loading plan. If the joint is mechanically blocked or unstable, the plan has hit its boundary.
If you already had a meniscus repair or meniscectomy, your timeline is different because surgical restrictions change loading, range of motion, and weight-bearing. For that route, use a post-op plan such as knee surgery recovery workouts for apartment renters and follow your surgeon’s restrictions first.
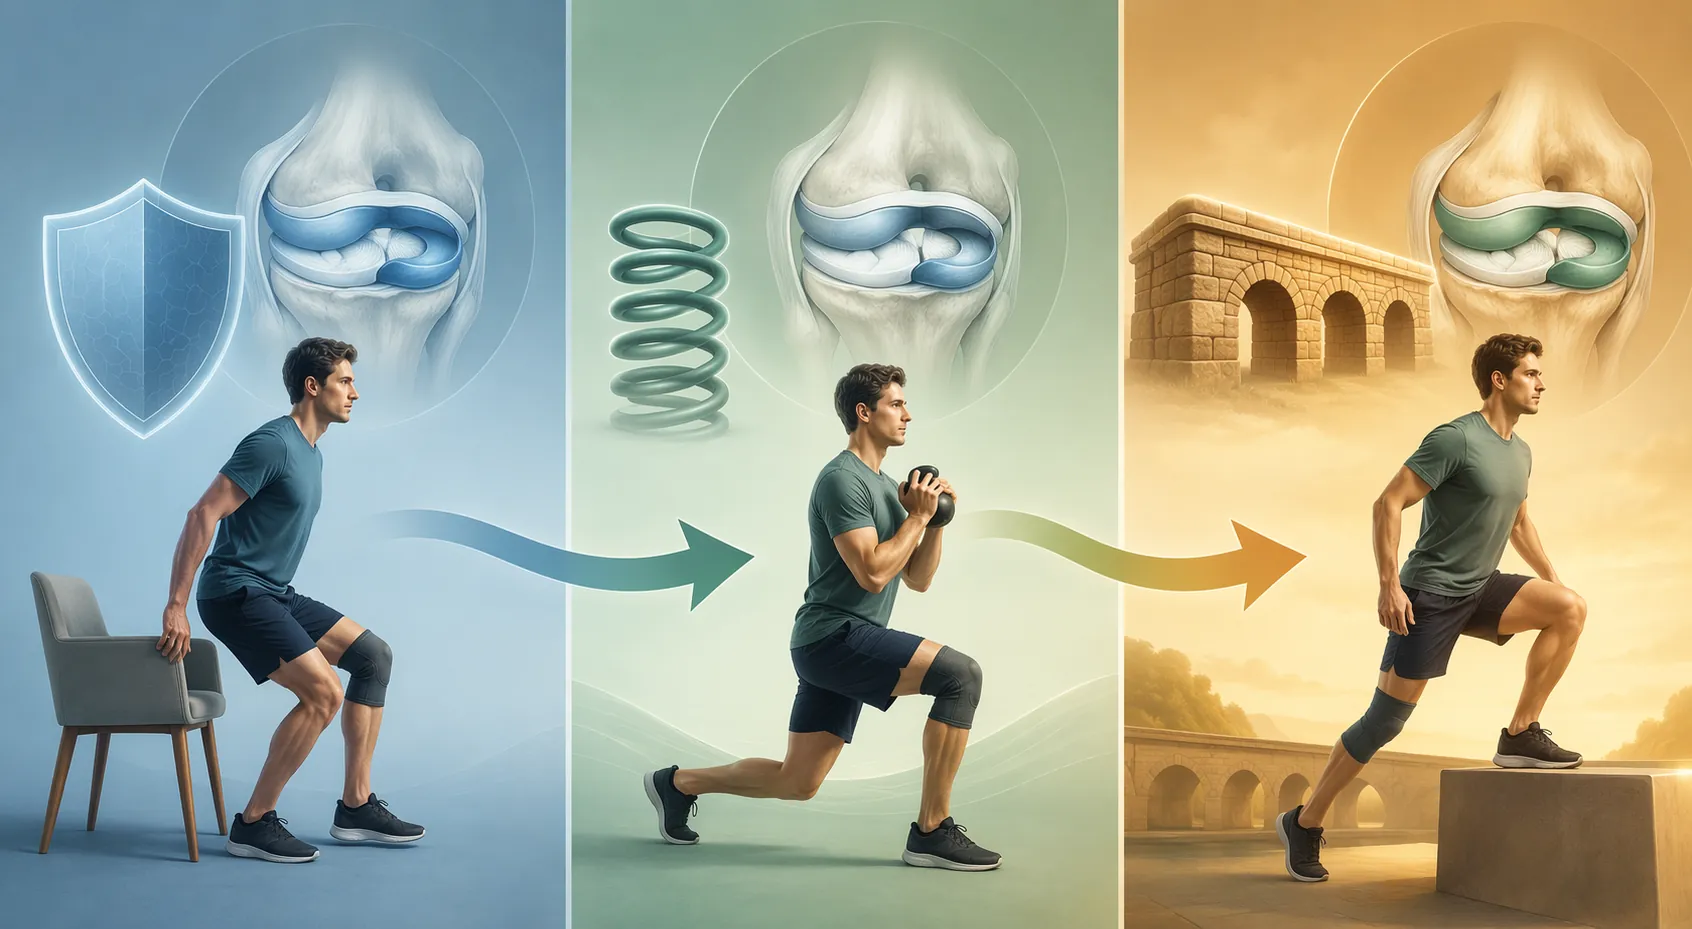
The home recovery map
| Phase | Usual timing | Main goal | Home exercises that fit | Progress when | Avoid for now |
|---|---|---|---|---|---|
| Phase 1 | Weeks 0–2, or whenever the knee is hot, swollen, or easily irritated | Calm symptoms, restore basic motion, wake up the quadriceps | Quad sets, straight leg raises, ankle pumps, gentle heel slides if tolerated | Walking is smoother, swelling is not increasing, knee can bend and straighten more comfortably | Testing deep bends, pivoting, long walks to “see what happens” |
| Phase 2 | Weeks 2–6 for many mild or stable tears | Rebuild daily strength for chairs, stairs, and level walking | Sit-to-stands, shallow wall sits, side-lying hip work, heel raises | Pain stays mild during exercise and settles by the next day; no swelling increase | Deep squats, twisting under load, loaded bending past 90° |
| Phase 3 | Weeks 4–8 when control is improving | Add balance, single-leg control, and better hip-knee alignment | Single-leg balance, single-leg mini squats, marching bridge | You can control the knee without wobbling inward or guarding | Fast direction changes, uneven-surface challenges, jump landings |
| Phase 4 | Weeks 6–12+, often longer for degenerative tears | Prepare for longer walks, hills, light sport drills, or training return | Short-step forward lunges, supported squat holds to about 45°, low-impact loading prep | Strength, range of motion, and swelling response are reliable across several sessions | Aggressive pivots, deep loaded flexion, high-impact work before the knee proves ready |
The calendar ranges overlap on purpose. A knee that is quiet at week 3 may be ready for shallow strengthening. A knee that swells after a grocery trip at week 5 is still behaving like a Phase 1 or early Phase 2 knee. The phase is not a prize for waiting long enough.
Why 4–6 weeks, 6–12 weeks, and 3+ months can all be honest answers
People get confused because meniscus recovery timelines are often quoted as if all tears behave the same. They do not. A mild, stable tear that mostly needs symptom control and strengthening may feel much better in 4 to 6 weeks. A more irritable tear, a knee with osteoarthritis, or a person who must stand at work and climb stairs every day may need 6 to 12 weeks just to make daily loading predictable. Degenerative tears can remain a 3-month-plus project, not because nothing is working, but because the knee has to be trained to tolerate repeated loading without swelling.
The long view matters because surgery is not automatically superior for degenerative tears. In the ESCAPE randomized clinical trial, 321 patients ages 45 to 70 with degenerative meniscal tears were followed for 5 years; exercise-based physical therapy was noninferior to arthroscopic partial meniscectomy for patient-reported knee function.[2] A 2024 EU-US meniscus rehabilitation consensus from 67 experts across 14 countries also stated that arthroscopic partial meniscectomy should not be first-line treatment for degenerative lesions, and it emphasized criterion-based progression rather than a purely time-based approach after meniscectomy.[3]
That is the useful middle ground. Conservative care is not “doing nothing.” It is a planned dose of loading. Surgery is not a moral failure. It is a decision point when symptoms, mechanics, imaging, and function say the knee is not behaving like a stable rehab case.
Phase 1: calm the knee before you test it
Phase 1 usually covers the first 0 to 2 weeks after a flare or injury, but it also returns whenever the knee gets angry. The job here is not to prove the tear is fine. The job is to reduce swelling, keep the knee moving in a comfortable range, and get the quadriceps firing again without grinding the joint through deep loaded bends.
Start with exercises that ask for muscle activation more than joint compression. Common home protocols place quad sets, straight leg raises, ankle pumps, and gentle range-of-motion work early because they can be done without heavy meniscus loading.[4][5][6][7]
- Quad sets: Sit or lie with the leg straight. Tighten the front thigh as if pressing the back of the knee gently toward the floor. Hold 3–5 seconds, then relax. Try 1–3 sets of 8–15 reps.
- Straight leg raises: Only use these if you can keep the knee fully straight without lagging or pain. Raise the leg a short distance, pause, and lower slowly. Try 1–3 sets of 6–12 reps.
- Ankle pumps: Move the ankle up and down several times during the day, especially if you are sitting more than usual.
- Gentle heel slides: Slide the heel toward you only as far as the knee allows without sharp pain or catching, then slide back out. Stop before the knee feels jammed.
Use the next-day rule. Mild discomfort during the exercise can be acceptable if it stays controlled and settles quickly. Swelling that appears later that day or the next morning is different. That means the dose was too high, the bend was too deep, the walk was too long, or the knee was not ready for that movement yet.
Ready to move into Phase 2
- You can walk around the home without limping more as the day goes on.
- The knee bends and straightens more easily than it did a few days ago.
- Quad sets and straight leg raises do not increase swelling.
- Pain is predictable, not sharp, catching, or alarming.
If you are not there by week 2, stay in Phase 1. There is no benefit in graduating to squats with a knee that is still bargaining with basic walking.
Phase 2: rebuild the movements daily life keeps asking for
Phase 2 is where many home plans either become useful or fall apart. The knee is no longer in full alarm mode, so people start doing normal life again. Chairs, stairs, errands, pets, laundry, a commute, and a slightly too-long walk all count as loading. If exercise is added on top without adjusting the rest of the day, swelling often comes back and the person decides rehab “didn’t work.”
The goal from about weeks 2 to 6 is to restore controlled, shallow knee bending and hip support. Sit-to-stands, shallow wall sits, side-lying hip work, and heel raises are commonly used in this stage of meniscus rehab because they build the capacity needed for ordinary loading without demanding deep flexion or twisting.[4][5][6][7]
Sit-to-stands
Use a firm chair. Place both feet under you, lean slightly forward, stand up, and sit down with control. Start from a higher chair if needed. The knee should track roughly over the middle toes, not collapse inward. Try 1–3 sets of 5–10 reps. If the last few reps make you twist, drop, or push mostly through the uninjured side, the set is over.
Shallow wall sits
Stand with your back against a wall and slide down only a little. Keep the bend shallow, around 30° or less at first. Hold 5–20 seconds, then stand back up. Use 2–5 short holds rather than one heroic hold. This is not a deep squat with a wall behind it; it is controlled exposure to a small amount of knee flexion.
Side-lying hip work
Lie on your side and raise the top leg slightly, keeping the pelvis from rolling backward. This trains the hip muscles that help control where the knee goes during walking, stairs, and squatting. Try 1–3 sets of 8–15 reps. If you feel it mostly in the low back, reduce the range and slow down.
Heel raises
Hold a counter or chair. Rise onto both toes and lower slowly. Start with both legs. Later, shift slightly more weight toward the injured side if the knee stays calm. Try 1–3 sets of 8–15 reps. Calf strength matters because the lower leg helps absorb load before the knee has to deal with it.
A useful weekly rhythm is three or four short strength sessions, not one long session that leaves the knee swollen. TeMPO’s home program used 25 minutes, four times per week, which is a practical dose for people who cannot live at a clinic.[1] Your version does not have to copy the exact trial program, but it should copy the seriousness: repeatable, boring, trackable work.
Ready to move into Phase 3
- Sit-to-stands are controlled and do not cause next-day swelling.
- You can tolerate short, ordinary walks without the knee feeling hotter or fuller afterward.
- You can do shallow wall sits without sharp joint-line pain.
- Stairs are improving or at least not worsening.
Back off if the knee swells, starts catching, or becomes more painful with every session. Reduce depth first, then reps, then frequency. Most people cut exercises completely when the smarter first move is to make the dose smaller.
Phase 3: add balance and single-leg control
Somewhere around weeks 4 to 8, if symptoms allow, the knee needs more than two-legged up-and-down strength. Real life is full of small single-leg moments: stepping over something, catching balance on a curb, carrying groceries up stairs, turning in a kitchen. Phase 3 trains those moments without jumping straight to pivots and running.
Single-leg balance, single-leg mini squats, and marching bridges appear in home meniscus exercise progressions because they add control demands while still letting the person keep the range small and supported.[4][5][6][7]
Single-leg balance
Stand near a counter. Shift weight onto the injured side and lift the other foot just enough to balance. Build toward a 30-second hold. The first target is quiet control, not circus difficulty. If the knee wobbles inward, the foot grips hard, or pain rises, use fingertip support and shorten the hold.
Single-leg mini squats
Hold a counter and bend the knee a small amount, then return to standing. Keep the movement shallow. Think of it as a controlled dip, not a squat workout. Try 1–3 sets of 5–8 reps. Stop the set if the knee dives inward or if you feel a sharp pinch at the joint line.
Marching bridge
Lie on your back with knees bent. Lift into a comfortable bridge, then slowly lift one foot a small amount and set it down. Alternate sides while keeping the pelvis level. If marching is too much, hold a regular bridge first. This trains hip and trunk control so the knee is not asked to solve every balance problem by itself.
This phase is also where range of motion should be watched without being forced. The inner two-thirds of the meniscus, often called the white zone, has poor blood supply and may heal slowly or not fully; that is one reason gradual loading is more sensible than aggressive stretching into painful end ranges.[8] A stuck knee needs assessment. A stiff but improving knee needs patient, repeated, comfortable movement.
Ready to move into Phase 4
- You can balance on the injured leg with light or no support for up to 30 seconds.
- Mini squats stay shallow, smooth, and symptom-controlled.
- Walking volume is increasing without swelling the next morning.
- The knee feels more trustworthy on stairs, curbs, and household turns.
Phase 4: prepare for heavier life, not just harder exercises
Phase 4 usually begins somewhere around weeks 6 to 12, and it may stretch longer for degenerative tears or knees with arthritis. The goal is not to collect advanced exercises. The goal is to make the knee reliable under the loads you actually need: longer walks, hills, stairs, low-impact training, kneeling alternatives, light recreational sport drills, or a return to home workouts.
Short-step forward lunges, supported squat holds to about 45°, and low-impact loading preparation are common late-stage home progressions.[4][5][6][7] They should still be treated as exposure, not punishment.
Short-step forward lunges
Take a short step forward and bend both knees slightly, keeping the range small. Push back to the start. Hold a counter if needed. Try 1–3 sets of 5–8 reps per side. A short step keeps the movement controlled. A long step often turns this into a balance and hip-flexor challenge before the knee is ready.
Supported squat holds to about 45°
Hold a sturdy surface and lower into a partial squat, roughly halfway to a chair at most. Hold 5–20 seconds and stand back up. The knee should feel loaded, not trapped. If the only way to make it “work” is to go deeper, add time or control before adding depth.
Low-impact loading prep
This can mean short bouts of stationary cycling if available, controlled step-ups to a low step, longer flat walks broken into segments, or gentle home strength circuits that avoid twisting. If you need a broader phased knee framework, the same pain-scale logic is covered in a phased approach to knee rehab exercises at home.
Return-to-sport or return-to-running decisions need more caution than return-to-walking decisions. A knee can tolerate a 30-minute walk and still not be ready for cutting, pivoting, basketball, tennis, soccer, or loaded deep squats. For those goals, the knee should show repeated control over several sessions, not one good day.
What to avoid while the meniscus is still irritable
The avoid list is short because it should be memorable. Deep squats, pivoting or twisting movements, loaded knee flexion past 90°, and any exercise that causes sharp pain or increased swelling are commonly restricted in home meniscus rehab guidance.[4][5]
- Avoid deep loaded squats until shallow squats and daily stairs are consistently quiet.
- Avoid twisting on a planted foot, especially while carrying weight.
- Avoid kneeling into a painful end range just to “stretch it out.”
- Avoid testing the knee with a sudden jog, jump, or sport drill because one good rehab session made you hopeful.
Ordinary rest-and-ice advice can help symptoms settle, but it does not rebuild capacity. On the other side, aggressive stretching and deep strengthening can keep the joint irritated. The useful path sits between those extremes: load the knee often enough to adapt, lightly enough that swelling does not get the final vote.
How to judge progress without fooling yourself
A home plan needs simple measurements because memory is unreliable when pain changes day to day. Track four things: pain, swelling, range of motion, and control. These matter more than whether a chart says you are supposed to be in week 6.
| Measure | Good sign | Back-off sign |
|---|---|---|
| Pain | Mild, predictable, settles after exercise | Sharp, catching, worsening during the set, or changing your walking |
| Swelling | Same or less the next morning | Knee feels fuller, hotter, or tighter later that day or the next day |
| Range of motion | Bending and straightening gradually feel easier | Knee feels blocked, stuck, or unable to fully straighten |
| Control | Knee tracks well during sit-to-stands, balance, and shallow squats | Knee collapses inward, buckles, or needs constant guarding |
If the same exercise keeps causing swelling, do not keep it in the plan just because it is listed for your phase. Change one variable at a time: reduce depth, reduce reps, use more support, shorten the session, or add a rest day. If that still does not work, remove the exercise and get help with assessment.
For exercise form details beyond the timeline, use meniscus tear recovery exercises you can do at home. For a broader injury-progression model, phased knee injury recovery exercises at home can help you think through pain-scale progression across other knee problems.
When home rehab needs outside help
Some people need a clinician because the diagnosis is unclear, the knee is mechanically catching, or pain is not matching the expected pattern. Others need hands-on coaching because they cannot tell whether the knee is tracking well, whether swelling is significant, or whether fear is making them underload the leg. That is not a failure of home rehab. It is the point where better information changes the plan.
Surgical review becomes more relevant when there is locking, recurrent catching, buckling, inability to fully straighten, sharp pain with swelling, or failure to regain useful function despite a real conservative program. The evidence against routine first-line arthroscopic partial meniscectomy for degenerative tears does not mean surgery is never appropriate; it means the stable degenerative knee usually deserves a committed conservative trial before anyone treats the operating room as the default.[2][3]
Most stable or degenerative meniscus tears deserve a criterion-based home program first. The program only works when symptoms guide progression and red flags override the timeline.
References
- Home exercise alone highly effective for meniscal tear and osteoarthritis pain — News Medical / Mass General Brigham, 2025
- Effect of Physical Therapy vs Arthroscopic Partial Meniscectomy… Five-Year Follow-up — JAMA Network Open, 2022
- EU-US Meniscus Rehabilitation 2024 Consensus — PMC, 2024
- Meniscus Injury Home Rehab Timeline — Osteo Studio
- Exercises for Meniscus Tear Rehab — Sports Injury Physio
- Meniscus Tear Exercises — Hinge Health
- Meniscus Tear: Rehabilitation Exercises — Kaiser Permanente
- 8 Exercises for a Meniscus Tear — Healthline
This is general fitness education, not medical advice. For diagnosis or treatment of pain or injury, consult a qualified clinician.
Pick your next session
Browse all routines to find an appropriately-spaced next session.
Spot something off?
This content sits adjacent to health guidance — tell us if a citation or figure needs a correction.