4-Week Beginner Home Workout Plan (No Equipment Required)
A complete, week-by-week home workout plan for absolute beginners — no gym, no equipment, no guesswork. Built on six foundational movement patterns with three modification tiers per exercise and progressive overload logic backed by the 2026 ACSM position stand, so you can start today in your living room and know exactly what to expect each week.
Why a No-Equipment Home Plan Actually Works
The skepticism is understandable. If you've spent any time around fitness culture, you've absorbed the idea that real training requires a gym, a barbell, or at minimum a set of dumbbells. A living room and your own bodyweight sounds like a compromise — something you do when you can't do the real thing.
That framing is outdated. In early 2026, the American College of Sports Medicine published its first major resistance training position stand update in 17 years, synthesizing findings from 137 systematic reviews covering more than 30,000 participants. The conclusion on home-based training was direct: bodyweight exercises, elastic bands, and home-based routines produce meaningful improvements in strength, muscular endurance, and physical function. Traditional gym settings are not required.
"The best resistance training program is the one you'll actually stick with. Training all major muscle groups at least twice a week matters far more than chasing the idea of a perfect or complex training plan. Whether it's barbells, bands, or bodyweight, consistency and effort drive results." — Stuart M. Phillips, PhD, FACSM, commenting on the 2026 ACSM position stand
One thing this plan will not do is promise a visible physical transformation in four weeks. That would be dishonest. Strength adaptations in weeks one through three are primarily neurological — your nervous system learns to recruit muscle fibers more efficiently, which is why you get noticeably stronger before you look noticeably different. Visible body composition changes typically require six to eight weeks of consistent training. What you will have after four weeks is a measurably stronger, more capable body and a training habit that is worth building on.
How This Plan Is Designed
The structure is deliberately simple: three sessions per week, each lasting 20 to 35 minutes, with at least 48 hours between sessions. That spacing matters — muscle tissue repairs and adapts during rest, not during training. Two to three sessions per week is the evidence-backed frequency floor for beginners per the 2026 ACSM position stand, and three sessions hits that target without overwhelming a body that is just getting started.
This is a sets-and-reps plan, not a circuit or timed AMRAP. Each exercise has a defined number of sets, a defined rep range, and a defined rest period. That structure is more appropriate for building strength than timed circuits, which tend to reward speed over controlled movement — exactly the wrong priority for beginners learning new patterns.
The plan gets harder each week through three specific levers, not through random variation:
- Lever 1 — Harder exercise variations: progressing from easier to more demanding versions of each movement (e.g., incline push-up → standard push-up → diamond push-up).
- Lever 2 — Tempo manipulation: slowing the lowering phase of a movement to three or four seconds dramatically increases time under tension — the same exercise becomes substantially harder without changing a single rep.
- Lever 3 — Volume and density increases: adding sets or reps week over week so your muscles face a progressively greater total workload.
Each week transition in this plan applies one or more of these levers in a deliberate sequence. The changes are not arbitrary — they reflect a logical progression from learning the movements, to doing more of them, to doing harder versions of them, to expressing them with speed and power.

The Six Movement Patterns Trained Every Session
Every session in this plan trains the same six foundational movement patterns. This is not variety for its own sake — these six patterns cover every major muscle group and movement capability the human body uses in daily life and athletic activity. Training all six in every session ensures balanced development and prevents the compensatory weaknesses that accumulate when some patterns are skipped.
| Pattern | What It Trains | Why It Matters |
|---|---|---|
| Squat | Quads, glutes, hamstrings, core | Fundamental lower-body strength; mirrors sitting, standing, and climbing |
| Hinge | Hamstrings, glutes, lower back | Posterior chain development; mirrors picking things up from the floor |
| Push | Chest, shoulders, triceps | Upper-body pressing strength; mirrors pushing objects away from the body |
| Pull | Upper back, biceps, rear shoulders | Counterbalances all pushing; prevents shoulder imbalance and poor posture |
| Lunge | Quads, glutes, balance, single-leg stability | Exposes and corrects left-right strength asymmetry |
| Core | Abs, obliques, spinal stabilizers | Transfers force between upper and lower body; protects the spine under load |
On the pull pattern specifically: a sturdy dining table or desk is the one household object this plan uses. It is not equipment you need to purchase — it is a surface you almost certainly already own. Lie under the table, grip the edge with both hands, and row your chest up to it. If your table is too heavy to slide or too low to lie under comfortably, the standing wall row requires nothing at all: stand facing a wall, place your hands at shoulder height, lean back slightly, and row yourself toward the wall by driving your elbows back.
How to Read the Plan: Sets, Reps, Tiers, and Rest
Before you look at a single workout table, understand the key. Every exercise in this plan appears with three modification tiers. This is not a nice-to-have — it is the plan's core design principle. The right tier for you is the one where you can complete all reps with controlled form and still feel challenged by the last two repetitions.
| Term | What It Means |
|---|---|
| Easiest tier | A reduced-difficulty version of the exercise — shorter range of motion, more support, or a mechanically simpler position. Start here if you are unsure. |
| Standard tier | The baseline version of the exercise as written. Most beginners will work here for the majority of the plan. |
| Progression tier | A harder version of the same movement pattern — more range of motion, less support, or added instability. Move here when the Standard tier feels manageable for all sets. |
| Sets | The number of times you complete a full group of repetitions. '3 sets of 10' means you do 10 reps, rest, do 10 reps again, rest, then do 10 reps a third time. |
| Reps | The number of times you perform the movement within one set. |
| Rest | 60 to 90 seconds between sets. Use a phone timer. Shorter rest increases cardiovascular demand; longer rest allows fuller strength recovery. |
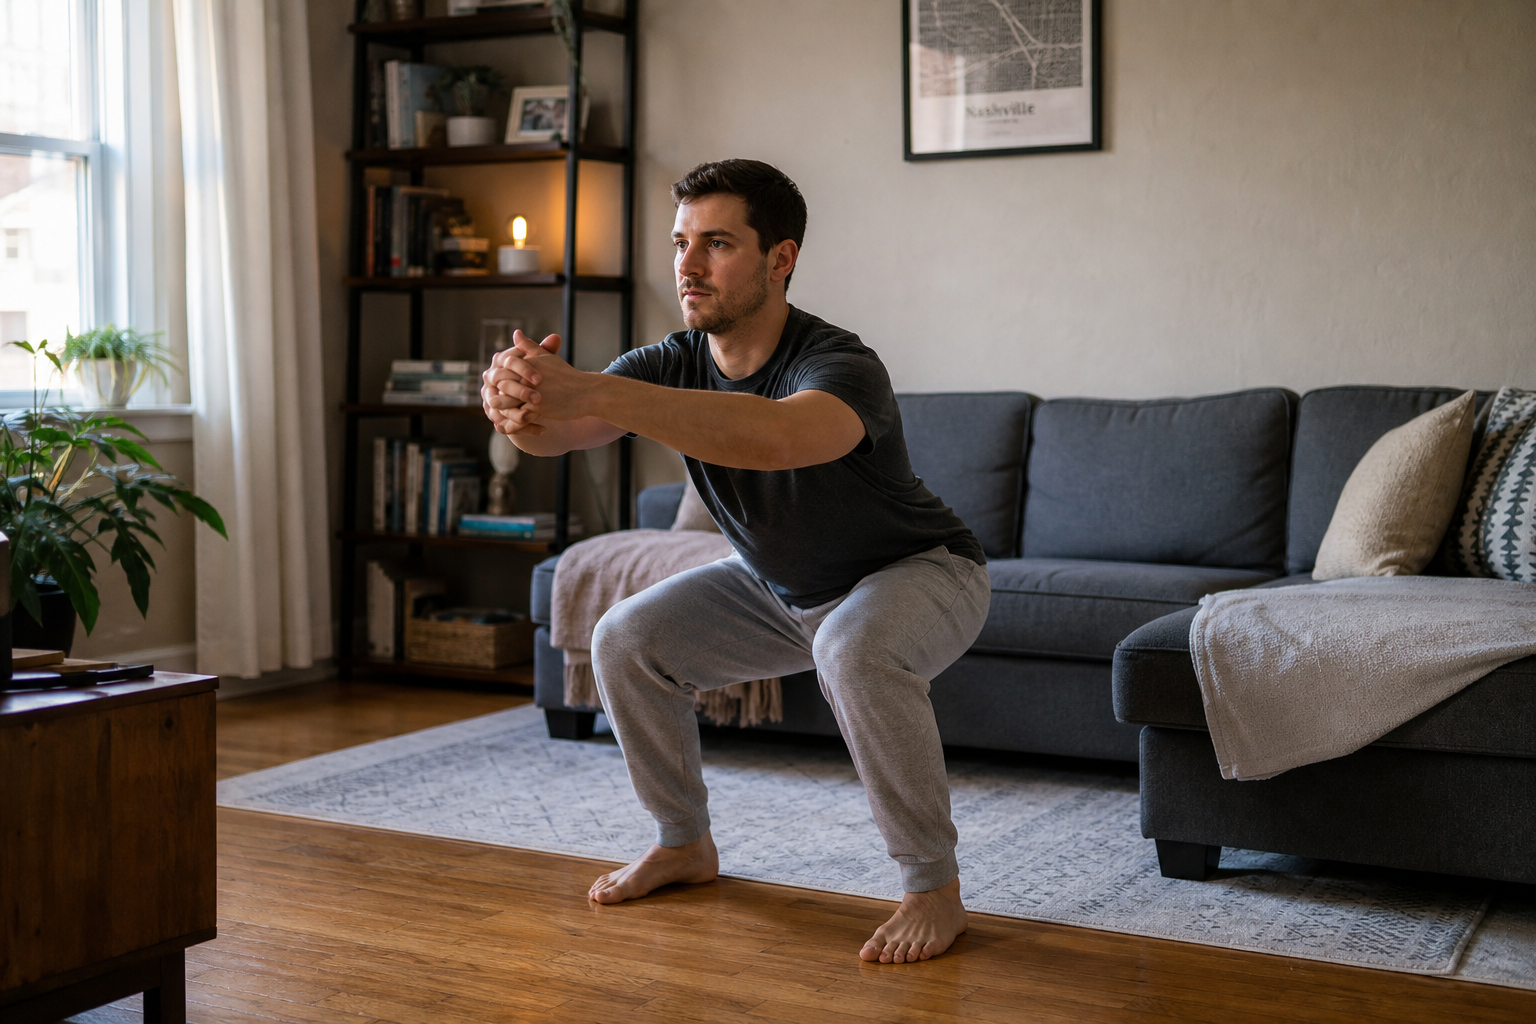
Week 1 — Foundation: Learn the Patterns
Week 1 has one job: establish clean movement in all six patterns. The overload lever applied this week is controlled tempo — every rep should be deliberate, with a two-second lowering phase and a one-second pause at the bottom of each movement. Do not rush. Speed is not the goal; learning the pattern under control is.
All three sessions this week are identical. Complete them on non-consecutive days — for example, Monday, Wednesday, and Friday. Rest or walk lightly on the other days.
Expect delayed onset muscle soreness (DOMS) after sessions one and two — particularly in your legs and glutes. This is normal, not a signal of damage, and it fades significantly by session three as your body begins adapting. Do not skip session three because you are sore.
| Pattern | Easiest Tier | Standard Tier | Progression Tier | Sets | Reps | Rest |
|---|---|---|---|---|---|---|
| Squat | Assisted squat (hold a doorframe or chair back) | Bodyweight squat | Pause squat (2-sec hold at bottom) | 2 | 10–12 | 60–90 sec |
| Hinge | Standing hip hinge (hands slide down thighs to mid-shin) | Single-leg Romanian deadlift (light touch on wall for balance) | Single-leg Romanian deadlift (no wall) | 2 | 8 each leg | 60–90 sec |
| Push | Wall push-up | Incline push-up (hands on couch or chair seat) | Knee push-up | 2 | 8–10 | 60–90 sec |
| Pull | Standing wall row (hands on wall, lean back 30°) | Inverted row under table (feet on floor, body at 45°) | Inverted row (body more horizontal) | 2 | 8–10 | 60–90 sec |
| Lunge | Reverse lunge (step back, both feet stay close) | Reverse lunge (full step back) | Forward lunge | 2 | 8 each leg | 60–90 sec |
| Core | Dead bug (arms only — extend one arm overhead, return) | Dead bug (opposite arm and leg) | Plank hold | 2 | 8 reps or 20-sec hold | 60 sec |
Week 2 — Volume: Do More of What Works
Week 2 applies the volume overload lever. The movements are the same, the tiers are the same, but you are doing more of them. Sets increase from two to three across all patterns. This is the week where the movements should start feeling more natural — your nervous system has had six sessions of practice. DOMS will be milder or absent. Use that clarity to focus on full range of motion: squat to full depth, lower all the way in push-ups, feel the full stretch in each hinge.
| Pattern | Easiest Tier | Standard Tier | Progression Tier | Sets | Reps | Rest |
|---|---|---|---|---|---|---|
| Squat | Assisted squat | Bodyweight squat | Pause squat (2-sec hold) | 3 | 10–12 | 60–90 sec |
| Hinge | Standing hip hinge | Single-leg RDL (wall touch) | Single-leg RDL (no wall) | 3 | 8 each leg | 60–90 sec |
| Push | Wall push-up | Incline push-up | Knee push-up | 3 | 10–12 | 60–90 sec |
| Pull | Standing wall row | Inverted row (45°) | Inverted row (more horizontal) | 3 | 8–10 | 60–90 sec |
| Lunge | Reverse lunge (short step) | Reverse lunge (full step) | Forward lunge | 3 | 10 each leg | 60–90 sec |
| Core | Dead bug (arms only) | Dead bug (arm + leg) | Plank hold | 3 | 10 reps or 25-sec hold | 60 sec |
If the Standard tier felt manageable throughout Week 1 — meaning the last two reps were challenging but achievable — consider moving to the Progression tier for one or two patterns in Week 2. Do not move up on patterns where form still feels uncertain.
Week 3 — Intensity: Harder Variations and Slower Tempo
Week 3 applies the variation-progression and tempo levers simultaneously. Harder exercise variations are introduced as the new Standard tier, and explicit tempo cues are added to increase time under tension. A three-to-four second lowering phase on squats, push-ups, and lunges produces a qualitatively different kind of fatigue — the muscle is working longer on each rep, and your body will notice.
This is also the week where real strength changes become noticeable. Single-leg work will likely expose a difference between your stronger and weaker leg — that asymmetry is normal and is exactly what the lunge and hinge patterns are designed to address. Do not skip or abbreviate the single-leg work.
| Pattern | Easiest Tier | Standard Tier (New) | Progression Tier (New) | Sets | Reps / Tempo | Rest |
|---|---|---|---|---|---|---|
| Squat | Bodyweight squat | Slow squat (4-sec descent, 1-sec pause) | Bulgarian split squat (rear foot elevated on couch) | 3 | 8–10 / 4-1-1 tempo | 90 sec |
| Hinge | Single-leg RDL (wall touch) | Single-leg RDL (no wall, 3-sec lower) | Single-leg RDL (pause at bottom) | 3 | 8 each leg / 3-sec lower | 90 sec |
| Push | Incline push-up | Standard push-up (3-sec descent) | Diamond push-up | 3 | 8–10 / 3-sec descent | 90 sec |
| Pull | Standing wall row | Inverted row (more horizontal, 3-sec lower) | Inverted row (feet elevated on chair) | 3 | 8–10 / 3-sec lower | 90 sec |
| Lunge | Reverse lunge | Slow reverse lunge (3-sec descent) | Walking lunge | 3 | 8 each leg / 3-sec descent | 90 sec |
| Core | Dead bug (arm + leg) | Plank hold | Side plank (each side) | 3 | 30-sec hold (plank) / 20 sec each (side plank) | 60 sec |
Week 4 — Challenge: Power and Maximum Effort
Week 4 introduces power-focused variations — movements where the concentric (lifting) phase is performed as quickly and forcefully as possible. This is not just for athletes. The 2026 ACSM position stand specifically notes that power training using moderate effort and a fast concentric phase improves physical function and is beneficial even for beginners. Power — the ability to produce force quickly — tends to decline earlier than strength with age, and training it early builds a more complete physical foundation.
All three modification tiers remain available. If you are not ready for plyometric variations, use the Standard tier at maximum controlled effort — move as powerfully as you can without leaving the ground. The goal is intent, not necessarily air time.
| Pattern | Easiest Tier | Standard Tier | Progression Tier (Power) | Sets | Reps | Rest |
|---|---|---|---|---|---|---|
| Squat | Slow bodyweight squat | Bodyweight squat (fast drive up) | Jump squat (land softly, absorb with bent knees) | 3 | 8–10 | 90 sec |
| Hinge | Single-leg RDL (slow) | Single-leg RDL (controlled speed) | Single-leg RDL into knee drive (drive knee up at top) | 3 | 8 each leg | 90 sec |
| Push | Standard push-up (slow) | Standard push-up (fast drive up) | Explosive push-up (hands leave floor briefly at top) | 3 | 8–10 | 90 sec |
| Pull | Inverted row (slow) | Inverted row (fast pull, 2-sec lower) | Inverted row (explosive pull) | 3 | 8–10 | 90 sec |
| Lunge | Reverse lunge (slow) | Alternating reverse lunge (controlled pace) | Jump lunge (alternate legs in air — only if landing is controlled) | 3 | 8 each leg | 90 sec |
| Core | Plank hold | Plank with shoulder taps | Plank with alternating leg lift | 3 | 30–40 sec or 10 taps/lifts each side | 60 sec |
What to Expect Each Week
Understanding what is actually happening in your body each week reduces the chance you will quit when things feel harder or different than expected.
- Week 1: DOMS will hit after sessions one and two — your legs, glutes, and chest will likely be the most affected. This is your body's normal inflammatory response to unfamiliar mechanical stress, not a sign of injury. It diminishes significantly by session three. Your nervous system is learning to coordinate the movement patterns, which is why everything feels slightly awkward at first.
- Week 2: Movements feel cleaner and more automatic. DOMS is milder or absent. You may notice that reps that felt hard in Week 1 now feel manageable — that is neurological adaptation working. This is the week to focus on range of motion: go deeper, lower further, feel the full movement.
- Week 3: The first real strength signals appear. The slow tempo will produce a new kind of burn — sustained tension rather than cardiovascular breathlessness. Single-leg exercises may reveal that one side is noticeably stronger than the other; this is normal and expected. Stay with the harder tier even when it is uncomfortable.
- Week 4: You are measurably stronger and more capable than you were four weeks ago. Exercises that felt impossible in Week 1 are now achievable. Visible body composition changes are not the right metric at this stage — strength adaptations in the first four weeks are primarily neurological. The physical changes that follow a consistent training habit take six to eight weeks to become visible, and they are built on exactly the foundation this plan establishes.
Rest Days and Active Recovery
This plan trains three days per week, leaving four days for rest and recovery. Those four days are not wasted time — they are when adaptation actually happens. Muscles are not built during training sessions; they are built during the recovery that follows. Skipping rest days or adding extra training sessions does not accelerate results for beginners — it delays them.
On non-training days, the most useful things you can do are:
- Walk. Light walking on rest days promotes blood flow, reduces DOMS duration, and contributes toward the broader physical activity guidelines without adding training stress. Twenty to thirty minutes is enough.
- Gentle mobility work. Five to ten minutes of light hip circles, shoulder rolls, and gentle spinal rotation keeps you moving without loading fatigued muscles. This is not a stretching session designed to increase flexibility — it is maintenance movement.
- Sleep. Sleep is the primary recovery mechanism. Seven to nine hours per night is the range where most adults see optimal hormonal and tissue repair processes. If your sleep is consistently poor, your training adaptation will be consistently limited — no amount of extra sessions compensates for insufficient sleep.
Common Beginner Mistakes to Avoid
Three mistakes consistently derail beginners following bodyweight plans. All three are avoidable if you know to watch for them.
- Speeding through reps. Tempo is the primary overload mechanism in this plan. A controlled four-second squat descent creates substantially more muscular tension than a one-second drop. When you rush, you eliminate the stimulus that drives adaptation. If a set feels too easy, slow it down before you increase reps or move to a harder variation.
- Skipping the pulling pattern. The inverted row and wall row are the most commonly omitted exercises in home workout plans. Skipping them while continuing to train push patterns creates a muscular imbalance — the chest and front shoulder become relatively stronger than the upper back and rear shoulder, which over time contributes to rounded posture and shoulder discomfort. Every session includes a pull. Do it.
- Staying on a variation that feels comfortable. If you complete all sets and reps of an exercise and the last two reps of the last set feel easy, you are ready to move up a tier. Staying at a comfortable difficulty level is not training — it is maintenance. Progression is the mechanism. When the current tier no longer challenges you, advance.
After 4 Weeks: Three Paths Forward
Completing this plan is not a finish line — it is the point at which your training foundation is established and the options in front of you become meaningful. Here are three concrete paths, depending on what you want next.
- Repeat the plan targeting harder tiers and higher reps. Run the four-week cycle again, but this week's Progression tier becomes next cycle's Standard tier. Aim for the top of each rep range before advancing. This is the right path if you want to continue building strength with zero investment and are not yet at the Progression tier for most exercises.
- Add resistance bands or dumbbells and revisit the same movement patterns. The six foundational patterns in this plan are identical to the patterns you would train with external load. A set of light resistance bands (typically under $20) or a pair of adjustable dumbbells allows you to apply the same progressive overload logic with added resistance. The movement skill you have built over four weeks transfers directly.
- Combine this plan with a consistent walking routine. Three sessions per week of resistance training plus 150 minutes of moderate-intensity walking per week meets the full ACSM physical activity guidelines for adults. Adding a 30-minute walk on four of your rest days accomplishes this without any additional equipment or gym access. This combination addresses both muscular fitness and cardiovascular health — the two most evidence-supported dimensions of long-term physical function.
Frequently Asked Questions
These are the questions that come up most often from beginners starting a plan like this.
- Can I do this plan if I'm very out of shape or returning after a long break? Yes — the Easiest tier exists specifically for this situation. Start every exercise at the Easiest tier in Week 1 regardless of how it looks. You can always move up; starting too hard and getting injured sets you back weeks.
- What if I can only do two sessions per week? Two sessions per week is the evidence-backed minimum frequency for meaningful strength adaptation per the 2026 ACSM position stand. You will progress more slowly than with three sessions, but you will still progress. Extend each week by one extra calendar week if needed — run the plan over five to six weeks rather than four.
- Will I lose weight doing this plan? Resistance training supports body composition improvements over time, but this plan is not designed or framed as a weight-loss program. Body composition changes are a secondary effect of consistent training and are influenced heavily by nutrition and overall activity levels. Do not use four-week scale changes as the primary measure of this plan's success.
- What if I miss a session? Miss one session and pick up where you left off at the next scheduled training day. Do not try to make it up by doubling up sessions — two sessions in one day with no recovery between them is not twice the benefit. One missed session in a four-week plan has no meaningful effect on your results.
- Is soreness a sign I'm doing it right? DOMS in the first week is a normal response to unfamiliar mechanical stress and is not a reliable indicator of training quality. Some effective sessions produce significant soreness; others do not. By Week 2, soreness decreases even as training effectiveness continues — your body is adapting, not failing to respond. Sharp, joint-localized, or persistent pain is different from DOMS and warrants stopping and consulting a healthcare provider.
- Do I need to warm up? A brief warm-up is worth the three to five minutes it takes. Five minutes of light movement — arm circles, leg swings, hip circles, and a slow walk around the room — raises muscle temperature, increases joint lubrication, and prepares your nervous system for loaded movement. Starting cold into a set of jump squats in Week 4 is how sprains happen.
What a small equipment investment adds
We don't have a build tagged to this exact tier yet. Browse all builds.
How often should you repeat this?
See our recovery and rest reference for citation-anchored rest-interval guidance.
Spot something off?
Tell us if a movement, tier assumption, or duration didn't match your experience.