
A Ballet Barre Workout at Home With No Equipment
A complete no-equipment ballet barre workout for a small apartment: a sturdy chair back, countertop, or wall replaces the barre, a towel stands in for the mat, and roughly 6x4 feet of floor space is all you need. The low-impact, near-silent session suits renters and builds muscular endurance—with honest expectations about what barre can and cannot deliver on its own.
- Equipment tier required
- none
- Duration
- 35 min
- Difficulty
- beginner
- Target area
- lower body, core
- Space footprint needed
- 6x4 ft
- Noise level
- quiet, no jumping
First, check the barre you already have
A ballet barre is not the thing giving you resistance. It is a balance assist. That is the useful fact for a ballet barre workout at home with no equipment, because it means a sturdy chair back, a countertop, or a wall can do the job honestly, without pretending your apartment has become a studio overnight. Cleveland Clinic and Healthline both describe barre as a workout that uses ballet-inspired positions with support from a barre or similar stable surface, including home substitutes like a chair or countertop. [1][2]
The support should help you place your body; it should not be something you hang from. If the chair shifts when you lightly press down on it, it is not your barre. If it has wheels, it is not your barre. If the back is loose, cracked, decorative, or too low to hold without rounding your shoulders, move to a countertop or wall.
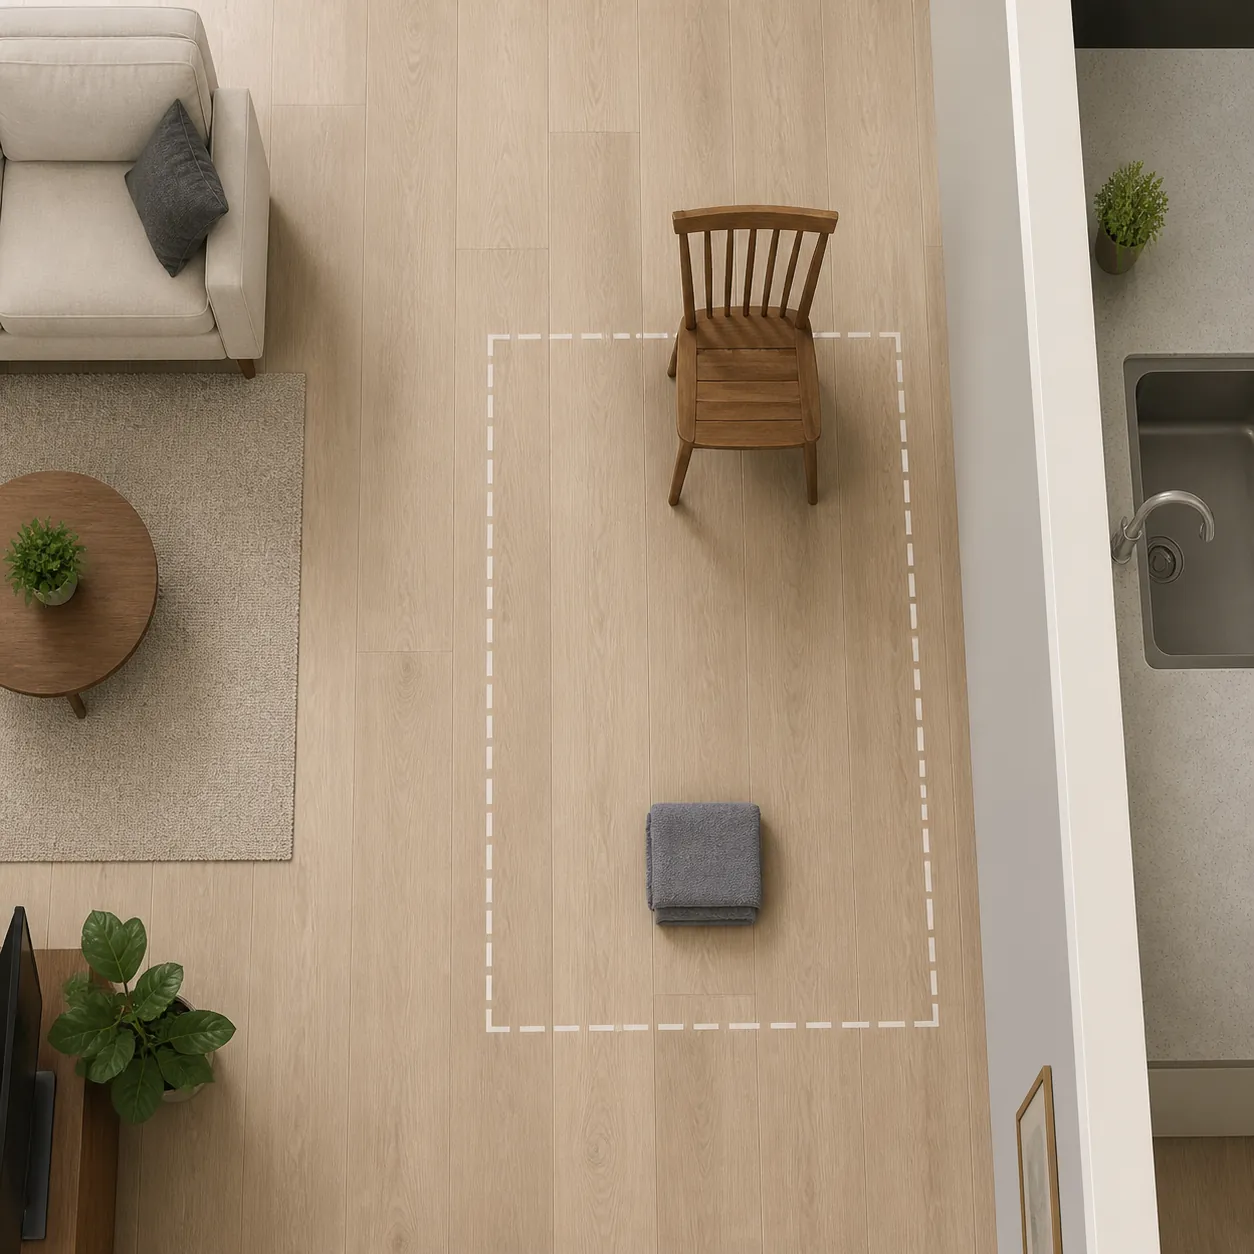
You do not need a dedicated room. A no-equipment barre setup can fit in roughly a 6-by-4-foot working area with a chair used as the barre and a towel used as the mat. [3] That is about enough room to stand beside a sofa, extend one leg to the back or side without kicking a table, and lower to the floor for core work without negotiating with a coffee table mid-plank.
Do this room check before you start:
- Put the chair back against a wall if you are using a chair. This keeps the chair from drifting when your hand gets tired.
- Use a chair without wheels. A rolling office chair is useful for work and terrible for balance.
- Clear the leg path: front, side, and back. Barre uses small ranges, but you still need space for a controlled lift.
- Put a towel on the floor for knees, forearms, or seated work. It is not a perfect mat, but it keeps the $0 version moving.
- Check the floor. If it is slippery, skip socks. If it creaks badly in one spot, shift the workout zone before the first plié.
- Keep the music low or use earbuds. The workout itself is low-impact and does not require jumping, which is why it can be close to silent in an apartment. [1][4]
If you are building out a bigger quiet-training corner later, the same priorities apply: floor protection, stable support, and movements that do not punish the person downstairs. For more on that larger setup problem, see this compact apartment home gym setup.
The 30–45 minute no-equipment home barre session
The session below uses only body weight, a chair/counter/wall for balance, and a towel for floor work. Published no-bar barre routines commonly build around chair support, 12-to-20-rep sets, and multi-round circuits; this version keeps those practical ranges while stripping out props you do not need. [5][6]
| Segment | Time | What you do |
|---|---|---|
| Joint warm-up | 5–7 minutes | Gentle standing movement, calf raises, hip circles, arm reaches |
| Posture and support check | 2–3 minutes | Find neutral ribs, light hand pressure, soft knees, quiet foot placement |
| Standing barre circuit | 18–25 minutes | Pliés, pulses, relevés, leg lifts, attitude work, and glute-focused extensions |
| Floor and core work | 6–8 minutes | Towel-supported forearm plank, seated C-curve, bridge pulses |
| Cool down | 4–6 minutes | Calves, hip flexors, glutes, hamstrings, chest, and breathing |
Use the beginner range if you are new to barre, returning after a break, or still testing whether your support setup feels right. Use the advanced range only if you can keep the movement small, controlled, and quiet.
| Level | Reps or time | Rounds |
|---|---|---|
| Beginner | 12 reps per move or 20–30 seconds of pulses | 1–2 rounds per circuit |
| Intermediate | 15–18 reps per move or 30–40 seconds of pulses | 2–3 rounds per circuit |
| Advanced | 20 reps per move or 40–60 seconds of pulses | 3–4 rounds per circuit, or 4–6 total rounds across shorter circuits |
Warm-up: make the floor and joints cooperate
Stand beside your chair, countertop, or wall with one hand resting lightly on the support. Keep your feet parallel and hip-width apart. The first few minutes are not there to exhaust you; they are there to see whether your knees, ankles, hips, floor, and support are all willing to participate.
- March in place for 60 seconds. Keep the steps soft enough that you could do them while someone is in the next room.
- Do 12–20 slow shoulder rolls, then 12–20 arm reaches overhead.
- Do 12–20 calf raises with feet parallel. Lift for two counts, lower for two counts.
- Do 8–12 hip circles each direction, holding the support only as much as needed.
- Do 8–12 gentle bodyweight squats. Stop before your pelvis tucks hard under or your heels peel up.
Before the first circuit, set the posture you will keep returning to: feet rooted, knees tracking over toes, ribs stacked over pelvis, shoulders wide, hand light on the support. If you are gripping the chair so hard your knuckles change color, the movement is too big or the support is wrong.
Circuit 1: parallel legs, calves, and quiet control
Stand facing your support. If it is a chair, both hands can rest on the top of the chair back. If it is a wall, place your fingertips at chest height. The wall version usually forces a lighter touch, which is a good correction if you tend to lean.
- Parallel plié: Feet hip-width and parallel. Bend the knees a few inches, then straighten without locking. Do 12–20 reps.
- Parallel plié pulses: Hold the lowest controlled point and pulse one inch up, one inch down. Work for 20–60 seconds.
- Relevé calf raises: Rise onto the balls of the feet, pause, then lower slowly. Do 12–20 reps. If your ankles wobble, lower the heels and make the range smaller.
- Plié to relevé: Bend the knees, lift the heels, lower the heels, straighten the legs. Do 8–15 slow reps. This is where many people start bouncing; resist that.
- Heel hover hold: Lift both heels slightly and hold for 10–30 seconds. Keep the support light enough that your calves, not your wrists, are doing the work.
Rest 30–60 seconds. Repeat the circuit once if you are a beginner, twice if you are comfortable, and more only if your knees still track cleanly and your feet land silently.
Circuit 2: turned-out pliés without forcing turnout
Turn your toes out only as far as your hips allow. This is not a contest with a ballet poster. If the knees collapse inward, narrow the stance and reduce the turnout.
- First-position plié: Heels close or lightly touching, toes turned out. Bend and straighten for 12–20 reps.
- First-position pulse: Hold the plié and pulse for 20–60 seconds. Keep the torso tall; do not sit back like a squat.
- Wide second-position plié: Step the feet wider than hips, toes angled out. Bend the knees over the toes, then rise. Do 12–20 reps.
- Second-position side-to-side shift: Stay low and shift weight a few inches right and left for 12–20 total shifts. Keep the movement smooth, not stompy.
- Second-position heel lift: In a low plié, lift the right heel for 8–12 reps, then the left. Advanced option: alternate heels for 20–40 seconds.
If the floor is slippery, bring the stance in. Barre work gets hard because the positions are precise and sustained, not because your feet are sliding apart while you bargain with the hardwood.
Circuit 3: back-body work with the chair, counter, or wall
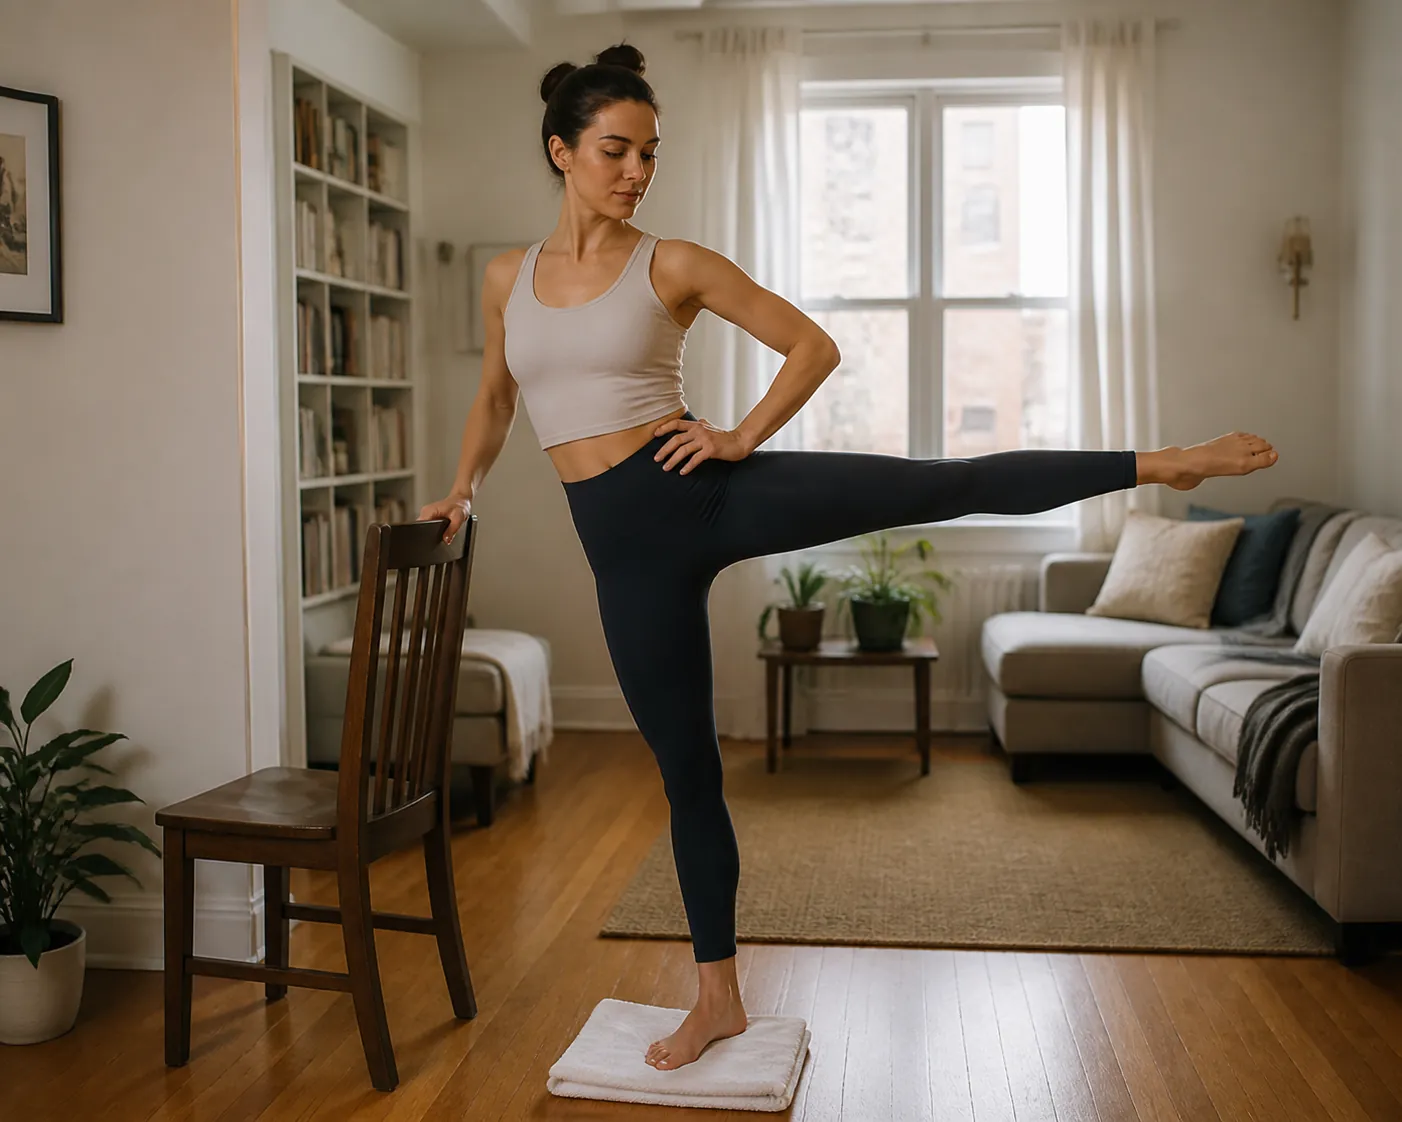
Face your support again. Step far enough back that you can hinge slightly from the hips without rounding your back. Keep your standing knee soft. Your working leg should move from the hip, not from a dramatic arch in the low back.
- Straight-leg back lift: Extend the right leg behind you with toes pointed or flexed. Lift a few inches, lower with control. Do 12–20 reps, then switch sides.
- Back lift pulses: Hold the leg lifted and pulse one inch for 20–60 seconds each side.
- Attitude back pulse: Bend the working knee behind you. Keep the knee pointing down and slightly out, then pulse the thigh upward. Do 12–20 reps each side.
- Hamstring curl: Keep the thigh slightly behind the hip and bend the heel toward the seat, then extend. Do 12–20 reps each side.
- Standing glute squeeze hold: Lift the leg slightly, bend the knee, and hold for 10–30 seconds. Keep the pelvis level; if one hip hikes up, lower the leg.
A countertop is usually the best support for this circuit if your chair is light. The farther your leg moves behind you, the more tempting it is to pull the support toward you. Do not make a dining chair responsible for your entire center of gravity.
Circuit 4: side leg work in a small footprint
Stand with your right side toward the support and your right hand resting on it. The working leg is the outside leg. This is the part where the 6-by-4-foot zone earns its keep: you need enough lateral space for the leg, not enough room to travel.
- Side leg lift: Lift the outside leg a few inches to the side, then lower without dropping the hip. Do 12–20 reps each side.
- Side leg pulses: Hold the leg lifted and pulse for 20–60 seconds each side.
- Tiny side circles: Keep the leg lifted and draw small circles, 8–12 each direction. Smaller is usually better here.
- Passe balance: Bring the outside foot to the inside ankle or calf, knee turned slightly out. Hold 10–30 seconds. Use the wall if the chair makes you lean.
- Passe to side tap: From passe, tap the foot out to the side and return. Do 8–15 reps each side.
This circuit should feel contained. If your furniture arrangement makes you kick outward into open space, angle your body slightly toward the support and reduce the height of the lift.
Floor and core work with a towel
Lay the towel down where your knees or forearms will go. A towel slides more than a mat, so set it on a surface where it stays put. If it bunches under you, fold it smaller and use it only for padding.
- Forearm plank: Forearms on the towel, knees down for the beginner option or legs extended for the advanced option. Hold 15–45 seconds. Keep the ribs from dropping toward the floor.
- Knee plank pulses: From a kneeling forearm plank, shift the body one inch forward and back for 8–15 reps. The movement should be almost annoyingly small.
- Seated C-curve hold: Sit with knees bent, feet on the floor, hands behind thighs. Round the low back slightly and lean back until the abdominals work. Hold 15–30 seconds.
- C-curve arm reach: Keep the C-curve and release one or both hands forward. Pulse the arms for 20–40 seconds, or hold still if the low back takes over.
- Bridge pulses: Lie on your back, knees bent, feet hip-width. Lift the hips, then pulse one inch up and down for 20–60 seconds.
- Bridge heel lifts: Hold the bridge and lift one heel, then the other. Do 8–12 each side. Keep the hips level.
Floor work is optional if your space is too tight or your floor is uncomfortable. In that case, repeat one standing circuit instead. A no-equipment workout should not require you to kneel on a floor that feels like a landlord’s afterthought.
Cool down without turning it into a second workout
Spend 4–6 minutes bringing the intensity down. Hold each stretch gently; no bouncing, no forcing turnout, no chasing a shape you did not own during the workout.
- Calf stretch: Face the wall or chair, step one foot back, and press the heel down for 20–30 seconds each side.
- Hip flexor stretch: Step one foot forward into a short lunge, back knee down on the towel if needed, and hold 20–30 seconds each side.
- Figure-four glute stretch: Sit or lie down and cross one ankle over the opposite thigh for 20–30 seconds each side.
- Hamstring fold: Extend one leg forward with a soft knee and hinge from the hips for 20–30 seconds each side.
- Chest opener: Clasp hands behind the back or place one forearm on a wall and breathe for 20–30 seconds each side.
Why the burn shows up even when the workout is quiet
Barre can feel intense because it keeps muscles working in small ranges for a long time. The repeated pliés, pulses, holds, heel lifts, and end-range leg positions create time under tension. ACE describes barre as a trend built around small-range movements, isometric holds, higher repetitions, and work that often emphasizes muscular endurance rather than maximal strength. [7]
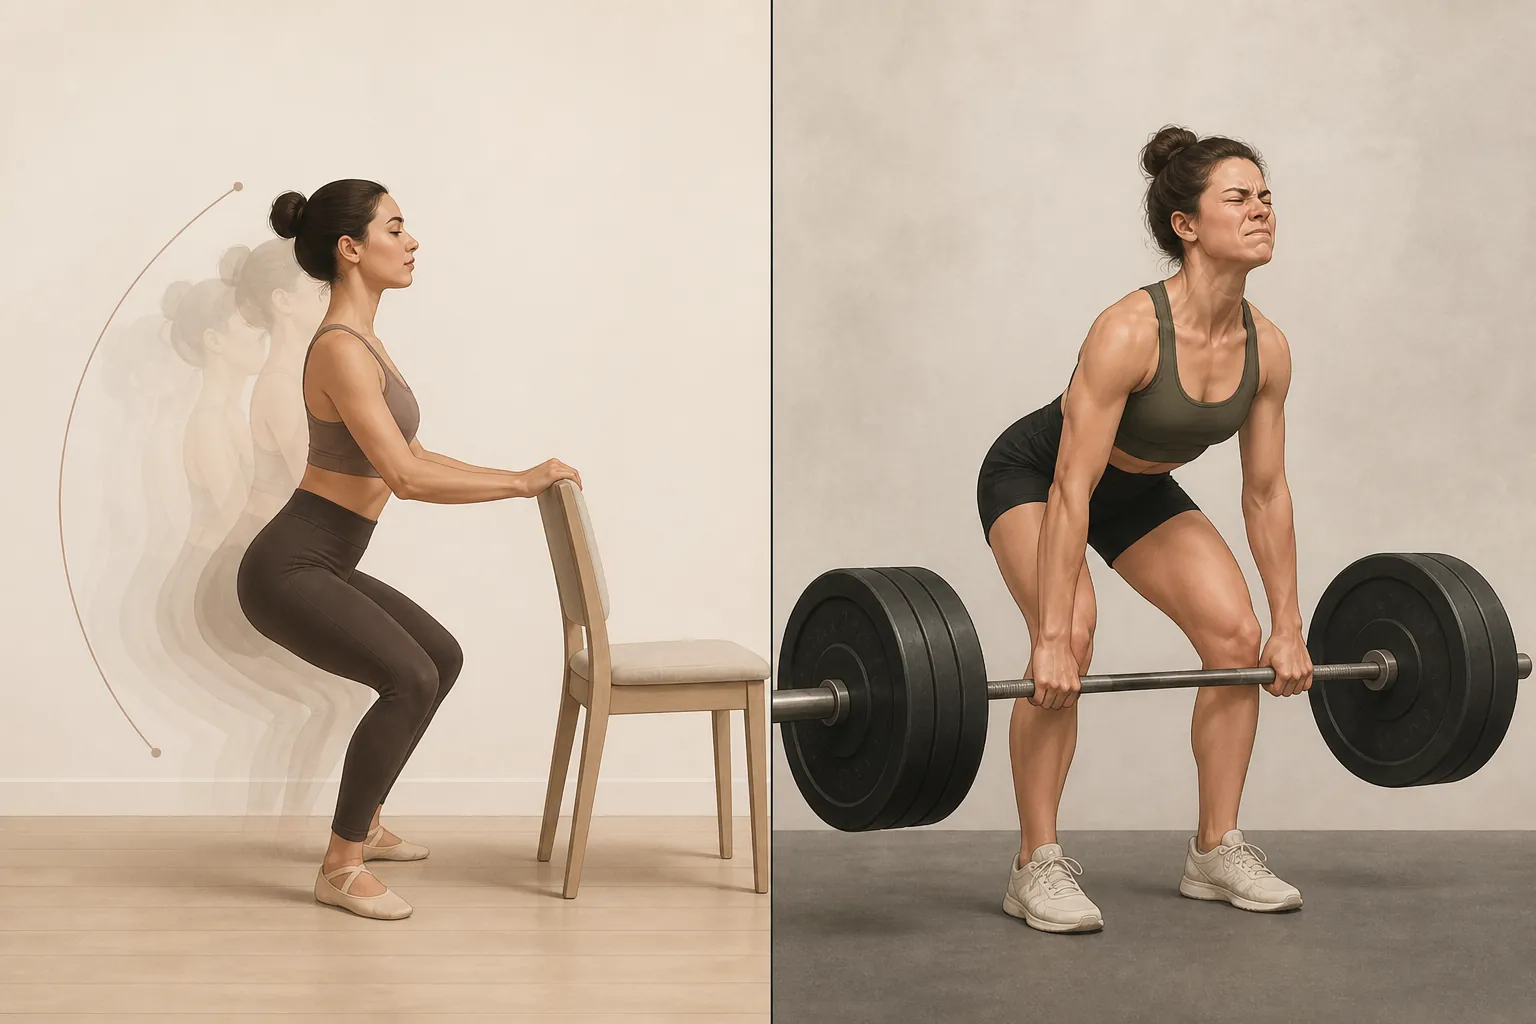
That shaking feeling in the thighs is not magic, and it is not proof that your muscles are being reshaped into a different genetic category. It usually means the local muscles are fatiguing under repeated, precise work. That can be useful. It can improve your tolerance for sustained positions, make you more aware of knee and hip alignment, and give you a low-impact training day that does not require pounding the floor.
The tradeoff is also clear. Bodyweight pulses against gravity are not the same stimulus as progressive heavy resistance. If your goal is to build high levels of strength, you eventually need loading that increases over time. Barre can support that goal as accessory work, especially for control and endurance, but it should not be sold as a full replacement for strength training.
What to ignore in the marketing language
Be suspicious of any at-home barre promise that leans too hard on “long lean muscle,” fast transformation timelines, or precise calorie burn claims. Barre may help you train consistently because it is quiet, low-impact, and easy to set up. That is already a good case. It does not need to become a body-recomposition fairy tale.
Calorie burn varies with body size, intensity, class length, rest periods, and how much of the session is true continuous work. A 30-minute apartment barre session with chair support is not automatically equivalent to a longer studio class, and neither one guarantees weight loss. Weight change depends on more than whether your legs trembled during second-position pulses.
The cleaner expectation is this: barre is low-impact muscular endurance and control work. It asks you to hold positions, repeat small movements, and notice alignment under fatigue. If that is what you want tonight, the chair version is not a cheap imitation. It is the workout.
How to use it in a real week
Use this session on days when you need quiet training, low-impact work, or a controlled lower-body and core session that will not take over the apartment. It fits beginners because the ranges can stay small and the support is always available. It fits renters because nothing has to be mounted, delivered, assembled, or explained to a property manager.
If your goals include heavier strength, pair barre with separate resistance training. That can be dumbbells later, bands later, a gym membership, or a limited-equipment app that progresses load more clearly. If you want help choosing that side of the week, this guide to strength training apps for limited equipment is the more relevant next step.
If your goals include cardiovascular fitness, add separate cardio that matches your joints, floor, and neighbors. That might be outdoor walking, cycling, swimming, low-impact intervals, or another quiet routine. Barre can sit well beside those choices because it does not leave equipment in the room or make your living space feel like a storage unit.
So yes, a ballet barre workout at home with no equipment is real. A stable chair back, countertop, or wall gives you the balance assist. A towel covers the floor work. A small rectangle of cleared floor is enough. Use it for endurance, control, low-impact training, and consistency; add separate strength or cardio when those are the goals.
References
- What Is Barre? — Cleveland Clinic — https://health.clevelandclinic.org/what-is-barre
- What Is Barre Workout? — Healthline — https://www.healthline.com/health/what-is-barre-workout
- No Equipment Barre Workout — BarreWorkout.com — https://barreworkout.com/free-workouts/no-equipment/
- Exercises Barre Workout at Home — TODAY — https://www.today.com/health/diet-fitness/exercises-barre-workout-at-home-rcna193206
- No Bar Barre Workout — Physical Kitchness — https://physicalkitchness.com/no-bar-barre-workout/
- Home Barre Workout — Shape — https://www.shape.com/fitness/workouts/home-barre-workout
- Hitting the Barre: Understanding the Popular Group Fitness Trend — ACE Fitness — December 2019 — https://www.acefitness.org/continuing-education/certified/december-2019/7432/hitting-the-barre-understanding-the-popular-group-fitness-trend/
What a small equipment investment adds
We don't have a build tagged to this exact tier yet. Browse all builds.
How often should you repeat this?
See our recovery and rest reference for citation-anchored rest-interval guidance.
Spot something off?
Tell us if a movement, tier assumption, or duration didn't match your experience.