Beginner Bodyweight Workout Routine: A Complete 3-Day-Per-Week Home Plan
A structured, no-equipment full-body workout routine for absolute beginners — including three modification tiers for every exercise, an apartment-friendly weekly schedule, and a 4-week progression framework that removes all guesswork about what to do, how often, and when to advance.
- Duration
- 30 min
Why Bodyweight Training Works for Absolute Beginners
The most common reason people delay starting a workout routine is the assumption that they need a gym, equipment, or a higher baseline of fitness first. None of those things are true — and the research backs that up.
A 2020 study published in BMC Public Health found that untrained adults who completed a 12-week bodyweight program saw significant increases in both muscle size and strength. Separately, research published in the journal Physiology and Behavior — summarized by Harvard Health — confirmed that bodyweight exercise builds muscle independent of external load, as long as the muscle fibers are sufficiently challenged.
What makes bodyweight training particularly effective for beginners is the nature of early adaptation. Research from Human Kinetics shows that strength gains in the first four weeks are primarily neural — your nervous system becomes better at recruiting and activating muscle fibers. You don't need heavy loads to trigger that process. Consistent, well-structured bodyweight sessions are enough.
How This Routine Works
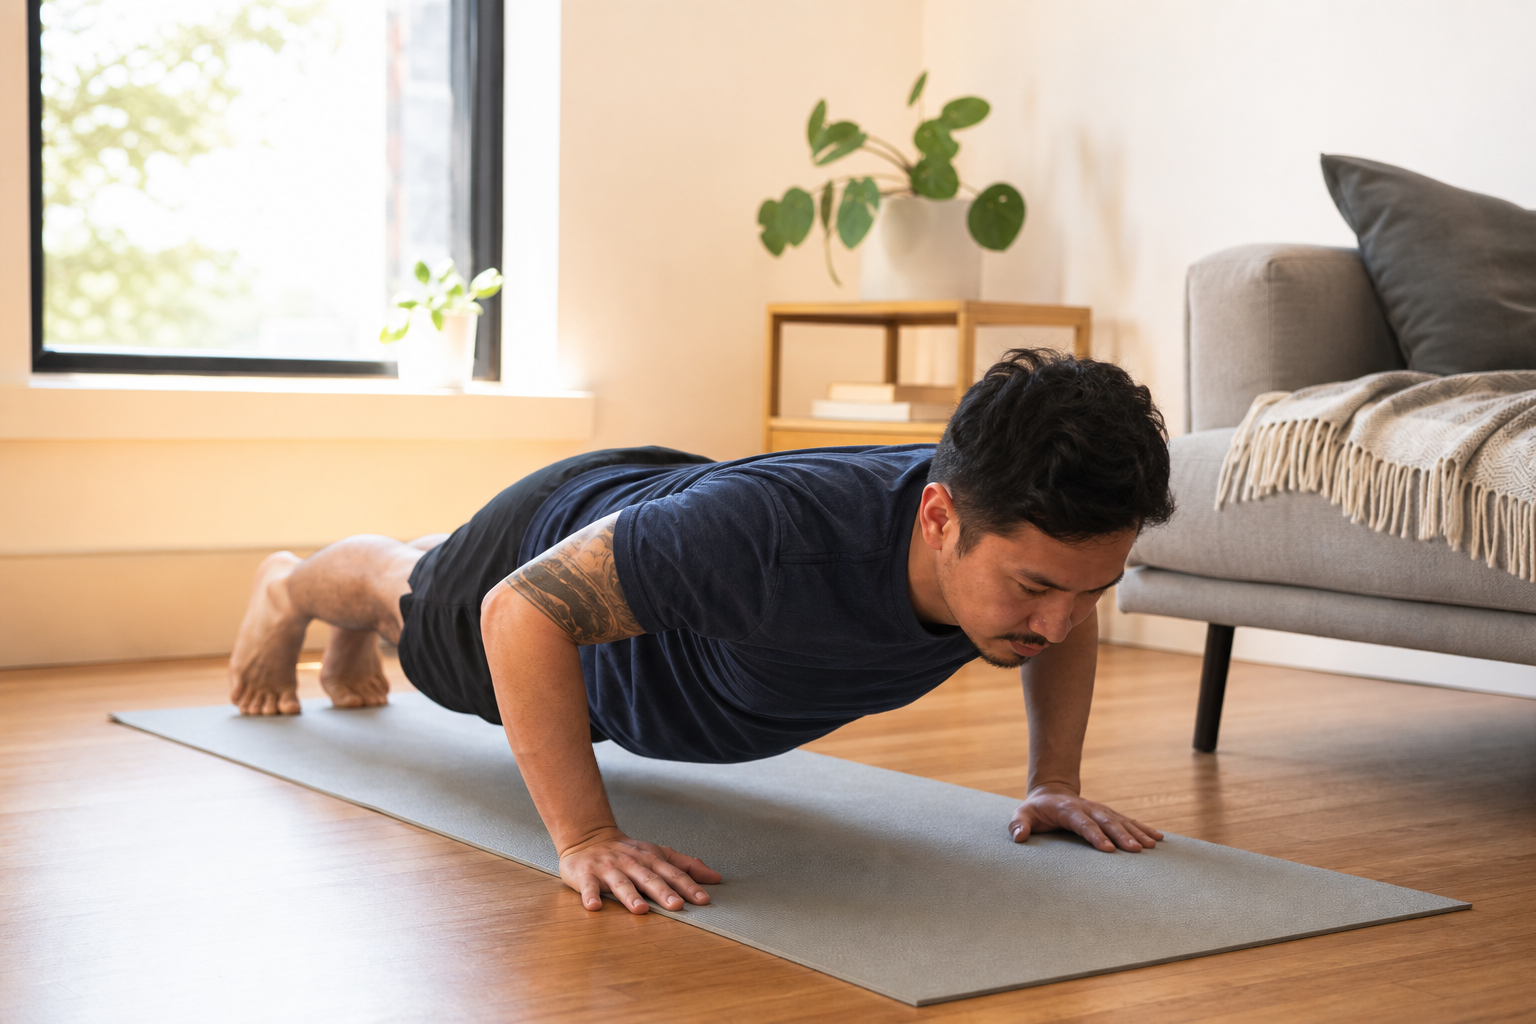
This is a full-body routine designed to be done three days per week. Each session covers six foundational movement patterns, takes roughly 30 minutes including warm-up and cool-down, and requires no equipment. The full workout fits in a 6×4-foot floor space — a cleared patch of living room or bedroom is all you need.
- Frequency: 3 days per week, with at least 48 hours between sessions. You build strength during rest, not during the workout itself — skipping recovery time slows progress.
- Sets and reps: 2–3 sets of 10–15 reps per exercise.
- Rest between exercises: 30–60 seconds.
- Rest between full sets: 60–120 seconds.
- Equipment: None. No mat required, though one helps on hard floors.
Each exercise in this routine has three clearly labeled modification tiers:
- Tier 1 (Easiest): The most supported or reduced-range version of the movement. Start here if you're not sure.
- Tier 2 (Standard): The conventional form of the exercise. Move here when Tier 1 feels controlled and easy.
- Tier 3 (Harder): An increased-challenge variation that adds range of motion, tempo, or instability. Move here only when Tier 2 is consistently clean.
Dynamic Warm-Up (5–7 Minutes)
Do not skip this. A short dynamic warm-up raises your core temperature, increases joint mobility, and reduces injury risk — sports medicine experts recommend 5–7 minutes of dynamic movement before any bodyweight session. This sequence has no jumping and works in any apartment.
- Brisk march in place — 60 seconds. Lift your knees to hip height, swing your arms naturally.
- Arm circles — 30 seconds forward, 30 seconds backward. Keep your shoulders relaxed.
- Shoulder rolls — 10 slow rolls forward, 10 backward. Let your chest open on the backward rolls.
- Torso twist — 10 reps per side. Stand with feet shoulder-width apart, arms out, and rotate your upper body side to side. Keep your hips facing forward.
- Bodyweight squat prep — 10 slow reps. Lower only as far as feels comfortable. This activates the hips and legs before the main workout.
The Full Workout: 6 Exercises by Movement Pattern
The six exercises below cover the fundamental movement patterns your body uses every day: pushing, squatting, hinging, lunging, core stability, and posterior chain activation. Training all six in one session ensures balanced development without overloading any single muscle group.
For each exercise: choose your tier, complete your sets and reps, rest, then move to the next exercise. Complete all sets of one exercise before moving on.
1. Push Pattern — Push-Up
Muscles worked: chest, shoulders, triceps, core.
| Tier | Exercise | Key Form Cues |
|---|---|---|
| Tier 1 | Wall push-up | Stand arm's length from a wall, hands flat at shoulder height. Lower your chest toward the wall by bending your elbows, then push back. Keep your body in a straight line from head to heels. |
| Tier 2 | Knee push-up | Hands shoulder-width apart on the floor, knees down, hips slightly forward. Lower your chest toward the floor until it nearly touches, then press back up. Do not let your hips sag or pike. |
| Tier 3 | Full push-up | Hands shoulder-width apart, toes on the floor, body in a straight plank line. Lower your chest to just above the floor, elbows at roughly 45 degrees from your torso. Press back to full arm extension. |
- Sets: 2–3
- Reps: 10–15
- Rest: 30–60 seconds, then move to the next exercise
2. Squat Pattern — Bodyweight Squat
Muscles worked: quadriceps, glutes, hamstrings, core.
| Tier | Exercise | Key Form Cues |
|---|---|---|
| Tier 1 | Chair squat | Stand in front of a sturdy chair, feet shoulder-width apart. Lower your hips toward the seat — lightly touch it, then stand back up. The chair teaches you the correct depth and hip-hinge pattern. |
| Tier 2 | Bodyweight squat | Feet shoulder-width apart, toes slightly out. Push your hips back and down until your thighs are parallel to the floor (or as low as comfortable). Keep your chest up and knees tracking over your toes. |
| Tier 3 | Slow-eccentric squat | Same as Tier 2, but take 3 full seconds to lower down, pause 1 second at the bottom, then take 3 seconds to stand back up. The slow tempo increases muscle activation without adding weight. |
- Sets: 2–3
- Reps: 10–15
- Rest: 30–60 seconds
3. Hinge Pattern — Glute Bridge
Muscles worked: glutes, hamstrings, lower back.
| Tier | Exercise | Key Form Cues |
|---|---|---|
| Tier 1 | Glute bridge | Lie on your back, knees bent, feet flat on the floor hip-width apart. Press your feet into the floor and lift your hips until your body forms a straight line from knees to shoulders. Squeeze your glutes at the top, then lower slowly. |
| Tier 2 | Single-leg bridge | Same setup as Tier 1, but extend one leg straight out and perform the bridge on a single leg. Keep your hips level — do not let one side drop. Complete all reps on one side, then switch. |
| Tier 3 | Hip thrust (elevated) | Place your upper back on a couch or low chair, feet flat on the floor. Drive your hips up until your torso is parallel to the floor, squeezing your glutes hard at the top. Lower under control. |
- Sets: 2–3
- Reps: 10–15 per side (for single-leg)
- Rest: 30–60 seconds
4. Lunge Pattern — Lunge
Muscles worked: quadriceps, glutes, hamstrings, hip flexors.
| Tier | Exercise | Key Form Cues |
|---|---|---|
| Tier 1 | Stationary lunge (split squat) | Stand with one foot about two feet in front of the other. Lower your back knee toward the floor, keeping your front shin roughly vertical. Push through your front heel to return. Both feet stay planted throughout. |
| Tier 2 | Reverse lunge | Start standing, feet together. Step one foot back and lower your back knee toward the floor. Push off your back foot to return to standing. Alternate legs each rep. |
| Tier 3 | Lateral lunge | Stand with feet together. Step one foot wide to the side, pushing your hips back and bending the stepping knee while keeping the other leg straight. Push back to center. Alternate sides. |
- Sets: 2–3
- Reps: 10–12 per leg
- Rest: 30–60 seconds
5. Core Stability — Plank
Muscles worked: deep abdominals, obliques, lower back, shoulders.
| Tier | Exercise | Key Form Cues |
|---|---|---|
| Tier 1 | Knee plank | Hands or forearms on the floor, knees down, hips slightly forward. Keep your back flat — do not let your lower back arch or your hips rise. Hold for the target time. |
| Tier 2 | Forearm plank | Forearms on the floor, elbows under shoulders, toes on the floor. Body forms a straight line from head to heels. Brace your core as if bracing for a punch. Hold for the target time. |
| Tier 3 | Plank with leg lift | Start in a full forearm plank. Lift one foot 3–4 inches off the floor, hold 2 seconds, lower, then alternate. Keep your hips level and do not rotate. |
- Sets: 2–3
- Hold time: 20–40 seconds (Tiers 1–2) or 10 reps per side (Tier 3)
- Rest: 30–60 seconds
6. Posterior Chain — Bird Dog / Superman Progression
Muscles worked: lower back, glutes, deep spinal stabilizers.
| Tier | Exercise | Key Form Cues |
|---|---|---|
| Tier 1 | Bird dog | Start on all fours, hands under shoulders, knees under hips. Extend your right arm forward and left leg back simultaneously, keeping your back flat and hips level. Hold 2 seconds, return, and alternate sides. |
| Tier 2 | Superman | Lie face down, arms extended overhead. Simultaneously lift your arms, chest, and legs off the floor a few inches. Hold 2 seconds, lower, and repeat. Keep the movement controlled — do not jerk. |
| Tier 3 | Dead bug | Lie on your back, arms pointing at the ceiling, knees bent at 90 degrees in the air. Slowly lower your right arm toward the floor overhead while simultaneously extending your left leg toward the floor. Return to start without letting your lower back arch off the floor. Alternate sides. |
- Sets: 2–3
- Reps: 10 per side
- Rest: 60–120 seconds after completing all sets, then you're done for the day
Your Weekly Schedule Template
The 48-hour gap between sessions is not optional — it is when your muscles actually repair and grow stronger. Training on consecutive days as a beginner increases injury risk and slows adaptation. The schedule below is a direct template you can follow without modification.
| Day | Activity | Notes |
|---|---|---|
| Monday | Full workout (all 6 exercises) | Complete warm-up first |
| Tuesday | Active rest | 20–30 min walk, or gentle stretching |
| Wednesday | Full workout (all 6 exercises) | Complete warm-up first |
| Thursday | Active rest | 20–30 min walk, or gentle stretching |
| Friday | Full workout (all 6 exercises) | Complete warm-up first |
| Saturday | Active rest or light movement | Optional walk or mobility work |
| Sunday | Full rest | No structured exercise |
Active rest days — a walk, some light stretching, or gentle movement — support recovery better than complete inactivity. They keep blood flowing to your muscles without adding training stress.
4-Week Progression Plan
Progressive overload — gradually increasing the challenge over time — is what turns a workout into lasting strength gains. Without it, your body adapts to the routine and stops changing. This four-week framework uses only variables a beginner can control: sets, reps, tempo, and exercise variation.
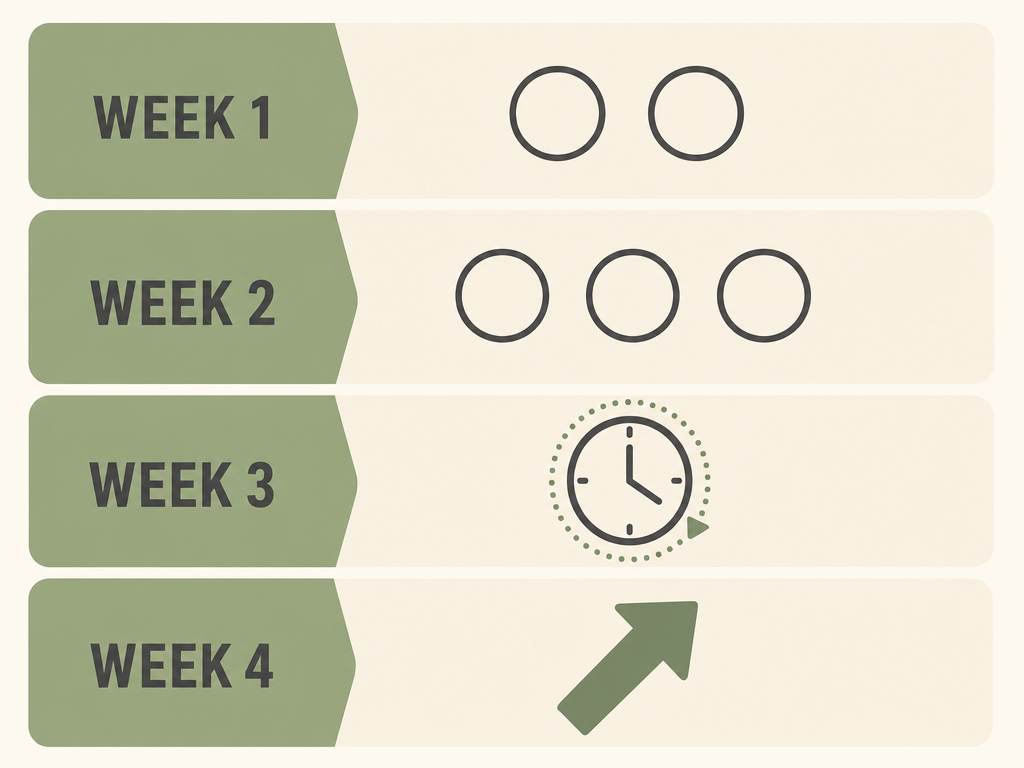
| Week | Sets | Reps | Tempo | Focus |
|---|---|---|---|---|
| Week 1 | 2 | 10–12 | Normal pace | Form first. Learn each movement. Choose your starting tier and do not advance yet. |
| Week 2 | 3 | 10–12 | Normal pace | Add a third set to each exercise. Keep the same reps and tiers as Week 1. |
| Week 3 | 3 | 12–15 | 3-1-3 slow eccentric | Increase reps toward 15, and slow down the lowering phase to 3 seconds. This increases muscle activation without adding weight. |
| Week 4 | 3 | 12–15 | Normal or 3-1-3 | Advance one tier on any exercise where Week 3 felt consistently controlled. Or reduce rest periods by 10–15 seconds. |
The 3-1-3 tempo in Week 3 means: 3 seconds lowering, 1 second pause at the bottom, 3 seconds returning to the start. Research on time under tension shows this increases muscle activation and growth without requiring any additional load — it is one of the most effective progressive overload tools available to bodyweight trainees.
Common Beginner Mistakes to Avoid
- Skipping the warm-up. Five minutes of dynamic movement before your session meaningfully reduces injury risk. Cold muscles are less pliable and more prone to strains. The warm-up is part of the workout.
- Progressing too fast. Jumping to Tier 3 in Week 1 because the exercise looks easy is one of the fastest ways to get hurt or burn out. Follow the 4-week framework and let adaptation happen at the pace it is designed for.
- Ignoring rest days. More training is not always better. Muscle growth happens during recovery, not during the workout. The 48-hour rule exists for a reason — training on consecutive days as a beginner shortchanges the adaptation process.
- Sacrificing form to hit rep targets. If you are grinding out the last two reps with a rounded back or collapsing knees, stop. Do not sacrifice good form for extra reps — sloppy reps train poor movement patterns and increase injury risk. Drop to a lower tier or reduce reps instead.
- Confusing pain with discomfort. Muscle fatigue and a burning sensation during a set are normal. Sharp, stabbing, or joint pain is not. As sports medicine guidance puts it: discomfort is normal, pain is not. Stop immediately if you feel sharp or joint pain and consult a healthcare provider.
- Inconsistent session frequency. Doing two sessions one week and zero the next produces minimal results. Consistency over four weeks — even imperfect sessions — produces more adaptation than sporadic intense effort.
Exercise doesn't need to be very complicated or time-consuming to be effective. Think about starting with something small and being consistent. — Dr. Rosa Pasculli, sports medicine physician, Emory Orthopaedics
Frequently Asked Questions
How sore is normal after the first week?
Some muscle soreness in the 24–72 hours after your first few sessions is expected — this is delayed onset muscle soreness (DOMS) and is a normal sign of adaptation. You should be able to move normally, even if uncomfortably. If soreness is so severe that it limits your range of motion or lasts more than four days, you likely did too much volume in your first session. Scale back to fewer sets in Week 1 and build from there.
What if I miss a scheduled day?
Do the missed session the next available day, then continue the schedule from there. Do not try to cram two sessions into one day to "make up" for the missed workout. One missed session has no meaningful impact on your four-week results — the pattern over the full month is what matters.
Can I really do this in a small apartment?
Yes. Every exercise in this routine fits within a 6×4-foot floor space — roughly the size of a yoga mat plus one step in each direction. None of the exercises require jumping, and none produce significant floor impact. Wall push-ups need only a clear wall. The glute bridge and bird dog are done lying down. If you can clear a patch of floor in your living room or bedroom, you have enough space.
How do I know when I'm ready to progress?
The signal is consistent, clean form across all sets — not just the first set. Peloton instructor guidance frames it this way: progress when exercises feel easier and form stays solid throughout all sets. If your last set looks noticeably worse than your first set, you are not ready to advance yet. When all sets feel controlled and the target reps feel achievable without straining, move forward.
What Comes Next After Week 4
Completing four consistent weeks of this routine means your nervous system has adapted, your movement patterns are established, and your body is ready for more challenge. You have two clear paths forward.
- Continue advancing within the tier system. If you have not yet reached Tier 3 on all exercises, that is your next target. You can also continue applying tempo training (3-1-3 eccentric) and reducing rest periods to extend the challenge of the same exercises.
- Add your first piece of equipment. A set of resistance bands (typically $15–$30) unlocks pulling exercises — rows and pull-aparts — that bodyweight alone cannot replicate well. A doorframe pull-up bar (typically $25–$40) adds vertical pulling. Neither is required, but both meaningfully expand your training options without taking up significant space.
If you want a structured multi-week program that builds on the foundation you have established here, a progressive training plan will specify exactly how to sequence sessions, when to deload, and how to advance across 6–8 weeks. That is the logical next step once a single-session routine feels familiar and consistent.
What a small equipment investment adds
We don't have a build tagged to this exact tier yet. Browse all builds.
How often should you repeat this?
See our recovery and rest reference for citation-anchored rest-interval guidance.
Spot something off?
Tell us if a movement, tier assumption, or duration didn't match your experience.