
Caitlin Clark's 5 Practice Drills for Home Workout
Learn Caitlin Clark's go-to practice drills—wall-tap ball handling, tight dribbling, conditioning sprints, and more—and how to adapt them for a small home space with just a basketball and a wall.
- Equipment tier required
- none
- Duration
- 25 min
- Difficulty
- beginner
- Target area
- full body
- Space footprint needed
- 6x6 feet
- Noise level
- moderate
The most useful Caitlin Clark practice drill for a home workout is not a logo three. It is the wall-tap handle drill: ball behind the back, hands touching the wall, feet close enough that a bad stance shows up immediately. You can try it with a basketball, a blank wall, and roughly 6x6 feet of floor. That is the right starting point because it is small, awkward, and honest.
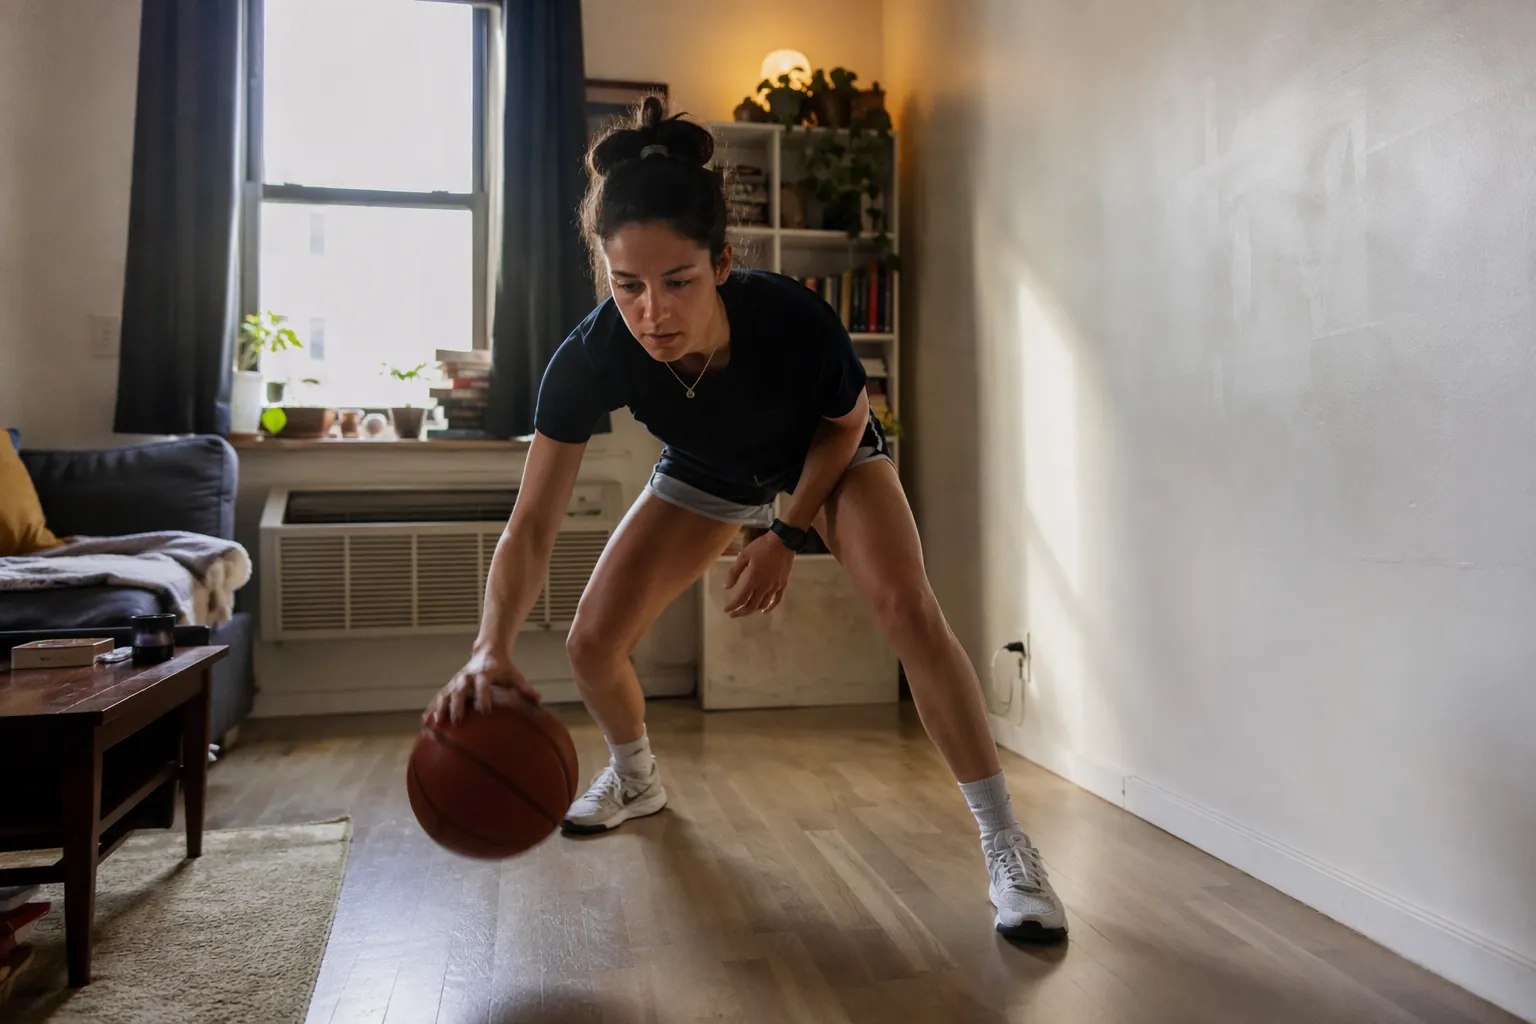
There is one boundary to keep before the drills start: this is not an official Caitlin Clark home workout released by her camp. The strongest documented piece of her routine is the reported 300-shot summer session: 100 threes, 100 mid-range shots, and 100 free throws, with a recorded 233 makes out of 300 attempts. That session included 63/100 from three, 81/100 from mid-range, and 89/100 from the line; Clark’s own read was, “3s were a little bit lower, I'll still take 63 but I want to be more around 70 if I can. 81 mid-range is really, really good.” [1]
That matters more than the number itself. The point is that the session was counted, judged, and corrected. Fever training footage later analyzed by Sports Illustrated’s women’s basketball coverage pointed to tight low dribbling, off-balance finishing, and screen navigation as areas Clark appeared to be working on in a 13-minute team release from December 2024; that analysis is useful, but it is still an outside reading of footage, not a coach handing out a home program. [2]
So the home version should stay modest: borrow the transferable pieces. Ball control. Foot replacement. Balance after contact. Conditioning before skill work. Measured volume instead of random reps.
| Drill | Home setup | What it trains |
|---|---|---|
| Behind-the-back wall taps | Ball, clear wall, 3-6 feet of space | Handle tightness, shoulder control, low base |
| Tight low dribbling | Ball, small square of floor | Pound control, hand speed, hip level |
| Short-space conditioning shuttles | Two markers or floor lines | Repeated effort before skill work |
| Off-balance catch-and-recover footwork | Ball, wall or self-toss, clear landing space | Balance recovery, foot replacement, shot-ready posture |
| Measured shooting-volume substitute | Wall target or hoop if available, notebook or phone | Tracking, self-critique, repeatable standards |
1. Behind-the-Back Wall Taps
This is the drill I would give first to someone with no court because it punishes the same things a small room exposes: standing too tall, reaching instead of moving your feet, and letting the ball drift away from your body.
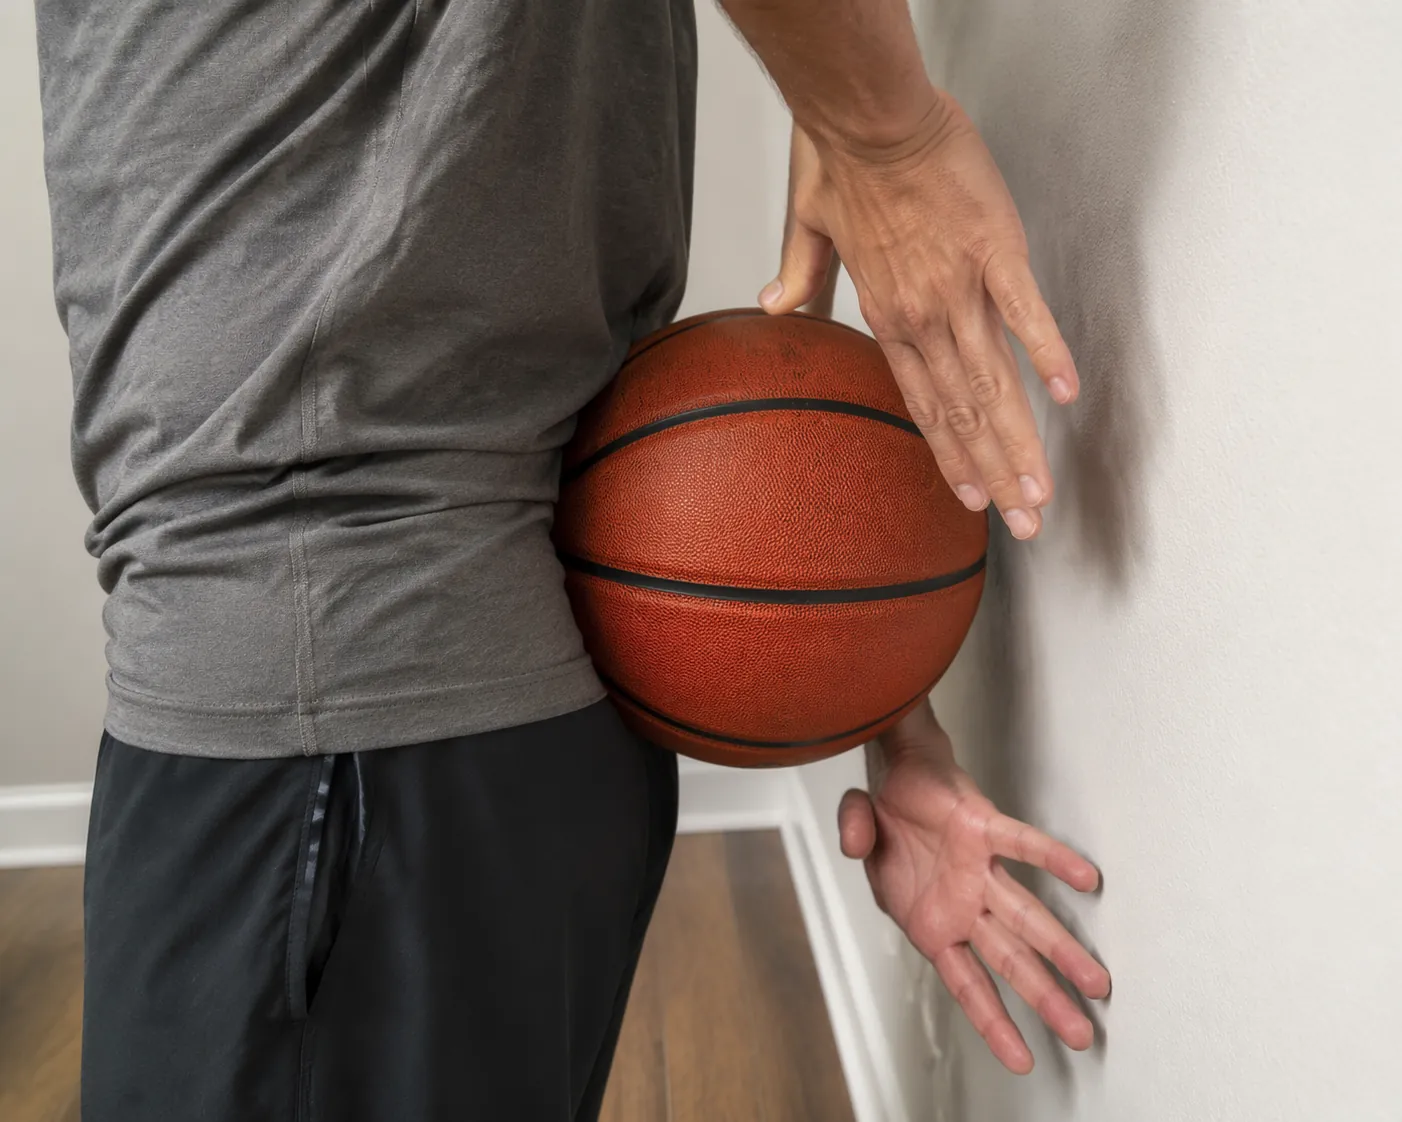
Set your toes about a foot from the wall. Get into a low stance: knees bent, hips back, chest angled forward without collapsing. Put the ball behind your back. Tap the wall with one hand, then the other, while controlling the ball behind your body. The wall tap keeps your shoulders from flying open; the behind-the-back control keeps the ball close.
- Start with 3 rounds of 20 seconds, resting 30-40 seconds between rounds.
- Keep both feet active but quiet; if your heels glue to the floor, reset.
- Tap the wall lightly. The wall is a position check, not something to slap.
- If the ball hits your back, widen your hands slightly and slow down.
- If you live above someone, use a softer ball or move this drill to a patio, garage, or outdoor wall.
The mistake is trying to make it look fast before it is tight. Clark’s range gets the attention, but this kind of drill lives underneath the shot: hips low enough to change direction, hands quick enough to protect the ball, shoulders quiet enough to stay balanced.
Make it easier or harder
- Easier: hold the ball behind your back without dribbling and alternate wall taps for 15 seconds.
- Standard: control the ball behind your back while alternating taps.
- Harder: after every 5 taps, replace your feet with a quick left-right or right-left step.
- Quiet version: use a tennis ball for the wall-tap rhythm, then repeat the footwork with a basketball held behind your back.
For apartment players, the noise problem is real. A hard dribble through thin flooring can turn practice into a neighbor negotiation. If that is your setup, pair this article with our guide to practicing basketball at home without noise complaints before you add volume.
2. Tight Low Dribbling in a Small Box
The Fever footage analysis is useful here because it does not treat Clark’s handle as decorative. It points to tight, low dribbling work and screen-navigation movements, the kind of training that keeps a guard functional when space disappears. [2]
Tape or imagine a square about two steps wide. If you only have a rug edge, a doorway, or two shoes on the floor, use those. Your job is to keep the ball below your knee and your body inside the square while changing rhythm.
- Right-hand pounds: 20 seconds.
- Left-hand pounds: 20 seconds.
- Low crossovers: 20 seconds.
- Inside-out right, then inside-out left: 20 seconds each.
- Two hard pounds, one retreat step, two hard pounds back into the square: 30 seconds.
Do not chase speed first. A good low-dribble rep has three signs: the ball stays close to your outside hip, your eyes can stay up for at least part of the round, and your feet do not wander out of the box every time your hand changes.
General at-home basketball drill guidance from US Sports Camps includes ball wraps, figure 8s, jump stops, X dribbles, and other small-space fundamentals. Those are not Caitlin Clark-specific drills, but they fit the same home-training lane: make the handle and feet behave before asking the shot to save you. [3]
The correction that fixes most bad reps
Lower your hips before you lower the ball. Players often bend at the waist, drop the dribble, and think they are low. That gives you a tired back and a loose handle. Bend at the knees and hips, keep your chest strong, and let the ball live beside your foot instead of out in front of your toes.
3. Short-Space Conditioning Before Skill Work
Conditioning belongs before the skill block when the goal is transfer. Clark’s reported 300-shot session is impressive because it is not just volume; it asks the body to keep producing makes while fatigue is present. The home version does not need a treadmill or a full baseline-to-baseline sprint. It needs repeatable bursts that raise your breathing without stealing the whole workout.
Use two markers: shoes, cones, water bottles, or floor seams. In a small room, the distance might be only a few steps. That is fine. The work is the stop, touch, turn, and re-accelerate.
| Option | How to run it | Where it fits |
|---|---|---|
| Micro-shuttles | Go marker to marker for 15 seconds, rest 30 seconds, repeat 4-6 times | Before wall taps or low dribbling |
| Defensive slide touches | Slide left-right between markers, touch the outside marker with your outside hand | Before footwork and balance work |
| Sprint-to-stop reps | Take 2-4 quick steps, plant, freeze in a shot-ready stance | Before measured shooting or wall-target work |
Explosive bodyweight work can fill the same role when you cannot run. Seattle Storm strength coach Emily Blurton, CSCS, told SELF that skater hops, pop squats, and single-leg jumps are foundational WNBA training tools that require no equipment. [4]
Pick one, not all three. Two sets of 6-8 clean skater hops are more useful than a sloppy circuit that leaves you too gassed to handle the ball. Land quietly, hold the landing for a beat, then move again. Basketball conditioning is not only about being tired; it is about still owning your feet while tired.
4. Off-Balance Catch, Plant, and Recover
Off-balance finishing showed up in the Fever training footage analysis, and that is one of the easiest ideas to misunderstand at home. The goal is not to fling yourself around the room. The goal is to lose perfect balance briefly, then recover into a usable base. [2]
Stand a few feet from a wall. Toss the ball lightly off the wall so it returns to one side of your body. Catch it, step across your body or slightly backward, and land in a balanced stance with the ball loaded near your shooting pocket. Hold the finish for one second. If you have a hoop, shoot. If you do not, freeze the shot-ready position and check your feet.
- Round 1: catch to the right side, right-left plant, hold.
- Round 2: catch to the left side, left-right plant, hold.
- Round 3: catch, retreat one step, replace your feet, hold.
- Round 4: catch, slight side bump into your own shoulder line, recover, hold.
Keep the toss soft. A home wall is not a rebounder, and your coffee table is not a defender. If the drill gets chaotic, shrink it: smaller toss, shorter step, longer hold. The hold is where you learn whether your feet are actually under you.
What to watch
- Your inside knee should not cave hard toward the floor.
- Your last step should bring you back to balance, not farther away from it.
- Your eyes should lift after the catch instead of staying locked on the ball.
- Your shoulders should finish square enough that a shot would be possible.
5. A Measured Shooting-Volume Substitute
The 300-shot session should not become a fake living-room shooting workout. Without a hoop, you cannot reproduce the actual demand: arc, depth, touch, makes, misses, free throws, and the pressure of watching the numbers move. What you can borrow is the standard: count the work and write down what failed.
Clark’s reported 233/300 session is valuable because the misses stayed visible. She did not simply say she got shots up; the session separated threes, mid-range shots, and free throws, then judged the quality of each category. [1]
At home, use a smaller version that matches your setup:
- With a hoop: take 30-60 total shots and separate them by spot or shot type.
- With only a wall: make 50 accurate chest-high target passes, then 50 one-hand form releases into a soft wall target if your space allows it.
- With no safe wall contact: do 50 foot-replacement reps into a shot pocket, then 50 form holds without releasing the ball.
- Afterward: write one make/miss number if you had a target, plus one technical note you would fix next time.
The note should be specific enough to change the next session: “right foot lands narrow,” “ball drifts left on wall target,” “eyes drop during low crossovers,” or “conditioning round made the first 10 reps sloppy.” That is closer to Clark’s practice standard than pretending a bedroom wall can stand in for 100 threes.
For a full breakdown of the 300-shot structure, see our companion guide to Caitlin Clark’s home workout drills without a full court. This article is the drill card; that one is the volume map.
A 25-Minute Home Version
If you want the drills in one usable session, run them in this order. Keep the first version boring enough that you can repeat it twice a week without needing a perfect day or an empty gym.
| Time | Work |
|---|---|
| 3 minutes | Warm up with bodyweight squats, ankle rocks, arm circles, and easy ball wraps |
| 4 minutes | Short-space shuttles or skater hops, clean reps only |
| 6 minutes | Behind-the-back wall taps, 20-second rounds with rest |
| 6 minutes | Tight low dribbling in a small box |
| 4 minutes | Off-balance catch, plant, and recover |
| 2 minutes | Write your count and one correction for next time |
If the floor is loud, remove the hard dribble rounds first and keep the wall-tap, footwork, and form-hold pieces. If your knees or ankles feel unstable on jumps, use shuttle walks, defensive slides, or stationary foot replacement instead of explosive hops.
What This Can and Cannot Give You
A home workout cannot give you Clark’s full practice environment. It cannot replace a court, a hoop, a rebounder, a coach, defensive pressure, or the fatigue of game-speed shooting. The limitation matters because shooting range is not built by vibes or celebrity imitation.
What it can give you is a tighter handle, better foot replacement, quieter balance recovery, and a habit of measuring reps instead of performing them. That is enough to make a small room useful.
If you want another WNBA-style small-space workout that leans more into post footwork and balance, try our Sylvia Fowles footwork drills. The player model changes, but the useful home-training rule stays the same: choose drills that survive the room you actually have.
References
- Caitlin Clark's brutal offseason workout regimen revealed after WNBA rookie sensation's Indiana Fever debut - TalkSport
- Caitlin Clark Fever Training Footage: Here's What WNBA Star Appears To Be Working On - Sports Illustrated
- 11 Basketball Drills You Can Do at Home - US Sports Camps
- Explosive Strength Exercises WNBA Coach - SELF
What a small equipment investment adds
We don't have a build tagged to this exact tier yet. Browse all builds.
How often should you repeat this?
See our recovery and rest reference for citation-anchored rest-interval guidance.
Spot something off?
Tell us if a movement, tier assumption, or duration didn't match your experience.