
How to Do Boxing Footwork Drills at Home in a Small Apartment
Learn how to practice boxing footwork drills at home in a small apartment without damaging floors or annoying neighbors. Four foundational patterns fit in a 6x6 ft space and build real skills for sparring and bag work.
- Equipment tier required
- none
- Duration
- 12 min
- Difficulty
- beginner
- Target area
- legs
- Space footprint needed
- 6x6 ft
- Noise level
- low impact
Yes, you can practice home boxing footwork drills for beginners in a small apartment. The useful minimum is not a full ring. Licensed professional trainer Aarron Morgan of Marksman Boxing Coaching says a 2m × 2m area is enough for boxing footwork drills, and KO Studio gives a similar practical floor target by recommending about 6×6 ft as the minimum for effective shadowboxing at home.[1][2]
That is roughly the size of a coffee-table gap, a cleared bedroom corner, or four large foam tiles arranged into a square. It is not enough for sparring. It is not enough for long retreats, big ring movement, or pretending the apartment is a gym. But it is enough for the beginner work that usually matters first: taking small steps, keeping stance width, turning without crossing the feet, and resetting before the body starts chasing the punch.
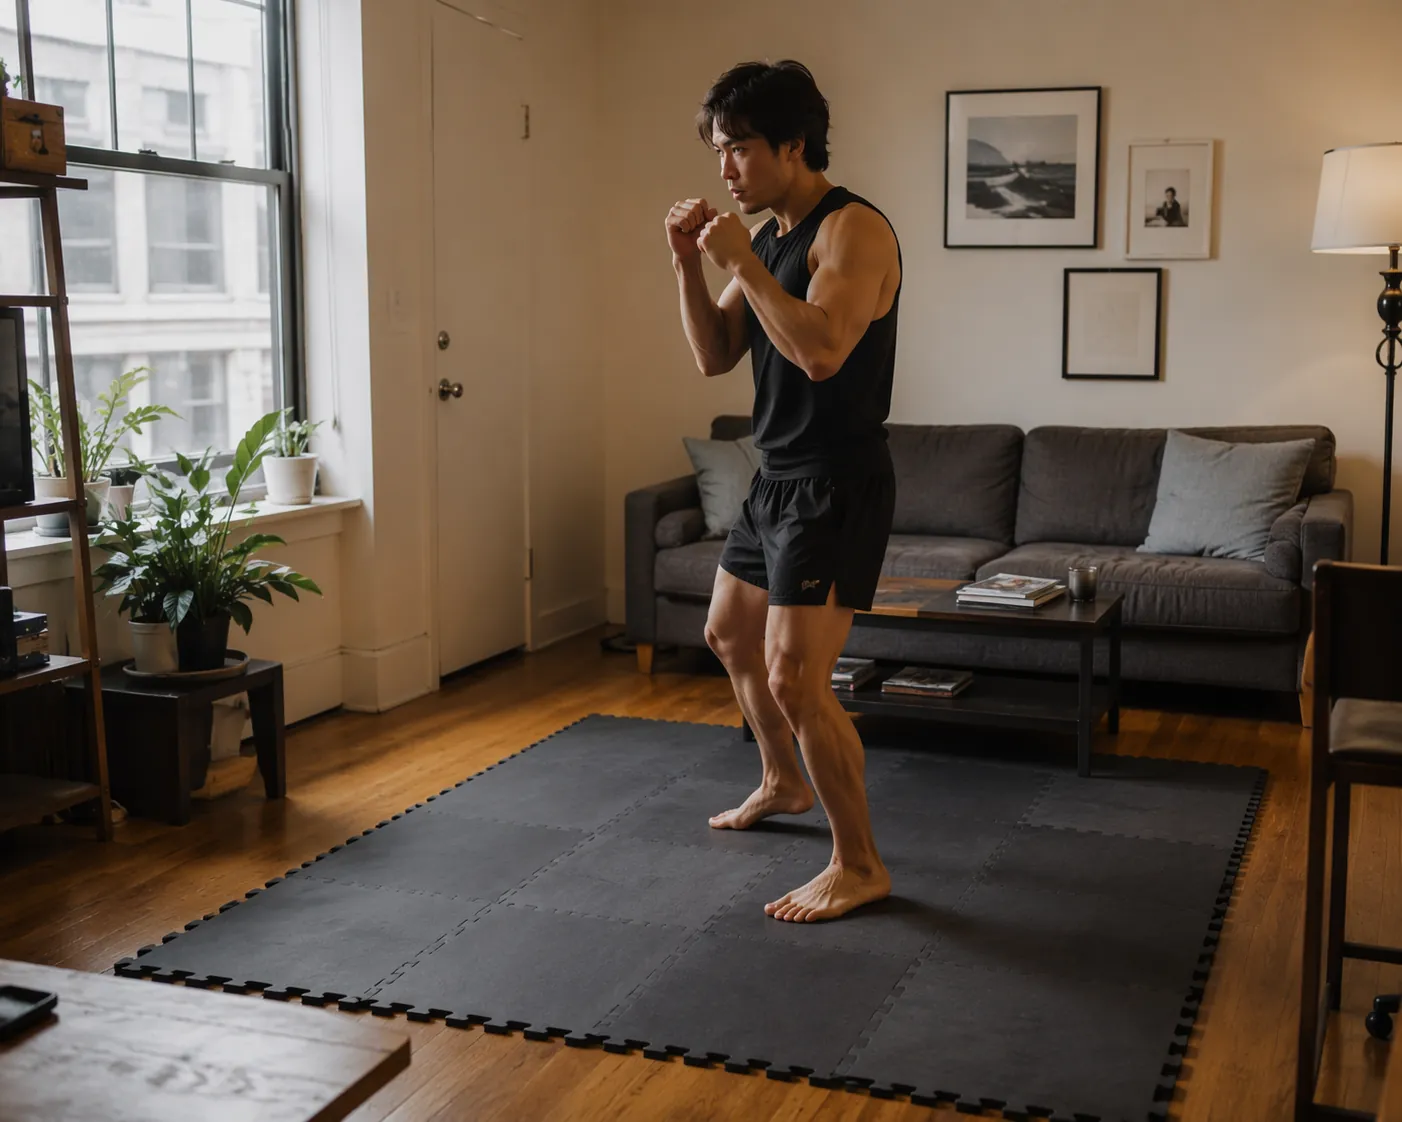
The small square actually helps. Beginners with too much room often take steps that are too long, drift after every combination, or bounce until their head rises and falls like a marker on a metronome. A 6×6 ft space punishes that immediately. If the step is wasteful, you run out of room. If the turn is sloppy, you lose your stance. If the floor is loud, you hear it before your downstairs neighbor does.
Set Up the Square Before You Start Moving
Clear the square first, then judge the training. Do not judge it while standing between a couch leg and a coffee table corner. You need enough room to stand in boxing stance, step forward and back a few inches, turn both directions, and make one diagonal exit without your heel touching furniture.
If you have a tape measure, mark about 6×6 ft. If you do not, use your body. Stand in stance at the center. Take one small step forward, one back, one left, one right, then pivot both ways. If you can do that without reaching, jumping, or looking down at obstacles, the space is usable.
| Apartment constraint | What to do |
|---|---|
| Hardwood, tile, or laminate floor | Put down interlocking foam mats before drilling |
| Downstairs neighbor or shared building | Train with step-drag footwork, not bouncing or stomping |
| No room for cones or ladders | Use tape, a water bottle, or one marked center point |
| Only a bedroom corner available | Keep all drills inside the square and reset after each pattern |
The most apartment-specific piece of equipment is not a bag. It is the floor. Foam puzzle mats, often sold in 1/2-inch to 5/8-inch EVA foam tiles, reduce joint impact during repeated footwork and help limit structure-borne noise compared with bare feet on hardwood or tile.[3] They also make the training boundary obvious. The edge of the mat becomes your quiet little ring.
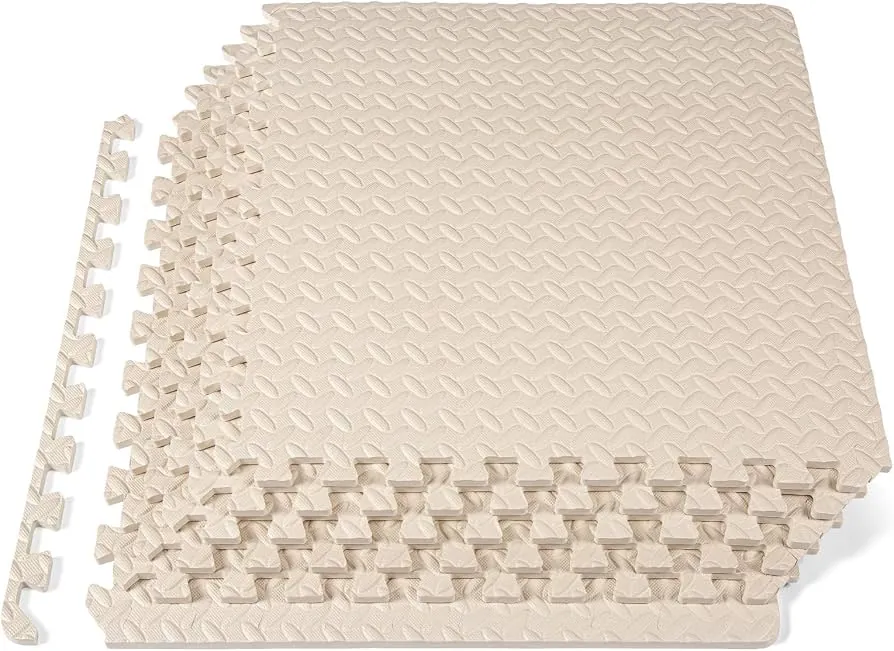
Foam is not magic soundproofing. A hard heel drop can still travel through a building. But for beginner footwork, the goal is not to absorb a loaded barbell or heavy bag swing. The goal is to soften repeated steps, protect the finish on the floor, and give the feet a surface that does not encourage slipping. If you are also weighing deposit risk, flooring thickness, or whether rubber belongs in a rental, FitAtHome’s guides to home gym flooring mistakes and choosing gym floor mats are worth reading before buying a stack of tiles.
Once the mat is down, add one mark. A strip of painter’s tape in the center is enough. If tape is not safe for your floor or mat surface, use a water bottle, sock, or small towel. That mark becomes the thing you move around, leave, return to, and pivot over.
The Four Patterns That Fit Inside 6×6 ft
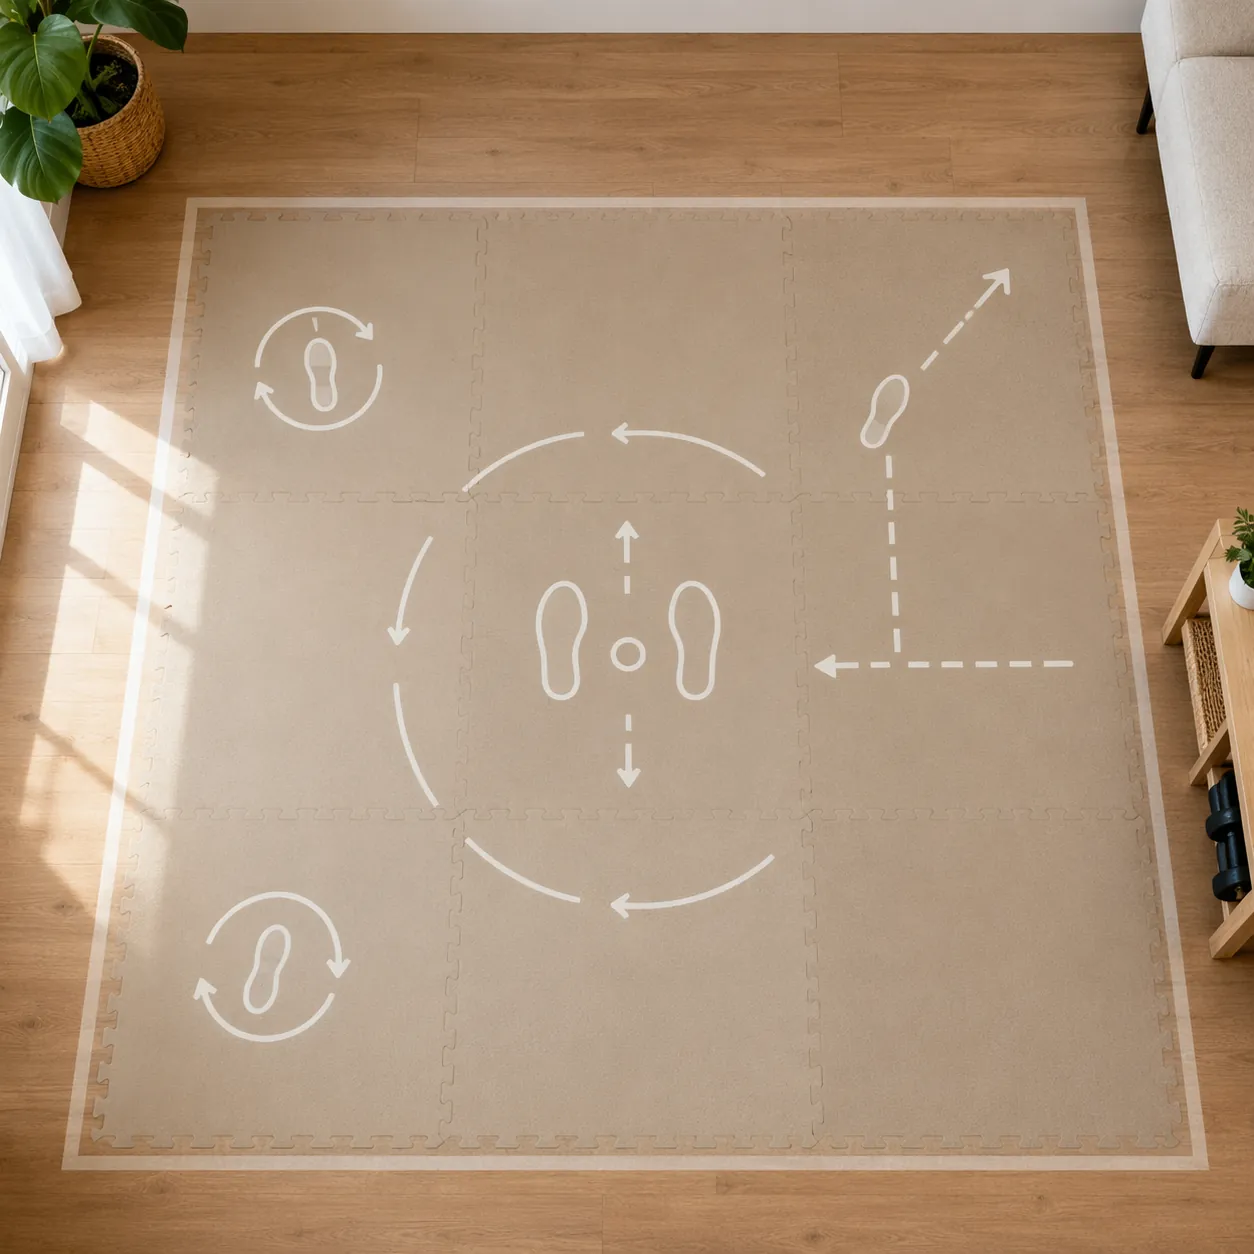
Across beginner coaching from ExpertBoxing, FightCamp, and MyBoxingCoach, the same family of patterns keeps showing up: step and reset, circling, L-step or diagonal exits, and pivots.[4][5][6] Treat the “four patterns cover roughly 90%” idea as a coaching shortcut, not a measured statistic. It means these patterns show up constantly in beginner bag work and sparring preparation. It does not mean they replace partner timing, defense, or ring experience.
| Pattern | What it teaches | Apartment rule |
|---|---|---|
| Step-and-reset | Distance control without chasing | Move only a few inches, then recover stance |
| Circle drill | Angles without needing a long lane | Turn around a fixed point instead of drifting |
| L-step / diagonal exit | Leaving the center line after punching | Step off, then reset before adding speed |
| Pivot | Changing angle while staying balanced | Rotate small, not dramatic |
1. Step-and-reset
Start in stance at the center of the square. If you are orthodox, your left foot is forward and your right foot is back. If you are southpaw, reverse it. Keep the feet about shoulder-width apart, knees soft, chin level, hands up.
- Step forward with the lead foot by about 2 inches.
- Drag the rear foot forward the same amount.
- Pause long enough to check that your stance width is still there.
- Step back with the rear foot by about 2 inches.
- Drag the lead foot back and reset at the center.
FightCamp and ExpertBoxing both emphasize small step-drag movement before adding speed, including short 2-inch increments for control.[4][5] That detail matters more than it looks. A beginner who always steps 12 inches forward has to pull the rest of the body along for the ride. The punch starts dragging the feet, the head crosses the front knee, and the boxer ends up chasing instead of choosing distance.
In an apartment, this drill also teaches quietness. The rear foot should skim, not slap. The lead foot should land under control, not stomp. If the mat clicks, the floor thuds, or your weight crashes into the step, slow down. The sound is feedback.
Add punches only after the reset is honest. Jab as the lead foot steps, then bring the rear foot back into stance. Throw a one-two only if the second punch does not make the rear foot swing wide. The square tells the truth quickly: if you need to shuffle three times after a two-punch combination, the punch was bigger than your balance.
2. Circle around one fixed point
Put a water bottle, tape cross, or towel in the center of the mat. Stand just outside it in stance. Your job is not to run around the object. Your job is to keep your stance while changing the angle a little at a time.
Move clockwise for one round, then counterclockwise. In orthodox stance, circling left often feels easier because the lead foot opens the path. Circling right asks the rear foot to behave. Southpaws usually feel the opposite. Do not rush toward the comfortable side and call the other side “awkward.” The awkward side is where the drill is doing its work.
- Lead with the foot closest to the direction you are moving.
- Move the second foot only far enough to restore stance.
- Keep your chest facing the center point.
- Stop every few steps and check that your feet did not narrow.
This is the drill that proves a small apartment is not the problem. Angular movement does not require a long side wall. The turn happens around the point. If you drift until your heels reach the mat edge, you are not circling; you are walking sideways in boxing gloves.
Once the circle is smooth, add a jab every third step. Then add a jab-cross and circle one step out. Keep the punches light enough that your feet still decide where the body goes. If the punch spins you, remove the punch and fix the feet.
3. L-step and diagonal exit
The L-step is useful because it gives a beginner a clean way to leave the line without needing a big retreat. Imagine a straight line from your chest to the center mark. After you punch, you step off that line, then recover your stance on a new angle.
Try it without punches first. From the center, step back a few inches with the rear foot. Then step diagonally out with the lead foot, making an L shape on the mat. Bring the rear foot with you and reset. The exact direction depends on stance and comfort, but the rule is simple: one step creates space, the next changes the angle.
The mistake is turning this into a leap. A diagonal exit is not an escape scene. In a 6×6 ft square, it should look almost underwhelming: small step, angle, stance. If your shoulders rise, your feet cross, or your eyes drop to the floor, the exit is too big.
4. Pivot on the mark
Place the ball of the lead foot near the center mark. Keep the rear foot light. Rotate a small amount, then let the rear foot follow so your stance returns to its normal width. ExpertBoxing’s micro-movement approach favors small pivots of roughly 10–15 degrees because they preserve balance and stance width better than dramatic turns for beginners.[4]
A 90-degree pivot looks satisfying in a video, but many beginners pay for it with a full second of repair: weight shifts onto the wrong foot, the rear heel swings too far, and the hands drop while the body tries to find itself. Start smaller. Pivot a little, freeze, check stance, then pivot again.
Add a jab before the pivot only when the turn stays quiet. Jab, pivot 10–15 degrees, reset. Jab-cross, pivot, reset. The pivot is not a flourish after the punch. It is the new position from which the next punch could be thrown.
A 12-Minute Small-Apartment Footwork Session
Keep the first sessions short enough that quality survives. A cramped room magnifies sloppy work, so the point is not to win a sweat contest in the living room. The point is to finish with the same stance you started with.
| Time | Drill | Focus |
|---|---|---|
| 2 minutes | Quiet stance shifts | Feel the mat, soften the knees, keep head level |
| 3 minutes | Step-and-reset | Move in 2-inch increments and recover stance |
| 3 minutes | Circle drill | Stay facing the center mark without drifting |
| 2 minutes | L-step / diagonal exit | Leave the line without jumping |
| 2 minutes | Small pivots | Turn 10–15 degrees and reset |
If you want to add punches, keep them light and sparse at first. One jab during step-and-reset is enough. One jab-cross before an exit is enough. The feet are the lesson. The hands are there to test whether the lesson holds.
Use a 30-Second Video Check
Set your phone on a shelf or windowsill and record 30 seconds from the side. Put a piece of tape on the wall behind you at about head height. Move through step-and-reset or circling while watching whether your head rises and falls above that line. ExpertBoxing uses this kind of visual self-check as a practical coaching diagnostic for over-striding and wasted vertical movement.[4]
You are looking for four things:
- Your head stays mostly level instead of bobbing up with every step.
- Your feet return to stance width after each movement.
- Your rear foot does not drag loudly or swing behind you.
- Your eyes stay forward instead of checking the floor after every step.
The video does not need to look athletic. It needs to look repeatable. If the head bobs, shrink the step. If the stance narrows, slow the reset. If the mat is loud, soften the landing. If you keep drifting to one edge, return to the center mark after each pattern.
What This Does and Does Not Replace
Small-space footwork builds useful habits for bag work and early sparring preparation: balance after punching, cleaner distance changes, quieter feet, and less panic when changing angle. That is a good use of an apartment square.
It does not replace coached sparring, partner reactions, defensive timing, or the feeling of another person taking space away from you. The available sources here are practitioner coaching sources, not peer-reviewed studies on boxing footwork outcomes. So the honest claim is practical rather than scientific: these drills are widely taught by boxing coaches and fit the space a renter can usually make.
If the square is quiet, the floor is protected, and your stance survives the four patterns, you have enough to begin. From there, you can plug these drills into a weekly home boxing training plan or build out a broader compact apartment gym setup without pretending your living room has to become a boxing club.
References
- Boxing Footwork Drills for Small Spaces — Marksman Boxing Coaching
- How to Build a Home Boxing Setup — KO Studio
- Which Gym Floor Mat Should You Choose? Rubber vs Foam vs Stall Mats — FitAtHome
- Boxing Footwork Drills — ExpertBoxing
- Boxing Footwork Drills for Beginners — FightCamp
- Boxing Footwork Drills — MyBoxingCoach
What a small equipment investment adds
We don't have a build tagged to this exact tier yet. Browse all builds.
How often should you repeat this?
See our recovery and rest reference for citation-anchored rest-interval guidance.
Spot something off?
Tell us if a movement, tier assumption, or duration didn't match your experience.