
Maintain Muscle After 50 With a Simple Home Routine
A practical weekly plan using bodyweight, resistance bands, and light dumbbells that fits small apartments and busy schedules — backed by evidence from Cochrane reviews and CDC guidelines for adults 50+.
- Equipment tier required
- $0-100
- Duration
- 30 min
- Difficulty
- beginner
- Target area
- full body
- Space footprint needed
- small
- Noise level
- low impact
Yes: a realistic home fitness routine for muscle maintenance after 50 can fit into 2–3 weekly sessions of about 30 minutes, even in a small apartment. The catch is that the routine has to cover the main jobs your muscles do: push, pull, squat, hinge, and single-leg support. Each movement also needs an easier version for days when joints or balance complain, and a harder version for the month when the starting version no longer asks enough of you.
The CDC recommends that adults 65 and older do muscle-strengthening activities at least 2 days per week, along with weekly aerobic activity, and a Cochrane review of 121 trials with more than 6,700 participants found that progressive resistance training improves physical function, strength, and muscle mass in older adults.[1][2] That is enough evidence to stop waiting for the perfect home gym. The practical question is what you do on Tuesday at 7:15 p.m. when the living room rug is the only workout space available.
This routine uses bodyweight, a sturdy chair, a long resistance band, and one or two pairs of dumbbells if you have them. Five to 25 pounds covers many useful starting points, but the plan does not pretend one pair of light dumbbells solves every strength problem forever. The real tool is progression: more controlled reps, a harder angle, a stronger band, a slower lowering phase, a longer pause, or eventually a heavier weight.
If you have a medical condition, recent injury, unexplained pain, dizziness, or a history of falls, get medical clearance before starting. That is not a warning label meant to scare you off. It is how you keep a good plan from becoming the wrong plan for your body.
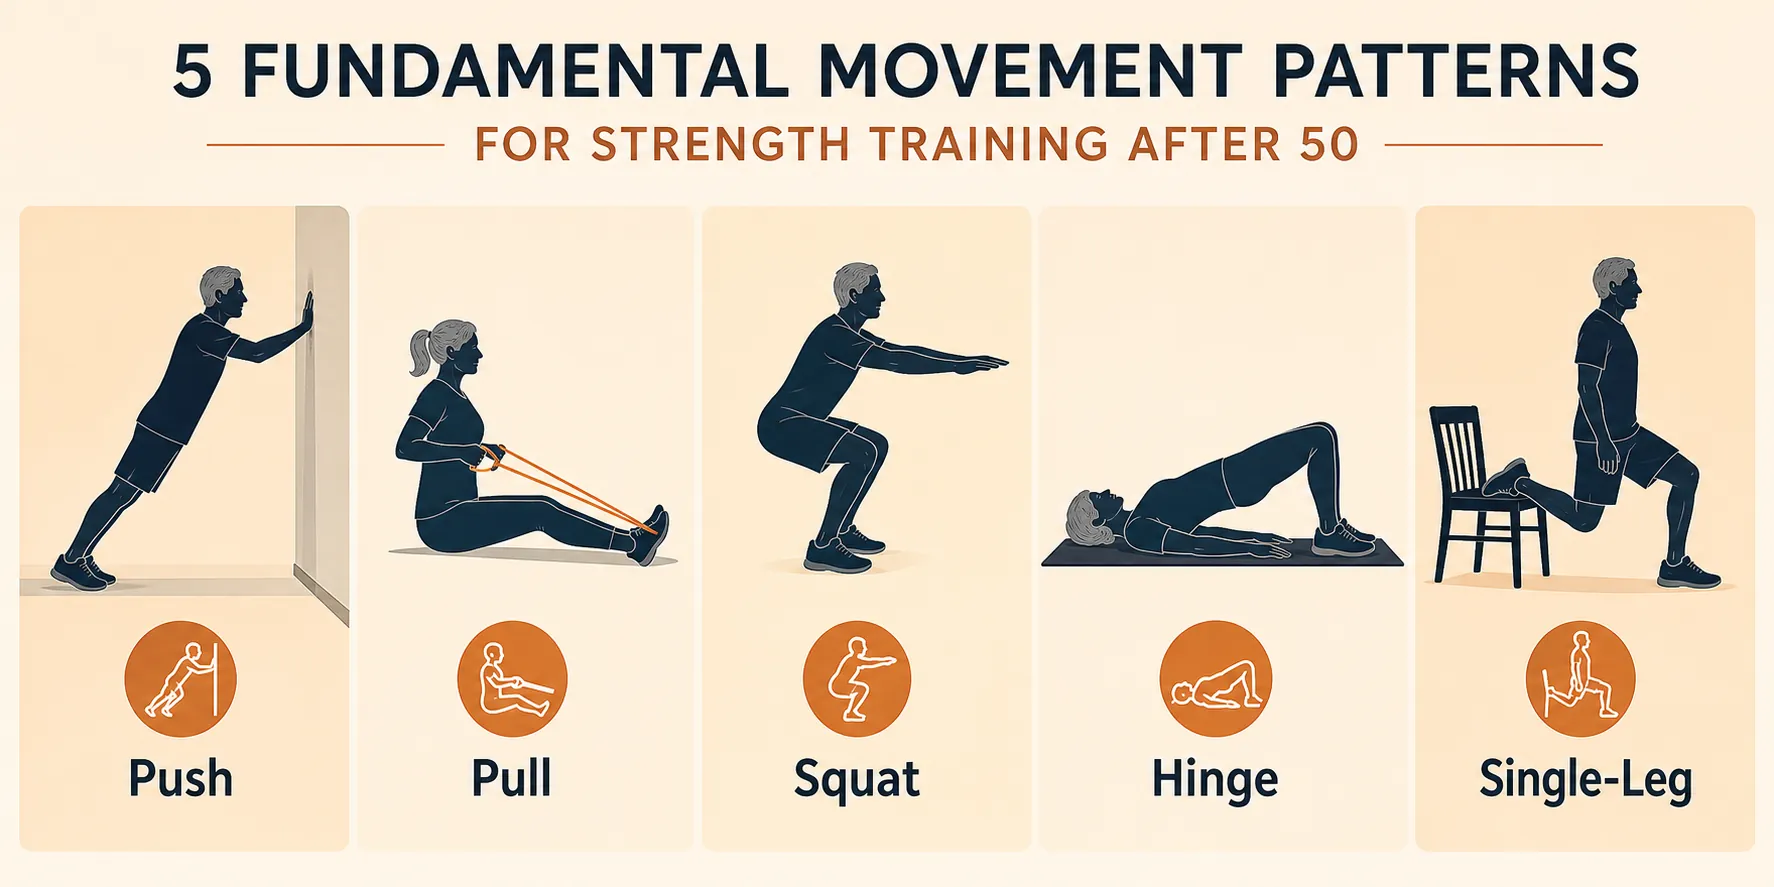
The Five Movements Your Week Has to Cover
A home routine gets weak when it becomes a random list of exercises. Biceps curls, countertop pushups, and a few sit-to-stands are not bad, but they do not automatically cover the body well. Start with movement patterns instead.
| Pattern | What it trains | Small-space options |
|---|---|---|
| Push | Chest, shoulders, triceps, trunk stiffness | Wall pushup, incline pushup on counter, floor pushup, dumbbell floor press |
| Pull | Upper back, biceps, posture muscles | Band row, seated band row, one-arm dumbbell row |
| Squat | Thighs, hips, getting up from chairs | Chair squat, supported squat, bodyweight squat, goblet squat |
| Hinge | Glutes, hamstrings, hip control | Hip-hinge drill, glute bridge, dumbbell Romanian deadlift |
| Single-leg | Balance, hip stability, stair and curb confidence | Supported split stance, step-back tap, split squat, low step-up |
Those five patterns are enough to build a sensible week. They also keep you honest. If every workout is mostly squats and curls, the upper back gets neglected. If every lower-body move uses both feet evenly, you miss the balance and hip-control work that shows up when you climb stairs, step off a curb, or catch yourself before a stumble.
Choose the 2-Day or 3-Day Week
Two days is the floor. Three days gives you more practice and slightly smaller doses per session. Both versions work better than an ambitious plan that requires four long workouts and collapses by the second week.
| If your week allows | Schedule | Best fit |
|---|---|---|
| 2 strength days | Monday and Thursday, or Tuesday and Friday | Busy weeks, beginners, people returning after a long break |
| 3 strength days | Monday, Wednesday, Friday, or Tuesday, Thursday, Saturday | People who recover well and like shorter practice gaps |
Keep at least one day between strength sessions at first. On non-strength days, walking, gentle cycling, mobility work, or easy household movement can handle the aerobic side of the week. The strength sessions are not meant to exhaust you; they are meant to be repeated.
The 30-Minute Session
Set a timer if that helps. A complete session does not need to sprawl. The warmup prepares the joints, the main circuit covers the five patterns, and the last few minutes are for noting what you actually did.
| Time | What to do | Details |
|---|---|---|
| 0:00–5:00 | Warm up | March in place, shoulder circles, gentle hip hinges, chair sit-to-stands, easy band pull-aparts |
| 5:00–25:00 | Main strength circuit | Do one push, one pull, one squat, one hinge, and one single-leg exercise |
| 25:00–28:00 | Repeat or finish your weakest pattern | Use this slot for a second set of the movement you most need to practice |
| 28:00–30:00 | Record and reset | Write down exercise version, resistance, reps, and how controlled it felt |
For the main circuit, start with 1–2 sets of each exercise. Most people can use 8–12 controlled reps for the push, pull, squat, and hinge patterns. For single-leg work, use 6–10 controlled reps per side or 20–30 seconds of a supported hold. Stop each set with 1–3 good reps still available. Grinding, twisting, or holding your breath to finish a rep is not useful data; it is the set telling you it is done.
Rest long enough that the next set looks like exercise, not survival. That might be 30 seconds after wall pushups and 90 seconds after goblet squats. In a small apartment, the rest period is also when you move the chair, check the band, or clear the dumbbells from the walking path.
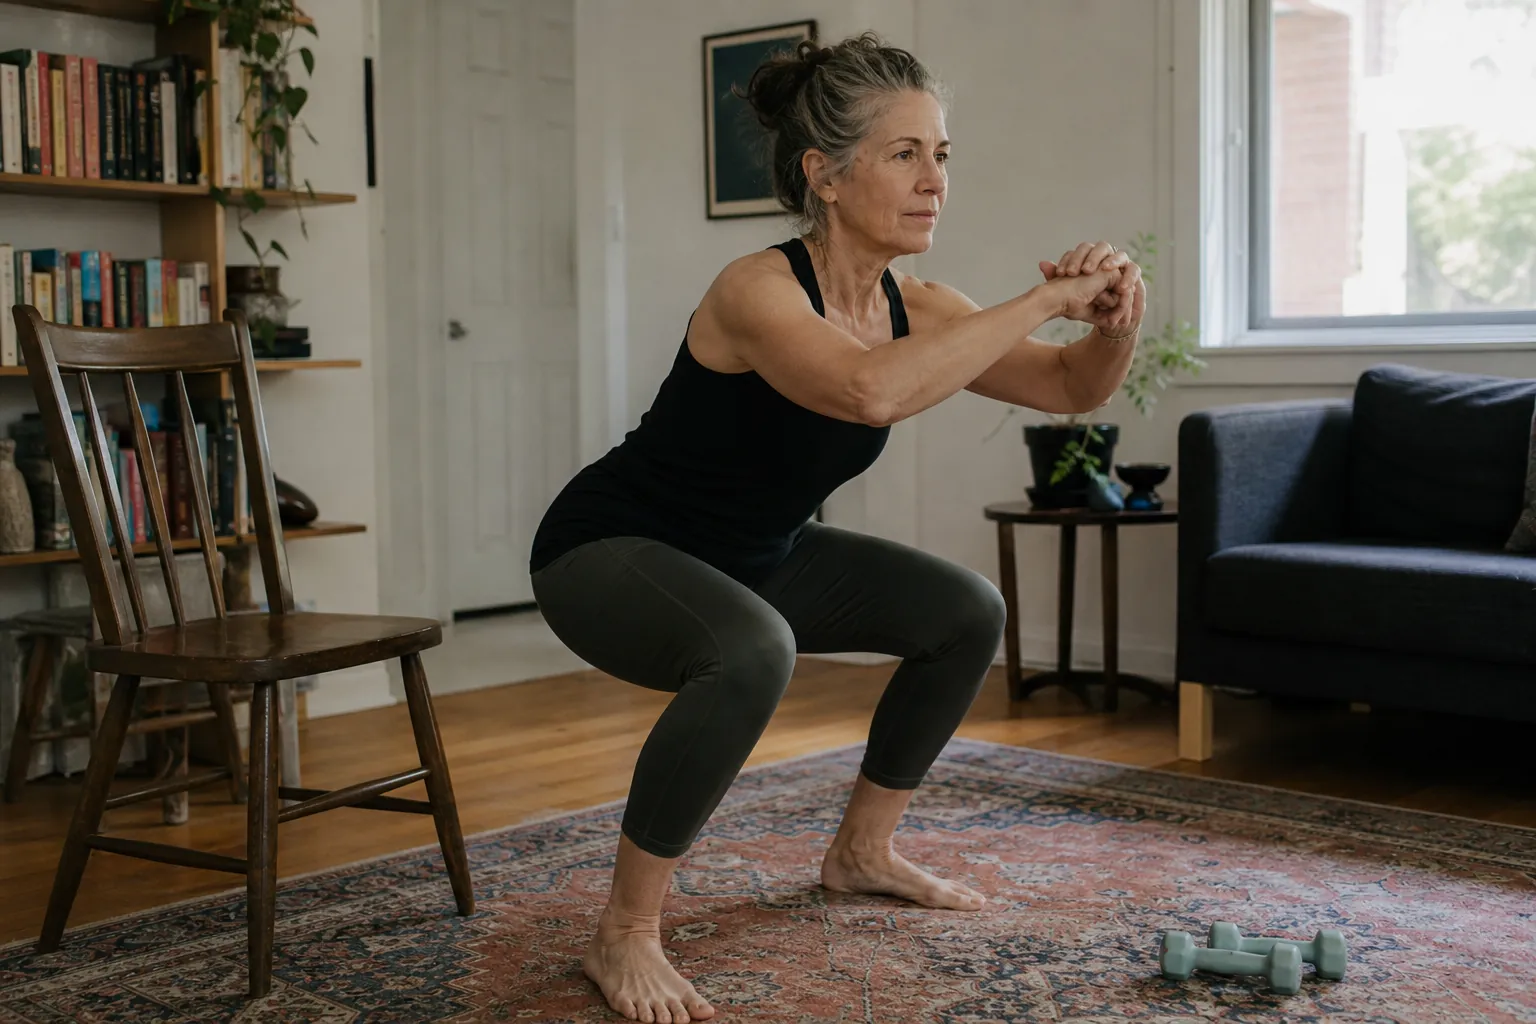
Workout A and Workout B
Use two sessions and alternate them. If you train twice per week, do A and B. If you train three times per week, do A, B, A the first week, then B, A, B the next week.
| Pattern | Workout A | Workout B |
|---|---|---|
| Push | Wall, incline, or floor pushup | Dumbbell floor press or incline pushup |
| Pull | Seated or standing band row | One-arm dumbbell row or band row |
| Squat | Chair squat or goblet squat | Supported squat or slow bodyweight squat |
| Hinge | Glute bridge | Hip-hinge drill or dumbbell Romanian deadlift |
| Single-leg | Supported split stance or split squat | Step-back tap or low step-up |
Do not rush to the hardest version in the table. The right version is the one you can repeat with steady feet, controlled breathing, and no joint pain that changes your form. Muscle maintenance after 50 does not require turning the living room into a test of nerve.
How to Pick the Right Version of Each Movement
Push: start where your shoulders stay quiet
A wall pushup is not a consolation prize. It is the correct starting point if floor pushups make your shoulders pinch, your wrists complain, or your middle sags. Stand facing a wall, hands at chest height, body in one long line, and lower under control. When that feels easy for 2 sets of 12, move to a countertop or sturdy table edge. The lower the hands, the harder the pushup.
If getting to the floor and back up is not a problem, dumbbell floor presses are a good alternative. Lying on the floor limits shoulder range compared with a bench, which can make the exercise friendlier in a living room. Press the dumbbells up, lower until the upper arms gently touch the floor, pause, and press again. A pair of light dumbbells may be plenty at first; when 12 controlled reps feel too easy, slow the lowering phase or use heavier dumbbells if available.
Pull: anchor the band before you pull
For rows, the anchor matters more than people admit. A band can go around a heavy table leg, a closed door with a proper door anchor, or your own feet for a seated row. Do not loop a band around a light chair and hope for the best. Before each set, tug the band once at half strength to confirm it will not slip.
Keep the row simple: sit tall or stand tall, pull elbows back, pause when your hands reach the side of your ribs, then return slowly. If the band is too easy, step farther away from the anchor, shorten the band, use a stronger band, or pause longer at the back of the row. If you have dumbbells, a one-arm row with one hand supported on a chair can work well, but the chair has to be sturdy and placed where it will not slide.
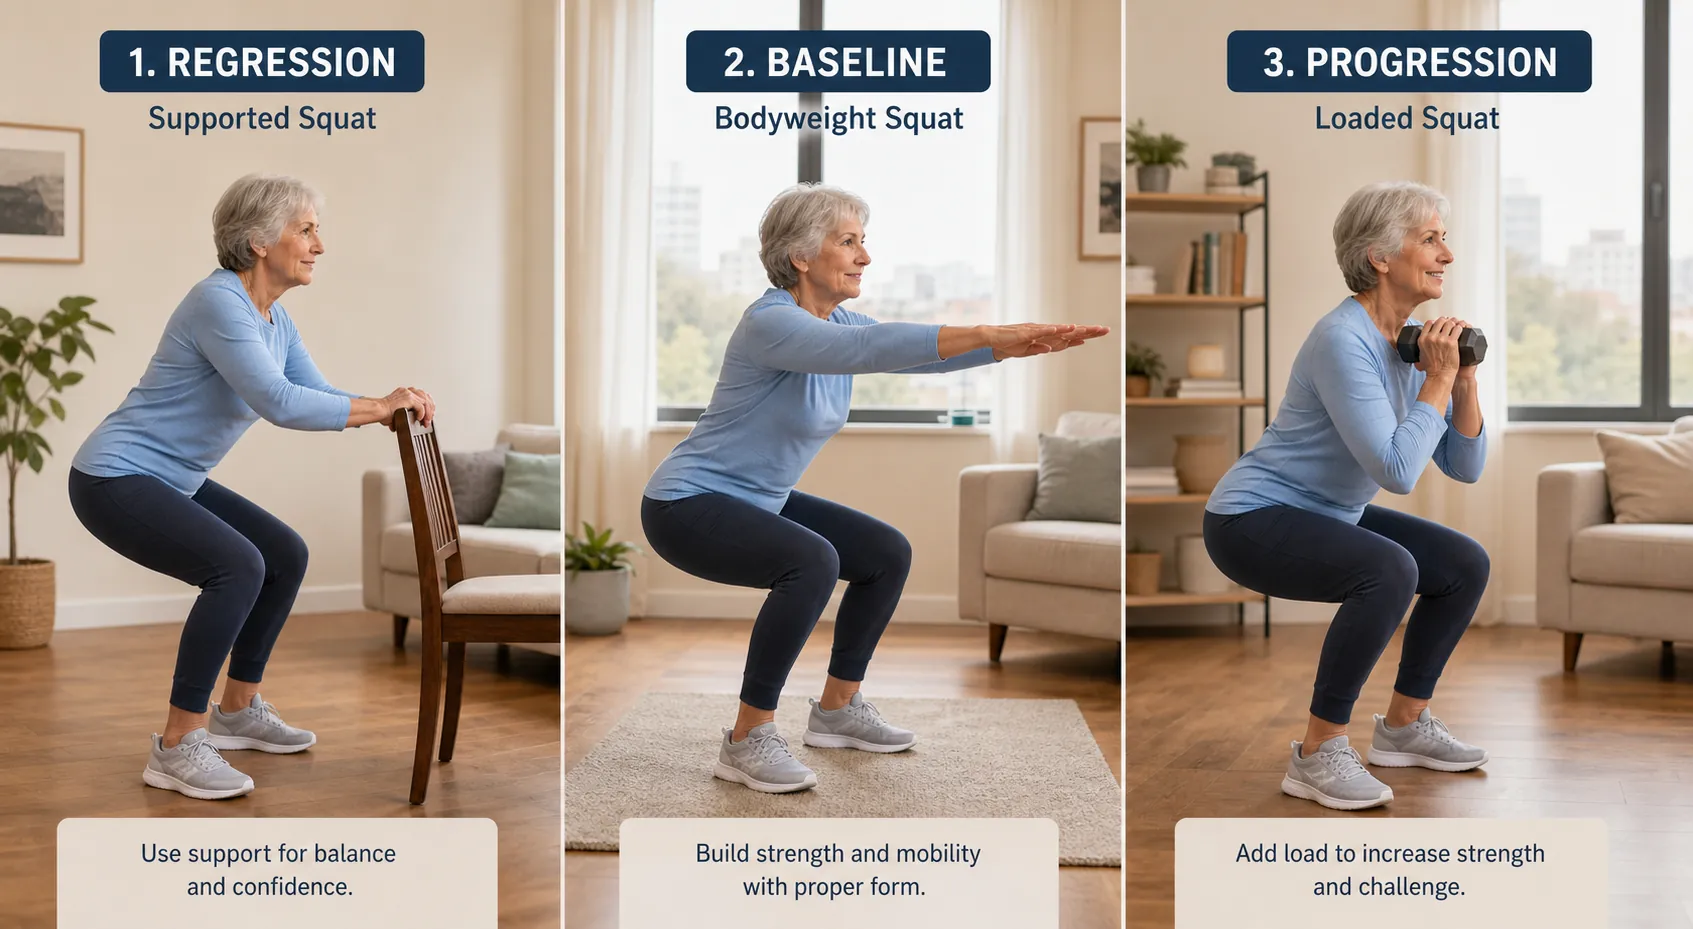
Squat: use the chair without apologizing for it
The chair gives you a target, feedback, and confidence. Stand in front of it, feet about hip to shoulder width, and sit back until you touch the seat lightly. Stand again without rocking if you can. If that is too hard, use your hands on the chair arms or place a cushion on the seat to shorten the distance.
Progress by using less hand help, lowering more slowly, pausing just above the chair, or holding one dumbbell at the chest. A squat that gets deeper next month with the same control is progress. So is moving from a chair-assisted squat to an unassisted bodyweight squat.
Hinge: teach the hips before loading the hands
The hinge is the pattern behind picking something up without turning every lift into a rounded-back reach. Practice by standing a few inches from a wall, softening the knees, and sending the hips back until they tap the wall. The chest tilts forward, but the spine stays long. If that feels awkward, keep it as a drill for a few sessions before adding weight.
Glute bridges are the floor-friendly hinge option. Lie on your back with knees bent, press through the feet, and lift the hips until your body forms a line from shoulders to knees. Pause at the top. To progress, slow the lowering phase, add a longer pause, or hold a dumbbell across the hips with both hands securing it. For dumbbell Romanian deadlifts, keep the weights close to the legs and stop the descent when hamstrings say enough, not when the dumbbells reach a certain height.
Single-leg: train balance with support nearby
Single-leg work is where many home routines get too brave too quickly. Start with a supported split stance: one foot forward, one foot back, both feet on the floor, fingertips on a wall or chair. Bend both knees a little, stand tall again, and keep the front knee tracking over the foot. The support is there so the legs can train instead of the nervous system spending the whole set searching for the floor.
Progress to step-back taps, split squats, or low step-ups only when the supported version feels controlled on both sides. Expect one side to be less cooperative. Train the weaker side first, match the reps on the stronger side, and resist turning the exercise into a wobbling contest.
The Progression Rule That Keeps Minimal Equipment Useful
Progressive resistance training means the body is asked to do a little more over time. It does not mean every workout has to be harder than the last. The older-adult evidence includes a striking trial in which nonagenarians increased muscle strength by 174% and mid-thigh muscle area by 9% after 8 weeks of high-intensity progressive resistance training, but that should be read as proof that older muscle can respond, not as a promise that every person will see the same result.[2]
Use one progression variable at a time. If you add reps, do not also switch to a harder band and slow the lowering phase in the same session. That way, when a knee or shoulder objects, you know what changed.
| When the exercise feels too easy | Progress one variable | Example |
|---|---|---|
| You can exceed the rep target with clean form | Add reps first | Move from 8 reps to 10, then 12 |
| You can do the top reps for 2 sessions | Add a set | Move from 1 set to 2 sets |
| The top reps and sets feel controlled | Make the version harder | Wall pushup to counter pushup |
| The movement is easy but heavier weights are not available | Change tempo | Lower for 3 seconds, pause for 1 second |
| A band exercise has no challenge left | Increase band tension | Step farther from the anchor or use a stronger band |
| Dumbbells are clearly too light | Increase load if available | Move from 10-pound to 15-pound dumbbells |
A simple double-progression system works well: choose a range, such as 8–12 reps. Start with a version you can do for 8 controlled reps. Over sessions, build toward 12. When you can do 12 reps for all planned sets with good form, make the exercise slightly harder and return to the lower end of the range.
Your workout notes can be plain: “Band row, red band, 2 x 10, steady,” or “Chair squat, no hands, 1 x 8, left knee felt stiff.” That record is more useful than memory, especially when the week gets crowded and the sessions are separated by several days.
What to Buy, and What to Skip for Now
Start with what fits in a closet: a long resistance band, a mini band if you like hip work, and one or two pairs of dumbbells. Everyday Health’s older-adult dumbbell guidance points readers toward basic total-body exercises and starting weights that can be adjusted to ability, which matches the main rule here: the weight has to let you move well and still feel like work by the end of the set.[5]
If you want a more detailed buying path, use a small-space equipment guide rather than guessing from social media. The small apartment home gym tour is the better place to compare $100, $300, and $800 setups, while the under-$1,000 home gym guide can help decide what is worth upgrading later. For this routine, a bench, rack, cable machine, and adjustable dumbbells are optional conveniences, not admission tickets.
If you train above downstairs neighbors or on delicate flooring, keep the routine low impact: no jumping, no dropping dumbbells, and no fast direction changes. A rug may be enough for bodyweight work, but dumbbells deserve a stable surface and a landing zone. If floor protection becomes an issue, use a dedicated home gym flooring guide before buying thick mats that bunch up under your feet.
How Much Muscle Loss Should You Worry About?
The numbers are useful as context, not as a scare tactic. Stanford Lifestyle Medicine describes muscle mass declining by about 0.5% per year from age 30, with faster losses after 50 and 60, based on its cited source chain.[3] UT Southwestern reports that sarcopenia affects a meaningful share of older adults, including figures of 25–45% among U.S. seniors and diagnostic estimates of 8.85% for adults 40–64 and 15.51% for adults 65 and older, while citing another study for those estimates.[4]
Those figures do not tell you what will happen to your body next year. They tell you why strength training belongs on the calendar with the same seriousness as dental cleanings and eye exams. The reassuring part is that the intervention is not mysterious: repeatable resistance training, progressed gradually, is enough to move the odds in a better direction.
Protein Helps, but It Does Not Replace the Work
Protein matters because training gives muscle a reason to adapt, and food supplies the material. Stanford Lifestyle Medicine cites a protein range of 1.2–1.6 grams per kilogram of bodyweight, roughly 80–100 grams per day for a 150–175 pound adult, as support for muscle maintenance alongside strength training.[3] That range may not fit everyone, especially people with kidney disease or medical nutrition restrictions, so it is worth discussing with a clinician or registered dietitian if you are unsure.
For routine purposes, keep the nutrition job simple: include a protein source at meals, do not let long busy days accidentally become low-protein days, and avoid using supplements as a substitute for consistent training. Readers who want a broader look at how nutrition and home exercise pair with aging health can continue with nutrition and home workout routines.
A First Week You Can Actually Start
For week one, choose the easiest version that feels controlled, not the version you wish you could do. If wall pushups, band rows, chair squats, glute bridges, and supported split stances are the right starting point, that is a complete strength session. It covers the five patterns and gives you something to progress.
- Pick 2 days if you are returning after a break; pick 3 days if you already recover well from regular exercise.
- Do one push, pull, squat, hinge, and single-leg movement each session.
- Use 1–2 sets and stop with 1–3 good reps still available.
- Record the version, reps, resistance, and any joint feedback.
- Progress only one variable at a time next week.
That is the next decision: 2 days or 3 days, easiest controlled variation, reps written down, one progression at a time. Muscle maintenance after 50 is built from that kind of repeatable week more often than from the equipment people keep meaning to buy.
References
- Physical Activity Guidelines for Older Adults, CDC.
- Resistance Exercise to Prevent and Manage Sarcopenia and Dynapenia, Annual Review of Gerontology and Geriatrics / NIH.
- Strength Training for Women 50+, Stanford Lifestyle Medicine.
- Strength training over 60 can help prevent sarcopenia, UT Southwestern Medical Center.
- The Only 5 Dumbbell Exercises Older Adults Need for Total Body Strength, Everyday Health.
What a small equipment investment adds
Cable Machine Alternatives That Save Space and Money
Compare the best cable machine alternatives for home gyms – from resistance bands and pulley systems to suspension trainers and compact digital units – and find the right option for your space and budget.
Small Treadmill Buying Guide: 7 Critical Specs to Check Before You Buy
A cross-category spec primer for apartment and small-space dwellers comparing walking pads, ultra-compact folding treadmills, and full-size folding treadmills. Learn the concrete thresholds for motor HP, deck length, noise, warranty, and subscription lock-in so you can compare apples to apples.
How to Practice Basketball at Home Without Noise Complaints
Learn how to run a full basketball workout in a small apartment without noise complaints. This guide covers no-dribble handling drills, wall form shooting, and silent ball options that let you train without disturbing neighbors.
How often should you repeat this?
See our recovery and rest reference for citation-anchored rest-interval guidance.
Spot something off?
Tell us if a movement, tier assumption, or duration didn't match your experience.