
A 4-Week Indoor Bike Training Plan for Renters, Tested in an Apartment
This 4-week indoor cycling plan is built for renters who need quiet, floor-safe workouts that fit in a small apartment. Each session is designed to run 20–45 minutes, avoids peak neighbor hours, and works with basic magnetic-resistance bikes and a simple rubber mat.
- Equipment tier required
- $100-300
- Duration
- 30-45 min
- Difficulty
- beginner
- Target area
- legs
- Space footprint needed
- 4 ft x 8 ft
- Noise level
- low
The first test of indoor bike training for home fitness renters is not whether the workout looks hard on paper. It is whether the bike can come out, the mat can go down, the ride can happen, and the living room can return to normal before the apartment starts feeling like a storage unit with a sofa.
This 4-week plan starts there. It assumes a basic magnetic-resistance exercise bike, no power meter, no Zwift subscription, no dedicated training room, and a real need to protect the floor and avoid becoming the neighbor with the mysterious thumping machine. The training target is modest but useful: three rides per week, usually 30-45 minutes, with a 20-minute version available when time, noise, or patience runs short.
The plan is a FitAtHome renter adaptation built from established indoor cycling principles and apartment constraint data, not a single published protocol from one lab or coaching system. The training structure borrows from beginner indoor cycling guidance, low-volume cycling plans, and sweet spot interval methods. The apartment rules come from available noise, floor-protection, and setup-space sources. That distinction matters: the workouts are structured, but the renter-specific format is a practical synthesis.
The Apartment Setup This Plan Assumes
A magnetic-resistance bike is the default here because it keeps the noise problem smaller. Harison Fitness reports magnetic-resistance bikes operating in a range below 20-55 dB, which sits below normal conversation levels, though the lowest figures come from a manufacturer and should be treated as useful guidance rather than independent lab proof.[1] Wirecutter’s 2026 exercise-bike testing also describes magnetic resistance as all but silent, which supports the general direction even if it does not verify every decibel claim.[2]
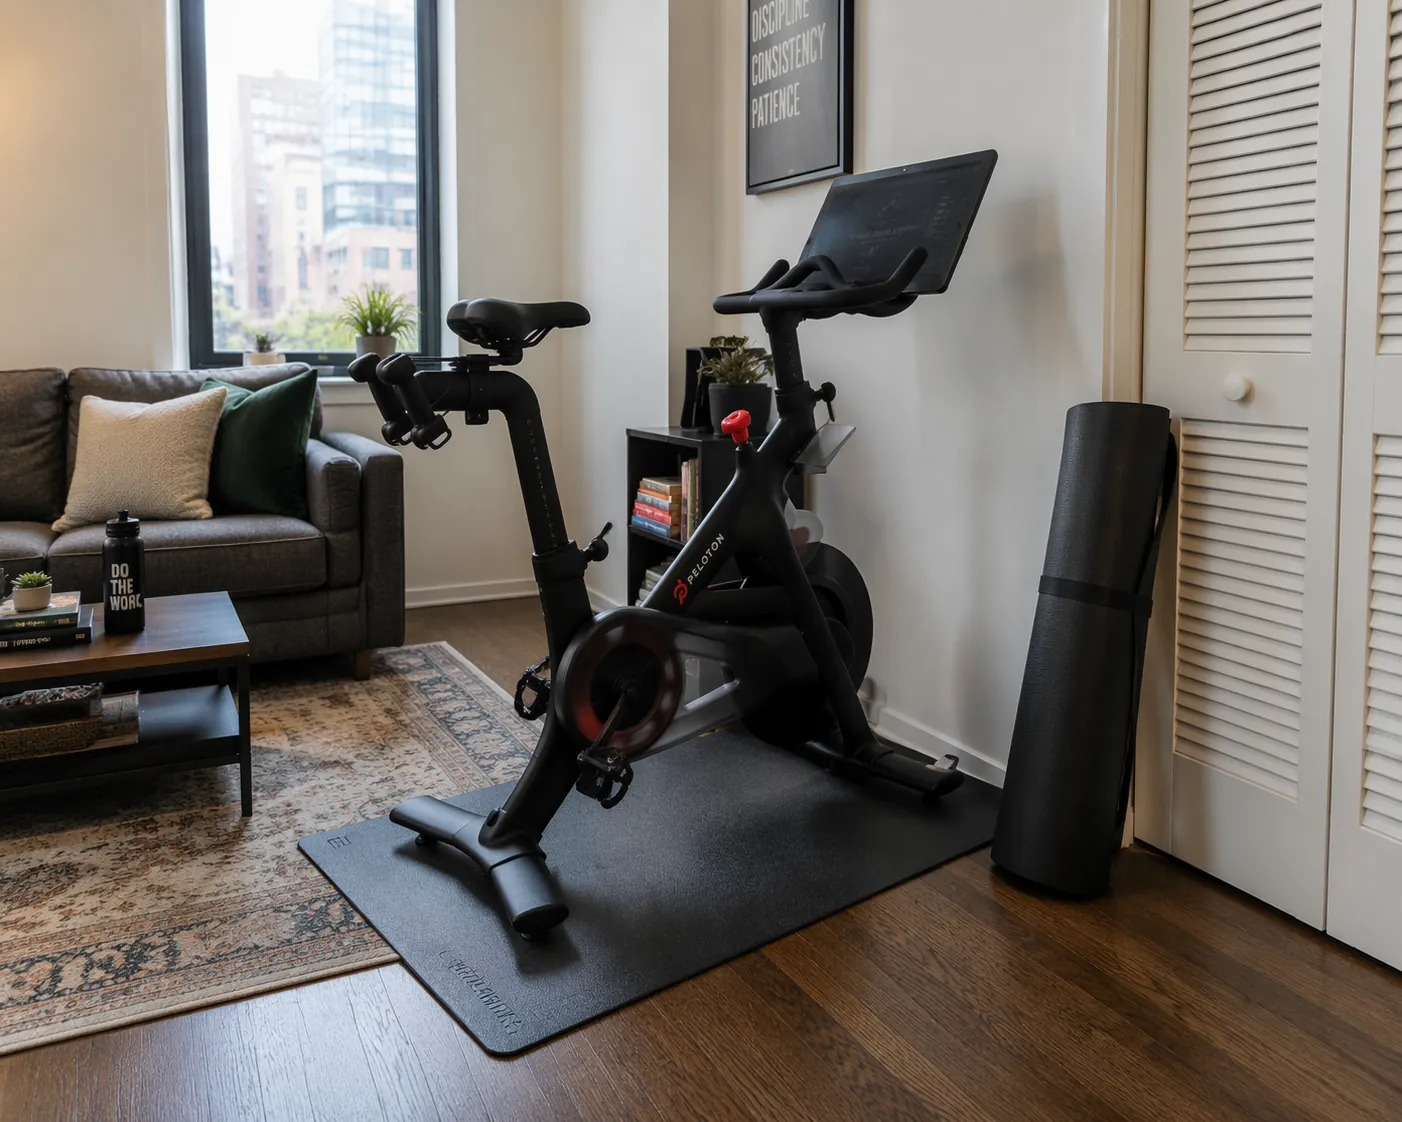
The floor matters as much as the bike. A thick rubber mat in the 6-10 mm range is the baseline, not an accessory. HomeGymGearExperts recommends thick rubber matting for floor protection and vibration control, and renter-forum reports also point to this kind of mat as a way to reduce the structure-borne vibration that bothers downstairs neighbors.[3] The safer assumption is that the mat reduces vibration; it does not give permission to sprint at midnight in a thin-floored building.
| Constraint | Working Assumption |
|---|---|
| Bike type | Magnetic-resistance stationary bike or indoor cycling bike |
| Floor space | About 4 ft x 8 ft if possible, with some clearance to mount, dismount, and move around the bike |
| Floor protection | 6-10 mm rubber mat under the full bike footprint |
| Noise timing | Avoid early morning, late night, and known quiet hours in the lease or building rules |
| Workout length | 20 minutes minimum; 30-45 minutes for the full sessions |
| Measurement | RPE, breathing, cadence feel, and repeatable resistance settings instead of power |
The 4 ft x 8 ft footprint comes from indoor cycling setup guidance for more complete trainer spaces, not only freestanding exercise bikes, so it is a conservative planning number.[4][5] Many apartment bikes need less length than that, but the extra space accounts for the mat, a towel, a water bottle, safe mounting, and the awkward half-minute when the bike is being rolled back into place.
If the bike has transport wheels and a frame length under about 50 inches, it is realistic to store it against a wall or in a closet after the ride, but the exact time depends on furniture, thresholds, and how much the bike weighs. Renter reports of rolling compact bikes away in under 5 minutes make that a believable setup target, not a guarantee for every apartment layout.[6]
The Weekly Pattern
Three weekly sessions are enough to give the plan structure without making the bike a permanent piece of living-room furniture. TrainerRoad’s beginner and low-volume indoor training materials support the idea that fitness can improve with a small number of structured weekly rides, and Verywell Fit presents beginner stationary-bike workouts that can be scaled without power data.[7][8]
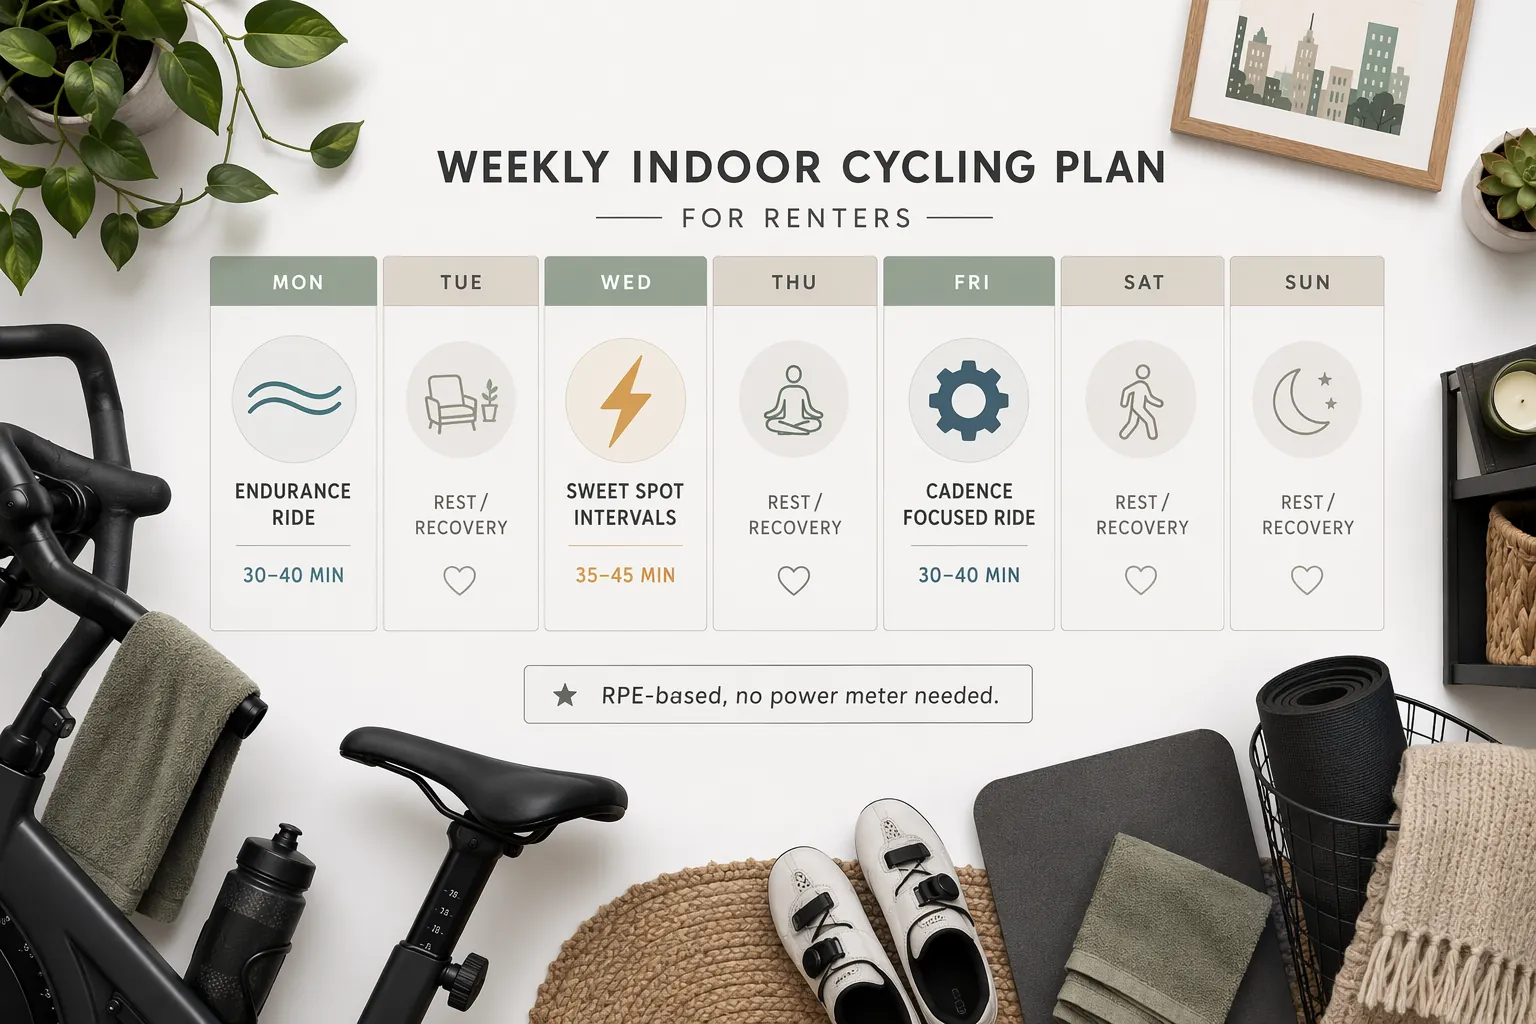
| Day | Ride | Purpose | Typical Length |
|---|---|---|---|
| Day 1 | Steady endurance | Build repeatable aerobic work without much noise or recovery cost | 30-40 minutes |
| Day 2 | Controlled harder intervals | Raise sustained effort using RPE instead of power | 30-45 minutes |
| Day 3 | Cadence and comfort ride | Improve pedaling control and finish the week without a big strain spike | 25-40 minutes |
Place at least one non-bike day between the harder interval ride and the next session. A Monday-Wednesday-Saturday pattern works. So does Tuesday-Thursday-Sunday. The exact days matter less than keeping the harder ride away from the most noise-sensitive time in the building.
Every ride uses RPE, or rate of perceived exertion, on a 1-10 scale. For this plan, RPE 2-3 means very easy spinning; RPE 4-5 means steady work where conversation is still possible; RPE 6-7 means focused, controlled effort; RPE 8 means hard but not a frantic sprint. There is no all-out RPE 10 work in this renter plan because hard stomping is usually where bike movement, floor vibration, and neighbor risk increase.
Before Each Ride: The 5-Minute Friction Check
Do this the same way every time. Consistency improves when setup stops becoming a separate negotiation.
- Roll or slide the mat into position before moving the bike, not after.
- Place the bike fully on the mat, including the stabilizers or feet.
- Check that leveling feet are stable so the bike does not rock under load.
- Put one towel on the handlebar and one under the sweat zone if the mat does not cover it.
- Set water and timer within reach before clipping in, strapping in, or starting the ride.
- Choose resistance settings you can change quietly, without yanking a knob or shifting body weight aggressively.
The teardown is part of the workout boundary. Wipe sweat before it reaches the floor, let the bike sit for a few minutes if the mat is wet, then roll it back. A bike that leaves a permanent sweat outline next to the couch slowly becomes harder to tolerate, even if the workouts are working.
Week 1: Make the Routine Repeatable
The first week is not a test of toughness. It is a test of whether the setup, timing, and bike position can survive three separate days.
| Ride | Session |
|---|---|
| Ride 1: steady endurance, 30 minutes | 5 min easy at RPE 2-3; 20 min steady at RPE 4-5; 5 min easy cooldown. |
| Ride 2: beginner intervals, 20-30 minutes | Use the 20-minute fallback: 5 min warm-up, 3 min baseline, 2 min harder, 3 min recovery, 2 min harder, 5 min cooldown. Add 5-10 min easy spinning only if setup and timing feel calm. |
| Ride 3: cadence comfort, 25-30 minutes | 5 min easy; 4 rounds of 3 min slightly quicker cadence at RPE 4-5 and 2 min easy; 5 min cooldown. |
The 20-minute fallback is adapted from Verywell Fit’s beginner stationary-bike workout structure: 5-minute warm-up, 3-minute baseline, 2-minute harder effort, 3-minute recovery, 2-minute harder effort, and 5-minute cooldown.[8] It is short enough to use when the building is quiet, the day ran long, or the bike is still sharing space with laundry.
For the harder pieces in Week 1, stay seated. If the bike starts rocking, the effort is too forceful for this setup. Reduce resistance, raise cadence slightly, or move the session to a time when a little more noise is acceptable.
Week 2: Add Time Before Adding Force
Week 2 increases total work mostly by extending the middle of the rides. That is more apartment-friendly than chasing harder resistance, because smooth seated pedaling usually creates less movement than grinding against a heavy flywheel.
| Ride | Session |
|---|---|
| Ride 1: steady endurance, 35 minutes | 5 min easy; 25 min steady at RPE 4-5; 5 min cooldown. |
| Ride 2: controlled intervals, 32-36 minutes | 6 min warm-up; 3 rounds of 4 min at RPE 6-7 with 3 min easy between; 5-7 min cooldown. |
| Ride 3: cadence comfort, 30-35 minutes | 5 min easy; 5 rounds of 3 min quicker smooth cadence at RPE 4-5 and 2 min easy; 5 min cooldown. |
The interval ride should feel controlled enough that the last minute of each hard segment is uncomfortable but not desperate. On a basic bike, use the resistance knob position and cadence feel together. If last week’s harder effort was resistance level 5 at a smooth cadence, this week does not need level 8. It may only need one small increase, or the same resistance held longer.
If only 20 minutes are available, keep the warm-up and one or two hard intervals. Do not cut the cooldown to zero. In an apartment, the cooldown is also when the bike stops dripping, the room quiets down, and the whole setup becomes easier to put away.
Week 3: The Main Work Week
Week 3 is the highest-load week in the plan. It borrows the logic of sweet spot training without requiring FTP testing. In cycling terms, sweet spot work is commonly described around 88-93% of functional threshold power, a range used to build threshold fitness without the fatigue cost of constant maximal work.[9][7] On a basic apartment bike, translate that into RPE 7: hard enough that you are focused, not so hard that form gets ugly.
| Ride | Session |
|---|---|
| Ride 1: steady endurance, 40 minutes | 5 min easy; 30 min steady at RPE 4-5; 5 min cooldown. |
| Ride 2: sweet spot-style intervals, 40-45 minutes | 8 min warm-up; 3 rounds of 6 min at RPE 7 with 3 min easy between; 6-8 min cooldown. |
| Ride 3: mixed cadence ride, 35-40 minutes | 5 min easy; 6 rounds of 2 min quicker cadence at RPE 5 and 2 min easy; then 8-10 min steady at RPE 4; cooldown to finish. |
This is the week to be most careful about timing. A 45-minute ride with several RPE 7 blocks is not the same apartment event as a 20-minute recovery spin. If the only available time is during quiet hours, use the 20-minute fallback and move the sweet spot-style ride to another day.
A useful sign of progress is not that the hard intervals feel easy. They should not. The better sign is that the third interval looks and feels similar to the first: same resistance neighborhood, similar cadence, controlled breathing, no rocking bike, no urge to stand and stomp.
Week 4: Consolidate and Check What Improved
Week 4 backs off slightly from Week 3 while keeping enough structure to show whether the first three weeks transferred into better repeatability. It is not a formal fitness test. It is a renter-friendly check: can you ride a little longer, hold the same effort more smoothly, or finish the same workout with less drama around setup and recovery?
| Ride | Session |
|---|---|
| Ride 1: steady endurance, 35-40 minutes | 5 min easy; 25-30 min steady at RPE 4-5; 5 min cooldown. |
| Ride 2: repeatable intervals, 35-40 minutes | 7 min warm-up; 4 rounds of 4 min at RPE 6-7 with 3 min easy between; 6 min cooldown. |
| Ride 3: 20-minute benchmark or 30-minute easy finish | Option A: repeat the Week 1 20-minute beginner workout and compare control. Option B: ride 30 min easy-steady at RPE 3-4 if fatigue is higher than expected. |
The benchmark is intentionally simple. Use the same bike, same approximate time of day, same mat, and similar resistance settings. Notice whether the two harder 2-minute efforts feel smoother than they did in Week 1. If your bike has only a basic console, record time, distance, or cadence if available, but do not treat cheap console numbers as laboratory data. The main comparison is whether you can repeat the work with better control.
How to Adjust Without Breaking the Plan
The plan works best when the adjustment rules are decided before the stressful day arrives. Otherwise every missed 45-minute ride starts feeling like failure, and that is how the bike turns into furniture.
| Problem | Adjustment |
|---|---|
| Only 20 minutes available | Use the beginner fallback: 5 min warm-up, 3 min baseline, 2 min hard, 3 min easy, 2 min hard, 5 min cooldown. |
| Bike rocks or mat creeps | Lower resistance, stay seated, check leveling feet, and keep cadence smooth. |
| Downstairs-neighbor concern | Skip high-resistance intervals and ride steady at RPE 3-5 during a less sensitive hour. |
| Legs feel flat before intervals | Do the endurance ride instead and move the interval ride later in the week. |
| Knees feel irritated | Reduce resistance immediately and check saddle height before continuing. |
| Apartment feels taken over | Shorten the ride, but complete teardown fully so the routine stays livable. |
Do not make up missed intensity by adding standing sprints. Standing can be useful in some indoor cycling workouts, but it is rarely the best choice for thin floors, small mats, and lightweight bikes. If you miss Ride 2, either do it later or let it go. The next week does not need punishment added to it.
Why the Renter Constraints Are Part of the Training
Noise, floor protection, and storage are often treated like setup notes before the real workout begins. For renters, they decide whether the workout happens at all. A plan that requires a permanent bike corner, a fan blasting beside the TV, and a screen mounted at eye level may be effective for someone else and still be wrong for an apartment.
Magnetic resistance helps because it removes much of the mechanical noise that comes from friction pads or rougher resistance systems. The remaining problem is usually not just sound in the room; it is vibration through the floor, movement from uneven feet, and the occasional clunk of a rider changing position too aggressively. That is why this plan avoids maximal stomping and asks for a mat before it asks for harder intervals.
Floor protection is also deposit protection. Sweat, pressure marks, rubber transfer, and repeated bike movement can all become small repair arguments when a lease ends. A mat wide enough to catch the bike footprint and sweat zone is cheaper than explaining a damaged floor later. Thick rubber mats are commonly available around $30-40, though prices vary by size, brand, and retailer.[3]
Bike choice can make this easier, but it should not turn this into a buyer’s guide. Wirecutter highlights the Schwinn IC4 as a heavily tested magnetic-resistance option around $900 in 2026, while Verywell Fit’s 2026 testing names the Merach S26 around $210 as a budget pick.[2][8] Those prices are useful context, not requirements. The plan works with any stable magnetic bike that fits the space, adjusts to your body, and can be used without disturbing the building.
What Counts as Progress After 4 Weeks
For this plan, measurable fitness does not have to mean a lab test or a power curve. It can mean that Week 4’s 20-minute benchmark covers more console distance at the same RPE, that the same resistance feels smoother, or that 35 minutes no longer feels like a scheduling event. If your bike records cadence or heart rate through a connected device, those can help, but they are not required.
Track only a few things so the habit does not become another setup burden: date, ride type, total minutes, main RPE, resistance setting if repeatable, and one apartment note. The apartment note might be “mat stayed flat,” “bike rocked during interval two,” or “too late for hard ride.” Those notes are not trivial. They tell you what the plan has to survive.
| Metric | Good Sign |
|---|---|
| Consistency | You completed 9-12 rides over 4 weeks. |
| Endurance | A 35-40 minute steady ride feels controlled at RPE 4-5. |
| Intervals | Later hard efforts resemble earlier ones instead of falling apart. |
| Apartment fit | Setup and teardown take minutes, not emotional energy. |
| Noise control | Harder rides happen outside sensitive hours and without bike rocking. |
After Week 4
If the plan felt challenging but manageable, repeat Weeks 2-4 and make only one progression: add 5 minutes to one endurance ride, add one interval to the controlled interval day, or slightly raise resistance during the RPE 7 blocks. Choose one, not all three.
If the plan felt too hard, repeat Week 1 and Week 2 until three weekly rides feel ordinary. That is not a downgrade. It is the version of training that respects the fact that a renter’s recovery includes putting the room back together.
If the workouts were easy and the apartment setup caused no problems, then upgrades can wait until they solve a real limitation. A better console, heart-rate strap, heavier bike, or connected app can be useful later. None of them is the reason this 4-week block works. The reason is simpler: protect the floor, keep the bike quiet, avoid the wrong hours, and repeat three structured rides often enough for the body to notice.
References
- Noise test: magnetic vs. friction resistance dB data, Harison Fitness
- Best exercise bikes 2026, Wirecutter, 2026
- Floor protection: mat thickness guidance and flooring risk analysis, HomeGymGearExperts.com
- Ride Inside, TrainingPeaks / Joe Friel
- Indoor cycling space setup tips, CTS / Jim Rutberg
- TrainerRoad forum renter setup reports, TrainerRoad Forums
- Beginner's guide to indoor cycling training, TrainerRoad
- Stationary bike workout for beginners and 2026 exercise bike testing, Verywell Fit, 2026
- Indoor cycling workout plans: speed, endurance, threshold, Bicycling
What a small equipment investment adds
We don't have a build tagged to this exact tier yet. Browse all builds.
How often should you repeat this?
See our recovery and rest reference for citation-anchored rest-interval guidance.
Spot something off?
Tell us if a movement, tier assumption, or duration didn't match your experience.