
A 4-Phase Home Mobility Exercise Plan for Paralysis Recovery
This phased exercise progression helps individuals recovering from paralysis rebuild strength and mobility at home using minimal equipment, guided by evidence-based rehabilitation guidelines and designed for early-to-mid stage recovery.
Before you start
- Equipment required
- Bodyweight and resistance bands
- Assumes build tier
- No specific tier required
- Difficulty
- Beginner
- Noise level
- Quiet
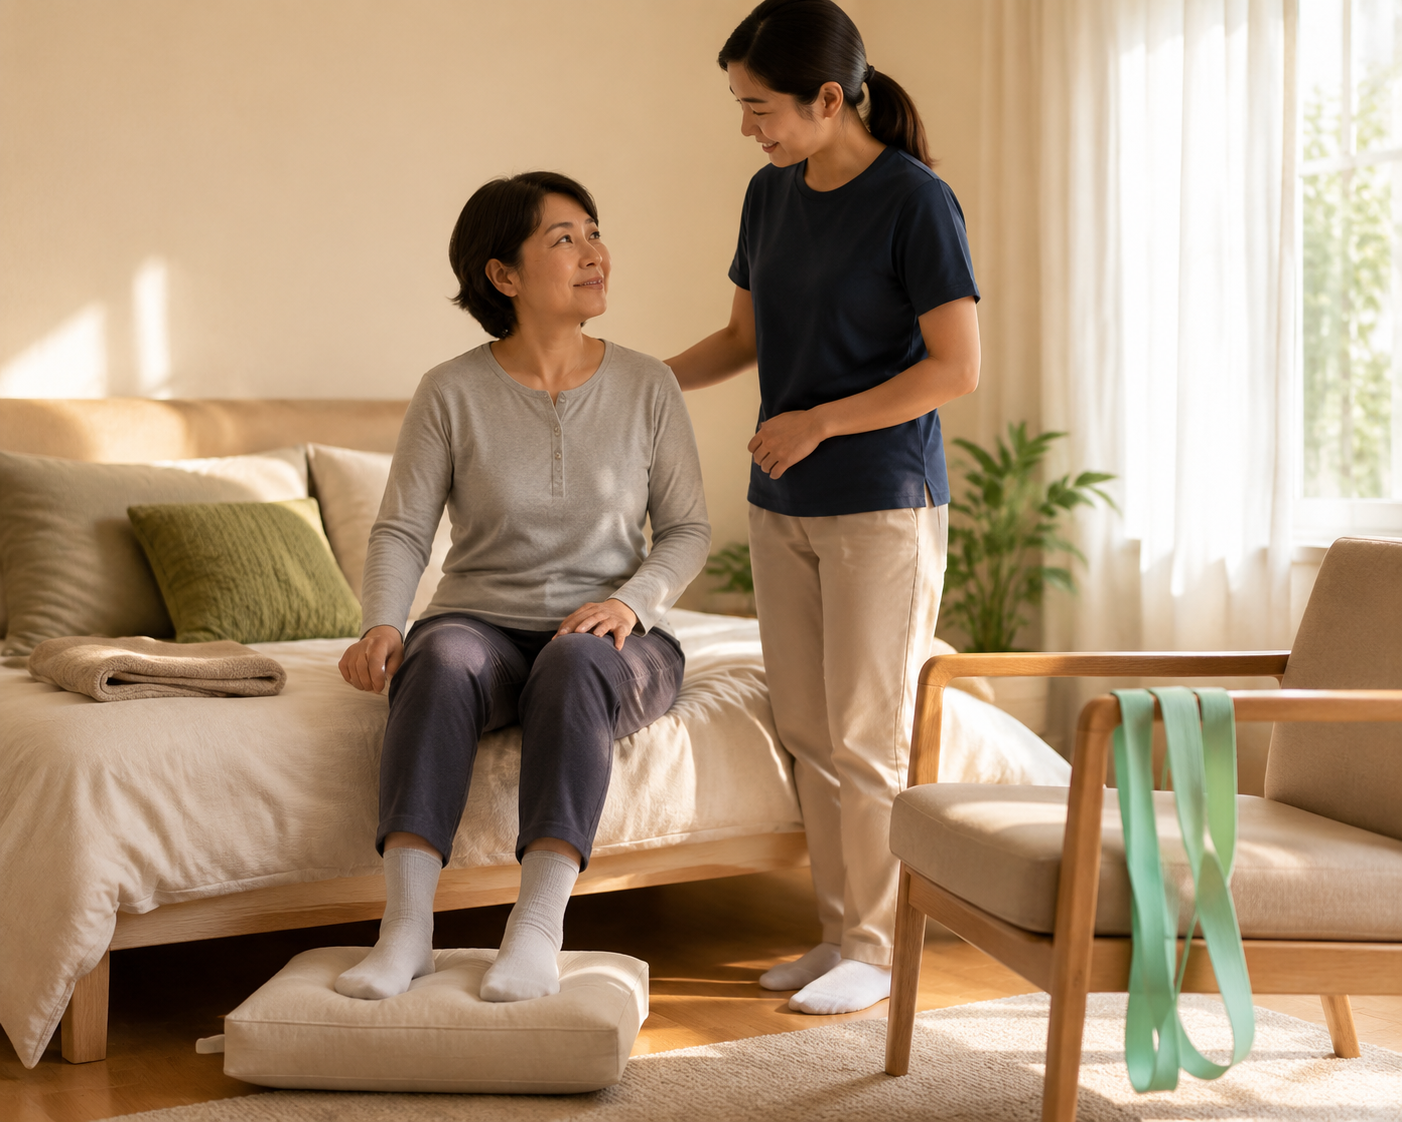
Start at the bed, because that is where many home mobility exercises for paralysis recovery are safest, clearest, and easiest to repeat. The goal is not to copy a clinic session or prove that the person is “ready” for harder work. The goal is to choose the safest next movement level for today: passive movement, assisted bed work, seated strengthening, or light resistance.
Before beginning, get clearance from the physician, physical therapist, or rehabilitation team. Paralysis after stroke, spinal cord injury, or another neurological condition can look similar at home while carrying very different risks. For spinal cord injury, the MSKTC exercise guidance builds toward at least 20 minutes of moderate-to-vigorous aerobic activity twice weekly and 3 sets of strength training twice weekly, with intensity checked partly by the “talk test.”[1] The peer-reviewed guideline work behind those targets gives a useful benchmark, but it should not be treated as a starting prescription for someone who is newly weak, medically unstable, or still learning safe transfers.[2]
| Phase | Main Position | Typical Work | Move On When |
|---|---|---|---|
| 1. Passive bed mobility | Lying in bed | Caregiver-assisted range of motion, ankle pumps, heel slides, body rolls | Movement is comfortable, skin tolerates positioning, symptoms stay stable |
| 2. Assisted or active bed work | Lying or partly supported | Quad sets, active-assisted heel slides, supported rolling, short holds | The person can participate without breath-holding, pain, or unsafe fatigue |
| 3. Seated strengthening | Chair, wheelchair, or bed edge with support | Seated marching, knee extensions, trunk rotation, front arm raises | Sitting balance is reliable enough for controlled movement |
| 4. Light resistance | Seated or supported | Resistance bands, light cuff weights, gentle rows or presses | Control and tolerance are consistent, and the rehab team approves loading |
A common home exercise duration reported by occupational therapists for neurological injury is 16 to 30 minutes daily, and more than 85% of surveyed occupational therapists reported demonstrating home exercises to caregivers.[3] That finding is helpful for expectations: a home plan often works best as a short, repeatable routine, not a long workout that leaves the person exhausted for the rest of the day.
Safety Rules That Apply Before Any Phase
The person doing the exercise should be positioned so they can breathe normally, keep the head and neck supported when needed, and stop without rushing. The caregiver should know where to place hands before the movement starts. If the movement requires lifting a limb, support above and below the joint rather than pulling from the wrist, ankle, hand, or foot.
- Stop the session for new or increasing pain, dizziness, unusual sweating, headache, nausea, shortness of breath, chest discomfort, sudden weakness, confusion, or a feeling that something is wrong.
- For spinal cord injury at T6 or above, ask the care team for an autonomic dysreflexia plan before exercising; a pounding headache, sweating, flushing, goose bumps, or a sudden blood pressure concern should be treated as urgent.
- Check skin before and after bed or seated work, especially over the heels, sacrum, hips, elbows, and shoulder blades. Redness that does not fade, rubbing, or new soreness means the setup needs to change.
- Avoid forcing range of motion. A stretch can feel mild or unfamiliar; it should not feel sharp, pinching, electrical, or like the joint is being levered.
- Keep sessions short enough that the person can recover. Fatigue that worsens transfers, sitting balance, swallowing, speech, or alertness is not a good trade.
If the person has tone, spasms, fragile skin, osteoporosis risk, recent surgery, shoulder pain after stroke, or medical restrictions on hip or spine movement, the therapist’s limits override any general range suggested here.
Phase 1: Passive Bed Mobility
This phase is for days when the person cannot yet move a limb reliably, tires quickly, has limited sitting tolerance, or needs a caregiver to guide most of the motion. Passive does not mean careless. It means the caregiver supplies the movement while the person pays attention to comfort, breath, sensation, and any stop signs.
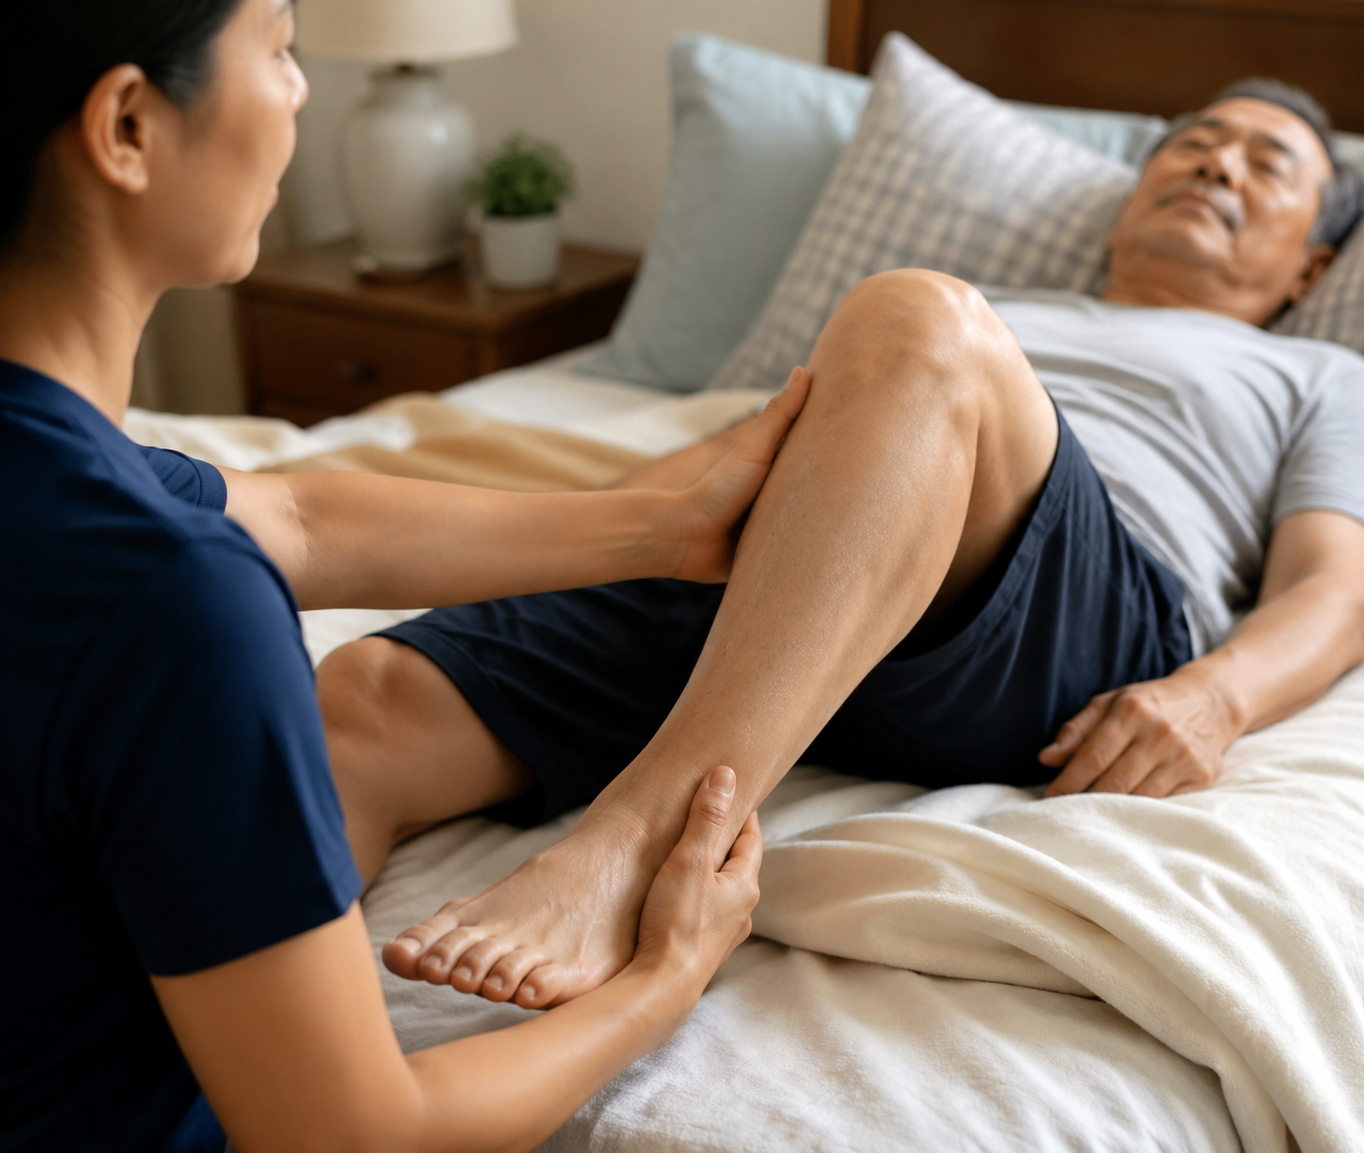
For passive range of motion, move one joint at a time through a comfortable arc. The Shepherd Center home exercise materials include bed mobility and range-of-motion style movements such as body rolls and trunk rotation as part of home exercise education after injury.[4] At home, the important detail is control: slow enough that the person can report discomfort, and small enough that the caregiver never has to tug.
Ankle Pumps
With the person lying on their back, support the lower leg so the heel is not grinding into the bed. Gently move the foot up toward the shin, then point it away. AARP’s bed-exercise guidance describes ankle pumps as a simple bed-based movement, along with other exercises such as heel slides and quad sets.[5]
A reasonable starting range is 5 to 10 slow repetitions per side, often 1 to 2 rounds, if the care team has not given a different plan. Keep the knee relaxed. Do not push through ankle stiffness or clamp the toes to force motion. If the person can help even slightly, invite them to “pull the toes toward you” and then relax while the caregiver completes only the comfortable part.
Heel Slides
For a heel slide, the person lies on their back while the caregiver supports the leg and helps the heel slide toward the buttocks, then back down. A towel under the heel can reduce friction. The movement should come from the hip and knee bending together, not from twisting the knee or dragging the skin.
Try 5 to 10 repetitions if comfortable. Stop earlier if the hip hikes, the knee collapses inward, the person holds their breath, or the skin under the heel starts to shear. If one side has more paralysis, compare comfort and control without trying to make both sides look identical.
Body Rolls
Body rolls prepare for pressure relief, hygiene, dressing, and later bed mobility. Bend the knees if allowed, cross or support the arms as instructed by the therapist, and roll the person slowly toward one side. A caregiver should guide at the shoulder blade and hip, not pull from the arm. Pause on the side only if breathing, skin, and comfort remain stable.
This is not a speed drill. One to five controlled rolls each direction may be enough at first. If the bed is too low for the caregiver to keep a neutral back, the setup is not safe just because the movement is simple. Raise the bed if possible, move obstacles, and use pillows or folded towels to support the top leg and shoulder once the person is on their side.
Passive Shoulder and Arm Movement
Upper-limb passive movement needs extra patience, especially after stroke when shoulder pain and subluxation risk may be present. Support the arm at the forearm and upper arm. Move within the range already cleared by the therapist. Do not lift a weak arm overhead by the hand, and do not let the shoulder shrug toward the ear as a substitute for clean motion.
Some rehabilitation education materials describe passive range of motion as a way to provide sensory input to the nervous system, but that should be read narrowly: passive movement may support awareness and practice conditions; it does not guarantee voluntary recovery.[6]
Phase 2: Assisted and Active Bed Work
Move into this phase when the person can participate in the motion: tightening a muscle, starting a slide, helping roll, or holding a position briefly. The caregiver still assists, but the movement now has a shared job. The person tries first within safe limits; the caregiver guides, lightens the load, or finishes the range.
Quad Sets
A quad set asks the person to tighten the front thigh muscle while the leg is straight or nearly straight. Place a small towel under the knee only if the therapist recommends it, then cue the person to press the knee gently toward the bed and hold for 2 to 5 seconds. AARP includes quad sets among simple exercises that can be done from bed.[5]
Start with 5 repetitions per side. Watch for breath-holding, hip gripping, or the ankle turning hard inward or outward. A visible muscle twitch can count as participation in early recovery. Do not dismiss small contractions; they may be the safest active work available that day.
Active-Assisted Heel Slides
Use the same setup as the passive heel slide, but ask the person to begin the bend or straighten the leg as much as they can. The caregiver assists only enough to keep the heel moving smoothly and the knee aligned. If the person can complete only a few inches of motion, that is still active-assisted work.
A typical early range is 1 to 3 sets of 5 to 10 repetitions, with rest between sets. The number matters less than the quality: no sudden drop, no joint twisting, no skin dragging, and no fatigue that makes the next transfer unsafe.
Supported Rolling Practice
Rolling becomes active when the person reaches, turns the head, bends a knee, pushes through a foot, or contracts the trunk to help. The caregiver can set up the legs, cue the reach, and guide at the shoulder blade and pelvis. Avoid yanking the arm across the body. If the weaker shoulder is involved, use the positioning taught by the therapist.
Practice one direction at a time. If rolling toward the stronger side is safer, begin there. If rolling toward the weaker side is part of a therapist-directed goal, use more support and fewer repetitions. Two careful rolls can teach more than ten rushed ones.
Short Holds and Position Changes
Some days the useful exercise is not a big movement but a small hold: keeping knees from falling outward during a heel slide setup, holding the foot in a neutral position for a moment, or maintaining side-lying with pillows placed correctly. These holds build tolerance for later sitting and transfers.
How Much to Do: Repetition Without Overload
Repetition matters because the nervous system and muscles need repeated, specific practice. It is reasonable to think in short daily sessions for home exercise, since the occupational therapy survey found 16 to 30 minutes daily was the most commonly prescribed home-program duration for neurological injuries.[3] That does not mean every person should do 30 minutes. It means a modest, consistent window is a realistic home format.
For early phases, a session might include a few minutes of positioning, 5 to 10 ankle pumps, 5 heel slides, 3 body rolls, and several rest breaks. For mid-stage work, it might become 2 to 3 sets of 5 to 10 repetitions across selected movements. The plan should leave enough energy for meals, toileting, transfers, communication, and sleep.
- Use easier days deliberately: fewer repetitions, more passive support, longer rest.
- Progress one variable at a time: range, repetitions, sitting time, or resistance, not all at once.
- Track the after-effect: symptoms during the session matter, but so do fatigue, pain, spasms, and skin changes later that day.
- Treat a new stop sign as information, not failure. Report it to the care team before advancing.
Phase 3: Seated Strengthening
Seated exercises belong only when the person can sit with enough support to move without sliding, collapsing, or grabbing in panic. The seat should be stable. A wheelchair with brakes locked, a firm chair with arms, or the edge of the bed with a caregiver guarding may all be appropriate depending on the person. A soft couch is often harder than it looks.

Seated Marching
Seated marching asks the person to lift one knee slightly, lower it with control, then repeat on the other side if safe. Shepherd Center and NHS chair-exercise resources both include seated marching-style movements in home or chair exercise instruction.[4][7]
Start small: a heel lift may be enough before a full knee lift. Keep hands on the chair, thighs, armrests, or wheelchair frame as instructed. If the trunk leans far backward to lift the leg, reduce the height. Try 5 repetitions per side, rest, and decide whether another set is still clean.
Knee Extensions
For a seated knee extension, straighten one knee partway or fully, then lower the foot slowly. The thigh should stay supported by the chair. The person should not kick quickly or lock the knee hard. If the foot drops heavily, the movement is too large or the set has gone too long.
A starting range is 1 to 3 sets of 5 to 10 repetitions per side. For a weaker side, the caregiver may support under the lower leg and help through part of the range. Count only the repetitions that remain controlled.
Trunk Rotation
Trunk rotation can be useful, but it quietly assumes sitting balance. The person turns the chest slightly to one side, returns to center, then turns the other way. The movement should be small at first. A caregiver may stand close enough to guard the shoulders or pelvis without pulling.
Use this exercise only if the person can return to upright without a near-fall. If vision changes, dizziness, nausea, increased tone, or fear appears, stop and return to supported sitting or bed-based work.
Front Arm Raises
A front arm raise starts with the arm by the side or resting on the lap, then lifts forward only as high as comfortable. This is not a shoulder challenge for someone with pain, subluxation, or poor trunk control. The shoulder should stay relaxed, the neck should not brace, and the person should not lean backward to make the arm move.
If one arm is weak, the other hand or caregiver may assist at the forearm. Use a short range and stop before the shoulder hikes. In many home plans, 5 careful repetitions are more appropriate than a full set borrowed from fitness training.
Phase 4: Light Resistance, Only After Control Is Earned
Resistance bands and cuff weights can be useful, inexpensive tools. Add them only when the person can perform the movement without resistance, maintain posture, recover well afterward, and has clearance from the rehab team.
The SCI exercise guideline target of strength training twice weekly for 3 sets is a useful destination for people whose medical status and function support it.[1][2] For someone still rebuilding basic control, a band may turn a clean movement into a compensation pattern. The first question is not whether a band is available; it is whether the body can keep the same quality when the load appears.
- Band rows: seated with the band secured only in a way approved as safe, pull elbows gently back, then return slowly.
- Light cuff-weight knee extensions: use only if unweighted knee extensions are controlled and the therapist approves ankle loading.
- Band press-outs: hold the band close to the body and press forward through a small range without trunk collapse.
- Gentle band pull-aparts: use a very light band and stop if the shoulders hike, pinch, or ache.
Begin with the lightest resistance available, often 1 set of 5 repetitions. If quality holds and symptoms remain stable, the plan may progress toward 2 to 3 sets of 5 to 10 repetitions. For small-space equipment planning, a simple band setup is usually enough; readers who need broader gear ideas can use a guide such as How to Build a Home Gym Under $500 in a Small Space or review How to Safely Use a Resistance Band Door Anchor before anchoring any band.
A Simple Way to Choose Today’s Phase
Use the highest phase the person can perform cleanly today, not the highest phase they reached once. Recovery days vary. Sleep, medication timing, spasticity, pain, infection, mood, and caregiver availability can all change what is safe.
| If This Is True Today | Use This Level |
|---|---|
| The person cannot initiate the movement or cannot stay comfortable | Phase 1: passive bed mobility |
| The person can help a little but needs guidance through the motion | Phase 2: assisted or active bed work |
| The person can sit safely with support and move without sliding or collapsing | Phase 3: seated strengthening |
| The person controls unweighted movement and the care team approves loading | Phase 4: light resistance |
| New pain, dizziness, headache, unusual sweating, skin redness, or unsafe fatigue appears | Stop, return to a safer setup, and contact the care team when appropriate |
Keep a short log: date, phase used, exercises, repetitions, symptoms during the session, and symptoms later. That record is often more useful to a therapist than a vague report that exercise is going “fine” or “badly.” It shows whether fatigue is dose-related, whether a specific position irritates skin, and whether a movement is ready to progress.
The four phases give the home routine a structure between professional visits: begin with safe bed mobility, add active participation, earn seated work, and use resistance only when control and tolerance justify it. The equipment can stay minimal. The decision-making should stay careful.
References
- Exercise After Spinal Cord Injury, MSKTC
- Evidence-based scientific exercise guidelines for adults with spinal cord injury: an update and a new guideline, Spinal Cord, 2018
- Home Exercise Programs for Adults With Neurological Injuries: A Survey, American Journal of Occupational Therapy, 2016
- Home Exercises, Shepherd Center
- 8 Simple Exercises You Can Do From Bed, AARP, 2024
- Exercise for Stroke Patients with Paralysis, Flint Rehab
- Chair Exercises, NHS
Don't have the gear this routine assumes? Find the build that covers it.
Wondering how much rest you need after this? Read our ACSM-cited recovery reference.
Questions about form, substitutions, or a correction? Leave it below.
Comments
Join the discussion with an anonymous comment.