
5 Ballet Moves to Learn for Your Beginner Home Workout
Start ballet at home as a complete beginner with the five foundational moves — plié, relevé, tendu, dégagé, and rond de jambe — plus the form cues that make them safe. Then put them together in a 20-minute low-impact starter workout that needs only a sturdy chair for balance.
- Equipment tier required
- none
- Duration
- 20 min
- Difficulty
- beginner
- Target area
- lower body
- Space footprint needed
- small clear floor area
- Noise level
- low (no jumping)
You do not need a barre, ballet slippers, a full-length mirror, or perfect turnout to begin. For a beginner ballet home workout, the useful starting kit is much simpler: a sturdy chair, a little clear floor space, and five movements you can repeat without guessing what your knees, feet, ribs, and shoulders are supposed to do.
Those five movements are plié, relevé or elevé, tendu, dégagé, and rond de jambe. They are standard beginner ballet exercises that can be practiced at home without a barre, and they show up again and again inside follow-along ballet and barre classes.[1] Learn them slowly first, and the video you try later will feel less like a foreign language shouted over music.
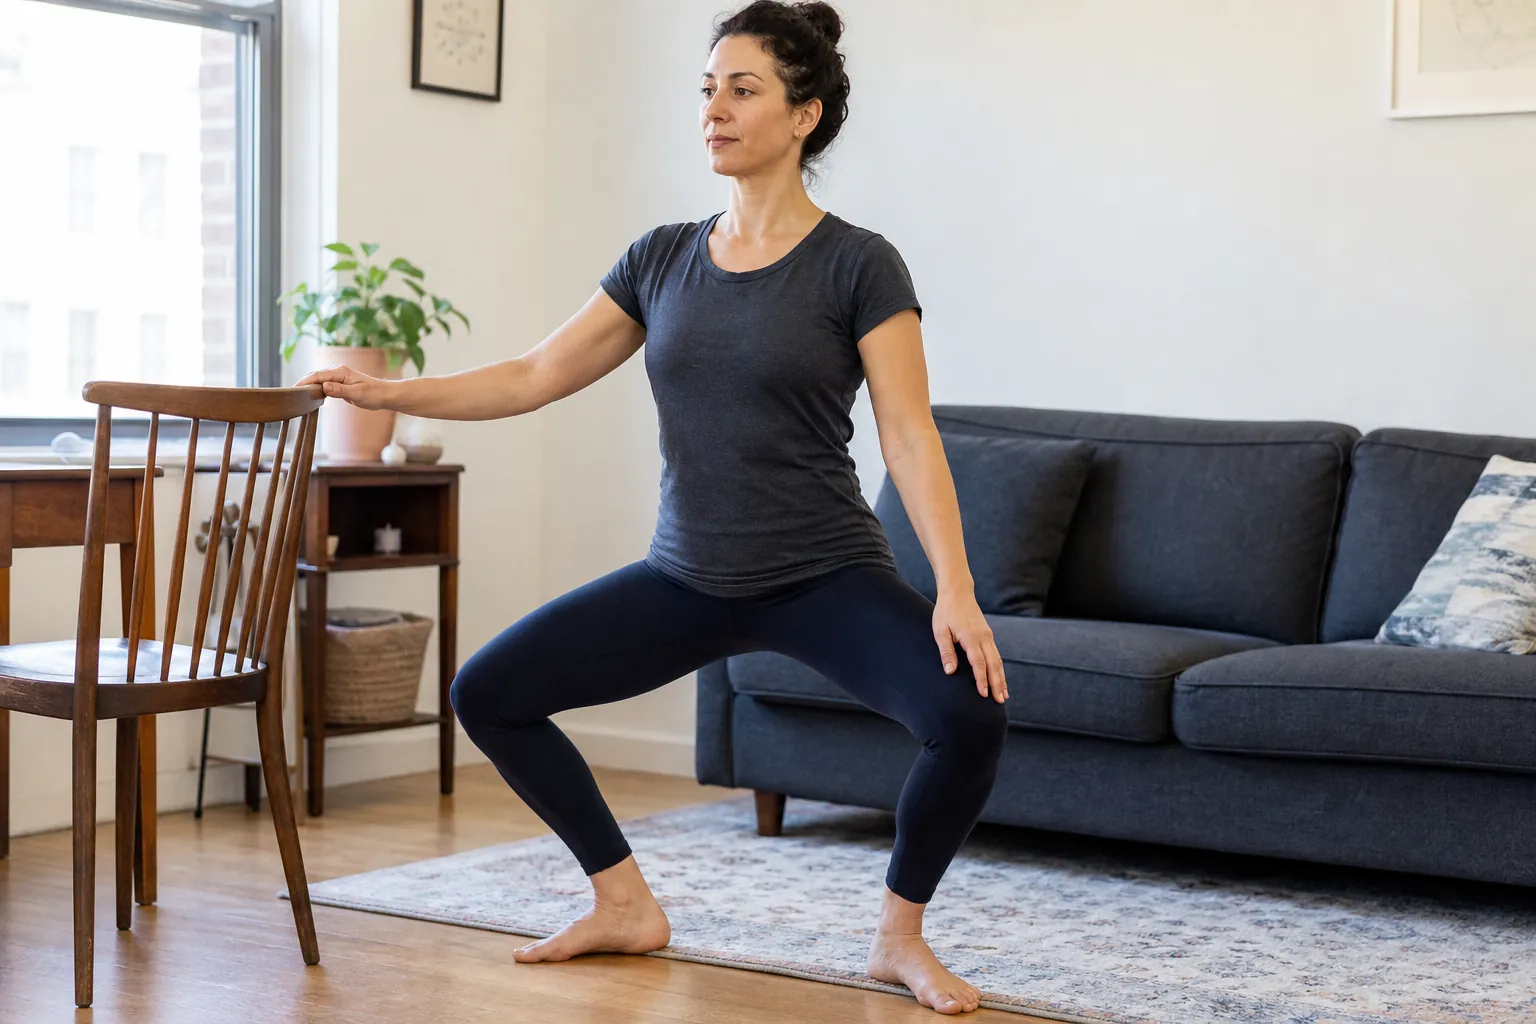
The five ballet moves to learn first
A chair is not there to hold you up. It is there to help you notice your balance while your legs do the work. At-home barre workouts commonly use a sturdy high-back chair for light balance support, which makes the setup realistic for beginners practicing in a living room or bedroom.[2]
| Move | Plain-English meaning | Why it matters |
|---|---|---|
| Plié | A controlled knee bend | Teaches knee tracking, foot pressure, and upright posture |
| Relevé or elevé | Rising onto the balls of the feet | Builds foot, ankle, calf, and balance control |
| Tendu | Sliding a straight leg out until the foot points on the floor | Teaches foot articulation and leg direction without impact |
| Dégagé | A tendu that lightly leaves the floor | Adds quickness while keeping control |
| Rond de jambe | Drawing a smooth circle or arc with the working leg | Teaches hip control without twisting the torso |
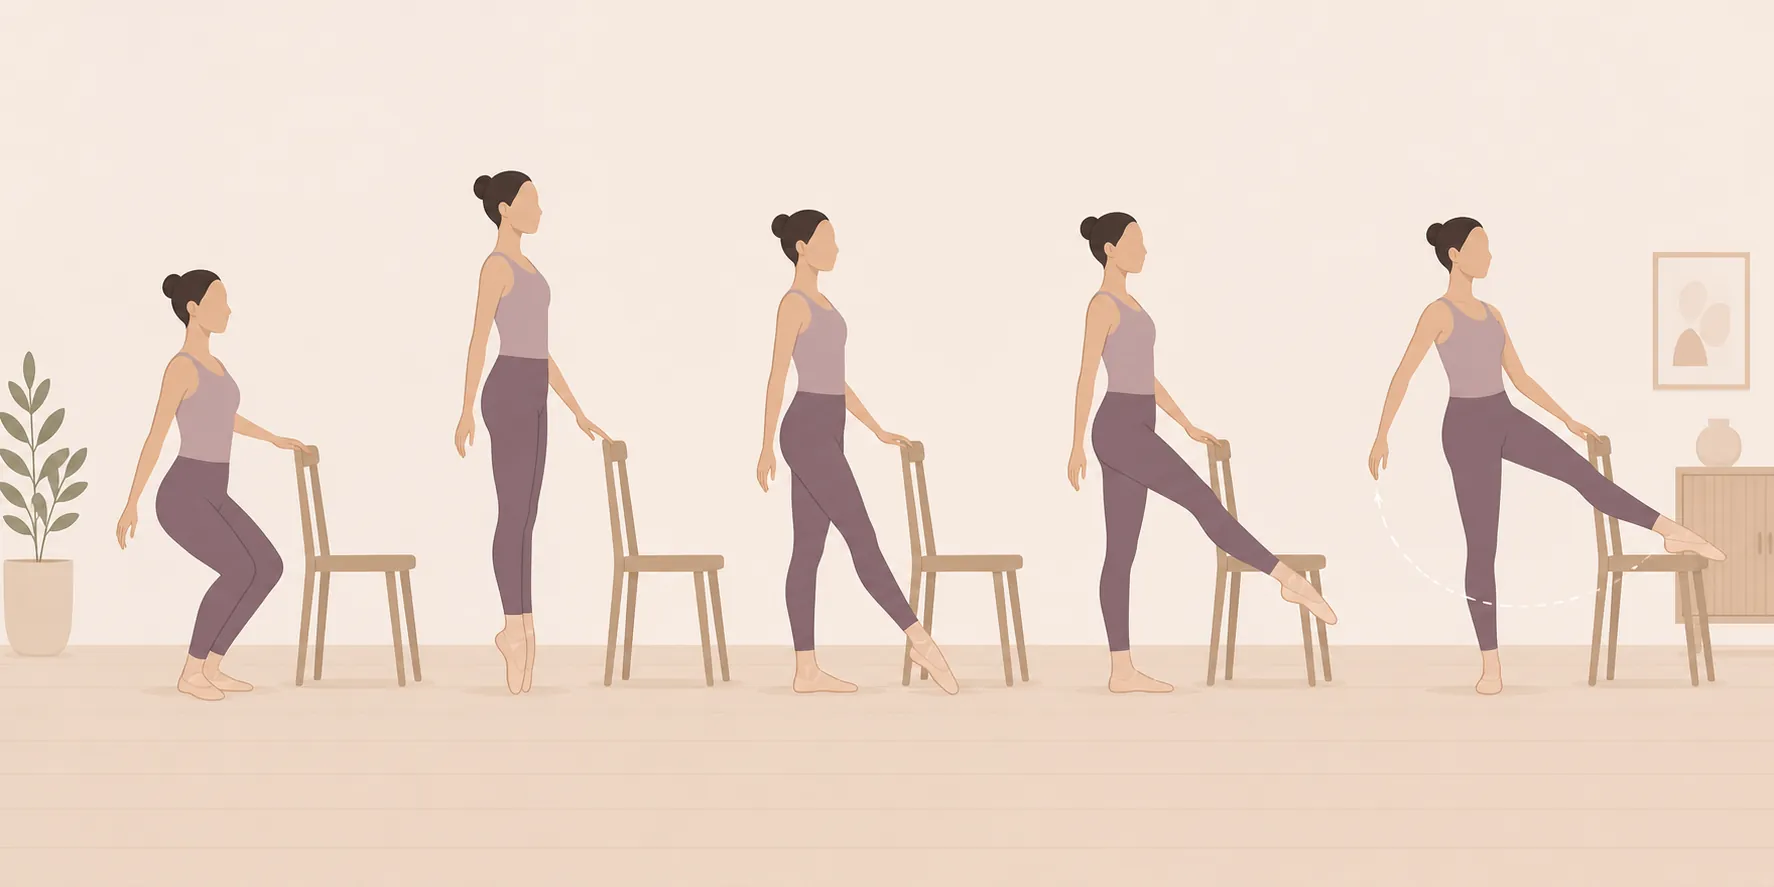
Set up your chair, feet, and posture before you start
Place the chair slightly to one side, close enough that your fingertips can rest on the back of it. If your hand has to grip, pull, or press down, the chair is too far away or you are asking the movement to be bigger than your balance can manage today.
Start with your feet in parallel or in a very small first position. First position means the heels are near each other and the toes angle outward, but for a home beginner that angle should come from your comfortable hip rotation, not from cranking the feet into a dancer shape. If your knees cannot bend in the same direction as your toes, the turnout is too wide.
Keep the ribs stacked over the hips, the back of the neck long, the shoulders down and back, and the abdomen gently engaged. These cues are not decorative. In barre-style exercise, repeating small movements in poor position can raise injury risk, so knee alignment, shoulder position, and core engagement are basic safety checks rather than finishing touches.[3]
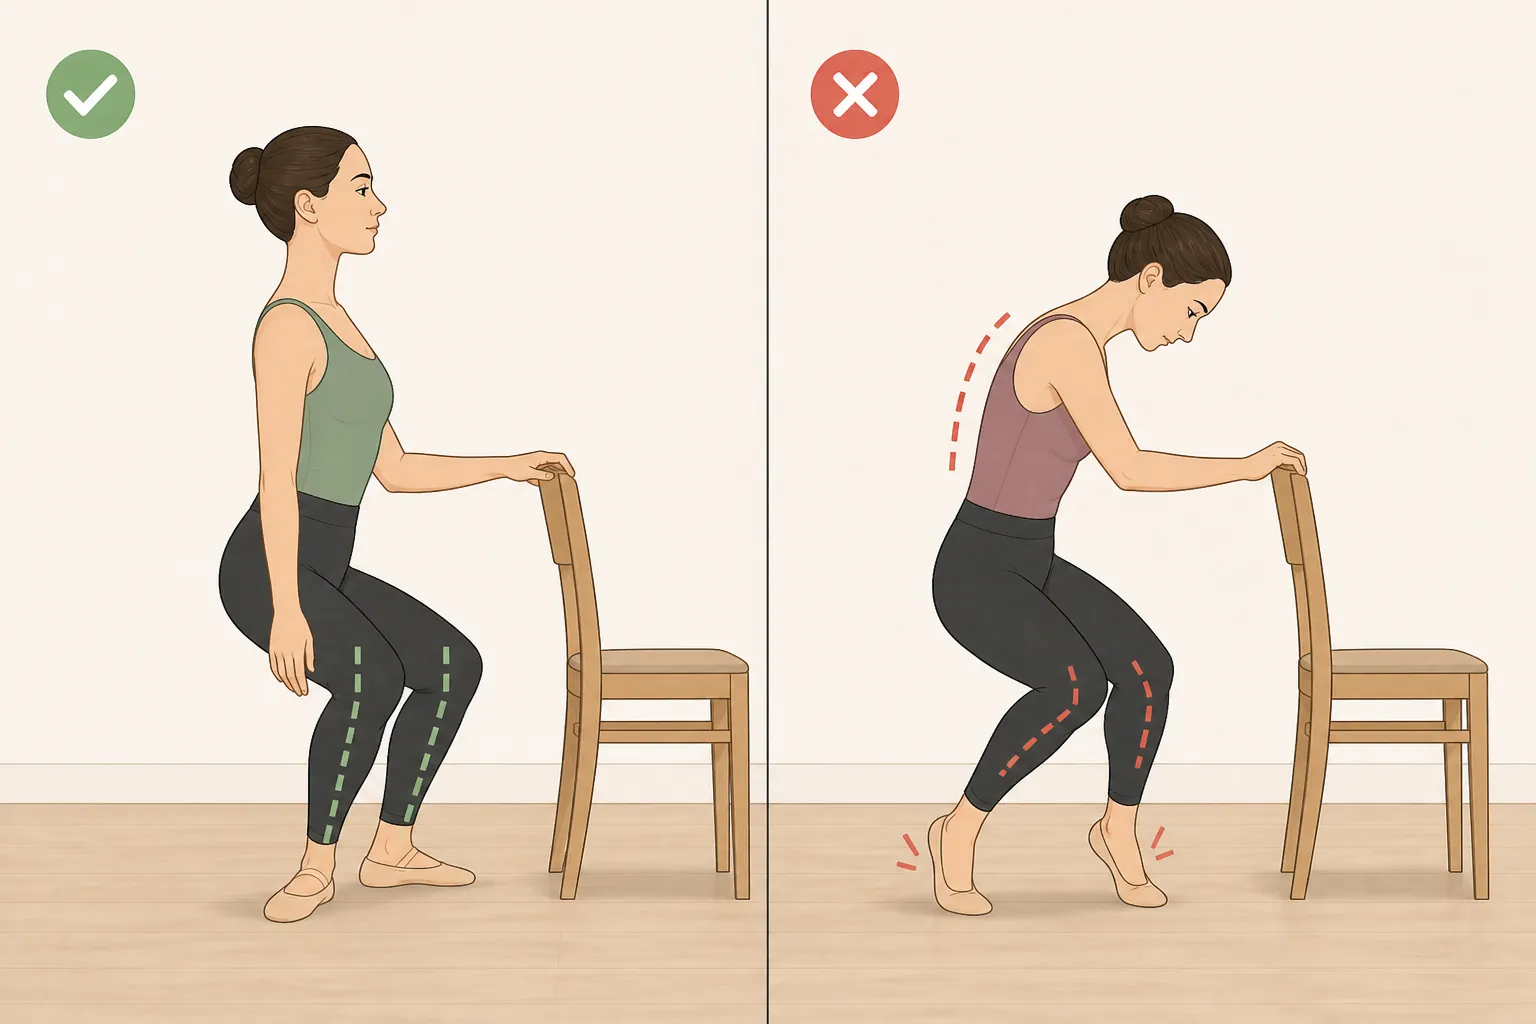
1. Plié: the knee bend that teaches everything else
A plié is a bend of the knees. For beginners at home, use a demi-plié: a small bend where the heels stay on the floor. Bigger is not better here. Cleaner is better.
How to do it
- Stand beside the chair with fingertips resting lightly on it.
- Set your feet parallel or in a small first position.
- Bend both knees, sending them in the same direction as your toes.
- Keep both heels on the floor and your spine tall.
- Press through the whole foot to straighten the legs again without snapping the knees back.
What you are watching for: the knees should track over the toes, not collapse toward each other. If you look down and see your kneecaps pointing inward while your toes point outward, reduce the turnout or return to parallel. A parallel plié done well is more useful than a turned-out plié your knees cannot support.
Keep the pelvis quiet. Many beginners tuck the tailbone under as they bend, which rounds the lower back and makes the movement feel cramped. Let the knees bend; do not turn the plié into a squat by pushing the hips far behind you. The torso stays lifted, as if the crown of the head is still moving upward while the knees bend.
Common fixes
- If your heels lift, make the bend smaller.
- If your knees roll inward, narrow your turnout or use parallel feet.
- If your shoulders creep up, soften your grip on the chair.
- If the movement causes sharp pain, stop rather than trying to stretch through it.
2. Relevé and elevé: rising without wobbling through your ankles
Both relevé and elevé bring you onto the balls of the feet. In many beginner settings, the words get used loosely, but the practical difference is simple: an elevé rises from straight legs, while a relevé rises through or from a plié. You can learn the foot and ankle action with either version.
How to do it
- Stand tall with feet parallel or in a small first position.
- Keep the knees long but not locked.
- Press through the big-toe mound, little-toe mound, and center of the ball of the foot as the heels lift.
- Pause briefly at the top without gripping the chair.
- Lower the heels slowly, keeping the ankles from rolling outward or inward.
The lowering matters as much as the lift. Dropping the heels teaches almost nothing except how to make noise. Try to arrive on the floor silently. If the ankles wobble, keep both feet parallel and rise only halfway until the path feels steadier.
For a simple relevé, bend into a small plié first, then rise as you straighten the legs. Keep the knees tracking over the toes during the bend and the rise. This is where beginners often lose the alignment they had in the plain plié, so slow the transition down.
3. Tendu: slide, point, and return with control
A tendu is a stretched leg and pointed foot that stay in contact with the floor. It looks small, which is why beginners sometimes rush it. Done carefully, it teaches the foot how to move from heel to ball to toes, then reverse the path on the way back in.
How to do it
- Stand beside the chair, with your weight mostly on the standing leg.
- Slide the working foot forward along the floor.
- Let the heel lift, then the ball of the foot, until only the toes touch the floor.
- Keep both hips facing forward and the standing knee softly lifted, not locked back.
- Return by brushing the toes, ball of the foot, and heel back to the starting position.
Start tendu to the front. Once that feels organized, try it to the side. To the back can wait if it makes you arch your lower back or twist your hips. The working leg should feel long, but the rest of the body should not lean away from it.
A useful check: if the chair suddenly has to hold more of your weight as the foot slides out, the leg has gone too far. Bring it closer and keep your body centered over the standing foot.
4. Dégagé: the same pathway, just off the floor
Dégagé means the working foot disengages from the floor. Think of it as a tendu with a tiny lift, not as a kick. The height can be very low; the control is the point.
How to do it
- Begin exactly as you did for tendu.
- Slide the foot out through the floor until it points.
- Let the pointed foot leave the floor slightly.
- Touch the toes back to the floor in the same line.
- Brush the foot back in without shifting the hips.
The common mistake is throwing the leg and hoping the chair catches the rest of you. Keep the lift low enough that your ribs stay over your hips. If you hear a thud when the foot returns, slow down and make the dégagé smaller.
Dégagé is also where foot shape can get tense. Point the foot by lengthening through the ankle and toes, not by curling the toes under. Curled toes make the movement look pointed while adding unnecessary gripping.
5. Rond de jambe: draw the circle without twisting your body
Rond de jambe means circle of the leg. At home, begin with the toe on the floor. A floor-based circle is enough to teach the coordination without asking your hip or balance for more than they can give.
How to do it
- Stand tall beside the chair and tendu the working foot to the front.
- Keeping the toes on the floor, draw a smooth arc from front to side.
- If your hips stay steady, continue the arc slightly toward the back.
- Bring the foot back through the same controlled path.
- Repeat slowly before changing legs.
Do not chase a large circle. The beginner goal is to keep the standing side quiet while the working leg moves. If your hip hikes, your waist shortens on one side, or your chest turns with the leg, reduce the circle until the torso can stay still. Keep the chair close here, because the standing leg often works harder than the moving leg admits.
Why these basics are worth taking seriously
Beginner ballet can look gentle from the outside because it is quiet and low impact. That does not make it empty. Pliés ask the thighs and hips to control bending and straightening. Relevés ask the feet, calves, and ankles to manage balance. Tendus and dégagés teach directional control. Rond de jambe adds hip coordination without jumping.
A small 2024 study of classical ballet for women over 50 gives a cautious reason to treat scaled ballet training as real training. In the study, 29 women enrolled and 22 completed the program; the completers represented 83% of those enrolled. Among completers, adherence was 95%, no adverse events were reported, and lower-limb strength measures improved, including an 8% faster five-times sit-to-stand result and improved forward leap distance.[4]
Those findings should stay in their lane. The study was small, single-arm, female-only, and focused on women over 50. Balance improved in only one of several test conditions, and the gains were statistically significant but not clinically significant.[4] So the fair takeaway is not that five chair-supported moves guarantee transformation. It is that beginner-level classical ballet can be structured, tolerable, and useful enough to deserve more respect than just follow the video.
Turn the five moves into a 20-minute starter session
A full beginner class may be much longer. In the Letton et al. study, the 60-minute classical ballet class used about 5 minutes of warm-up, 25 minutes of barre, 25 minutes of center work, and 5 minutes of cool-down.[4] At home, you can scale that structure down: warm up, practice supported basics, then cool down before fatigue starts stealing your alignment.
A 20- to 30-minute at-home ballet conditioning template performed three times per week is a reasonable reference point for beginners using body weight only.[5] If you are brand new, start with the 20-minute version below and keep the first week deliberately modest.
| Time | What to do | Form priority |
|---|---|---|
| 0:00–3:00 | Warm up with easy marching in place, shoulder rolls, ankle circles, and 4–6 tiny pliés in parallel. | Let the body get warm before asking for turnout or balance. |
| 3:00–6:00 | Plié: do 2 slow sets of 8 in parallel or small first position. | Knees track over toes; heels stay down; spine stays tall. |
| 6:00–9:00 | Elevé or relevé: do 2 sets of 8 slow rises and lowers. | Use fingertip chair support; lower the heels quietly. |
| 9:00–12:30 | Tendu: do 8 to the front and 8 to the side on each leg. | Slide through the foot; do not lean into the chair. |
| 12:30–15:30 | Dégagé: do 8 low lifts to the front and 8 to the side on each leg. | Keep the lift small and the landing silent. |
| 15:30–18:00 | Rond de jambe: do 4 slow arcs each direction on each leg, keeping the toe on the floor. | Steady hips matter more than circle size. |
| 18:00–20:00 | Cool down with calf stretches, gentle hamstring stretches, and relaxed breathing. | Finish before your form becomes sloppy. |
Use counts as a guide, not a command. If eight repetitions make you rush, do four. If changing legs confuses you, practice one direction at a time. The session is successful when you can repeat the movements with recognizable alignment, not when you squeeze in the most ballet vocabulary per minute.
Small-space safety checks before each practice
- Clear enough floor that your working foot can slide front and side without catching a rug edge.
- Use a chair that does not wobble or roll.
- Practice in socks only if the floor is not slippery; bare feet or supportive flat shoes may be safer for some floors.
- Keep turnout small enough that knees and toes point the same way.
- Stop for sharp pain, pinching, dizziness, or any balance problem that makes you grab the chair.
If the chair-supported part is the main thing you need right now, the fall-safety habits in this chair-supported home workout guide are useful even if you are not doing HIIT. If space is the bigger constraint, it may also help to compare your setup with a 2x2-meter no-equipment workout so you can see how little room controlled body-weight training can actually require.
How often to practice before trying a full class
Try two or three nonconsecutive 20-minute sessions per week for the first few weeks. Nonconsecutive days give your calves, feet, and hips time to adapt, especially if relevés are new to you. Stay with body weight and chair support until the five moves feel familiar enough that you no longer have to pause before every repetition.
When you are ready for a follow-along routine, use this mechanics guide as your reference point and move into Your First Ballet Workout at Home Needs No Equipment. The workout will make more sense once plié, relevé, tendu, dégagé, and rond de jambe are no longer mysterious words, but repeatable actions you can check in your own body.
References
- 6 Basic Ballet Exercises to Practice at Home — MasterClass
- At-Home Barre Workout with Ballet-Inspired Exercises — Shape
- Barre Workouts: Health Benefits, How to Get Started — Everyday Health
- Classical Ballet for Women Aged Over 50 Years — Research Quarterly for Exercise and Sport — 2024
- Ballet Conditioning at Home: No Equipment Needed — Ballet With Isabella
What a small equipment investment adds
We don't have a build tagged to this exact tier yet. Browse all builds.
How often should you repeat this?
See our recovery and rest reference for citation-anchored rest-interval guidance.
Spot something off?
Tell us if a movement, tier assumption, or duration didn't match your experience.