
A Beginner Breakdance Workout You Can Do at Home
A complete beginner breakdance workout for small apartments: one zero-equipment session built from toprock, the 6-step, basic freezes, and conditioning, sequenced in an injury-aware order with floor and noise notes. Includes a first-month progression and frequency guidance tied to CDC adult activity targets.
- Equipment tier required
- none
- Duration
- 25-35 min
- Difficulty
- beginner
- Target area
- full body
- Space footprint needed
- 6 x 6 feet
- Noise level
- quiet-friendly
A breakdance workout at home for beginners needs more than an empty-looking patch of floor. Before moving, shift tables, lamps, cords, pet toys, and anything else that could catch a hand or foot. Check the floor from hand level: grit, raised transitions, loose rugs, and hard furniture corners matter once the workout drops from standing steps to supported footwork.
As a FitAtHome practical estimate, aim for a cleared area of roughly 6 by 6 feet. You may be able to practice individual steps in less space, but the extra margin reduces the temptation to shorten the 6-step around a couch or plant. Wear athletic shoes with enough traction to stay controlled without pinning the feet to the floor. Open hardwood, linoleum, or tile—and cardboard placed over a hard surface—are commonly suggested practice options, but the surface still needs to be clean, level, and predictable.[1]
Noise is movement-specific. Toprock is usually manageable when steps stay light. A controlled 6-step produces some hand and foot contact but should not sound like repeated drops. Freeze entries can be quiet when you lower into them; failed attempts become loud when a knee, hip, or foot lands abruptly. If impact is traveling downstairs, reduce speed, remove hops, and practice positions separately rather than trying to bury the noise under a soft, unstable rug.
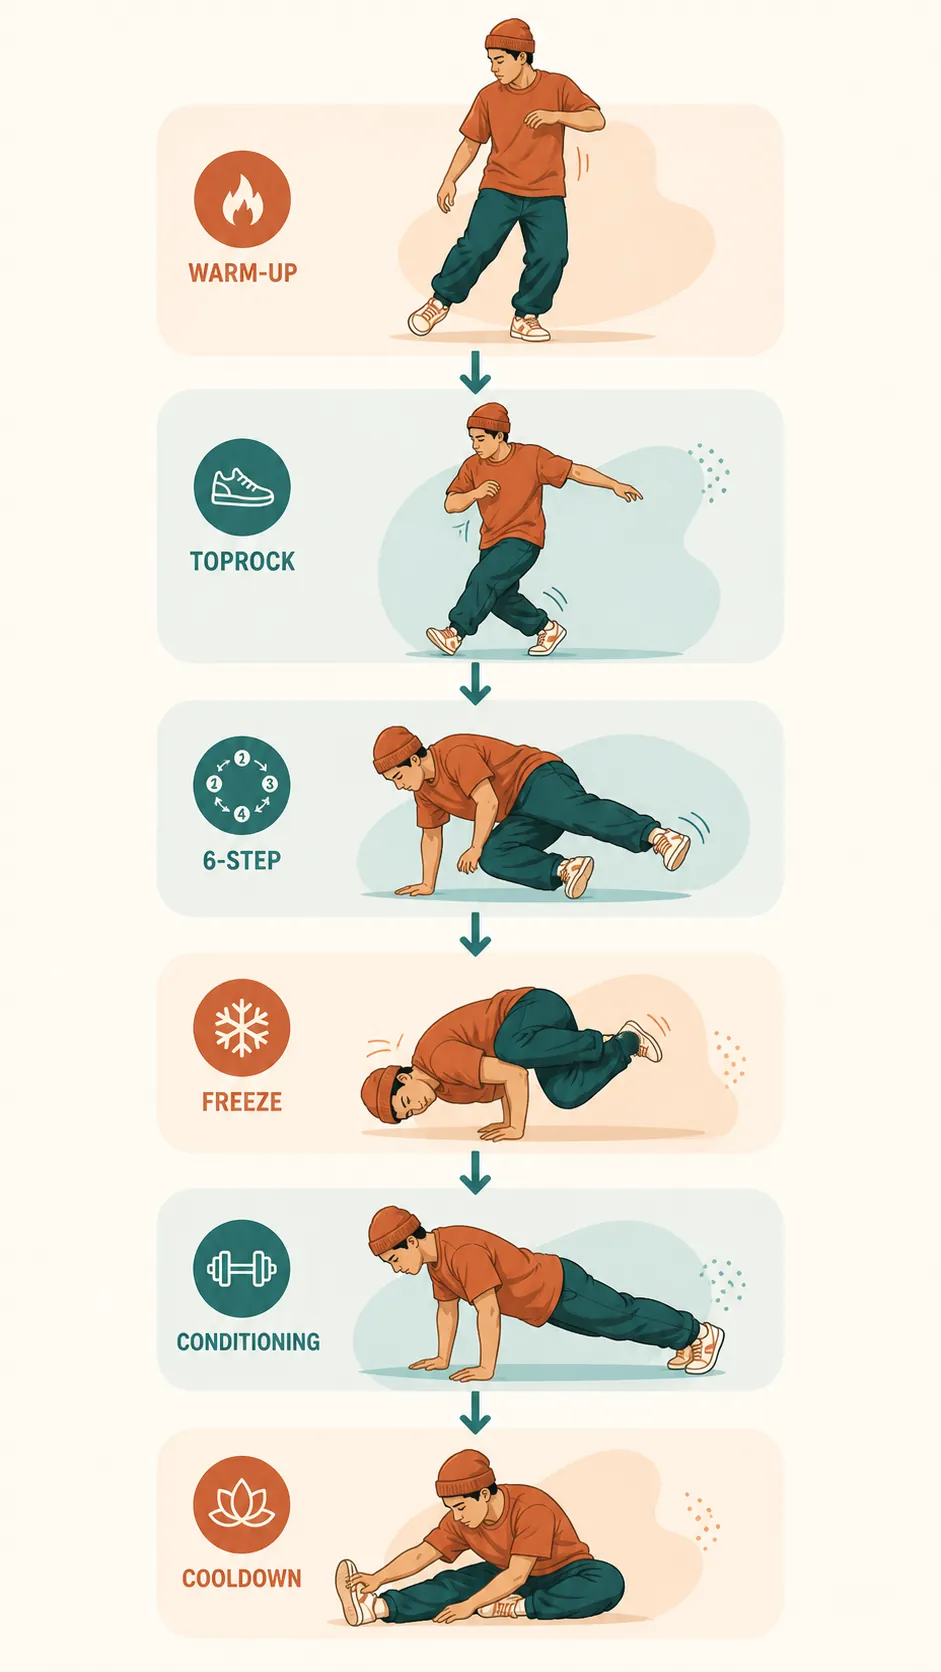
The complete standing-to-floor session
Breaking is commonly described through toprock, footwork, freezes, and power moves, with the 6-step serving as foundational floor footwork.[2] This workout uses the first three elements and leaves power moves out. Headspins, windmills, and backflips do not belong in a first-month home session—not as a finisher, not as a quick experiment, and not because a tutorial makes the entry look easy.
The following duration is FitAtHome’s practical session template rather than a research-derived prescription. Allow about 25 to 35 minutes, extending rest instead of rushing a floor transition.
| Block | Practical time | What to do |
|---|---|---|
| Warm-up | 5–7 minutes | Marching, joint circles, squats, low lunges, hand preparation, and slow floor transitions |
| Toprock | 5–7 minutes | Crossover steps and the Indian step, first separately and then in short combinations |
| 6-step practice | 7–10 minutes | Positions, half-sequences, and controlled full rounds in both directions |
| Freeze practice | 4–6 minutes | Baby-freeze setup first; optional chair-freeze setup only after stable, pain-free support |
| Conditioning | 3–5 minutes | Incline, knee, or full push-ups plus gentle wrist work |
| Cooldown | 3–5 minutes | Easy walking, forearm release, shoulder movement, and comfortable lower-body mobility |
Warm up before your hands take your weight
Begin with easy marching and side steps, then make comfortable circles at the ankles, knees, hips, shoulders, and wrists. Add shallow squats and alternating low lunges. The goal is to arrive at the floor gradually, not to stretch aggressively.
- Place the palms down with fingers spread and the middle fingers pointing approximately forward.
- Keep the heel of each hand in contact while gently shifting the shoulders forward, back, and side to side.
- Turn the hands slightly outward if straight-ahead placement feels cramped, but do not twist into pain.
- Practice stepping back to a high plank or supported crouch, then return to standing under control.
A mild sense of work in the forearms is different from a sharp or pinching sensation in the wrist. Stop loading the hand if discomfort becomes sharp, local, or progressively worse. Apply the same rule to the knees and shoulders throughout the session.
Build rhythm with crossover steps and the Indian step
Toprock is the standing portion of the workout. Keep the torso tall enough to breathe freely, let the arms balance the steps, and begin at a pace where the feet land quietly.
Crossover step: Step one foot diagonally across the body, place it lightly, return to the starting stance, and repeat on the other side. Avoid wrenching the planted knee to make the step look larger. The rhythm should survive even when the range is small.
Indian step: Step one foot forward and slightly across, open the stance as you recover, then change sides. Keep the bounce shallow in an apartment. If the movement becomes a stomp, slow down and rebuild it without the bounce.
Practice each pattern alone, then alternate them in a short combination—for example, two crossover steps followed by two Indian steps. This example is only a training format; it is not a required piece of choreography. Work until breathing rises while the feet remain organized, resting when coordination starts to dissolve.
Move from standing to the 6-step without collapsing
The first difficult transition is not the 6-step itself. It is getting from upright dancing to the floor without dropping onto the hands or twisting through a planted knee. End the toprock with both feet under you, bend through the hips and knees, place one hand and then the other, and step back into a supported crouch. Reverse that route when standing again.
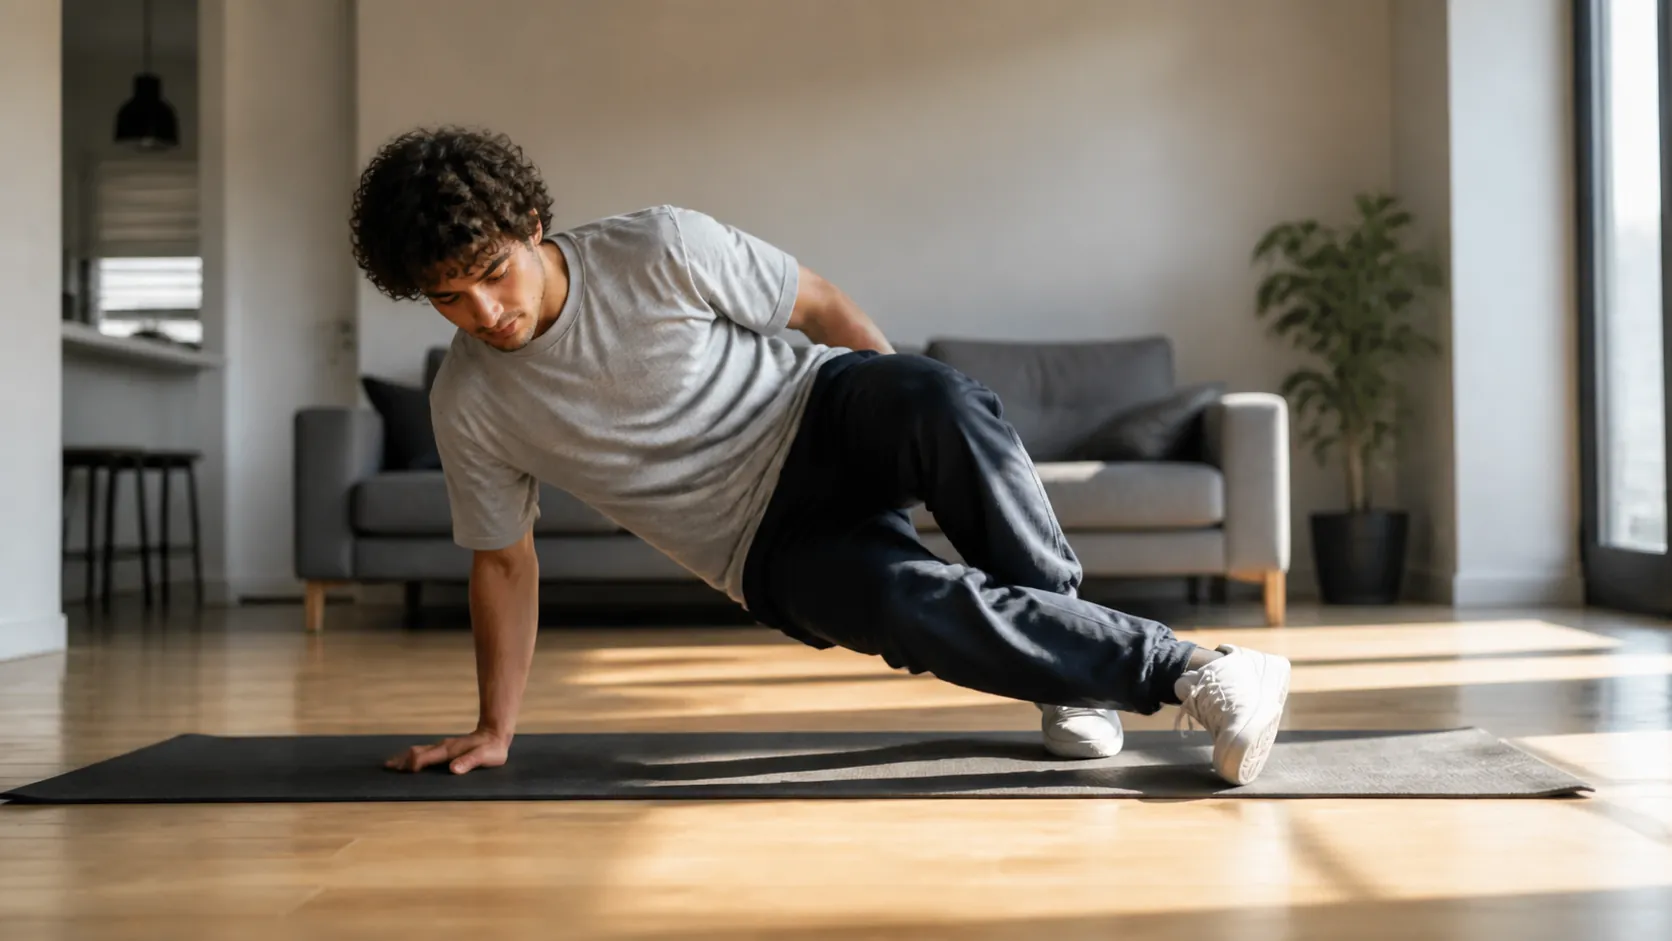
Learn the 6-step as positions around a stable center:
- Start in a compact bear-like stance with hands down, hips low, and knees off the floor if comfortable.
- Thread one leg underneath the body while the opposite hand provides support.
- Open into a brief side-facing position rather than forcing the feet to travel far.
- Bring the other leg around toward the front.
- Continue the circle by replacing one support point at a time.
- Return to the starting stance before beginning another round.
The sequence matters more than reproducing a large, fast circle. Begin with one or two steps, pause, and check the hands. Keep the fingers spread, avoid letting the shoulders sink toward the ears, and move a foot only after the remaining support points feel secure. Then practice three-step halves before connecting a complete round.
Use both directions, even if one side initially feels clumsy. Rest by kneeling comfortably or standing up; do not remain perched on loaded wrists between attempts. If a knee repeatedly hits the floor, reduce the travel and practice the individual positions. Speed is added only after the pathway can be repeated without scrambling.
Freeze practice begins with the entry, not the final pose
A freeze changes the task from traveling footwork to deliberate weight-bearing. That transition deserves more caution than the dramatic final shape suggests. For the baby freeze, start close to the floor, position the supporting elbow against the torso, set the hands before shifting weight, and keep the head available as a light support point if needed. Transfer weight gradually; do not kick the legs up.
- First attempt: find the hand and elbow position while both feet remain down.
- Next: shift enough weight to make one foot light, then put it back.
- Only then: lift both feet briefly if the wrist, shoulder, and neck remain comfortable.
- Exit by placing a foot down before removing a hand.
A chair-freeze setup places more emphasis on side support and shoulder control. Treat it as optional. Practice only the hand, elbow, and hip relationship while the feet stay on the floor until the baby-freeze setup is repeatable. Skip it entirely if the supporting wrist folds uncomfortably, the shoulder feels compressed, or you cannot lower out of the position quietly.
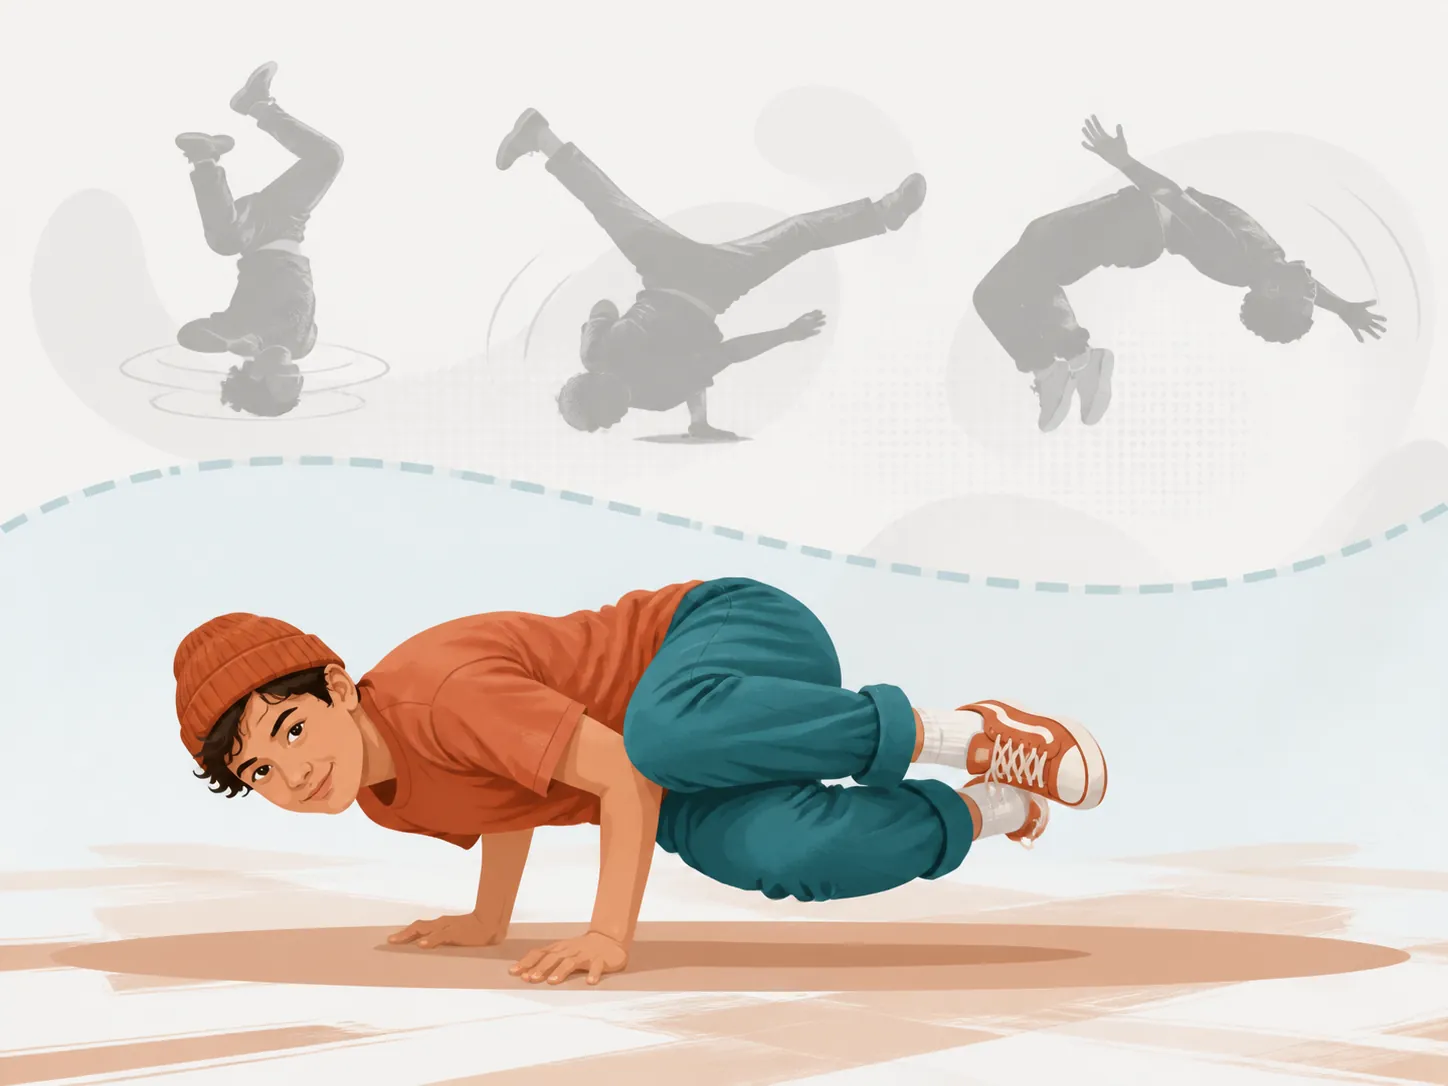
This conservative order reflects where amateur breakers actually report problems. One amateur-focused study recorded 4.02 injuries per 1,000 training hours; knees accounted for 23.4% of injuries and wrists for 15.3%.[3] A separate 2026 study reported a 94.84% injury prevalence in its sample, with the knee, shoulder, and wrist among the most commonly affected areas at 63.9%, 60.8%, and 57.7%, respectively.[4] These results use different measures—an injury rate in one study and prevalence in another—so they should not be merged into a single estimate.
A 2026 synthesis of published case reports also identified flips, spins, balancing, landings, and slides among the maneuvers associated with serious cases.[5] Case reports cannot tell us how frequently each maneuver causes injury, but they are sufficient reason not to introduce power moves into a general beginner workout.
Finish with simple pushing strength
Choose one push-up level that leaves the wrists and shoulders comfortable: hands on a stable counter, knees on the floor, or a full push-up from the toes. Complete controlled repetitions, stop before the hips or shoulders sag, rest, and repeat if form remains steady. For more no-equipment options beyond this session, use the no-equipment upper-body workout rather than adding longer freeze holds to tired wrists.
After the final set, shake the hands out and make small, unloaded wrist circles. A gentle palms-together position can be used if it feels comfortable, but pressing deeper is unnecessary. Finish with easy walking until breathing settles, relaxed shoulder circles, and comfortable calf, hip, and forearm movements.
Yes, breaking can be a real workout
The quick changes in level explain why this sequence can challenge both breathing and muscular support. Research on elite breakers found higher peak oxygen uptake than in dancers from other genres, while two-minute breaking sets produced significant blood-lactate responses.[6] That supports breaking as genuinely demanding cardiorespiratory work. It does not predict a beginner’s calorie expenditure, and it does not mean a slow practice session will match an elite set.
For a beginner, intensity comes from repeating clean toprock combinations, moving between standing and the floor, and connecting 6-step rounds with sensible rests. The hands, shoulders, trunk, and legs also perform bodyweight support, especially during footwork and freezes. There is no need to add jumps or dangerous skills to make the session count.
Flooring, pads, and downstairs neighbors
Zero equipment means the routine does not require purchased gear. It does not mean every bare floor is suitable. Thick carpet can catch a turning foot and make hand placement inconsistent. A loose rug can slide. A deeply cushioned exercise mat may buckle under footwork, while a very thin mat may provide little comfort over hard flooring. Test any surface with slow steps and supported positions before completing full rounds.
Knee or elbow pads are optional, and some beginners may prefer them for contact comfort. Do not treat pads as permission to drop harder or as a guarantee against injury. Fit and stability matter: gear that shifts, catches, or changes joint position can interfere with the movement.
For quieter practice, keep toprock low, step rather than hop into transitions, and separate the 6-step into positions. Freeze attempts should start close to the floor. If your apartment cannot accommodate those contacts comfortably, a standing-only toprock session is the better choice that day. The same floor and noise principles appear in the no-equipment apartment BJJ workout, where controlled transitions also matter more than impact.
How to progress through the first month
Two or three sessions per week is FitAtHome’s practical recommendation for this first month, not a frequency established by the breaking studies. Leave recovery time between sessions when the wrists, shoulders, or knees feel unusually tired. Each workout can use the same standing-to-floor order while the quality of the movement changes.
| Practice period | Main emphasis | Advance when |
|---|---|---|
| Early sessions | Quiet toprock, controlled floor entry, individual 6-step positions, baby-freeze setup with feet down | You can place hands and feet without dropping, sliding, or holding your breath |
| Middle sessions | Short toprock combinations, half and full 6-step rounds, brief baby-freeze weight shifts | You can repeat both directions with stable wrists and knees |
| Later sessions | Longer continuous combinations, smoother standing-to-floor transitions, brief controlled baby freezes | The sequence remains organized as breathing rises |
| End-of-month check | Connect toprock, a controlled floor entry, one or more 6-step rounds, and a deliberate freeze setup | Every entry and exit is quiet, controlled, and pain-free |
Progress can mean fewer pauses, a cleaner direction change, or better tolerance at the hands. It does not have to mean adding another move. If technique worsens when you connect the blocks, shorten the combination and restore the last stable version.
The CDC recommends that adults accumulate at least 150 minutes of moderate-intensity aerobic activity each week and perform muscle-strengthening activity on two days.[7] Two or three breaking sessions can contribute to those totals, depending on their duration and actual intensity, but this routine does not automatically satisfy either target. Skill practice includes pauses, and a few freeze attempts do not necessarily provide enough strengthening volume for every major muscle group.
Keep headspins, windmills, backflips, and other power moves outside the first-month plan. Advance only when the foundational sequence—from light toprock through the 6-step and basic freeze entry—remains controlled and pain-free.
References
- 6 Ways to Breakdance — wikiHow
- The Language of the Streets: The Official Breaking Terminology Guide for the Global Stage — World DanceSport Federation
- Injuries in breakdance — The Journal of Sports Medicine and Physical Fitness, 2015
- Prevalence and characteristics of injuries in breaking athletes — PubMed, 2026
- Breaking injuries: a synthesis of published case reports — Journal of Dance Medicine & Science, 2026
- Cardiorespiratory, anthropometric, and performance characteristics of elite breakers — Medical Problems of Performing Artists, 2018
- Adult Activity: An Overview — Centers for Disease Control and Prevention
What a small equipment investment adds
We don't have a build tagged to this exact tier yet. Browse all builds.
How often should you repeat this?
See our recovery and rest reference for citation-anchored rest-interval guidance.
Spot something off?
Tell us if a movement, tier assumption, or duration didn't match your experience.