
Train Like Sylvia Fowles with These Space-Efficient Footwork Drills
Learn the footwork drills that helped Sylvia Fowles become the WNBA's all-time leading rebounder and a 4x Defensive Player of the Year—all doable in a 5x5 ft space with just a basketball, no hoop required.
Before you start
- Equipment required
- basketball
- Assumes build tier
- No specific tier required
- Duration
- 15 minutes
- Difficulty
- beginner
You have a basketball, a 5x5 ft patch of floor, and no hoop. Maybe the couch is two steps away. Maybe someone downstairs can hear every hard dribble. Shooting still matters, of course, but in this room it is not the best use of the space. The best small-space basketball work is footwork: stance, pivots, slides, balance, recovery, and the habit of getting your body to the right spot before the other player does.
That is why Sylvia Fowles is such a useful model for home training, as long as we are honest about what we mean. These are not official Sylvia Fowles drills. They are space-efficient footwork drills inspired by the kind of positioning and defensive thinking that made her the WNBA’s all-time leading rebounder, with 4,006 career rebounds, and a four-time WNBA Defensive Player of the Year honoree.[1] If you came looking for sylvia fowles hall of fame basketball training tips, the useful lesson is not that you can copy a pro center’s whole program in an apartment. It is that the least glamorous work transfers.
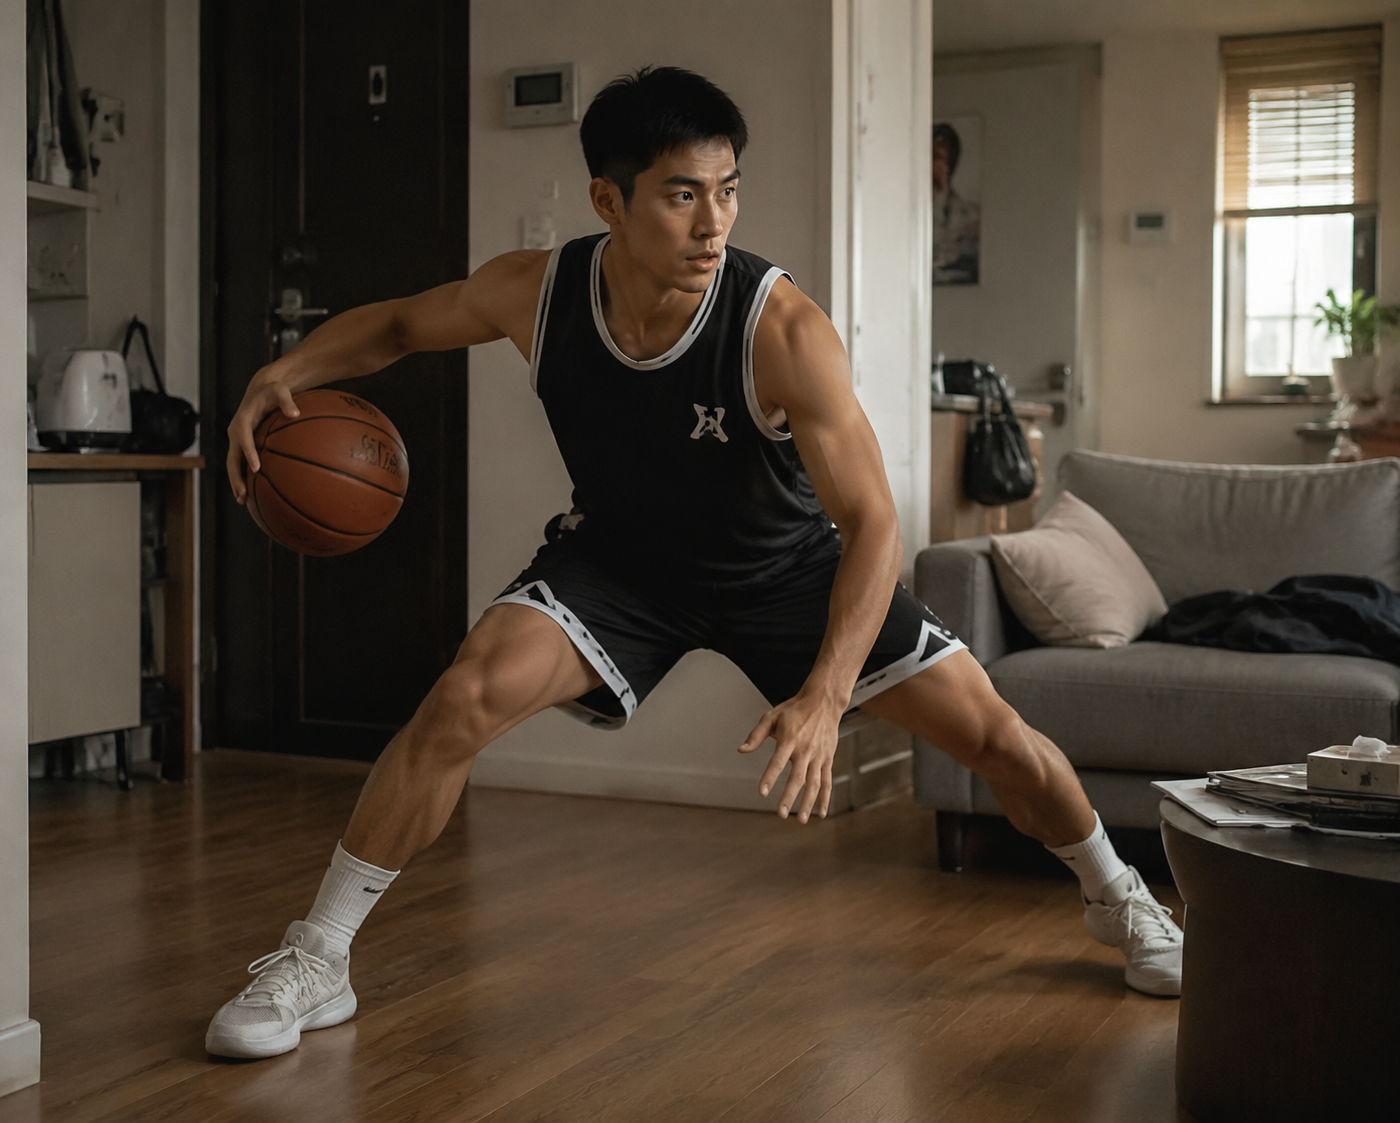
Fowles’ own basketball origin story makes the point better than a motivational poster would. A WNBA profile describes how, as a child playing against her older brothers, she was allowed to play only defense, a detail her collegiate coach Bob Starkey also connected to the anticipation and positioning that later defined her game.[2][3] That matters for the player in a hallway or bedroom because defense is the part of basketball that can be rehearsed before you have a clean court, a private hoop, or a ride to the gym.
Fowles once described her mindset this way: “I strategize everything to the tee. Whatever you're going to do, I'm going to try to beat you to it.”[2] That is the hinge for this routine. A slide is not apartment cardio. A pivot is not busywork. A stance hold is not punishment. Each rep is a tiny rehearsal for beating someone to a spot.
The Setup: One Ball, One Small Square
Use a 5x5 ft area if you have it. If you do not want tape on the floor, use the edges of a rug, floorboards, or imaginary boundaries. The rule is simple: the drill only counts if you stay inside the square. No cones, no weights, no hoop, no chair unless you already have one nearby and can use it safely. A basketball is enough.
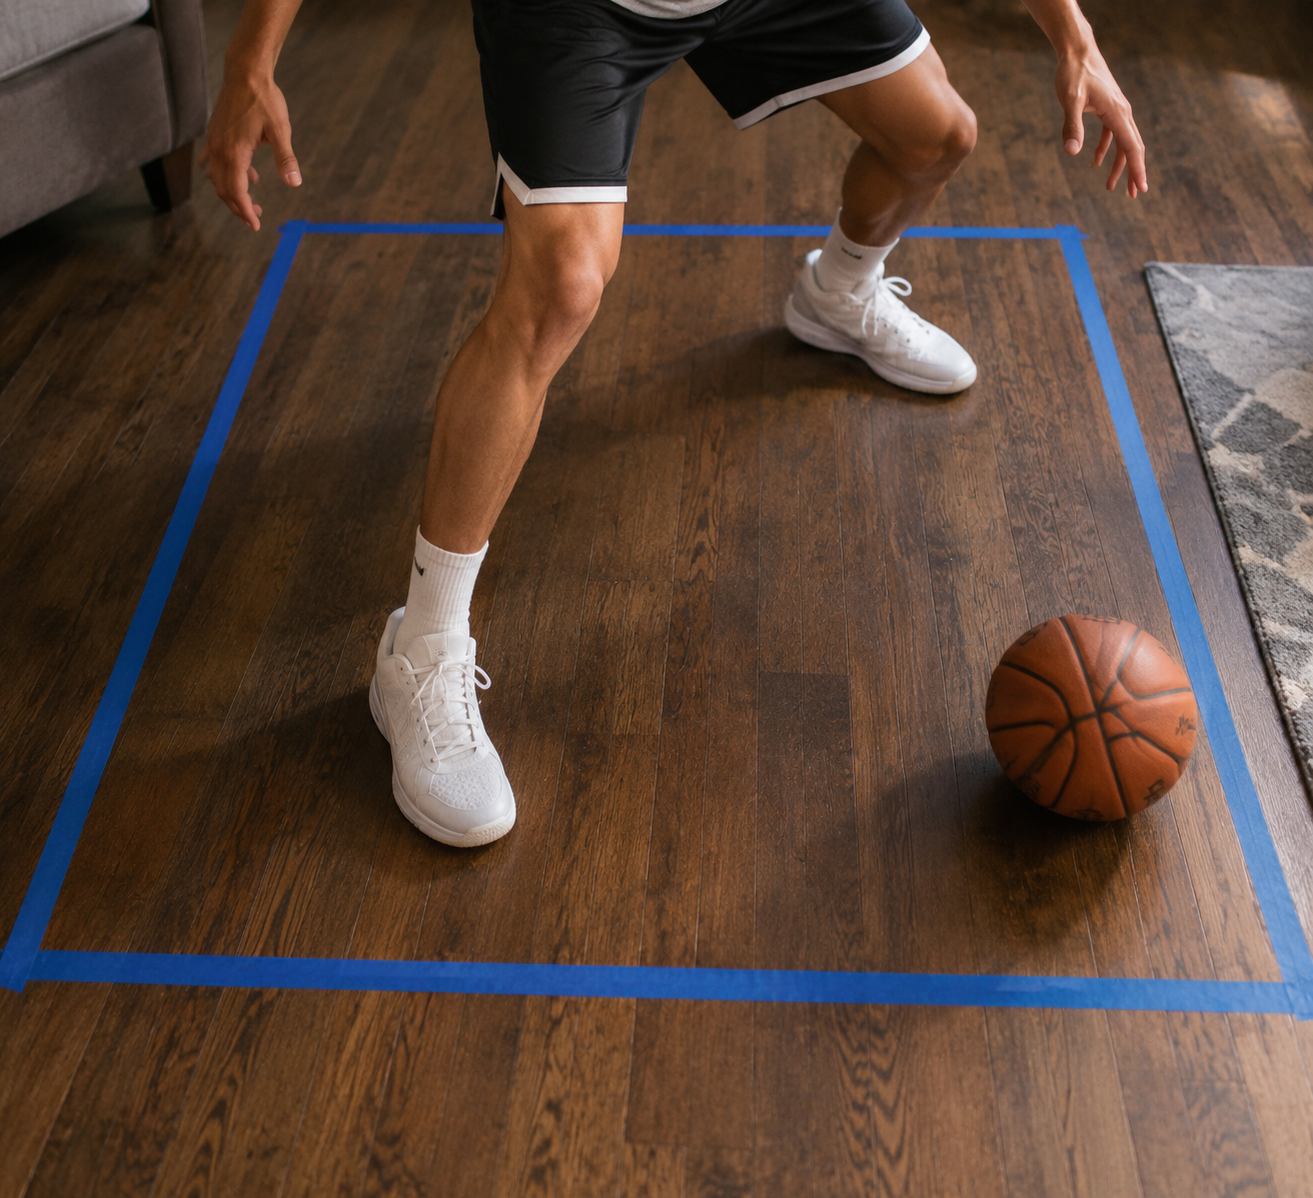
Train three times per week for 15 minutes. That is enough structure to repeat the movement patterns without turning the room into a conditioning test. The progression below adapts small-space basketball drills described by PlayGloba, Elite Hoops, and Dr. Dish, then narrows them to a basketball-only footprint that fits a small home.[4][5][6]
| Level | Main Job | Drills | Time |
|---|---|---|---|
| Level 1 | Build the base | Defensive stance holds, forward/reverse pivots, imaginary jump rope | About 15 minutes |
| Level 2 | Move without leaking out of the square | Defensive slides with floor touch, closeout footwork, rip-through pivots | About 15 minutes |
| Level 3 | Add game pressure carefully | Burpee-to-slide, closeout + recovery slide, one-foot pivot + imaginary pass | About 15 minutes |
Level 1: Build a Base That Does Not Collapse
Start here even if you already play. Most players do not need a harder drill first. They need a stance they can hold, feet that can pivot without hopping, and knees that stay lined up when they get tired. This level barely moves, which is exactly why it belongs in a small-space routine.
Defensive Stance Holds
Hold the basketball at your chest. Set your feet a little wider than your shoulders. Sit your hips back as if you are guarding someone who wants to drive through your top foot. Keep your heels light, but do not rise onto your toes. Hold for 60 seconds, rest, then repeat.
- Feel your weight through the balls of both feet, not dumped into one hip.
- Keep your chest up enough to see the room, not folded toward the floor.
- Let your knees track over your toes instead of caving inward.
- Stop the set if your lower back takes over for your legs.
A good stance should feel boring for the first 15 seconds and revealing by the last 15. If your feet start widening every time the hold gets difficult, mark your starting foot positions and keep returning to them. The goal is not to look low for a photo. The goal is to stay useful: low enough to move, tall enough to see, balanced enough to react.
Forward and Reverse Pivots
Stand in the middle of the square with the ball tight to your body. Choose the left foot as your pivot foot. Step and turn with the right foot for 20 forward pivots, then 20 reverse pivots. Switch feet. Move slowly enough that the pivot foot stays planted and the ball stays protected.
The pivot foot is the honesty test. If it slides, spins loose, or lifts, the rep did not hold up. That is not a failure; that is the exact mistake this drill is supposed to expose before a defender exposes it in a game. Keep the ball close to your ribs on the turn, then briefly show it outside your hip as if you are creating a passing angle.
For younger players, the most useful cue is “turn your belly button.” If only the foot moves, the body stays trapped. If the chest and hips rotate together, the player starts to understand how a post seal, outlet pivot, rip-through, or escape dribble begins before the ball ever leaves the hands.
Imaginary Jump Rope
Set the ball down safely inside the square. Bounce lightly for 30 seconds as if turning a rope. Keep the jumps low and quiet. Rest, then repeat for a few rounds. This is not a vertical-jump contest. It is ankle rhythm, landing control, and foot stiffness without the noise of hard dribbling.
Apartment rule: if the landing would annoy a downstairs neighbor, it is too high. A player who can land quietly usually has better control than a player trying to make the workout look harder.
Level 2: Move Inside the Box Without Drifting
Level 2 adds lateral movement, but the square still decides whether the drill is good. In a gym, a player can hide sloppy feet by covering more ground. In a small room, there is nowhere to hide. If one slide takes you into the coffee table, your stance was too tall, your first step was too long, or your recovery foot crossed when it should have pushed.
Defensive Slides With Floor Touch
Begin in stance with the ball held tight. Slide three short steps to the right, touch the floor with your outside hand if you can do it without collapsing your chest, then slide three short steps left. That is one rep. Complete 10 controlled reps.
- Push first with the inside foot instead of reaching with the outside foot.
- Keep the feet from clicking together between slides.
- Touch the floor only if the back stays flat and the eyes can come back up quickly.
- Make each slide small enough that the third step still fits inside the square.
This is where Fowles’ rebounding record becomes more than a number. Rebounding is not just who jumps highest after the ball hits the rim. It is who holds ground, feels contact, turns first, and claims space before the shot is even finished. A short slide that ends balanced is more valuable here than a dramatic lunge that would leave you out of the play.
Closeout Footwork Without a Cone
Pick a point on the wall, a cabinet handle, or the far corner of the rug. Start at the back edge of your square with the ball at your chest. Take two quick approach steps toward the target, chop your feet to slow down, raise one hand as if taking away a shot, then drop back into stance. You do not need a cone or a hoop. You need a target and a brake.
The brake is the skill. A closeout that cannot stop is just a run-by. Keep the last steps short, hips down, and hand high without letting the shoulders pull you upright. If the player keeps flying through the front of the square, cut the approach to one step until the stop improves.
Rip-Through Pivots
Hold the ball on one hip. Pivot, rip the ball across your body low and tight, and land with the ball protected on the opposite hip. Reset. Do 10 each direction, then switch pivot feet. Keep the ball under the imaginary defender’s arm, not up where it can be slapped away.
This drill helps guards and wings too. A small player uses the same foot discipline when escaping pressure that a post player uses to seal, reverse pivot, or pass out of a double team. The body has to turn before the ball gets exposed.
Level 3: Add Pressure Without Turning It Into Theater
Level 3 should feel sharper, not wilder. Game simulation in a living room can get silly fast if every rep becomes a fake buzzer-beater against the couch. Keep the same rule from the earlier levels: finish balanced, inside the square, ready for the next action.
Burpee-to-Slide Combo
Set the ball to the side where it will not roll under your hands. Do one controlled burpee or, for a quieter version, step back to a plank and step forward. Stand into defensive stance, then slide two steps right and two steps left. Complete only as many clean reps as you can keep quiet and controlled.
This drill is useful only if the transition is clean. The moment the player pops up tall, lands loud, or starts crossing feet to survive the slide, the conditioning is stealing from the basketball. Cut the reps before that happens.
Closeout + Recovery Slide
Use the same wall or rug target from Level 2. Close out with two short steps, chop the feet, then imagine the ball handler driving past your top foot. Open the hip and slide back toward the middle of the square. Reset and alternate sides.
The important detail is the hip turn. Players often try to recover by reaching with an arm. That is late. The better habit is to open the hip, push from the floor, and get the chest back in front of the drive path.
One-Foot Pivot + Imaginary Pass
Choose a pivot foot. Hold the ball strong. Pivot once to create space, snap an imaginary pass to a safe target, then recover the ball back to your chest. The pass can be a chest pass motion, bounce-pass motion, or overhead outlet motion, but the feet decide whether the rep counts.
This is a good place to bring back Fowles’ “beat you to it” idea. The pass is not the whole skill. The skill is reading where pressure would come from and getting the body turned before the defender traps the ball.
Where Strength Fits, and Where It Does Not
Strength matters in basketball, especially for rebounding and holding position. But for this routine, strength work should support the footwork, not replace it. A report on Minnesota Lynx strength coach Andrea Hayden’s game-day programming describes the use of isometric holds and eccentric control in current Lynx training, which lines up with the bodyweight demands of stance holds, slow pivots, and controlled landings.[7] That does not mean these were Fowles’ personal drills or her era-specific program. It means the qualities are familiar in serious basketball training: hold position, control the lowering phase, and do not let speed pull the body out of shape.
For home use, that support is simple. Hold the stance without rising. Lower into the floor touch without dropping the chest. Land from the imaginary rope quietly. Stop the closeout before your weight spills forward. Those are strength expressions a parent can watch without needing a stopwatch app, a subscription, or a garage full of gear.
How to Know It Is Transferring
A small-space routine should earn its place by changing what happens in games and practices. You do not need a lab test. Look for basketball signs.
- You recover from a closeout without crossing your feet.
- You pivot out of pressure without lifting the pivot foot.
- You make first contact on box-outs instead of getting walked under the rim.
- You stay low through the second and third defensive slide, not just the first.
- You stop hearing a coach say, “Get in a stance,” every other possession.
Parents can watch for quieter clues. Does the player finish reps in the same square where they started? Do the knees stay lined up when fatigue shows up? Does the ball stay protected during pivots? Does the player reset after a bad rep instead of rushing into another one? That is the useful kind of accountability. No one needs to pretend the living room is a WNBA practice facility.
A 15-Minute Session You Can Start Today
Use this as the basic three-times-weekly version. Stay on Level 1 for at least the first week if the stance or pivots are shaky. Move up only when the feet stay honest.
| Minute | Work |
|---|---|
| 0:00-2:00 | Light imaginary jump rope or quiet ankle bounces |
| 2:00-5:00 | Defensive stance holds, 60 seconds at a time with rest |
| 5:00-8:00 | Forward and reverse pivots, both feet |
| 8:00-11:00 | Defensive slides with floor touch or controlled slides only |
| 11:00-13:00 | Closeout footwork to a wall or floor target |
| 13:00-15:00 | Rip-through pivots or Level 3 recovery work if ready |
If the floor is slippery, wear shoes with grip or slow the work down. If the space is noisy, remove the jumping and use stance holds, pivots, and closeouts. If the player is tired from practice, keep the session at Level 1 and make it clean. The floor does not care how intense the plan looked on paper; it only shows whether the feet are under control.
Training like Sylvia Fowles at home does not mean becoming Sylvia Fowles in a 5x5 ft square. It means taking the part of her dominance that actually fits there: early positioning, balanced pivots, disciplined slides, and the patience to beat someone to a spot before the highlight begins.
References
- Sylvia Fowles, Naismith Basketball Hall of Fame.
- Sylvia Fowles: Strategic and Genuine, WNBA.com.
- Interview: Sylvia Fowles on Minnesota Lynx, Chicago Sky, LSU, Hall of Fame, basketball legacy, greatness and more, Swish Appeal, April 25, 2025.
- Basketball Training at Home Without Equipment, PlayGloba.
- Five Garage Drills for Youth Basketball Players, Elite Hoops.
- Basketball Practice: Maximizing With Limited Space and Baskets, Dr. Dish Basketball.
- WNBA Minnesota Lynx Workout: Inside Andrea Hayden’s Game-Day Lift Routine, BroBible.
Don't have the gear this routine assumes? Find the build that covers it.
Wondering how much rest you need after this? Read our ACSM-cited recovery reference.
Questions about form, substitutions, or a correction? Leave it below.
Comments
Join the discussion with an anonymous comment.