
The band is clipped in, the anchor is wedged in the door, and you are about to lean back for the first rep. This is the exact moment to stop. A resistance band door anchor can be safe at home, but only under specific conditions: hinge-side placement, a solid-core door, a locked door, an anchor that passes a firm tug test, inspected bands and straps, and a stretch length that stays roughly under 2 to 2.5 times the band’s resting length.
Skip one of those conditions and the setup changes character. It is no longer just a cheap cable-machine substitute for a small apartment. It becomes a loaded strap held in place by a door, a stopper, and whatever condition your band happens to be in that day.
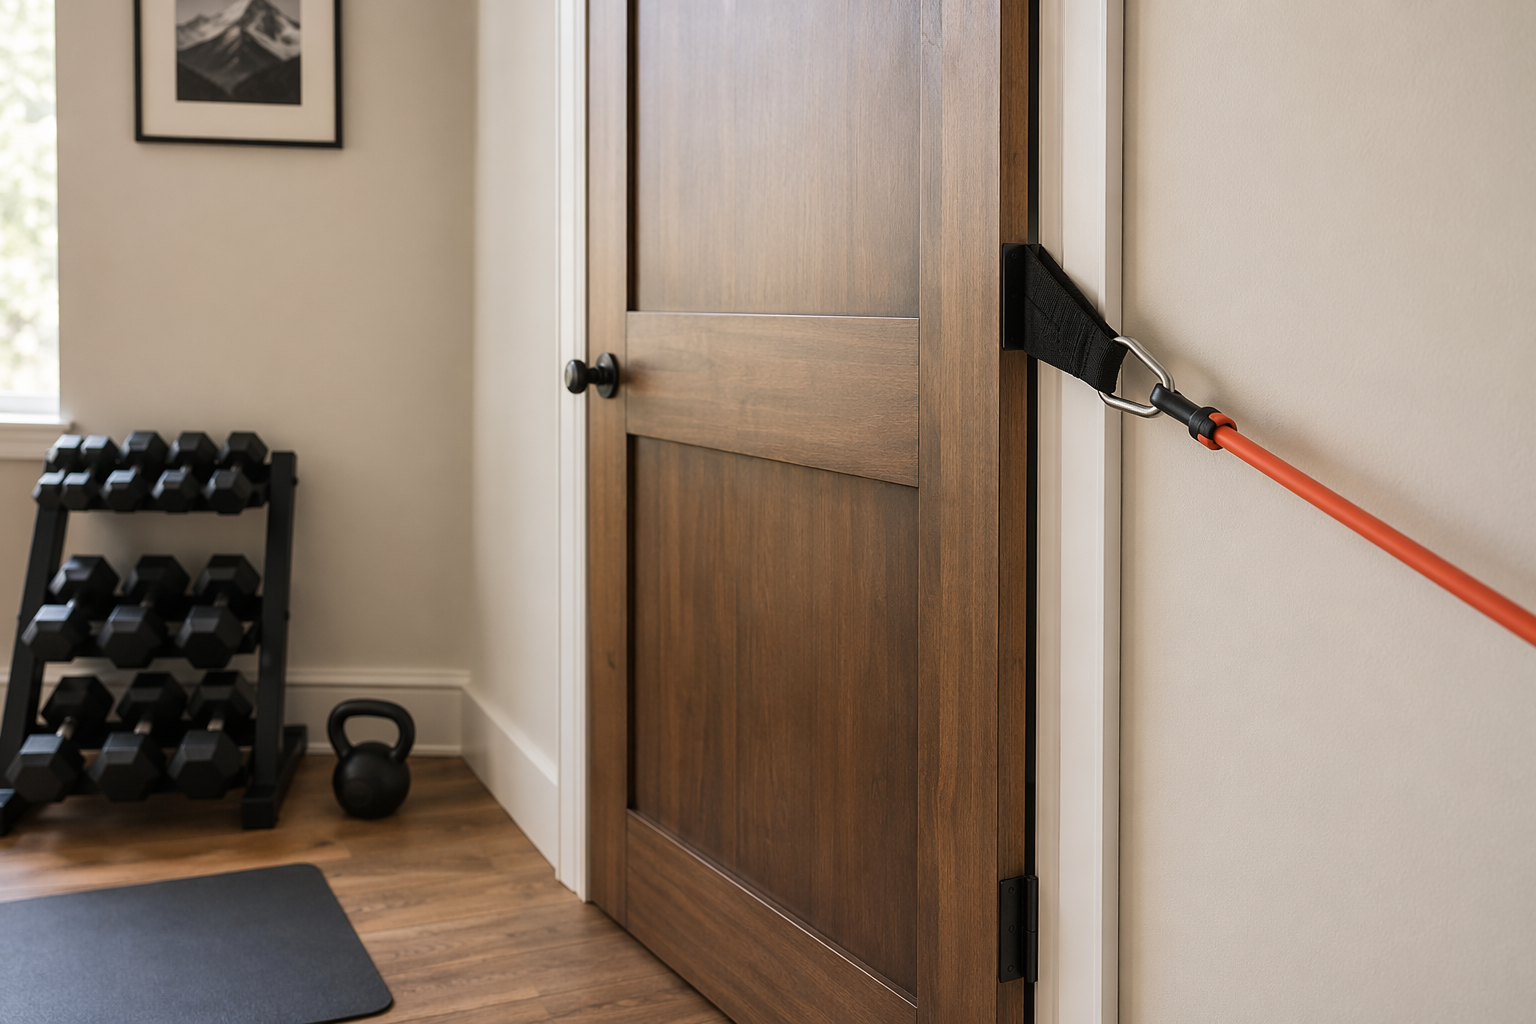
The Safe Setup, Before Any Exercise Starts
Do not start with the exercise. Start with the door. Rows, presses, rotations, pulldowns, curls — all of them depend on the same small chain of decisions before the first pull.
- Choose a solid-core door that closes firmly into a stable frame.
- Place the anchor on the hinge side whenever the exercise allows it, so the pull drives the door into the frame.
- Lock the door, or use a door that cannot be opened from the opposite side during the set.
- Inspect the band, clip, stitching, webbing, stopper, and door contact point.
- Pull firmly for two seconds before the first rep.
- Keep the band within its safe stretch range instead of walking farther away to make a heavy exercise out of a light band.
That list is short on purpose. A door anchor is not complicated equipment, but the simple parts have to be arranged correctly. The anchor does not know whether you are doing a careful rehab drill or trying to turn one thin tube into a heavy cable row.
Use the Hinge Side, Not the Latch Side
The hinge-side rule is the one I would fix first in most home setups. Serious Steel, Balego, and PowerBands all instruct users to place the door anchor on the hinge side, because the pulling force presses the door toward the frame instead of helping pull it open from the latch side.[1][2][3]
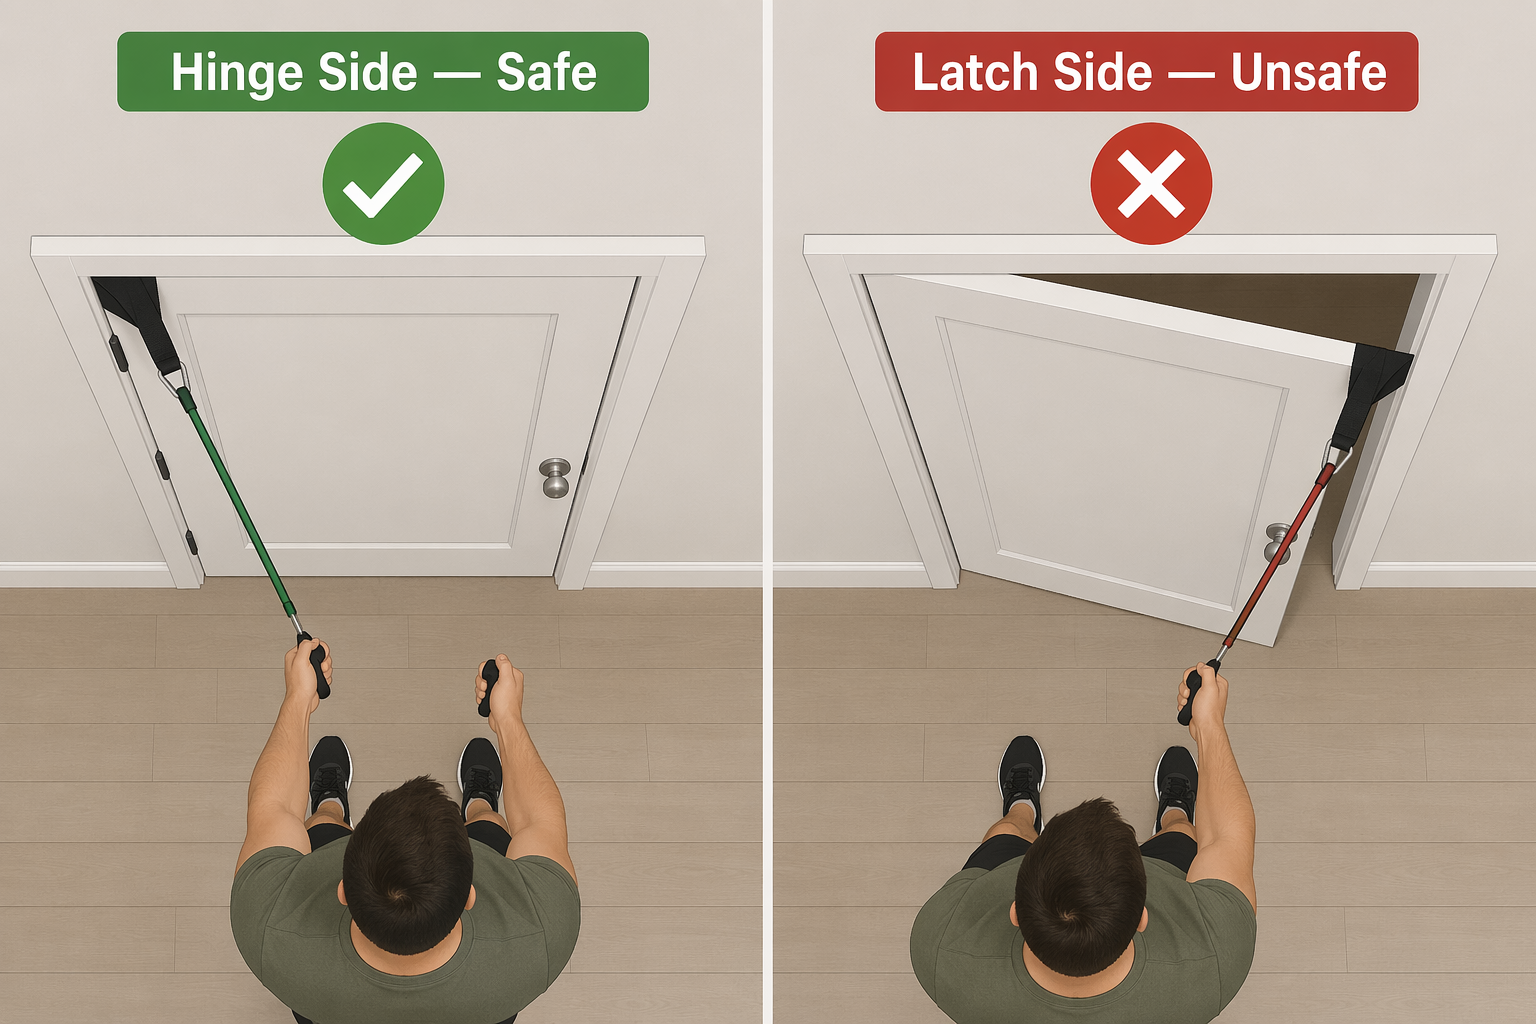
That difference matters more than the brand of band. On the hinge side, the door, frame, and hinges are working against the pull. On the latch side, the band is pulling in the same direction a person would use to open the door. A locked latch helps, but it is still not the same mechanical situation.
The safest version is usually this: stand on the side of the door that opens away from you, set the anchor on the hinge side, close the door fully, and pull in a direction that pushes the door into the jamb. If the exercise requires you to pull in a way that would peel the door open, change the exercise angle or use a different anchor point.
This is also why workout videos can be misleading. A band attached to a closed door can look secure on camera even when the pull direction is wrong. The test is not whether the anchor appears trapped. The test is where the force goes when the band is loaded.
The Door Has to Be Worth Trusting
A solid-core door is the better choice for band anchoring. FitBeast and PowerBands both warn against relying on hollow-core doors for medium-to-heavy band forces because those doors can crack, deform, or fail under load.[4][3]
There is an evidence gap here that is worth saying plainly: ordinary interior doors do not come with a useful resistance-band load rating. The available guidance is qualitative, not a neat chart saying this door handles this many pounds at this angle. That means you should not treat a flimsy rental bedroom door as if it has been tested like gym hardware.
| Door condition | Safety judgment |
|---|---|
| Solid-core door, tight frame, sound hinges, closes fully | Best candidate for a door anchor |
| Hollow-core interior door | Avoid for medium-to-heavy pulling; use only very light work if no better option exists |
| Loose hinges, cracked frame, door that rattles or does not latch cleanly | Do not use |
| Door someone else can open during the set | Do not use unless it can be locked or controlled |
Apartment dwellers have an extra problem: the door may not be yours to repair. A cracked hollow-core door is not a training badge. It is a maintenance conversation you could have avoided by using a lighter band, changing the exercise, or anchoring somewhere designed to take load.
Lock the Door, Even If You Live Alone
A locked door prevents the simplest ugly failure: someone opens the door from the other side while the band is stretched. Multiple setup guides treat the locked-door requirement as mandatory, not optional.[1][2][3]
If the door has no lock, use a door that opens away from you and put a clear warning on the other side, but do not pretend that is equivalent to a lock. If other people, children, roommates, or pets can move through that doorway, pick another location. The person opening the door may not even know they have become part of your exercise setup.
Inspect the Anchor Like It Is Holding Stored Force, Because It Is
Before each session, look at the parts that will take load: the band or tube, the carabiner or clip, the stitched loop, the nylon webbing, the foam or neoprene stopper, and the section that sits against the door frame. You are looking for cracks, whitening, cuts, flattened foam, loose stitching, rust, deformation, or anything that has changed since the last workout.
A padded foam or neoprene stopper with nylon webbing is generally preferable to small hard plastic parts because it spreads pressure more evenly and is less likely to slip or mark the door. Serious Steel’s product materials and FitBeast’s door-damage guidance both point toward padded, wider contact surfaces as the safer design direction.[1][4]
The property-damage point should stay in its lane. A thin cloth or felt pad can help reduce minor marks on painted surfaces, as PowerBands notes, but padding for paint is not a substitute for correct placement, a strong door, or an intact anchor.[3]
Be skeptical of any promise that a padded anchor simply will not damage doors. A good anchor reduces risk; it does not make a weak door strong, a bad pull direction safe, or an overloaded band harmless.
Do the Two-Second Tug Test
After the door is closed and locked, pull the band firmly for about two seconds before you begin the set. Serious Steel, Balego, Reshape App, and PowerBands all include this kind of pre-use pull check in their setup guidance.[1][2][5][3]
Do it from the same direction you plan to exercise. A straight-back test does not prove that a diagonal high-to-low pull is safe. If the anchor shifts, the door moves, the stopper creeps, the band makes a new cracking sound, or the frame flexes in a way you did not expect, stop there. Do not make the first loaded rep the test.
This is the least glamorous safety habit and probably the most useful one. It catches the anchor you failed to seat, the door you forgot to lock, the clip you did not close, and the band that looked fine until tension exposed the damage.
Do Not Make a Light Band Heavy by Walking Too Far Away
Resistance bands get harder as they stretch. That is useful until it becomes the reason they fail. Strength Zone Training recommends not stretching bands beyond roughly 2 to 2.5 times their resting length, warning that overstretching sharply increases snap risk.[6]
Treat that as a conservative operating rule, not an industry standard. Available evidence does not support a universal standard across all brands and materials. Still, it is a practical ceiling: if a 3-foot band is being stretched toward 7 or 8 feet during a row, you are no longer just adding intensity. You are asking the material and anchor to absorb a much larger load.
Use a heavier band, double bands only if the manufacturer allows it, shorten the range, or choose a different movement. Do not solve every difficulty problem by stepping farther from the door.
Why Anchor Release and Band Snapbacks Deserve Respect
The strongest injury evidence around door-anchor systems is not a vague warning that “bands can be dangerous.” It is a set of specific failures involving anchors and hard components released under tension.
In 2011, the U.S. Consumer Product Safety Commission announced a recall of 447,000 Embark resistance cords sold at Target because a black plastic ball on the door anchor could unexpectedly release and strike the user. The notice reported two confirmed cases of permanent vision loss.[7] A later Bollinger Fitness recall in 2014 involved 60,000 additional units using an identical plastic-ball mechanism, according to Schmidt Law’s summary of the recall history.[8]
That does not mean every current padded door anchor is the same product or carries the same risk. It does mean that small hardware details matter. A stopper, ball, clip, or tube end that releases under tension can travel toward the user faster than they can react.
Keep Your Face Out of the Line of Fire
Eye injuries are the consequence that should change how you stand. A Bascom Palmer Eye Institute case series published in 2020 described 11 patients with ocular trauma from exercise resistance bands during the COVID-19 pandemic. In that series, 100% had iritis, 82% had hyphema, and 4 of 14 affected eyes had vision of 20/60 or worse at final follow-up.[9]
That is a small case series, not a population-wide estimate of how often band injuries happen. Its value is different: it shows the kind of damage a band or attachment can cause when it snaps back toward the face.
Set up so the band is not aimed directly at your eyes. For face pulls, high rows, Pallof presses, and diagonal patterns, be especially careful about the line between the anchor and your head. If a movement puts your face directly in the recoil path, change your angle or choose another exercise.
Buying a Better Anchor Helps, but It Does Not Replace Setup
There is no industry-wide safety standard that makes every resistance band and door anchor kit comparable. RSB Law Firm notes that resistance bands lack uniform material specifications, performance requirements, and warning requirements.[10] That is a legal source, not a testing lab, but the practical takeaway is fair: you cannot assume a no-name kit and a well-made kit have been built or warned to the same level.
When choosing an anchor, look for wide webbing, clean stitching, a large padded stopper, smooth edges, a clip or loop that matches your band system, and instructions that clearly specify hinge-side placement and a tug test. Avoid small hard plastic balls or narrow parts that concentrate force against the door or become projectiles if released.
Replacement matters too. Bands age in sunlight, heat, sweat, and storage bends. If a band has cracks, sticky spots, flat sections, faded stress marks, or a nick you can feel with a fingertip, retire it. A cheap replacement is easier to justify than a snapped tube at eye height.
A Practical Pre-Rep Routine
Before every door-anchor workout, run the same short routine. It should take less time than finding the right playlist.
- Door: solid-core, fully closed, stable frame, no loose hinges.
- Anchor: hinge-side placement whenever possible, padded stopper seated flat, webbing not twisted.
- Lock: door locked or controlled so no one can open it mid-set.
- Band: no cracks, cuts, sticky spots, whitening, or damaged clips.
- Tug test: firm two-second pull from the exact exercise direction.
- Stretch: stay under roughly 2 to 2.5 times resting length and keep your face out of the recoil path.
If you are building a small-space gym around bands, this safety routine belongs before the workout plan, before the exercise menu, and before the clever cable-machine alternative. Door anchors are useful because they make compact training possible. They are safe when the setup forces the door closed, the door can tolerate the load, the anchor cannot release, the band is intact, and you do not overstretch it. Pause for two seconds before you pull.
References
- The Ultimate Guide to Using A Door Anchor, Serious Steel
- Door Attachment Setup for Resistance Bands and Tubing, Balego
- Resistance Band Door Anchor Exercises, PowerBands
- Can Resistance Bands Damage Doors?, FitBeast
- Resistance Band Setup Tips, Reshape App
- The Most Dangerous Resistance Band Exercises, Strength Zone Training
- Target Recalls Resistance Bands Due To Injury Hazard, U.S. Consumer Product Safety Commission, 2011
- Resistance Band Injury Lawsuit, Schmidt Law
- Ocular trauma secondary to exercise resistance bands during the COVID-19 pandemic, PubMed Central, 2020
- Common Resistance Band Injuries, RSB Law Firm
Comments
Join the discussion with an anonymous comment.