
How to Train for Continental Divide Trail Safety at Home
Most Continental Divide Trail hikers are stopped by a short list of known hazards: afternoon storms above treeline, San Juan snow, dry New Mexico water carries, road walking, and injury. This guide maps each one to a specific apartment-safe exercise, using 2025 hiker-survey data, so training targets the risks that actually end hikes.
- Equipment tier required
- $0-100
- Duration
- 30 min
- Difficulty
- beginner
- Target area
- full body
- Noise level
- quiet
The Continental Divide Trail is too large for one neat training plan, but the problems that scare or stop hikers are not random. In Halfway Anywhere’s 2025 CDT survey, the sample was self-selecting and relatively successful: 144 respondents, with a reported 92.3% completion rate. That matters. These numbers describe respondents, not every CDT hiker. Still, the regret is useful because it comes from people who actually stood on the route: 30.3% said they wished they had trained more or gotten in better shape before starting, even though 73.7% reported that they had trained beforehand.[1]
For Continental Divide Trail hiking safety and training, that is the interesting gap. The answer is not simply “get fitter.” The survey’s hazard pattern points to narrower demands: storms above treeline, snow and ice, exposed road walking, dry water carries, injury, and the mental drag of long solo days. Halfway Anywhere’s 2025 horror-story categories put weather and storms, plus snow, ice, and technical terrain, in its “very high” frequency tier; human threats and road walking were “high,” while wildlife was “moderate.”[2] In the same year’s worst-moments breakdown, environment and weather accounted for 23.3% of responses, health and injury for 18.6%, mental and emotional difficulty for 17.4%, and wildlife and safety for 15.1%.[3]
The mapping below is this article’s synthesis. The survey and trail sources identify the risks; the exercise choices translate those risks into trainable demands. No home routine makes lightning, rotten snow, dehydration, traffic, or tendons obedient. It can, however, reduce how often you meet those problems while already tired, unstable, overloaded, or underconditioned.
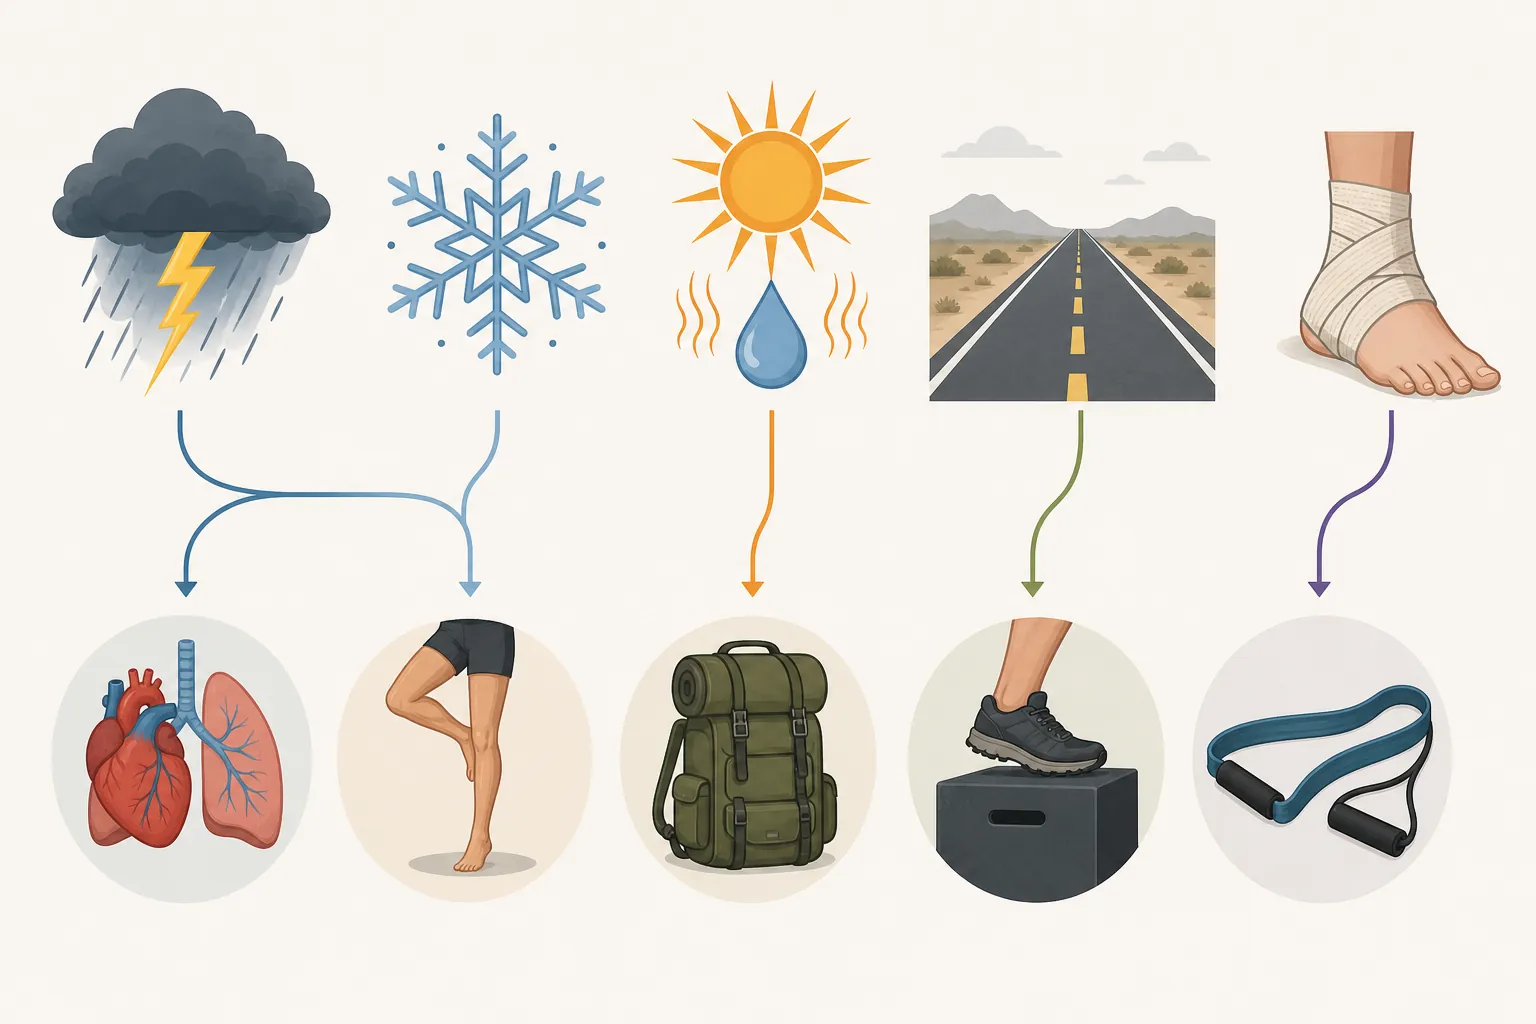
| Named CDT risk | Trail demand | Apartment-safe training target |
|---|---|---|
| Afternoon storms above treeline | Reach exposed passes earlier, descend while still thinking clearly | Quiet Zone 2 cardio, step-ups, loaded stair or step intervals |
| San Juan snow, postholing, steep descents | Single-leg strength, balance, controlled lowering | Step-downs, split squats, single-leg balance, banded hip work |
| New Mexico dry carries | Carry several extra kilograms without wrecking shoulders, hips, or trunk | Loaded-pack walks, suitcase carries, dead-bug variations, gradual pack loading |
| Road walking and hard surfaces | Repeated pavement impact, calf endurance, ankle stiffness tolerance | Calf raises, tibialis raises, foot doming, short pavement walks with progression |
| Overuse injury | Tendons, stabilizers, and pacing restraint | Eccentric strength, lateral band work, recovery spacing, no sudden mileage jumps |
| Loneliness and ego decisions | Stop, wait, turn around, filter, or shorten the day before conditions force it | Pre-written decision rules, solo practice walks, weather and water stop points |
The CDT context, without the postcard fog
A few route facts matter because they change the kind of stress training must prepare for. The CDT is not a single sidewalk with one official experience. Its official length is commonly listed around 3,028 miles, while actual thru-hike mileage varies by route choices, alternates, closures, and access decisions; the trail’s high point is Grays Peak at 14,278 feet.[4]
| Planning fact | Why it matters for training |
|---|---|
| Official length around 3,028 miles; actual routes may vary roughly from 2,700 to 3,150 miles | Training should prepare for repeated stress, not one heroic weekend effort.[4] |
| 2025 respondents averaged 145 days northbound and 139 days southbound | The body has to tolerate months of loading, not just a peak fitness test.[1] |
| 2025 respondents averaged 21.4 miles per day including zeros and 24.5 excluding zeros | Daily mileage plans become safety pressure when weather or water argues for stopping.[1] |
| Grays Peak reaches 14,278 feet | High terrain makes timing, weather, fatigue, and descent control more consequential.[4] |
| 85.5% of 2025 respondents rated Colorado the most difficult state | Snow, elevation, storms, and steep terrain deserve more training attention than generic “cardio.”[1] |
This is why a general hiking plan is only the base layer. If you need a broader progression for legs, cardio, and pack tolerance, use the site’s 8-week home hiking prep program first. The work below is the CDT-specific overlay: it asks which failure mode a drill is meant to reduce.
Storms above treeline: train for early starts, not lightning immunity
Colorado is the obvious place to start because CDT weather is not just uncomfortable there; it changes the day’s rules. TrailTemps notes Colorado’s July–August monsoon pattern, with afternoon thunderstorms near-daily in the high country, and emphasizes being off exposed ridges before early afternoon. It also flags hypothermia risk, even in summer.[5]
Fitness does not make a ridge safe in lightning. The trainable demand is earlier movement with less drama: waking up, climbing steadily, eating while moving, and descending before the sky makes the decision for you. That takes aerobic base more than bravado. If your only “training” is occasional hard efforts, you may be able to suffer uphill, but not repeat controlled mornings for weeks.
At home, use quiet Zone 2 work as the anchor. That can be a low step-up rhythm on a sturdy platform, an under-desk bike, a treadmill walk if you have one, or a no-jump circuit of marching, step-ups, and loaded carries. The intensity should let you speak in short sentences. The point is not to collapse on the floor; it is to build the boring engine that lets an alpine start feel normal.
- Starter version: 30–40 minutes of quiet Zone 2 movement, 3 days per week.
- CDT overlay: once per week, add a loaded step-up block with your pack, keeping the effort controlled rather than breathless.
- Decision practice: before the session, write a pretend turnaround time. Stop when the time arrives, even if the workout feels unfinished.
That last item sounds silly until a mileage spreadsheet starts arguing with a thunderhead. The exercise builds the body; the stop time trains the habit of obeying conditions.
San Juan snow: single-leg control matters more than looking strong
Snow, ice, and technical terrain sat in the “very high” frequency tier in the 2025 horror-story survey.[2] That does not mean every CDT hiker has the same snow year or the same route choice. It does mean snow travel belongs in the training plan, especially for hikers whose daily life gives them flat floors, elevators, and predictable sidewalks.
Postholing and steep snow descents punish two gaps that gym strength can miss: one-leg stability and controlled lowering. When a foot punches through crust or slides lower than expected, the useful question is not whether your quads are generally strong. It is whether your hip, knee, ankle, and trunk can accept load on one side without folding into a bad position.
The apartment version is not a fake snowfield. It is a small set of slow, precise drills.
- Step-downs: stand on a low step, lower one heel toward the floor for 3–5 seconds, tap lightly, and stand back up. Start low enough that the knee tracks cleanly.
- Rear-foot-elevated or regular split squats: use a chair or couch only if you can stay controlled. A shorter range of motion done well beats a dramatic wobble.
- Single-leg balance: practice barefoot or in socks on a safe surface, then progress by turning the head slowly or reaching one hand across the body.
- Banded lateral walks: keep the band light enough that your knees do not cave inward as you step.
ULA Equipment’s flatland thru-hike training advice makes the same basic point from the descent side: eccentric, slow-lowering movements condition tissues for downhill demands.[6] That mechanism transfers well to apartment training because a step, chair, and loaded backpack are enough to create controlled lowering. What it does not solve is route judgment. Strength helps you recover from a bad step; it does not decide whether a snow slope is worth crossing.
Dry New Mexico carries: practice the weight before the desert assigns it
Water is where “lightweight” thinking can get too cute. Longstride describes the first 84 miles from Crazy Cook to Lordsburg as dry enough that the Continental Divide Trail Coalition maintains five water caches, spaced roughly 15 miles apart.[7] A 5-liter water carry weighs about 11 pounds before counting bottles, food, fuel, or the rest of the pack, using the common planning estimate of about 2.2 pounds per liter.
The trainable demand is not only legs. Extra water changes shoulder pressure, hip-belt pressure, posture, foot strike, and patience. A hiker who is comfortable with a 20-pound pack but has never walked with an extra 11 pounds may discover the difference at the worst possible time: hot, exposed, and far from the next reliable source.
Start by loading the actual backpack you expect to use. If you do not want to store gear in it, use towels and water bottles. Walk indoors if necessary, but do not make every session a hallway shuffle. A short outdoor sidewalk loop teaches more about pack sway, foot heat, and shoulder irritation than perfect living-room laps.
| Home drill | What it trains | What to watch |
|---|---|---|
| Loaded-pack walk | Shoulder, hip, trunk, and foot tolerance under realistic weight | Increase load gradually; do not jump straight to a full desert carry |
| Step-ups with pack | Climbing under water weight | Keep steps quiet and controlled; stop if form degrades |
| Suitcase carry with one heavy bag | Anti-lean trunk endurance for uneven loading moments | Switch sides; avoid shrugging the shoulder |
| Dead bug or bird dog | Trunk control without pounding the floor | Move slowly enough that the low back does not arch |
Water safety also has a behavior side. In the 2025 survey, 11.5% of respondents reported a Giardia-like illness, while 80.9% said they always treated water.[1] That does not prove a single cause for those illnesses, and it does not turn treatment habits into a guarantee. It does justify practicing the unglamorous sequence before trail: stop, unload, filter or treat, drink, and leave with enough. If you only practice moving, water becomes the chore you rush when you are tired.
Road walking: condition the foot and ankle for the surface you will actually hit
Road walking is easy to underestimate because it looks less wild than a pass or snowfield. In the 2025 horror-story categories, human threats and road walking appeared in the “high” frequency tier.[2] The safety issue is partly exposure to vehicles and narrow shoulders, which home exercise cannot remove. The training issue is that pavement repeats the same impact pattern until small weaknesses become loud.
Trail runners and soft dirt can hide underprepared calves and feet for a while. Asphalt is less forgiving. The useful home work is lower-leg durability: calves, tibialis anterior, intrinsic foot strength, and ankle control. This does not need fancy equipment, and it should not start with heroic volume.
- Straight-knee calf raises: slow up, slower down. Use a wall for balance.
- Bent-knee calf raises: same idea, with knees slightly bent to bias the lower calf complex.
- Tibialis raises: lean against a wall and lift the toes toward the shins.
- Foot doming: gently shorten the foot without curling the toes.
- Short pavement walks: begin with deliberately modest walks in the shoes you plan to use, then progress duration before speed.
Road safety still depends on route choice, visibility, attention, and willingness to wait out a bad shoulder or hitch decision. Calf raises will not make a blind curve safer. They only reduce the chance that the hard surface becomes the hidden injury source while your attention is on traffic.
Injury prevention is conditioning, not a promise
In the 2025 Halfway Anywhere survey, injury was reported as the number one reason hikers left trail temporarily and the second most common named quit reason, at 22.2% of respondents; personal reasons led quit reasons at 33.3%.[1] The Trek’s CDT objective-hazards discussion also frames injury as the most common off-trail reason in its TRAILS series.[8] Those are not identical datasets, but they point in the same practical direction: injury prevention deserves more room than another debate about the perfect shoe.
Keep the claim narrow. These exercises do not treat pain, diagnose injuries, or make overuse impossible. They improve the tissues and movement patterns that often fail when mileage, load, terrain, and fatigue rise together.
| Weak link to train | Apartment exercise | Progression rule |
|---|---|---|
| Quads and tendons for descents | Slow step-downs, split squats | Add range before adding pack weight |
| Glutes and hip stabilizers | Banded lateral walks, single-leg bridges | Keep pelvis level; use a lighter band if you twist |
| Calves and Achilles tolerance | Straight- and bent-knee calf raises | Build repetitions gradually; avoid sudden high-volume days |
| Feet and shins | Foot doming, tibialis raises | Use small daily doses rather than one punishing session |
| Trunk under load | Dead bugs, bird dogs, suitcase carries | Stop sets when bracing fails |
If you already use bands for home strength work, this is where they earn their storage space. The same lateral hip and glute patterns used in a beginner resistance-band routine can be pointed at CDT durability rather than general toning. The difference is intent: slow control, repeatability, and enough recovery that the training itself does not become the first overuse problem.
A small-apartment CDT routine
You do not need a garage gym for this. A stable step, a light-to-medium resistance band, a loaded backpack, and enough clear floor space to step and lower safely cover most of the work. If you are still building the setup, the same constraints that apply to any compact home gym apply here: buy stable, quiet, repeatable tools before clever ones.
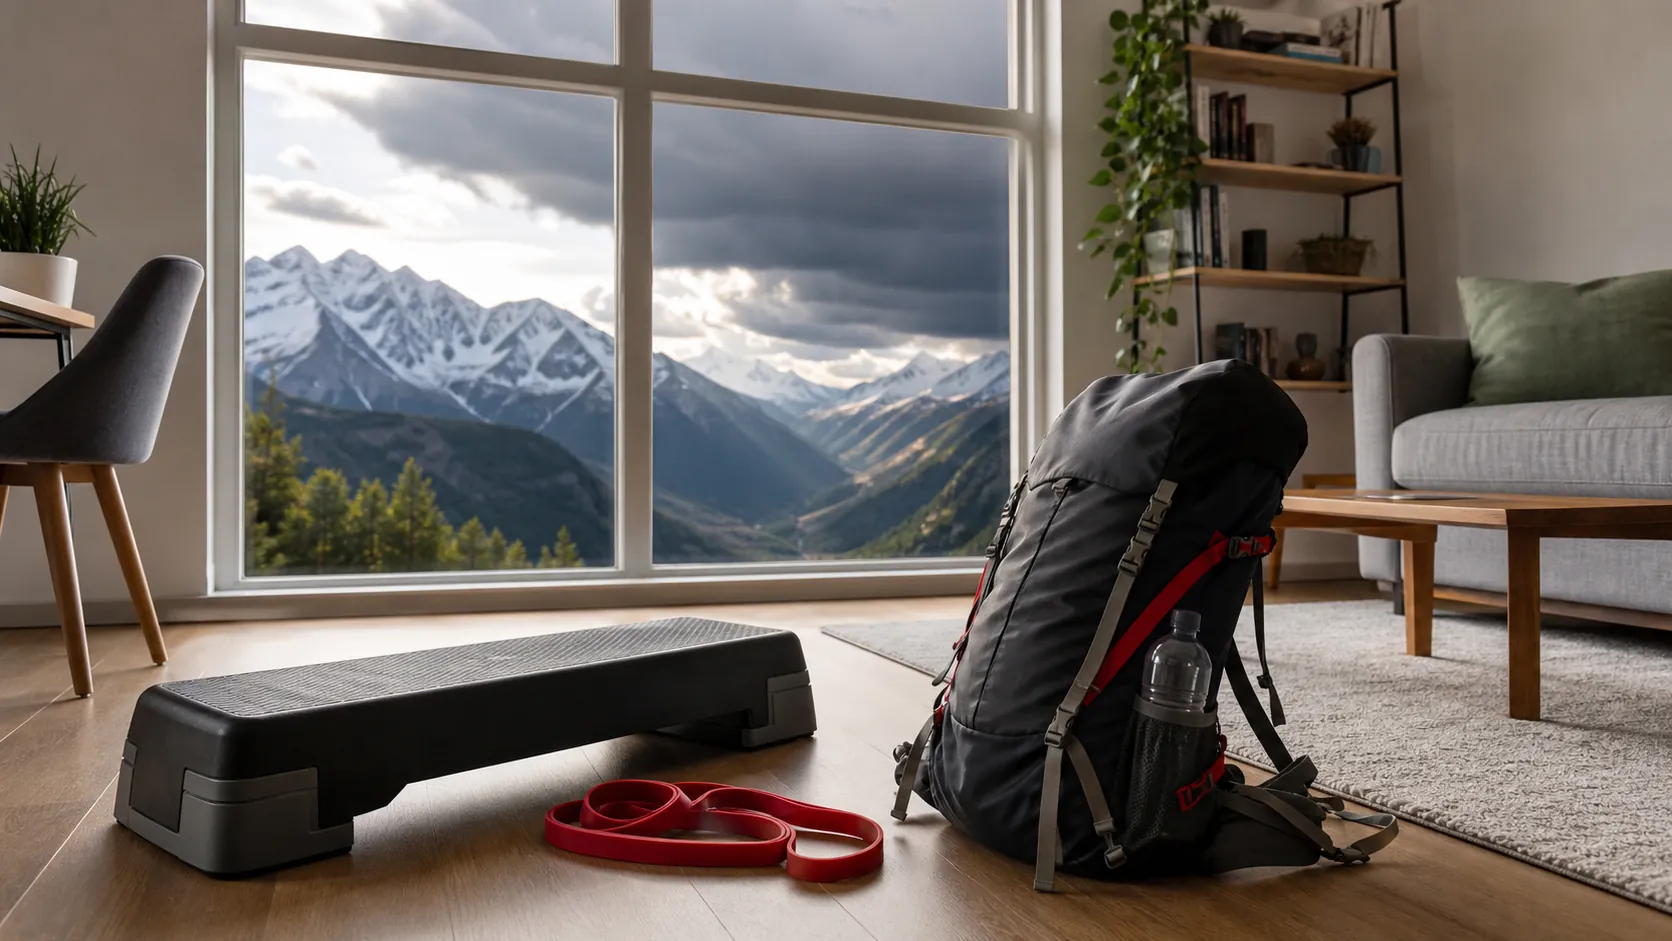
A practical week can be simple. The mistake is trying to turn every session into a miniature sufferfest. CDT training should leave enough room to repeat the work next week.
| Day | Main work | CDT safety target |
|---|---|---|
| Day 1 | Zone 2 step-ups or quiet cardio, 30–45 minutes | Early-start aerobic base for exposed terrain |
| Day 2 | Strength: step-downs, split squats, calf raises, banded lateral walks | Snow descents, road impact, stabilizers |
| Day 3 | Easy walk or rest | Recovery and progression restraint |
| Day 4 | Loaded-pack walk or indoor loaded carry session | Water-carry tolerance |
| Day 5 | Strength: single-leg balance, hip work, trunk work, tibialis raises | Ankles, hips, trunk under fatigue |
| Day 6 | Longer easy walk, ideally partly on pavement, with modest pack weight | Road walking and sustained foot tolerance |
| Day 7 | Rest or gentle mobility | Absorb the work |
For a budget version, skip the gadgets. Use a stair or sturdy step, a backpack you already own, water bottles for load, and one band. For a quieter version, keep step height low, avoid jumping, and use slow tempos. For a stronger version, add pack weight gradually rather than adding more complicated exercises. The site’s small-space sport-specific routines follow the same principle: the room is not the limiting factor if the drill matches the demand.
How to progress without making training the injury
Progress one variable at a time: duration, load, step height, range of motion, or weekly frequency. Do not increase all of them because a calendar says the start date is getting close. A hiker who arrives slightly undertrained but healthy has more options than one who wins March and loses May to tendon pain.
- If step-downs get shaky, lower the step before adding weight.
- If loaded walks create hot spots, fix footwear, socks, or lacing before increasing distance.
- If calves stay sore for days, reduce volume and keep the road-walk progression slower.
- If Zone 2 sessions drift into gasping intervals, slow down. The storm-readiness goal is repeatable morning movement.
The safety items training should not crowd out
Some CDT safety work is not exercise. Southern terminus access, permits, local closures, and land-management rules can change, and the Continental Divide Trail Coalition’s thru-hiking page is the place to check current requirements before arranging travel.[9] That belongs in the safety frame, but it is not the center of a home-training plan.
Wildlife also deserves respect without stealing the safety frame. In the 2025 horror-story frequency categories, wildlife was “moderate,” below weather and storms, snow and technical terrain, and road-walking or human-threat concerns.[2] Home training cannot replace food storage, bear awareness, or local guidance. It can keep fatigue from making you sloppy with the chores that reduce wildlife risk.
The same is true for water treatment, hypothermia layers, navigation, and road judgment. The training connection is indirect but real: exhausted hikers skip steps. A routine that makes pack weight, climbs, descents, and hard surfaces less shocking gives you more attention left for the non-fitness decisions.
The ego hazard is the part no step-up fixes
Halfway Anywhere’s 2025 respondents reported hiking alone an average of 65.1% of the time.[1] That figure matters because many bad decisions on a long trail are not made in front of an audience. They happen when no one is watching, the day’s mileage is behind schedule, the weather window is shrinking, and the next water source is annoyingly far away.
So add one non-physical drill to the plan. Before the hike, write rules that are boring enough to follow when tired: the latest time you will be on an exposed ridge, the minimum water that makes you stop and treat, the pain signs that end a day early, the road conditions that make you wait, the snow conditions that make you turn around. Do not write them as inspiration. Write them as operating limits.
Home training cannot make the CDT safe. It can reduce the number of trail decisions made while already overloaded, unstable, or underconditioned. Train the predictable demands at home; once you are on trail, let conditions—not pride, sunk cost, or spreadsheet mileage—make the final call.
References
- Continental Divide Trail Hiker Survey (2025) — Halfway Anywhere
- Continental Divide Trail Horror Stories (2025 Survey) — Halfway Anywhere
- Continental Divide Trail Hikers' Worst Moments (2025 Survey) — Halfway Anywhere
- Continental Divide Trail — Wikipedia
- Continental Divide Trail — TrailTemps
- How to Train for a Thru-Hike Without Living Near Mountains — ULA Equipment, 2025
- Water Nowhere, and Everywhere — Longstride
- The Fine Line: Managing Objective Hazards on the CDT | TRAILS Series Part 6 — The Trek
- Continental Divide Trail Coalition thru-hiking page — Continental Divide Trail Coalition
What a small equipment investment adds
Cable Machine Alternatives That Save Space and Money
Compare the best cable machine alternatives for home gyms – from resistance bands and pulley systems to suspension trainers and compact digital units – and find the right option for your space and budget.
Small Treadmill Buying Guide: 7 Critical Specs to Check Before You Buy
A cross-category spec primer for apartment and small-space dwellers comparing walking pads, ultra-compact folding treadmills, and full-size folding treadmills. Learn the concrete thresholds for motor HP, deck length, noise, warranty, and subscription lock-in so you can compare apples to apples.
How to Practice Basketball at Home Without Noise Complaints
Learn how to run a full basketball workout in a small apartment without noise complaints. This guide covers no-dribble handling drills, wall form shooting, and silent ball options that let you train without disturbing neighbors.
How often should you repeat this?
See our recovery and rest reference for citation-anchored rest-interval guidance.
Spot something off?
Tell us if a movement, tier assumption, or duration didn't match your experience.