
How to Practice Tennis at Home Without a Court
A realistic home tennis practice doesn't need a court or a big budget: what works depends on your space type and budget tier. The guide lays out honest options from a $0 technique tier through foam-ball mini-courts, rebounders, and portable ball machines, and calls out what's worth buying versus what's a waste.
- Equipment tier required
- none
- Duration
- 10-15 min
- Difficulty
- beginner
- Target area
- full body
- Space footprint needed
- few feet of clear floor space
- Noise level
- quiet
Start with the room, not the gear
Practicing tennis at home without a court in a small space is possible, but the useful version starts with a constraint check. A hallway, living room, garage, driveway, and shared-wall apartment are not the same practice environment. The mistake is treating them as if they all need the same rebounder, the same full swing, or the same shopping cart.
The better rule is simple: choose by space type and budget tier. If you have neighbors below you or a shared wall, start with quiet technique work and soft balls. If you have a small room, make the floor useful with tape lines and controlled racquet work. If you have a garage, basement, driveway, or outdoor wall, rebounders and practice walls become more realistic. A ball machine belongs last, after the practice area is already proven.
| Space you actually have | Best first option | What to delay |
|---|---|---|
| Apartment, upstairs room, shared wall | $0 technique drills, serve tosses, quiet racquet-control work, foam balls | Hard wall hitting, plywood walls, ball machines |
| Small bedroom, hallway, living room | Tape-marked footwork, slow shadow swings, mini-court touch drills | Full-speed groundstrokes unless ceiling, wall, and floor clearance are safe |
| Garage, basement, detached shed | Foam or low-compression balls, rebounder testing, controlled wall work | Permanent wall builds before checking noise transfer |
| Driveway, patio, outdoor wall access | Rebounder, wall rallies, larger-volume feeding | Ball machine until retrieval space, ball containment, and noise are solved |
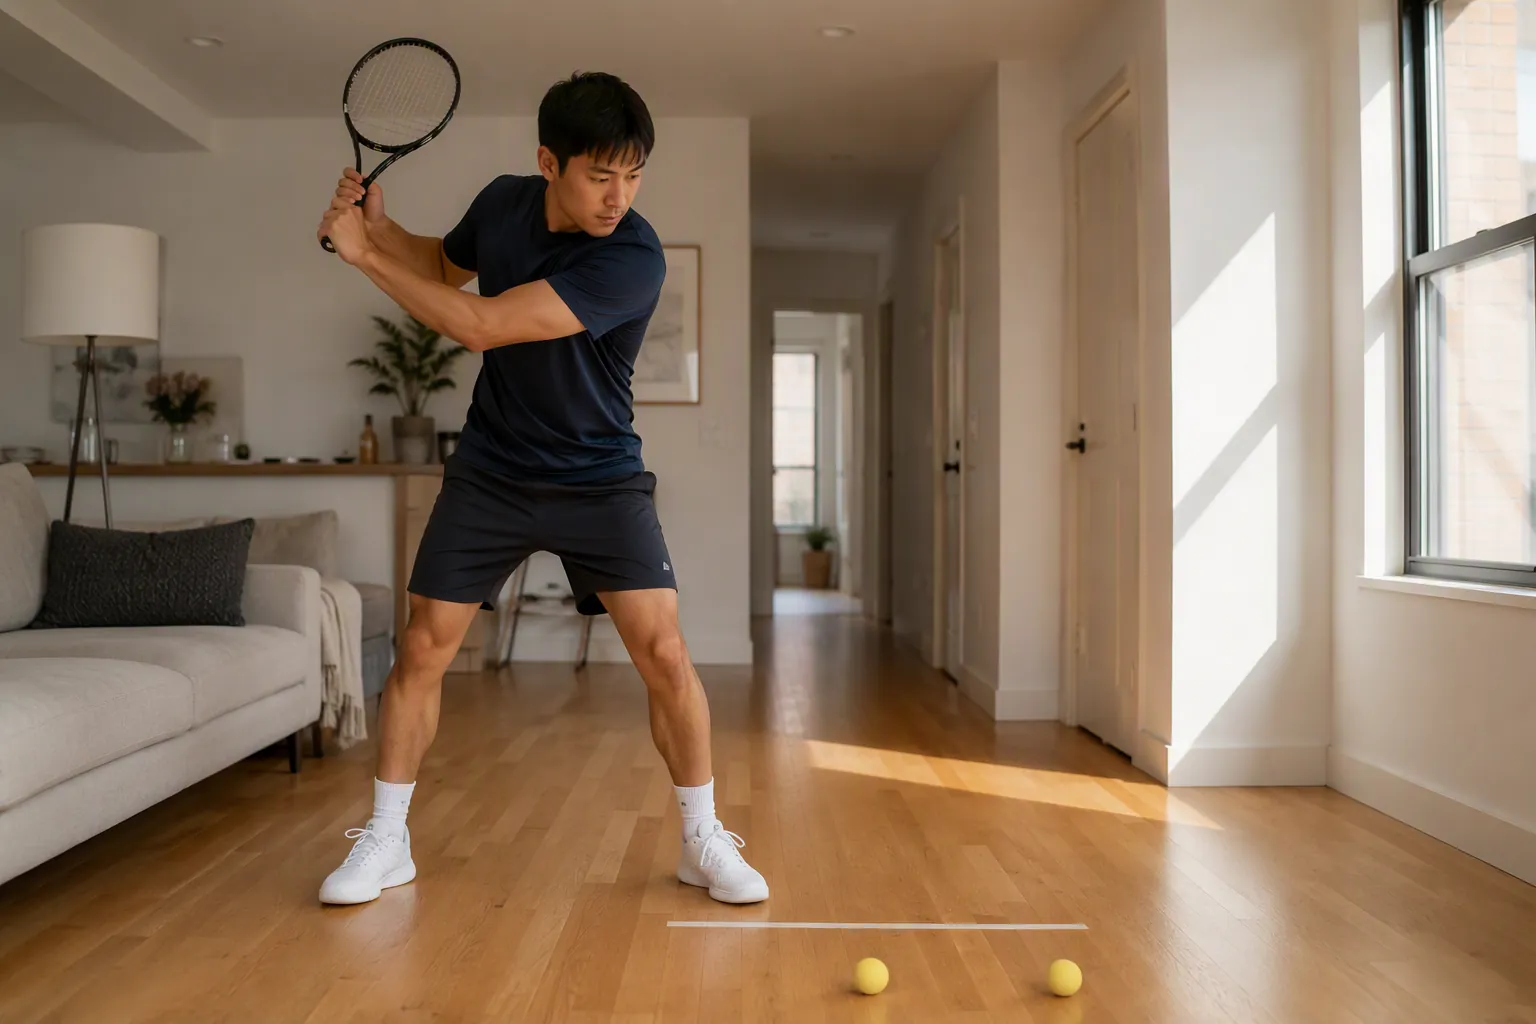
The $0 tier: ten quiet minutes that can be repeated tomorrow
The no-cost tier is not a consolation prize. It is where most home tennis practice should begin, because it removes the two things that usually wreck a small-space setup: impact noise and uncontrolled ball flight. A racquet, one ball, a strip of tape, and a few feet of floor are enough to work on swing path, contact awareness, balance, toss consistency, and first-step rhythm.
This is also where frequency claims need some honesty. PlayYourCourt recommends shorter daily sessions of about 15–30 minutes rather than saving everything for one long weekly session, but that is a coaching prescription, not a universal study of every recreational player’s improvement curve.[1] For a small room, the practical value is obvious anyway: short sessions are easier to keep quiet, easier to recover from, and less likely to turn into a furniture-moving project.
| Time | What to do | Small-space rule |
|---|---|---|
| 1 minute | Clear the swing path and mark a starting line with tape | If the racquet can touch a lamp, doorframe, or wall, shorten the swing |
| 2 minutes | Split-step and recovery pattern: split, turn, one step out, recover to tape | Keep the feet light; do not stomp through an apartment floor |
| 3 minutes | Slow forehand and backhand shadow swings | Stop the racquet before the wall; quality matters more than speed |
| 2 minutes | Ball bounces on the strings: forehand side, then backhand side | Use a dead or soft ball if the bounce is sharp or loud |
| 2 minutes | Serve toss repetitions without hitting | Let the ball drop or catch it; do not serve into drywall |
For shadow swings, the useful target is not “more reps” by itself. TeachMe.To frames slow, clean repetition as the point, including the idea that 20 perfect slow swings are more valuable than 100 sloppy ones; On makes the same quality-over-quantity point for solo practice.[2][3] That matters indoors, because the slower swing is also the safer one. You can feel whether the racquet face is turning over too early without shaving paint off a doorway.
The ball-bounce drill is just as unglamorous and just as useful. PlayYourCourt and TeachMe.To both include racquet-control work using only a racquet and ball, with 50 forehand-side bounces and 50 backhand-side bounces appearing in the coaching prescriptions.[1][2] In a cramped room, that drill tells you quickly whether your wrist is stable and whether you can keep the ball centered without chasing it under a couch.
The serve toss may be the best no-impact serve drill at home. TeachMe.To recommends about 50 tosses a day, which is enough to expose whether the ball keeps drifting behind your head, into the room, or across your body.[2] You do not need a court to learn whether the toss is repeatable. You need a ceiling that is high enough, a safe landing spot, and the patience to reset instead of reaching for a bad toss.
For deeper movement work, use this section as the setup layer rather than trying to turn one room into an entire tennis academy. The detailed movement progressions belong in these tennis footwork drills at home, and the stroke-specific rebuild belongs in the 15-minute forehand routine. At home, it is better to repeat one clean pattern tomorrow than to invent twelve drills today and abandon them by the weekend.
A few apartment rules before a ball enters the room
- Swing at half speed until you know the racquet path clears walls, ceiling fans, shelves, and doorframes.
- Use tape lines instead of cones if cones create a tripping hazard or make the room feel like a storage bin.
- Keep split steps quiet. If the floor shakes, the drill is no longer neighbor-friendly.
- Do not hit standard tennis balls into drywall. A home wall is not automatically a practice wall.
- Stop any drill that makes you chase the ball into furniture. Control is the point.
The $0–100 tier: buy quieter contact, not more gear
The first money spent should solve a real constraint: the ball is too loud, too lively, or too risky for the room. Foam balls, soft balls, dead balls, and low-compression balls are useful because they reduce speed and impact. PlayYourCourt describes foam, dead, or low-compression balls as dramatically quieter indoors and less likely to damage property than standard tennis balls.[1]
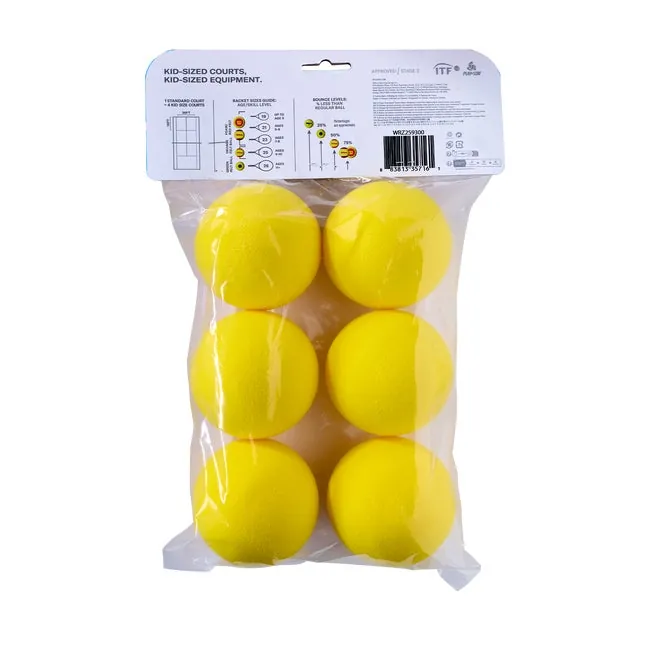
That does not mean foam balls make every room safe for full hitting. They still move, they still bounce unpredictably off furniture, and they can still knock over something fragile. Their real value is that they let you add gentle contact to drills that were already controlled: mini volleys, drop-and-catch forehands, touch bounces, and short wall taps if the wall is appropriate.
| Item | What it adds | Best fit | When it is a waste |
|---|---|---|---|
| Masking tape or painter’s tape | Footwork lines, recovery marks, mini-court boundaries | Any small room or hallway | Almost never, unless it damages the floor finish |
| Foam tennis balls | Quiet contact and lower damage risk | Apartments, kids’ rooms, shared spaces | If you expect a realistic court bounce |
| Low-compression balls | Slower bounce than standard balls | Garage, driveway, larger room | If even a soft bounce is too loud for neighbors |
| A small target | Visual aim point for tosses or controlled taps | Blank wall, door, garage surface | If the target encourages hard hitting indoors |
A tape-marked mini-court can be as simple as one baseline mark, one recovery mark, and two side marks. You are not recreating court geometry; you are giving your feet somewhere to return. In a small room, that is enough to practice split, turn, step, swing, recover. If you need a parallel example of how small-space ball practice can stay neighbor-friendly, the same constraint logic shows up in home pickleball drills for small spaces: soft contact, marked zones, and no pretending the living room is a regulation court.
The $100–300 tier: rebounder or wall is the decision that can annoy a house
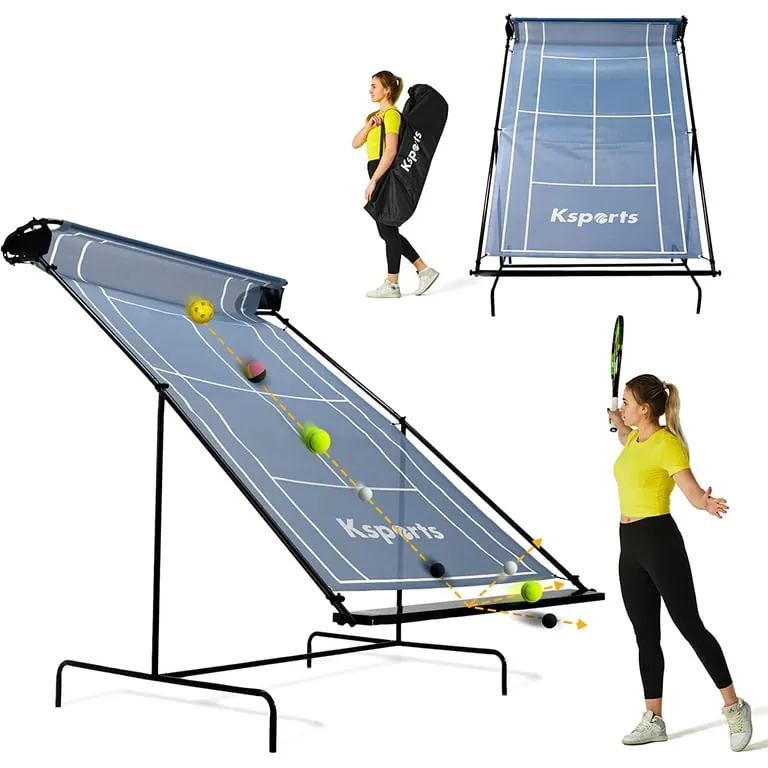
Once you move beyond foam balls and tape, the question changes. You are no longer just practicing technique; you are introducing repeated impact. That is where a rebounder net and a practice wall look similar in a product photo but behave very differently in a real home.
All Court Sports Guide puts net rebounders around a starting point of about $200 and notes that a DIY practice wall can be built for under $150, while also calling out the practical trade-off: a rebounder gives a softer return and a wall gives a more court-like rebound, but a plywood wall can create a boom that travels through house framing.[4] That last part matters more than the price. A cheap wall that turns the garage into a drum is not cheap if everyone in the house hates it.
| Option | Return behavior | Noise profile | Best use | Poor fit |
|---|---|---|---|---|
| Foam-ball mini practice | Slow, soft, not court-realistic | Lowest practical impact | Apartments, small rooms, touch control | Players expecting full groundstroke timing |
| Rebounder net | Softer, often faster upward return | Usually a thud rather than a boom | Volleys, reflexes, compact reaction work | Tiny rooms or spaces where the frame cannot be safely placed |
| DIY plywood wall | More direct and wall-like; better for groundstroke rhythm if space allows | Can be loud and transmit through framing | Garage, detached structure, outdoor area | Shared walls, upstairs rooms, attached living spaces |
| Existing outdoor wall | Most useful if surface and bounce are predictable | Depends on location and hours | Driveway, schoolyard-style wall access, patio | Any place where repeated impact bothers neighbors |
A rebounder is usually the more forgiving small-home purchase because the ball does not slam into a rigid surface. It is good for compact volleys, reaction touches, and getting used to preparing the racquet early. The catch is that the rebound is not a normal rally ball. Many rebounders send the ball back with a different arc, speed, and rise than a court bounce. If you use one, treat it as a reflex and contact tool, not as proof that your rally timing is match-ready.
A wall is more honest for repeated groundstroke rhythm when there is enough distance, but walls are where small-space tennis advice often becomes reckless. Drywall is not a practice surface. A door is not a backboard. A plywood build in an attached garage may sound manageable from three feet away and still carry a low boom through studs, joists, and the room above. Before building anything permanent, hit a few soft balls at the intended time of day and listen from the next room, upstairs, and outside the shared wall.
If the wall passes that test, keep the first sessions boring. Use foam or low-compression balls, stand closer than full rally distance, and work on clean contact rather than pace. The wall should give feedback, not invite you to prove how hard you can hit in a garage.
The premium tier: a ball machine is volume, not a shortcut
Portable ball machines are the easiest way to spend money before the space is ready. They can feed more balls than a wall or rebounder and remove the need for a partner, but they also bring storage, ball pickup, noise, power or battery management, and enough ball flight to make a small room silly.
Retailer listings need to be treated as retailer listings, not independent market research. Tennis Express lists tennis ball machines with entry portable units under $1,000, weights roughly in the 35–45 lb range, and hopper capacities in the 50–150-ball range, but prices and specifications should be checked at the time of purchase because they are seller-stated and can change.[5]
The practical threshold is not “can I afford one?” It is “do I already have a place where fed balls can be hit, land, and be collected without turning practice into a cleanup problem?” A driveway with containment, a quiet outdoor surface, or a private court-like area can make a machine useful. A living room cannot. An attached garage might work for low-speed feeds only after the wall, floor, and noise have been tested.
Even in a good space, a machine does not solve the parts of tennis that require an opponent: reading spin off a racquet, adjusting to awkward depth, handling pressure, choosing targets under match conditions, and recovering after a ball that was not fed to the perfect pocket. It adds volume. It does not replace playing tennis.
A realistic home-practice plan by budget
| Budget tier | Use it for | Skip it if | Best next step |
|---|---|---|---|
| $0 | Shadow swings, serve tosses, split-step patterns, racquet-control bounces | Almost never; this is the baseline | Repeat a 10–15 minute session for a week before buying gear |
| $0–100 | Foam balls, low-compression balls, tape-marked mini-court work, quiet touch drills | You are buying items that do not solve noise, space, or control | Add one ball type and one floor layout, not a pile of accessories |
| $100–300 | Rebounder nets or a carefully tested DIY wall setup | You share walls, lack ball clearance, or cannot tolerate repeated impact noise | Test bounce and sound before permanent installation |
| $300–800+ | Portable feeding volume in a driveway, garage, or outdoor practice area | You do not already have a safe hitting and collection area | Verify current specs, noise, hopper size, and storage before purchase |
A good home setup usually grows in that order. Start with technique because it works almost anywhere. Add soft balls or tape only when they make the same drills safer and more repeatable. Move to a rebounder or wall only when the sound and return behavior fit the space. Consider a machine only when the practice area already works without one.
If you are ready to build beyond the tennis-specific setup, the same budget-tier thinking used in compact home gym builds and small-space equipment testing applies here too: prove the habit and the room fit before escalating the gear.
For most players, the next useful practice is still the quiet one: mark the floor, rehearse the feet, swing slowly, bounce the ball under control, and own the serve toss. Then use the living-room footwork drills and at-home forehand routine for the actual movement work. You do not need a court, a garage, or a machine to begin; you need the practice tier that respects the room you actually have.
References
- How to Practice Tennis at Home — PlayYourCourt
- How to Practice Tennis at Home: 7 Solo Drills — TeachMe.To
- 10 tips to practice tennis alone like a pro — On
- Outdoor Tennis Rebounder vs Indoor Practice Wall — All Court Sports Guide
- Tennis Ball Machines — Tennis Express
What a small equipment investment adds
We don't have a build tagged to this exact tier yet. Browse all builds.
How often should you repeat this?
See our recovery and rest reference for citation-anchored rest-interval guidance.
Spot something off?
Tell us if a movement, tier assumption, or duration didn't match your experience.