
How to Build a Better Tennis Forehand at Home in 15 Minutes
No court? No partner? This 15-minute routine uses shadow swings and wall drills to rebuild your forehand mechanics step by step—starting with weight transfer and ending with topspin control.
What this routine assumes
Equipment required: Racket
No equipment required, no purchase needed to follow this routine.
The routine
- Duration
- 15 min
- Difficulty
- Beginner
- Space needed
- Small indoor space (apartment living room, garage)
- Noise level
- Low
You can work on tennis forehand technique at home without a court, partner, ball machine, or even a wall. The useful version is tiered: racket-only shadow swings first, optional resistance-band sequencing second, optional wall contact third, and a topspin trainer only if you already have a repeatable swing and need help feeling the brush.
That order matters. Rallying often hides the problem because the ball keeps forcing decisions: reach, block, flick, survive. At home, the ball stops interrupting the rebuild. Feel Tennis makes this point directly: home practice can isolate fundamentals better than rallying because the player can repeat the movement without chasing a live ball, and Tomaz Mencin identifies pelvis disengagement as the most common single forehand flaw he sees in recreational players after working with hundreds of students. Treat that as an experienced coach’s pattern recognition, not a measured incidence rate, but it names a real thing many adult players feel: the arm swings, the body opts out, and the forehand never quite connects. [1]
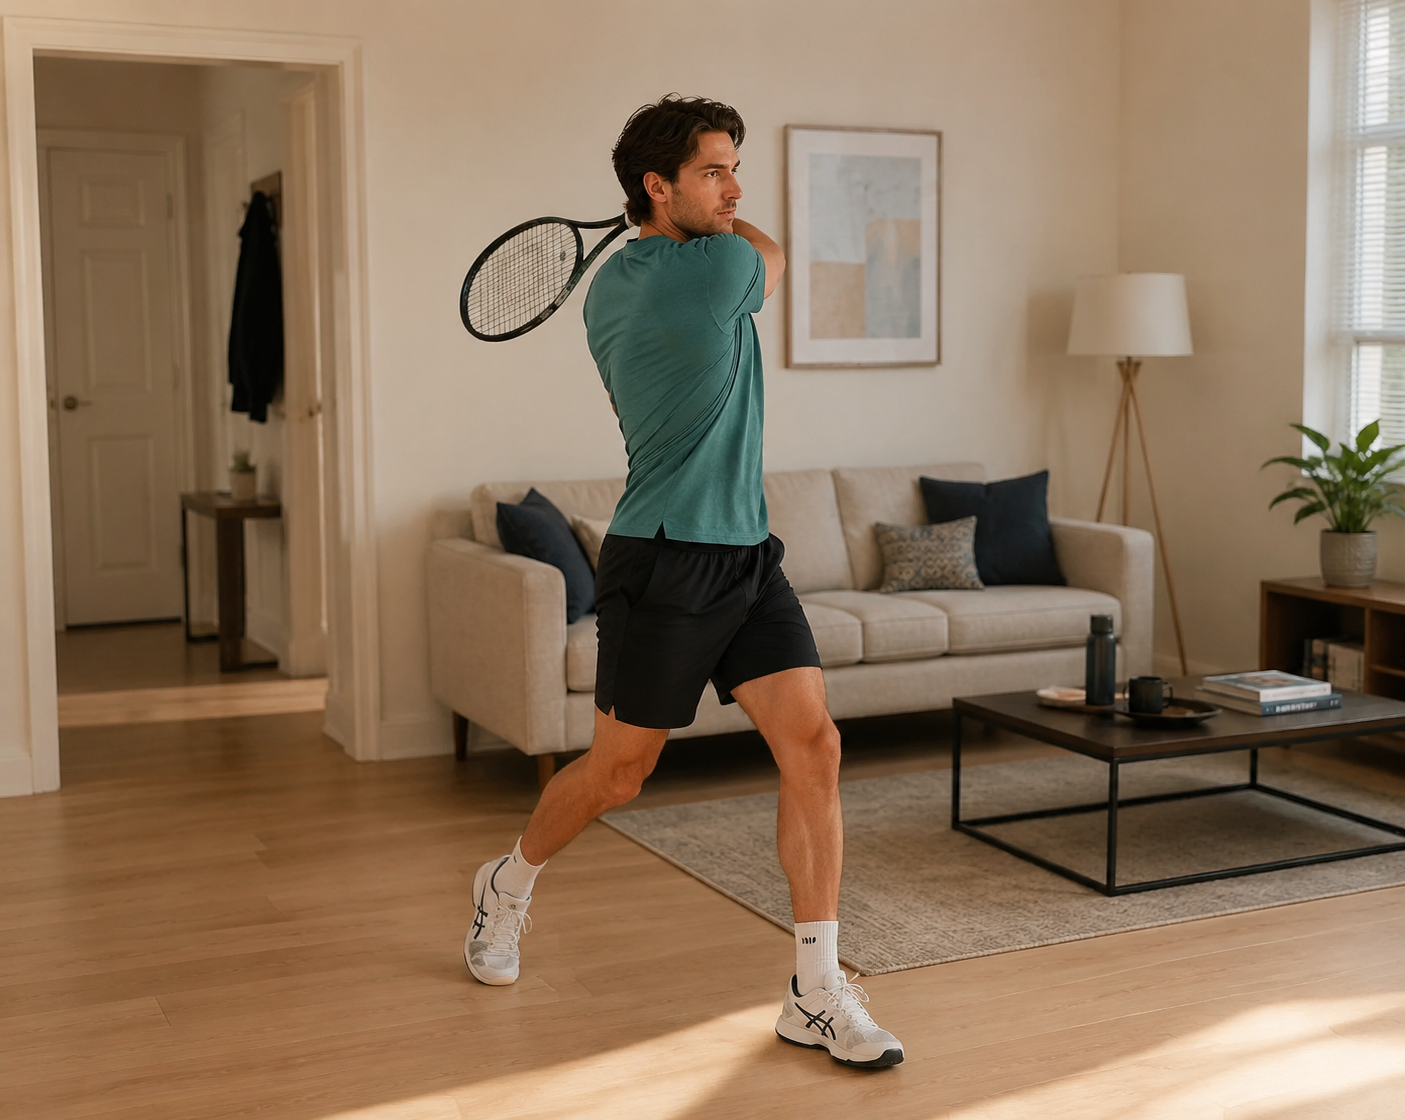
The 15-Minute Home Forehand Routine
Assume the smallest workable setup: one racket, enough room to swing safely, and a floor where you can mark two foot positions with tape or imagine them. A wall, resistance band, rebound ball, or topspin trainer can help later, but Phases 1–3 are still a complete practice block in an apartment or small garage.
| Time | Phase | Main Job | Equipment |
|---|---|---|---|
| 0:00–2:00 | Set stance and unit turn | Build the starting shape before the racket moves | Racket only |
| 2:00–5:00 | Weight transfer without spinning open | Connect feet, hips, and torso | Racket only; optional tape |
| 5:00–8:00 | Wrist lag and racket drop | Let the racket trail instead of forcing the wrist | Racket only |
| 8:00–12:00 | Full slow shadow swing | Blend the chain into one repeatable motion | Racket only |
| 12:00–15:00 | Optional wall or control test | Check contact rhythm without turning it into a rally | Wall, soft ball, or skip |
If you have no wall, do not replace the last three minutes with frantic imaginary hitting. Use them for slower full swings and two freeze checks: one at the loaded position, one at the finish. The routine still works because the most important reps happen before contact.
This routine follows the same equipment-tier idea as our home golf routine: start with the movement pattern, then add tools only when they solve a specific problem. If you are already building a compact training corner, the same bands, mat, and storage logic from a small-space home gym can cover this setup without turning the living room into a tennis shop.
0:00–2:00 — Build the Shape Before the Swing
Start in a neutral athletic stance, feet a little wider than your hips. Hold the racket in front of you as if the ball is coming to your forehand side. Turn your shoulders and hips together so the racket moves back as part of your torso turn, not as an independent arm reach.
The modern forehand sequence taught by Feel Tennis begins with the unit turn, then moves through hip rotation, wrist lag, swing path, and finish. You do not need to recite the sequence while practicing, but your first two minutes should look like that order: body turns first, racket follows, arm stays quiet enough that the stroke has somewhere to load. [2]
- Feet: mark your outside foot and inside foot if you tend to wander; the goal is repeatability, not a perfect pro stance.
- Hips: turn them with the shoulders at first; do not leave them facing the imaginary net while the arm goes back alone.
- Racket face: keep it calm and slightly closed or neutral; avoid opening it toward the ceiling during the takeback.
- Checkpoint: pause after the unit turn and make sure your chest is turned, your hitting arm is relaxed, and your weight is not already falling backward.
2:00–5:00 — Transfer Weight Without Disconnecting the Pelvis
This is the part worth doing slowly enough to feel almost boring. Load into the outside leg during the unit turn. Then shift pressure toward the front foot as the hips begin to unwind. The arm does not get permission to race ahead. If your racket is already flying forward while your belt buckle is still frozen sideways, the kinetic chain has broken.
A good home cue is to rehearse the stroke in two beats. Beat one: turn and load. Beat two: push from the ground and let the hips begin the forward swing. Do ten slow reps where the racket barely moves forward until your weight has started to move. Then do ten more with the full swing added.
The compensation to watch for is spinning. Many players hear “use your hips” and simply rip the front shoulder open. That creates rotation, but not transfer. If your finish pulls you off balance, or your back foot whips around because you are yanking your torso instead of moving pressure through the ground, slow down and make the next five reps half-speed.
An optional resistance band can make this clearer. Anchor it safely at about waist height, hold the free end near your torso with both hands, and rehearse the unit turn against light resistance before rotating forward. If you use a door anchor, set it up conservatively and inspect the door direction, hinge side, and anchor position first; the safety details matter more than the extra resistance. Our resistance band door anchor guide covers that setup.
5:00–8:00 — Create Wrist Lag Without Manipulating the Wrist
Wrist lag is easy to fake in a garage mirror. You can cock the wrist, admire the angle, and still have a forehand that collapses the moment a ball arrives. The useful version comes from the racket dropping and trailing as the body starts forward. The wrist feels loose, not posed.
TopspinPro’s forehand drill library uses a “bowling motion” drill and an edge-drop technique to teach this feeling: the racket falls and travels from below the ball path rather than being pushed straight forward by the hand. Those are good ideas even without the device, because they make the hand behave like a link in the chain instead of the engine. [3]
- Hold the racket loosely enough that the head can feel heavy.
- Turn and load as before.
- Let the racket head drop with the edge leading downward, as if it is falling into the slot behind you.
- Begin the forward move from the ground and hips, allowing the racket to trail for a moment.
- Swing up and through without snapping the wrist at an imaginary ball.
If you feel tension in the forearm, stop chasing the lag angle. Do smaller swings. The racket should feel late because your body started first, not because your wrist is being held hostage.
8:00–12:00 — Blend It Into a Full Shadow Forehand
Now run the whole forehand at about half speed. No ball. No target. No heroic finish. Just one clean chain: unit turn, load, hip start, racket drop, lag, low-to-high swing path, balanced finish.
Do three sets of eight reps. Between sets, check one thing only. First set: weight transfer. Second set: racket lag. Third set: finish balance. Trying to correct five details at once usually turns the swing into a pile of tiny repairs.
| If You Notice | It Usually Means | Change the Next Rep |
|---|---|---|
| You fall backward | Your weight transfer is late or absent | Load slower, then move pressure forward before the arm accelerates |
| The racket face opens up | Your hand is steering the takeback | Keep the unit turn quieter and reduce swing size |
| Your wrist feels locked | You are posing lag instead of letting the racket trail | Loosen the grip and rehearse the edge drop |
| You spin off the imaginary shot | Rotation has replaced balance | Finish with your chest forward and your head steady |
| Your finish changes every rep | The swing path is not stable yet | Return to half speed and stop after contact height |
This is also where a phone camera is more useful than another tip video. Film from behind and from the side. You are looking for gross sequencing errors, not frame-perfect imitation: does the body turn before the arm, does pressure move forward, does the racket drop, and can you finish without a recovery step?
12:00–15:00 — Add the Wall Only as a Test
A wall is useful because it gives immediate feedback, but it can also drag you back into survival mode. Top Tennis Training recommends progressing wall work and includes a catch drill that turns the wall into a control test rather than a chaotic rally: hit, read the rebound, catch or control the next ball, then reset. [4]
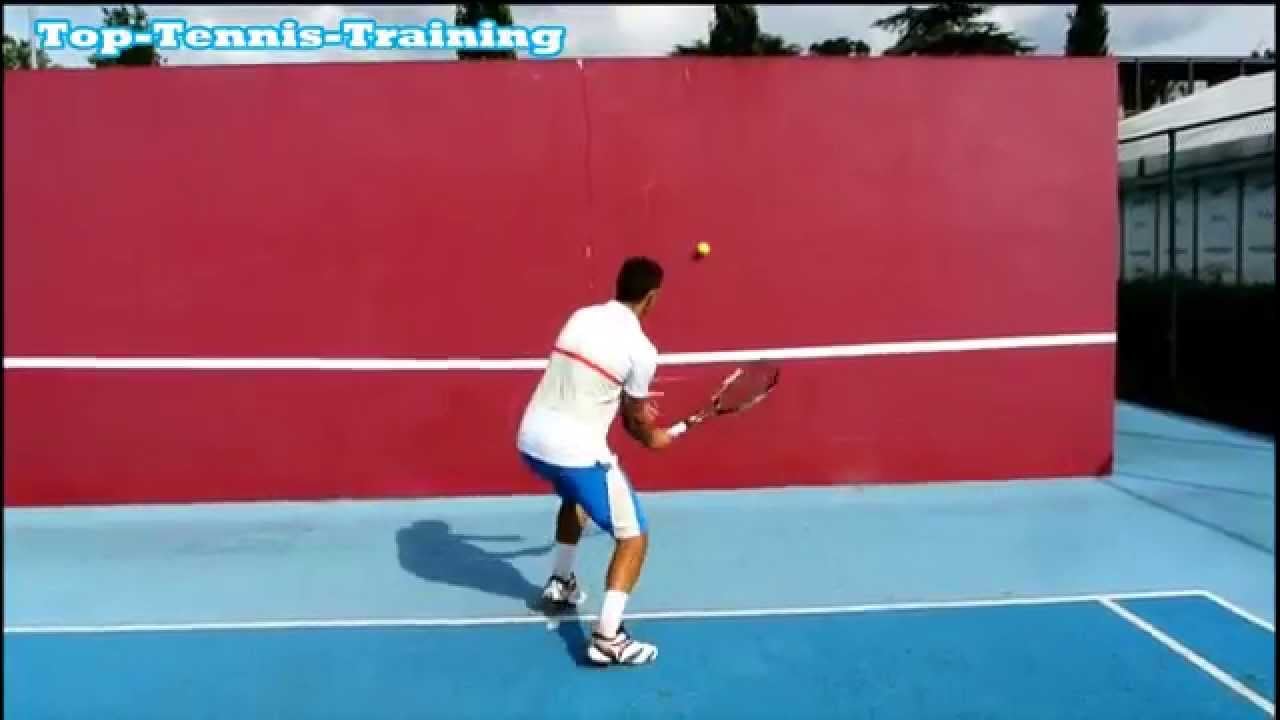
For three minutes, stand close enough that you can swing at 40–60% speed. Feed yourself one easy ball. Hit a controlled forehand into the wall. Let the ball rebound once. Catch it with your hand or trap it gently with the racket. Reset your feet. Repeat.
The catch matters because it prevents the wall from becoming a panic machine. Tennis.com has argued for the backboard as an underrated practice tool, but the benefit for this routine is narrow: it shows whether your slow mechanics survive the arrival of a real ball. [5]
- Pass: you can hit 10 controlled forehands with a reset between each one, without falling backward or slapping with the wrist.
- Almost pass: you keep the ball under control but your feet drift; move closer, slow down, and use the catch drill.
- Not ready: the wall makes you rush the takeback, open the racket face, or flick the wrist; return to shadow swings for another week.
How to Progress Without Fooling Yourself
The calendar is less important than the checkpoints. A week-by-week plan is useful only if it keeps you from adding speed before the swing can carry it.
| Stage | What to Emphasize | Move On When |
|---|---|---|
| Week 1 | Unit turn, stance, slow weight transfer | You can repeat 20 slow swings without losing balance |
| Week 2 | Racket drop and natural wrist lag | The racket trails without a forced wrist angle |
| Week 3 | Full shadow swing at controlled speed | Your finish lands in the same place most reps |
| Week 4 | Wall contact or soft-ball control | You can pass the reset-and-catch wall test |
That timeline is a coaching-informed progression, not a contract. If your wrist lag disappears when you swing faster, you are still in Week 2 for that skill. If the wall makes your pelvis disconnect and your arm take over, you are not failing the routine; the wall is simply telling the truth earlier than a friendly rally would.
Beginner solo drills can supplement the routine if they do not replace it. TeachMe.To lists at-home options such as shadow swings, footwork drills, and controlled solo practice for newer players. Use those as side dishes: footwork ladders, bounce control, and coordination work are helpful, but they should not crowd out the main forehand sequence if the goal is rebuilding mechanics. [6]
Where Topspin, Rebound Balls, and Training Aids Fit
A rebound ball is cheap and tempting, but it is not a clean substitute for a wall or a court. It can help with timing and hand-eye contact, yet the elastic return often changes the rhythm enough that you start reacting to the toy instead of rehearsing the stroke. Use it only after the shadow swing is stable, and stop if it makes you poke or scoop.
A TopspinPro belongs even later. Its own at-home practice material places shadow swings and structured home drills at the center of solo practice, and its forehand drills are most useful for a specific missing piece: brushing up the back of the ball and feeling the low-to-high release. [7][3]
The kneeling topspin drill is a good example. Taking the legs out can make the brushing path obvious, but it is not where a disconnected forehand should begin. If your weight transfer and racket drop are messy, kneeling and brushing may give you a nicer spin feeling while leaving the full stroke disconnected. Use it as a topspin clarification drill, not as the foundation.
At $149, that distinction is practical, not just philosophical. Some players will get enough feedback from it to justify the cost; others will use it twice and return to shadow swings. It is worth considering if you can already transfer weight without spinning open, keep the racket lagging without wrist manipulation, and repeat a low-to-high swing path slowly. It is not worth buying because your forehand feels generally bad.
A Simple Readiness Test
Before adding speed, topspin tools, or harder wall rallies, run this test at the end of a session.
- Do five slow shadow swings and freeze after the unit turn; your hips and shoulders should be loaded together.
- Do five more and freeze just before the forward swing; your weight should be ready to move forward, not sitting on the back foot.
- Do five more and watch whether the racket drops and trails without a forced wrist angle.
- Do five full swings and finish balanced, with the racket wrapping naturally and your head not yanking away.
- If you have a wall, hit 10 reset-and-catch forehands at low speed.
If you pass the shadow version but fail the wall version, stay with short wall feeds and catches. If you fail the shadow version, the answer is not more balls. It is slower reps.
A racket plus a safe swing area is enough for the first rebuilding block. A light resistance band can add useful body sequencing if you anchor it safely. A rebound ball is optional and imperfect. A $149 topspin trainer is a narrow aid for brushing and release after the base mechanics are already repeatable. The useful standard is not that 15 minutes at home magically beats every hour on court. It is that 15 structured minutes can give you cleaner forehand reps than an hour of unfocused rallying, especially when the thing you are fixing is the chain itself.
References
- How To Practice Tennis At Home — Feel Tennis — https://www.feeltennis.net/practice-at-home/
- Modern Forehand Technique — Feel Tennis — https://www.feeltennis.net/modern-forehand-technique/
- Tennis Forehand Drills — TopspinPro — https://topspinpro.com/blog/tennis-forehand-drills/
- Tennis Wall Training: Improve Your Tennis Using A Wall — Top Tennis Training — https://www.top-tennis-training.com/tennis-wall-training-improve-your-tennis-using-a-wall/
- Bouncing off the walls: An ode to the backboard and 5 practice tips — Tennis.com — https://www.tennis.com/news/articles/bouncing-off-the-walls-an-ode-to-the-backboard-and-5-practice-tips
- How to Practice Tennis at Home: 7 Solo Drills for Beginners — TeachMe.To — https://teachme.to/blog/how-to-practice-tennis-at-home-7-solo-drills-for-beginners
- At-Home Tennis Practice Guide — TopspinPro — https://topspinpro.com/blog/at-home-tennis-practice-guide/
Missing the equipment, or need to rest?
- How to Train as a Soccer Midfielder at Home on Any Budget
- Build a Tennis Home Training Routine That Fits Your Equipment and Space
- Build a Golf Workout Routine for Home on Any Budget
Sore or unsure how much rest you need? Read Recovery & Rest— this routine doesn’t cover injury-specific advice.
Comments
Join the discussion with an anonymous comment.