
How to Train as a Soccer Midfielder at Home on Any Budget
A complete, position-specific soccer training program for midfielders you can run at home, organized by equipment budget — from a ball and a wall to a full rebounder setup. Each tier includes a weekly schedule and a sample session built around the five midfielder essentials: scanning, first touch, passing, agility, and endurance.
What this routine assumes
Equipment required: Soccer ball and wall
No equipment required, no purchase needed to follow this routine.
The routine
- Duration
- 25 min
- Difficulty
- Beginner to intermediate
- Space needed
- Small space (driveway, garage, or room corner)
- Noise level
- Low to moderate
The first question is not what a midfielder would buy in a perfect setup. It is what you can do this week with the space, wall, ball, and budget you actually have. Good football training at home for midfielders should not feel like a random fitness circuit with a ball nearby. It should keep coming back to the rhythm of the position: receive, scan, decide, play, move again.
Commonly cited coaching figures put midfielders around 10–13 km covered in a match, with roughly 150–250 high-intensity actions layered into that work.[1] Those numbers are not lab-grade proof for every player in every role, but they describe the problem well enough: endurance alone is too blunt, and cone tricks alone are too small. A home program has to train five things together: scanning, first touch, passing accuracy, change-of-direction agility, and game-endurance conditioning.
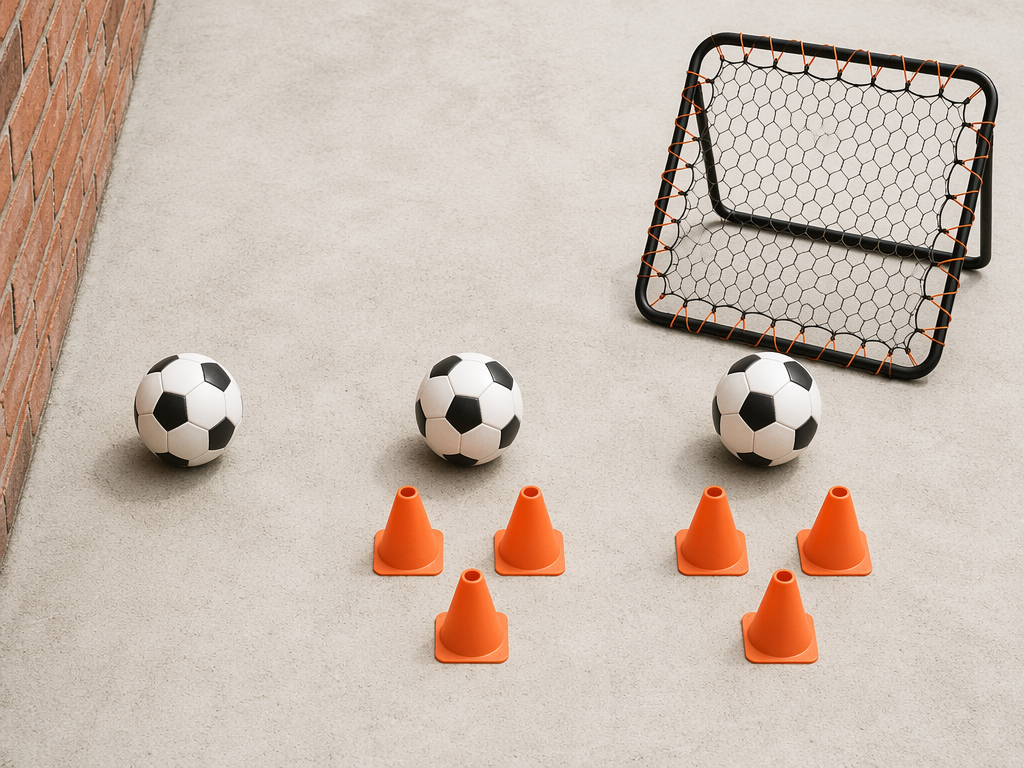
The Three Budget Tiers
| Tier | Assumed setup | Useful space | What it covers best | What it does not solve |
|---|---|---|---|---|
| Tier 1: Ball and wall | Soccer ball, safe wall or rebound surface, optional chalk or tape mark | About a small driveway, garage bay, patio, or quiet indoor wall area | Passing volume, first touch, scanning habit, simple turning, soccer-specific conditioning | Limited angles and less realistic pressure |
| Tier 2: Ball plus cones or markers | Ball, wall, 4–8 cones, flat discs, shoes, socks, or water bottles as markers | A rectangle or lane you can change direction in | Sharper body shape, turning angles, change of direction, receiving into space | Still depends on your wall quality and self-discipline |
| Tier 3: Ball, cones, and rebounder | Ball, cones or markers, portable rebounder or angled return net | Small yard, driveway, garage, or turf strip with a safe rebound path | Tempo, varied returns, cleaner repetition, passing under fatigue | Costs more and can hide poor wall habits if used lazily |
A wall is not a consolation prize. Playermaker’s at-home drill guide points to the simple value of a wall: a player can collect hundreds of targeted first-touch and passing repetitions in about 10 minutes.[2] That is why Tier 1 gets the most attention here. If a player cannot make the ball, the wall, and their own checking shoulder useful, more equipment will mostly make the mistakes travel faster.
Equipment does have a place. Home soccer gear guides commonly start with basic items such as a ball, cones, a pump, and rebound tools, and the useful entry point is well below the price of a full backyard setup.[3] Small-space agility work is also a real option when the work is planned around acceleration, deceleration, and sharp direction changes instead of long sprints.[4] So the tiers below are not a purity test. They are a way to spend money only when it buys better repetitions.
The Five Essentials Every Session Must Touch
- Scanning: looking before the ball arrives, not after it is already under your feet.
- First touch: taking the ball where the next action lives, not just stopping it dead.
- Passing accuracy: striking a realistic target with the correct weight, foot surface, and timing.
- Change of direction: braking, opening the hips, turning, and escaping after a bad touch.
- Game-endurance conditioning: repeated technical actions while tired, not a generic burn that ignores the ball.
A defensive midfielder may give more time to receiving side-on and playing away from pressure. A box-to-box midfielder may need more repeat sprint and recovery work. An attacking midfielder may need more half-turns, disguise, and first touch into a shot or final pass. The home structure can stay the same, but the emphasis should move with the role.
Tier 1: Ball and Wall
This is the most important tier because it removes the easiest excuse. You need one ball, one safe wall, and enough space to stand three to seven yards away. If the wall is indoors or shared, use a softer ball, reduce the power, and pick a target that will not annoy everyone in the house. The apartment version can still work, but the session becomes more about touch, scanning, and quiet passing than heavy striking.
A full solo midfielder session can include wall passing, dribbling patterns, turns, and conditioning, which supports the basic idea that a player training alone can still build a rounded session.[5] Separate no-equipment home sessions also show that a complete training block does not have to begin with a gear list.[6] The catch is that the player has to give the wall a job. Just smashing the ball at brick for 20 minutes is noise with sweat attached.
Tier 1 Weekly Schedule
| Day | Session | Main focus |
|---|---|---|
| Monday | 20–25 minutes | Wall passing, scanning, first touch across the body |
| Tuesday | Off or light mobility | Let the feet and calves recover |
| Wednesday | 20–25 minutes | Turns, weak-foot passing, short conditioning finish |
| Thursday | Off or easy juggling | Low load, cleaner ball feel |
| Friday | 25–30 minutes | Mixed midfielder circuit with fatigue |
| Weekend | Game, pickup, or 15-minute touch session | Do not stack hard conditioning on top of a match |
Three good sessions beat six restless ones. Young players especially tend to turn every mistake into extra punishment. That usually makes the next touch worse. Keep the ball moving, keep the eyes working, and leave a little quality for the next day.
Tier 1 Sample Session: 24 Minutes
- Warm up for 3 minutes. Dribble in a small square or lane. Use inside, outside, sole, and laces touches. Every four touches, look over one shoulder before touching the ball again. The look matters more than the speed.
- Wall pass rhythm for 5 minutes. Stand four to six yards from the wall. Pass with the inside of the right foot, receive with the right, then pass with the left, receive with the left. Before every return arrives, glance over your shoulder. If you cannot scan before the ball arrives, slow the pass down.
- First touch across the body for 5 minutes. Pass to the wall. As the ball comes back, open your hips and take the first touch across your body as if escaping pressure. Right-foot pass, left-foot receive across. Left-foot pass, right-foot receive across. The mistake to watch for is receiving square to the wall and needing an extra touch to turn.
- Check away, check to, play for 4 minutes. Start two steps back from your passing spot. Move away from the wall, then check toward it as the imaginary pass is about to arrive. Pass, receive, touch out of your feet, and move back again. This gives the rep a midfielder’s timing instead of a stationary passing pattern.
- Bad-touch repair for 3 minutes. Deliberately take every fifth first touch slightly too far left or right. Sprint one step to fix it, recover body shape, and play the next pass clean. Midfielders do not get clean games. They get repair work.
- Conditioning finish for 4 minutes. Work 20 seconds on, 20 seconds easy. During the work period, pass to the wall, receive across the body, play again, then shuffle two steps sideways before the next pass. During the easy period, walk and reset. Keep the passes accurate when breathing gets messy.
If you only have five square yards, shorten the passing distance and reduce the force. The session still works if the information loop stays alive: scan, receive, decide, play, move. If the wall is unforgiving or loud, use a lighter ball and turn the passing blocks into cushioned one-touch or two-touch work.
How to Progress Without Buying Anything
The first progression is not speed. It is cleaner information. Put two small visual cues behind you: a parent holding up fingers, two colored objects, or two doors you can name after scanning. Before the ball arrives, look, call the cue, then take the first touch that matches it. If the cue is “left,” the first touch goes across the body left; if the cue is “right,” the touch opens right. The cue does not need to be clever. It only needs to make the player look before receiving.
The second progression is foot discipline. Give the right foot a job and the left foot a job. For example, receive with the back foot and pass with the front foot for one block, then reverse it. A lot of home drills look tidy because the player keeps choosing the comfortable solution. Midfield training should remove that hiding place.
The third progression is fatigue with accuracy. Add short work intervals only after the passing target is reliable. Bodyweight movements such as squats, lunges, pushups, and core work are common soccer conditioning foundations, but they should not take over the session.[7] Use them as short separators: 20 seconds of split squats, then back into wall passing. The ball tells you whether the conditioning is helping or just making you sloppy.
Tier 2: Ball Plus Cones or Simple Markers
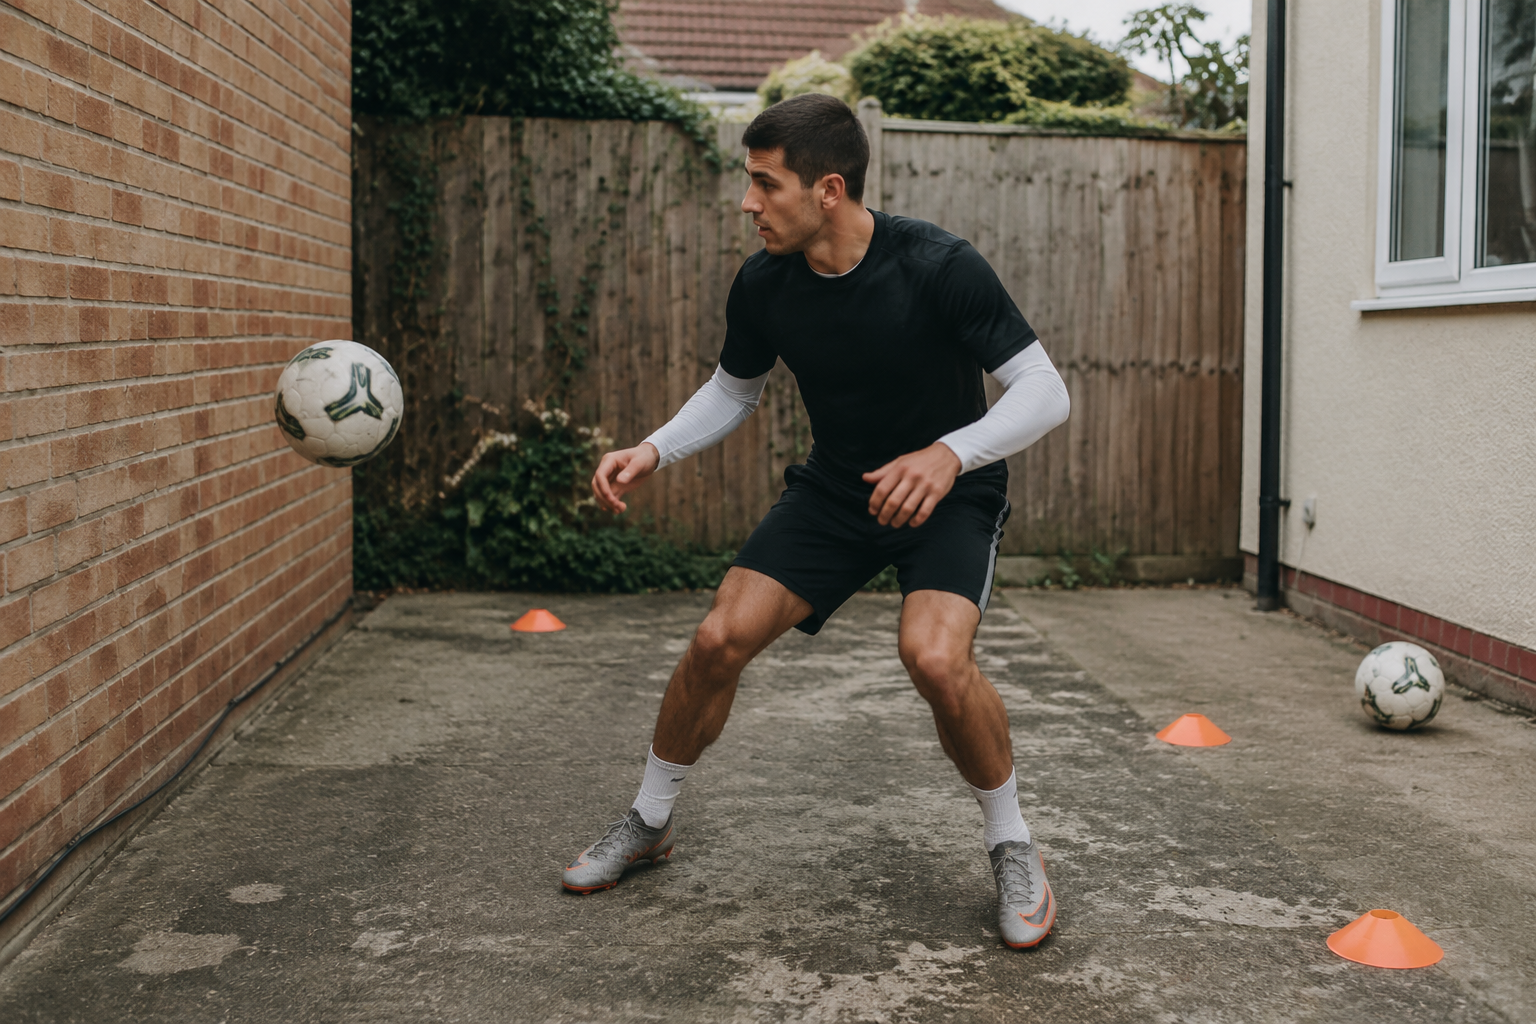
Cones do not make the player better by existing on the ground. They help when they define angles. A midfielder rarely receives, stands still, and passes straight back where the ball came from. Cones can mark the checking run, the receiving pocket, the escape touch, and the next movement. If you do not have cones, use flat markers, socks, water bottles, or tape.
Tier 2 Weekly Schedule
| Day | Session | Main focus |
|---|---|---|
| Monday | 25 minutes | Wall passing through gates, first touch into lanes |
| Tuesday | 15–20 minutes easy | Juggling, mobility, weak-foot touches |
| Wednesday | 25–30 minutes | Turns, cone angles, change of direction |
| Thursday | Off | Recovery |
| Friday | 25–30 minutes | Mixed technical conditioning circuit |
| Weekend | Game, pickup, or role-specific top-up | Defensive mid: receive side-on; attacking mid: half-turn and play forward |
Tier 2 Sample Session: 28 Minutes
- Set up the space. Put two cones one yard apart as a passing gate three to five yards from the wall. Put one cone two yards left of your starting spot and one cone two yards right. Those side cones are your escape pockets.
- Warm up for 4 minutes. Dribble around the side cones in a figure-eight. At the middle, lift your head and call which cone you are going to next. Keep the ball close enough that one bad touch does not end the rep.
- Gate passing for 5 minutes. Pass through the cone gate into the wall. Receive the return and take your first touch to either side cone. Reset through the middle. Every rep starts with a shoulder check before the ball comes back.
- Half-turn work for 5 minutes. Start with your back partly to the wall, as if checking into midfield. Pass to the wall, open your body, receive on the back foot, and turn toward one side cone. The common mistake is letting the ball run square across both feet instead of taking it into the next action.
- Change-of-direction block for 5 minutes. Pass, receive, touch to the left cone, plant, return through the middle, pass again, touch to the right cone. Make the plant quiet and strong. Slipping around the cone with loose feet is not the same as changing direction.
- Pressure clock for 5 minutes. Give yourself two touches only. First touch out of pressure, second touch through the gate. If you miss the gate, do not restart casually. Sprint to collect the ball, return, and play the next rep clean.
- Conditioning finish for 4 minutes. Work 30 seconds on, 30 seconds off. During work, pass through the gate, receive to a side cone, return through the middle, and repeat. Count only accurate passes through the gate.
This tier is where many midfielders start to look more game-like. The cones force the first touch to have a destination. They also expose a player who can dribble around objects but cannot arrive balanced enough to pass. Small-space speed work can be useful for exactly this reason: the training space is short, so the quality is in the brake, turn, and re-acceleration rather than in a long sprint.[4]
Tier 3: Ball, Cones, and Rebounder
A rebounder is useful when it improves the return: different pace, different height, different angle, less waiting. It is not mandatory. A good wall teaches honesty because the ball usually gives back what you put into it. A rebounder can add variety, but it can also let a player float lazy passes into a net and call the bounce “training.”
Use the rebounder when the player already has a basic wall rhythm. Angle it slightly so the return is not always straight. If the rebounder has two surfaces or adjustable tension, use one block for firm ground returns and one block for awkward bouncing returns. The point is not to make the session fancy. The point is to make the midfielder solve a new first-touch problem without a coach feeding perfect passes.
Tier 3 Weekly Schedule
| Day | Session | Main focus |
|---|---|---|
| Monday | 25–30 minutes | Rebound passing, first touch, scanning cue |
| Tuesday | Off or mobility | Recovery |
| Wednesday | 25 minutes | Cone angles, turns, weak-foot return control |
| Thursday | 15–20 minutes easy | Low-intensity ball mastery or juggling |
| Friday | 30 minutes | High-tempo midfielder circuit |
| Weekend | Match or pickup | Let real opponents supply pressure the equipment cannot |
Tier 3 Sample Session: 30 Minutes
- Set up the rebounder three to six yards away. Place one cone as your starting point, two cones as side pockets, and one cone behind you as a scan marker. If the surface returns the ball quickly, start closer to control the pace before backing up.
- Warm up for 4 minutes. Pass softly into the rebounder, receive with two touches, and move around the starting cone after each pass. Keep the hips loose and the eyes up.
- Variable return block for 6 minutes. Strike five passes with the inside of the foot, five with the laces, then five with the weaker foot. Before each return, glance at the scan marker behind you. If the ball pops up, cushion it rather than stabbing at it.
- Receive and escape for 6 minutes. Pass into the rebounder. Take the return with the back foot into a side pocket. Pass again from that new angle. Alternate left and right. The mistake to watch for is letting the rebounder rush you into square feet and a straight first touch.
- One-touch or two-touch decision block for 5 minutes. Have a parent, teammate, or timer call “one” or “two” before the ball returns. On “one,” play the return first time. On “two,” take one touch into space and pass on the second. If you are alone, alternate every rep.
- Midfielder fatigue circuit for 6 minutes. Work 40 seconds, rest 20 seconds. Each work period: pass into the rebounder, receive to a cone, play again, shuffle across, play again, then recover through the middle. Count clean passes only.
- Cool down for 3 minutes. Slow wall or rebound passes, weak-foot only. Finish with the cleanest contact of the session, not the hardest.
This is the tier for players who already train consistently and want more tempo. It also helps parents who cannot stand outside feeding passes for half an hour. Still, the rebounder is an upgrade in feedback, not a badge of seriousness. If the player stops scanning because the net is fun, the cheaper setup was doing better coaching.
How the Weekly Work Should Change by Role
Do not rebuild the whole program because someone plays a slightly different midfield role. Change the emphasis inside the same structure.
| Role | Add more of | Reduce slightly | Best home cue |
|---|---|---|---|
| Defensive midfielder | Scanning before receiving, back-foot touch, playing away from pressure | Showy dribbling patterns | Check both shoulders before the wall return |
| Box-to-box midfielder | Repeated work intervals, cone changes of direction, clean passing while tired | Long stationary passing blocks | Can you still hit the target in the final minute? |
| Attacking midfielder | Half-turns, disguise, first touch forward, quick one-touch play | Slow reset time between reps | Receive as if the next pass breaks a line |
Off-the-ball movement matters here too. Midfielder training resources often stress checking into space, creating passing angles, and moving again after releasing the ball.[8] At home, that means the rep should rarely end with the pass. Play the ball, move two steps, scan, and get ready for the next action.
A Four-Week Rotation That Does Not Go Stale
The same 20–30 minute window can repeat for a month without becoming dull if only one variable changes at a time. Do not add weaker foot, speed, smaller targets, longer intervals, and one-touch limits all in the same week. That is how clean training turns into chasing.
| Week | Main change | Keep stable | What to track |
|---|---|---|---|
| Week 1 | Learn the layout and rhythm | Comfortable passing distance | Clean target hits and scanning habit |
| Week 2 | Add weaker-foot requirements | Same session length | Whether the first touch still sets up the pass |
| Week 3 | Add speed or shorter rest | Same targets and angles | Accuracy under fatigue |
| Week 4 | Add decision cues | Same total volume | Correct first touch after the scan |
A simple training note after each session is enough: best drill, worst mistake, one fix for next time. Parents do not need a spreadsheet. Players do need to know whether they are improving the thing the drill was supposed to train.
What Home Training Cannot Replace
Home training can be complete enough to build the tools of a midfielder. It cannot fully replace pressure from opponents, tactical feedback from a coach, or the messy timing of real teammates. A wall never cuts off your passing lane. A cone never baits you into a bad turn. A rebounder never tells you that the better pass was behind the fullback instead of into feet.
That limitation is not a reason to wait for a full field. It is a reason to make the home work honest. Scan before the ball arrives. Take the first touch with a purpose. Pass to a target. Move after playing. Finish conditioning with the ball still under control. If a drill improves those pieces, it belongs. If it only looks busy on video, cut it.
Most midfielders can build an effective home program in the lower tiers. Buy the next piece of equipment only when it increases quality repetitions without breaking the budget or the space constraint.
References
- Conditioning for Soccer Midfield Endurance — Athletes Untapped — https://athletesuntapped.com/blog/soccer-midfield-endurance-conditioning/
- 11 Effective Soccer Drills You Can Do At Home — Playermaker — https://www.playermaker.com/blogs/news/soccer-drills-at-home
- Best Home Soccer Training Equipment 2026: 8 Coach Picks — Elite Champions Coaching — https://elitechampionscoaching.com/coaching-tools/best-soccer-training-equipment-for-home/
- Speed and Agility Training in Small Spaces — Next Level Athletics — https://nextlevelathleticsusa.com/uncategorized/speed-agility-training-small-spaces/
- Full Training for Midfielders (Alone!) — 360Football — https://www.360football.ch/en/blogs/trainingsblog/ganzes-training-fur-mittelfeldspieler-alleine
- Football Training Without Equipment: Full Session at Home — 360Football — https://www.360football.ch/en/blogs/trainingsblog/ganzes-fussballtraining-ohne-geraete
- The 5 Best Bodyweight Exercises for Soccer Players — Freeletics — https://www.freeletics.com/en/blog/posts/best-bodyweight-exercises-for-soccer/
- Mastering Midfield: Essential Off-the-Ball Movement Drills for Midfielders — Athletes Untapped — https://athletesuntapped.com/blog/mastering-midfield-essential-off-the-ball-movement-drills/
Missing the equipment, or need to rest?
- How to Build a Better Tennis Forehand at Home in 15 Minutes
- Build a Golf Workout Routine for Home on Any Budget
- Build a Tennis Home Training Routine That Fits Your Equipment and Space
Sore or unsure how much rest you need? Read Recovery & Rest— this routine doesn’t cover injury-specific advice.
Comments
Join the discussion with an anonymous comment.