
Phased Knee Injury Recovery Exercises at Home
A 6-week, three-phase home exercise plan for knee injury recovery using only a mat and chair, with progression guided by a traffic light pain scale rather than calendar dates.
Trust check
This pick is scored against a public rubric, not affiliate revenue. Read the methodology, or check the safety & recall status of items in this build.
If you are at home with a sore, recently injured, or clinician-cleared post-surgery knee, the first job is not to prove toughness. It is to find the smallest amount of movement your knee accepts today, repeat it calmly, and let your symptoms decide when to add more.
This guide is general education for mild-to-moderate knee injury recovery exercises at home and for people who have already been cleared by a clinician after surgery. It is not a diagnosis or a condition-specific rehab plan for an ACL tear, meniscus tear, cartilage procedure, fracture, infection, or unexplained swelling. If your clinician gave you restrictions, those instructions outrank anything here.
Use the traffic light before you use the calendar
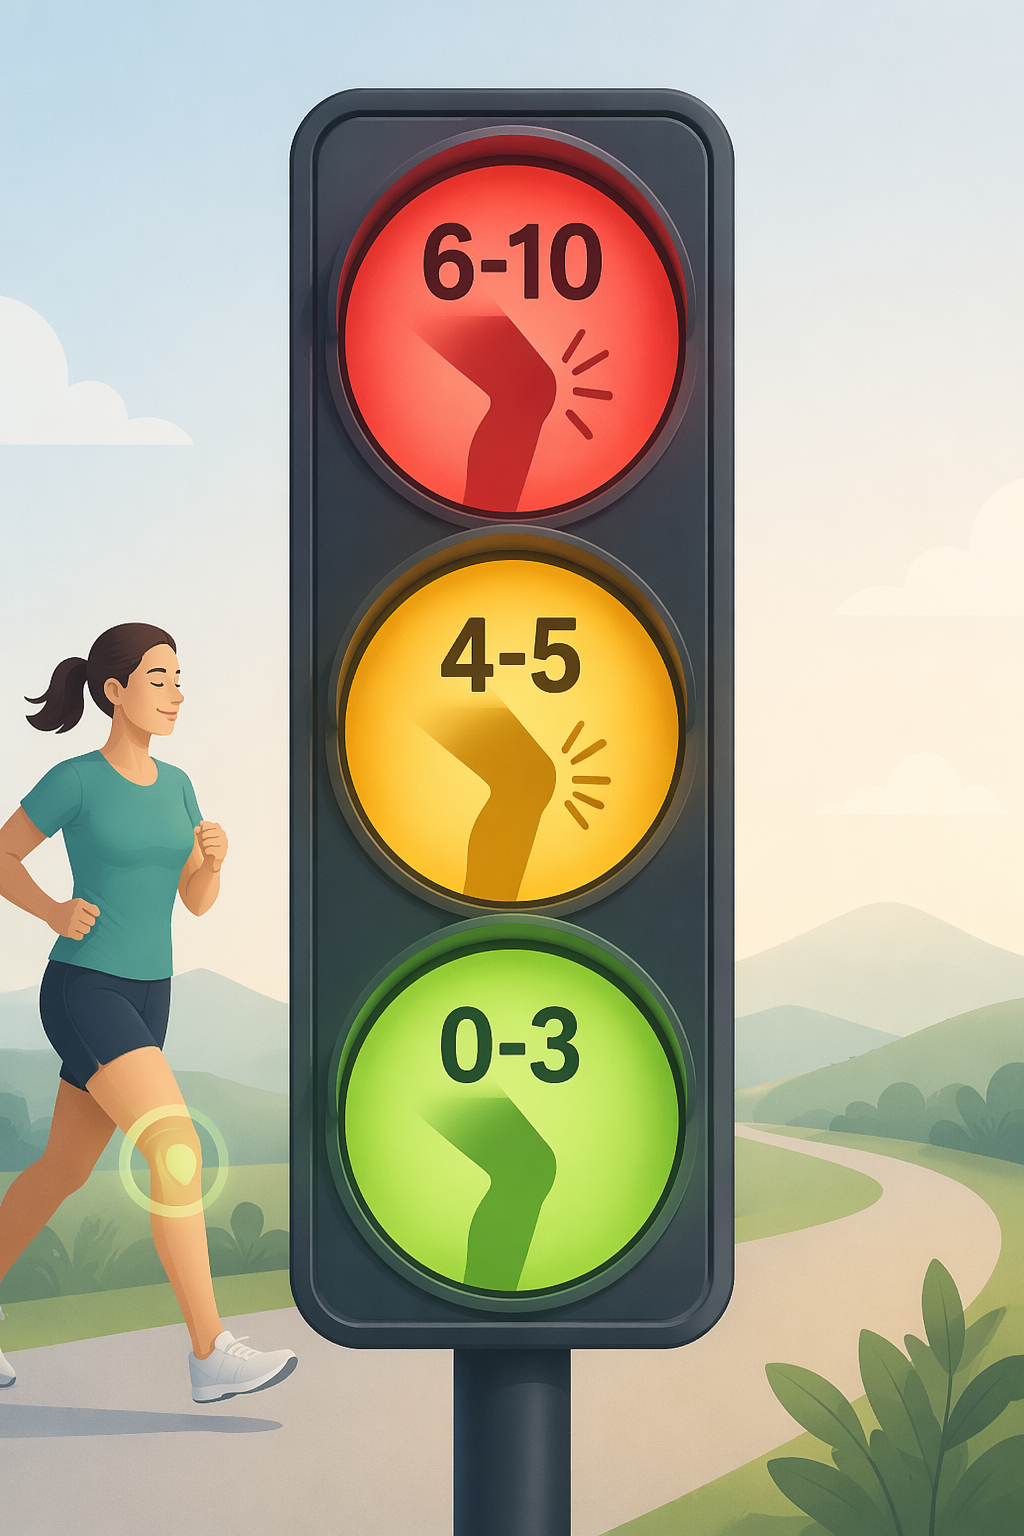
For each exercise, rate your knee pain from 0 to 10 while you move and again after you finish. The traffic light rule is simple: 0–3 is green and usually safe to continue, 4–5 is yellow and means reduce the range, reps, or effort and monitor the response, and 6–10 is red and means stop that exercise for now.[1]
| Pain response | What it means during home recovery | What to do next |
|---|---|---|
| 0–3, green | Mild discomfort or awareness that settles and does not change your walking later | Continue at the same dose or progress only if swelling and control also stay good |
| 4–5, yellow | Noticeable pain, guarding, or discomfort that makes you unsure | Make the movement smaller, do fewer reps, slow down, or return to the previous phase |
| 6–10, red | Sharp, escalating, or clearly protective pain | Stop the exercise and seek professional guidance if it repeats or comes with swelling, locking, giving way, fever, or inability to bear weight |
The calendar in this article gives a useful shape to the first 6 weeks, but it is not a promise. A knee that is calm, controlled, and in the green zone may be ready to move forward. A knee that swells, buckles, or keeps landing in yellow or red is telling you to pause, modify, or ask for help.
Knee pain is common enough that no one should feel strange for needing a cautious plan. A widely cited older estimate found frequent knee pain affecting about 25% of adults, though that 2011 figure should be read as a broad relevance marker rather than a fresh 2026 prevalence claim.[2]
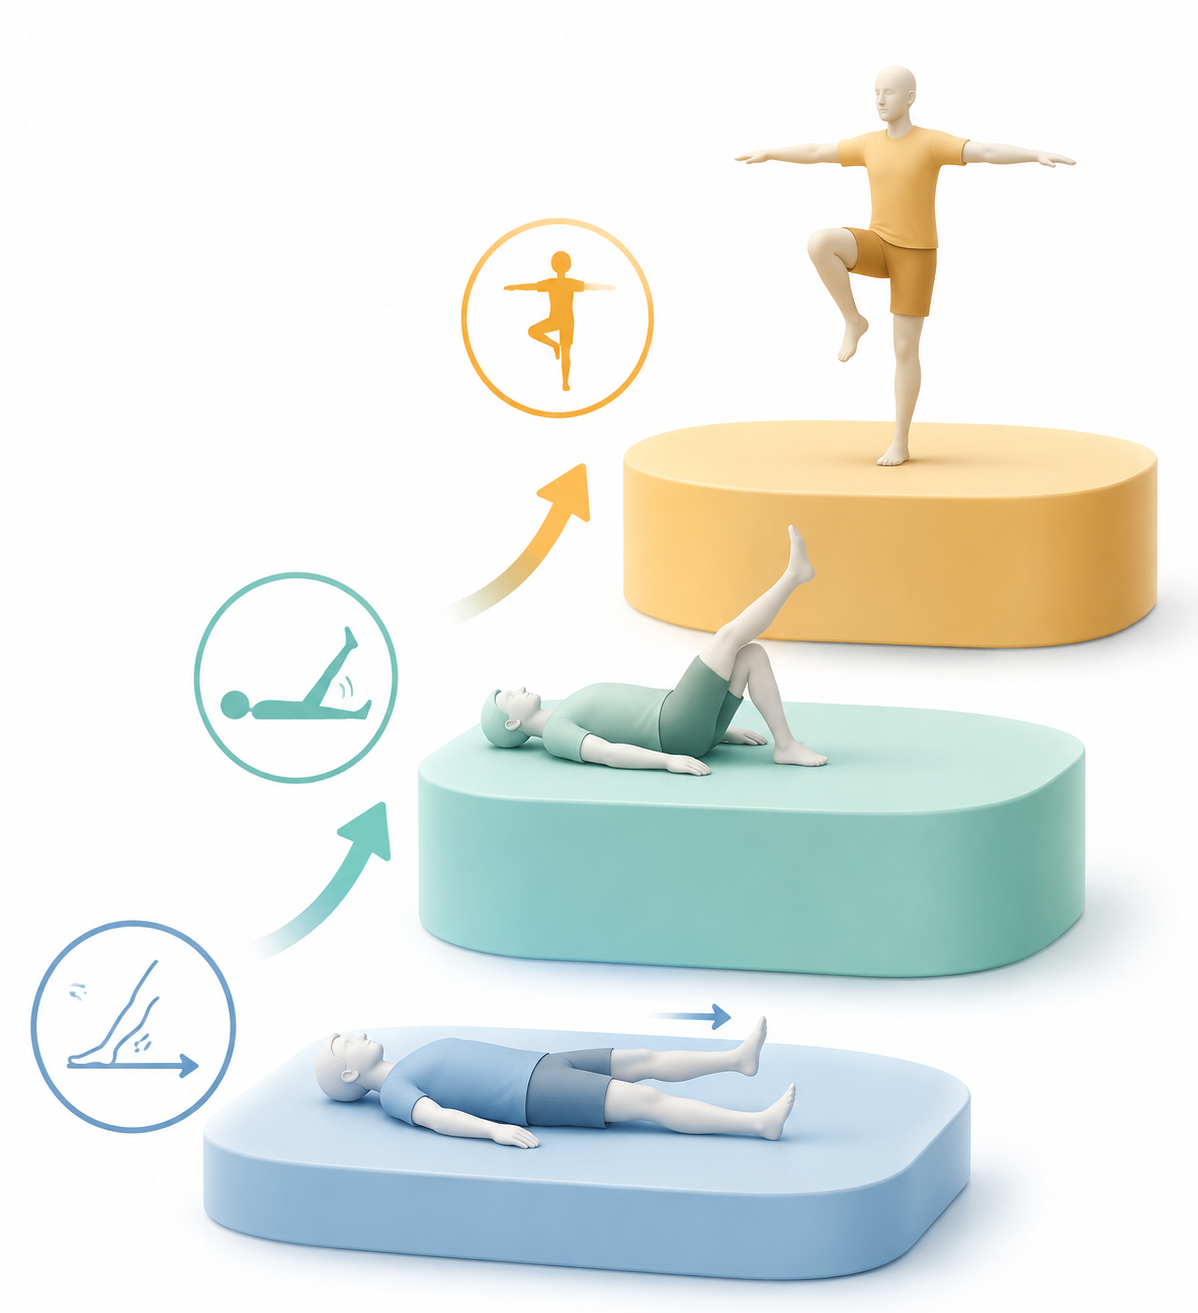
The 6-week map at a glance
You only need floor space, a mat or folded towel, and a sturdy chair. If you cannot get down to the floor comfortably, many early movements can be done on a firm bed.
| Phase | Usual timing | Main goal | Core exercises | Advance when |
|---|---|---|---|---|
| Phase 1 | Days 0–7, or longer if symptoms need it | Restore gentle motion and wake up the thigh muscle | Quad sets, heel slides, passive knee extension | Pain stays green, swelling does not increase, and you can straighten and bend the knee with less guarding |
| Phase 2 | Weeks 2–4, only after Phase 1 is tolerated | Build basic strength around the knee, hip, and calf | Straight leg raises, glute bridges, mini squats, calf raises | You can complete sessions with good form, no next-day flare, and controlled sit-to-stand or mini squat mechanics |
| Phase 3 | Weeks 4–6, only after Phase 2 is controlled | Improve balance, step tolerance, and single-leg control | Step-ups, single-leg balance, optional band side steps | You can step, balance, and move through daily tasks with green-light pain and no concerning symptom response |
The NHS knee exercise guidance starts beginners with very small doses, such as 2–3 repetitions several times a day, then builds over time toward 2 sets of 15.[3] That matters because a useful recovery plan does not have to start with a workout. In the first week, it may look like two careful heel slides every hour.
The AAOS knee conditioning program uses a 4–6 week structure, often 4–5 days per week, with 3 sets of 10 repetitions for many strengthening exercises; most of its listed exercises require no equipment beyond simple home supports such as a mat or chair.[4] That does not mean everyone should start at that dose. It means the destination is ordinary, repeatable practice rather than complicated equipment.
Phase 1: Days 0–7, gentle motion that does not poke the injury
Total rest feels safe, especially when the knee has recently hurt. The problem is that a knee can become more guarded and stiff when it gets no easy motion at all. NHS guidance says a gradual return to normal activities is the best route to good short- and long-term results after a knee problem, and physical therapy guidance also warns that immobilization can contribute to quadriceps muscle inhibition.[3][1]
Phase 1 is not training in the usual sense. It is a check-in with the joint, the thigh muscle, and your confidence. Use a dose so small that you can repeat it without bracing your shoulders, holding your breath, or dreading the next rep.
Quad sets
Lie on your back or sit with your injured leg straight and supported. Tighten the front of your thigh as if you are trying to press the back of the knee gently toward the floor or bed. Hold for 3–5 seconds, then fully relax.
- Beginner dose: 2–3 reps, several times per day, if the knee stays green.
- Build toward: 10 reps per set before adding more demanding strength work.
- Watch for: the kneecap pulling upward slightly and the thigh muscle working without a sharp joint pain.
Quad sets can look almost too small to matter. They are useful because many knees need to relearn a clean thigh contraction before leg raises, squats, or stairs are reasonable.
Heel slides
Lie on your back with both legs straight. Slowly slide the heel of the recovering leg toward your body, bending the knee only as far as it stays in the green zone. Slide the heel back out until the leg is straight again.
- Beginner dose: 2–3 gentle slides at a time, repeated through the day.
- Make it easier: put a towel under the heel so it glides instead of dragging.
- Stop short of: pinching, sharp pain, or a sense that the knee is forcing its way through the movement.
Kaiser Permanente’s meniscus rehabilitation exercise materials include early movements such as heel slides and quad activation, which is the level of simplicity this first phase needs.[5] The point here is not to copy a meniscus protocol for every knee. It is to notice that reputable early-stage rehab often begins with plain motion and muscle setting, not equipment.
Passive knee extension
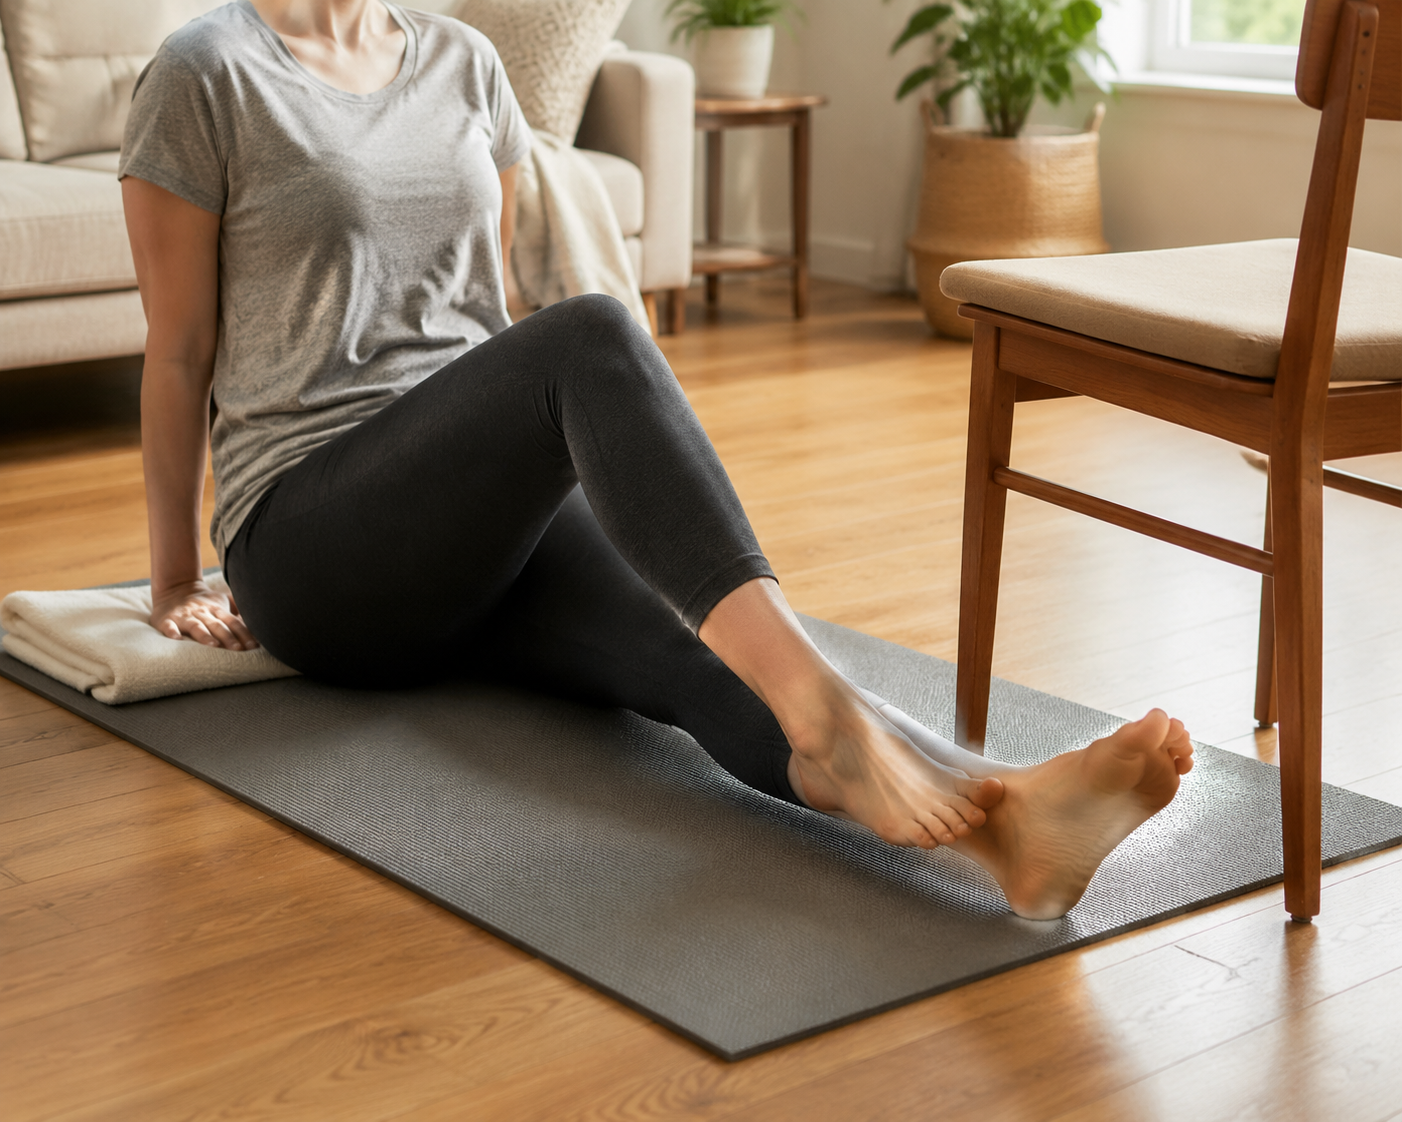
Sit or lie with your heel supported on a pillow, rolled towel, or low stool so the knee is allowed to relax toward straight. Do not force it down with your hands. Let gravity do the quiet part.
- Start with: 30–60 seconds if comfortable.
- Repeat: a few times per day if the knee does not ache afterward.
- Avoid: placing the support directly under the knee if the goal is to regain straightening.
You are ready to leave Phase 1 only when these movements feel boring in a good way: green-light pain, no increase in swelling, no new limp, and a little more trust in bending and straightening the knee.
Phase 2: Weeks 2–4, controlled strength without turning it into leg day
This is the phase where home rehab often goes sideways. Some people keep doing only heel slides because strength work feels risky. Others jump to deep squats, lunges, or long walks because the knee had one good day. Phase 2 sits in the middle: enough muscle work to rebuild support, not enough load to make the knee defensive.
A practical starting schedule is 2–3 strength sessions per week, leaving at least a day between harder sessions if your knee reacts slowly. ACSM guidance for muscle strengthening describes 2–3 sets of 8–12 reps at about 50–60% of maximum effort, while early research suggests measurable pain reduction may require at least 12 sessions and that total sessions and program duration may matter more than chasing high intensity.[6]
At home, that translates to this: start with one easy set if needed, keep every rep controlled, and let consistency do more work than effort. If you need another week before the numbers look like a standard program, take the week.
Straight leg raises
Lie on your back with the recovering leg straight and the other knee bent. Tighten the thigh of the straight leg first, then lift the leg about 12 inches. Pause briefly, lower slowly, and relax.
- Start with: 1 set of 5–8 reps if Phase 1 was recent or your thigh tires quickly.
- Build toward: 2–3 sets of 8–12 controlled reps.
- Form check: the knee stays straight; if it bends or shakes hard, do fewer reps or return to quad sets.
This is often the first movement that tells you whether the quad set is doing its job. A clean leg raise is more useful than a higher leg raise.
Glute bridges
Lie on your back with knees bent and feet flat. Gently tighten your buttocks and lift your hips until your body forms a line from shoulders to knees. Lower slowly.
- Start with: 1 set of 6–8 reps.
- Build toward: 2–3 sets of 8–12 reps.
- Make it easier: lift only partway if full height pulls at the knee or low back.
The bridge belongs in a knee plan because knees do not work alone. HSS physical therapist Mohammad Saad noted in April 2026 that knee pain is often driven by hip and glute weakness rather than joint damage itself.[7] That does not diagnose your knee. It does explain why a sensible plan trains the hips instead of staring only at the kneecap.
Mini squats to a chair
Stand in front of a sturdy chair with feet about hip-width apart. Bend your hips and knees a small amount, as if beginning to sit, then stand tall again. The chair is there as a target and safety cue, not as a test of depth.
- Start with: 1 set of 5 slow reps.
- Build toward: 2–3 sets of 8–10 reps.
- Keep: knees tracking roughly over the middle toes, weight even through both feet, and pain in the green zone.
- Reduce: depth before you reduce control.
A mini squat is not a fitness challenge. It is rehearsal for the small knee bends you already need for chairs, toilets, shelves, and stairs.
Calf raises
Stand behind a chair or near a counter. Rise onto the balls of both feet, pause, and lower slowly. Use your hands for balance, not to pull yourself up.
- Start with: 1 set of 8 reps.
- Build toward: 2–3 sets of 10–12 reps.
- Watch for: equal pressure through both feet and no bouncing at the top.
Calf strength helps with walking, stair rhythm, and balance. It is also easy to overdo because the movement feels familiar, so keep the first week of calf raises modest.
A simple Phase 2 week
| Day | Plan |
|---|---|
| Monday | Straight leg raises, glute bridges, mini squats, calf raises |
| Tuesday | Phase 1 motion only: quad sets, heel slides, passive extension |
| Wednesday | Repeat Monday if symptoms stayed green |
| Thursday | Motion only or rest from exercise while keeping normal easy activity |
| Friday | Repeat strength session or use a shorter version if the knee feels tired |
| Weekend | Gentle walking and Phase 1 motion as tolerated; no need to make up missed reps |
Move from Phase 2 to Phase 3 when strength sessions no longer feel like a gamble. The signs are plain: no swelling increase later that day or the next morning, no limp after exercising, mini squats that look smooth, and pain that stays green during and after the session.
Phase 3: Weeks 4–6, stability and load tolerance
Phase 3 does not replace Phase 2. It builds on it. Keep one or two foundational strength sessions each week, then add balance and step work only at doses the knee accepts.
Step-ups
Use a low, stable step if you have one. If not, use the bottom stair of a staircase and hold the rail. Step up with the recovering leg, bring the other foot up, then step down slowly. Keep the height low enough that you can control the knee without twisting or dropping your hip.
- Start with: 1 set of 5 reps per side.
- Build toward: 2–3 sets of 8–10 reps.
- Progress by: improving control before increasing step height.
Step-ups are a better test than they first appear. They ask the knee, hip, calf, and balance system to share load in a way that resembles stairs and curbs.
Single-leg balance
Stand near a chair, counter, or wall. Shift weight onto the recovering leg and lift the other foot slightly. Keep the knee soft, not locked. Use fingertips on the chair whenever needed.
- Start with: 5–10 seconds at a time.
- Build toward: 20–30 seconds with quiet control.
- Make it easier: keep the lifted toes lightly touching the floor.
- Stop if: the knee collapses inward repeatedly or pain moves into yellow and does not settle when you use support.
Balance work should look almost uneventful. Wobbling is not a failure, but a knee that repeatedly dives inward is asking for an easier version.
Optional: resistance-band side steps
A loop band can make hip and glute work more specific, but it is not required for this plan. The Arthritis Foundation treats resistance bands as optional higher-level progressions in knee exercise programming, not as the entry ticket to useful knee rehab.[8]
If you already own a light band and your knee tolerates Phase 2 and early Phase 3 well, place the band above the knees or around the ankles, soften the knees slightly, and take small side steps. Keep the torso quiet and the feet pointing forward. Start with 3–5 steps each direction. If the band changes your form or irritates the knee, skip it.
A simple Phase 3 week
| Day | Plan |
|---|---|
| Monday | Phase 2 strength plus step-ups |
| Tuesday | Gentle motion and easy walking |
| Wednesday | Single-leg balance plus a short Phase 2 strength session |
| Thursday | Motion only or rest from exercise |
| Friday | Step-ups, balance, and optional band side steps if already tolerated |
| Weekend | Normal light activity, symptom check, and no forced catch-up session |
How to know whether to advance, repeat, or step back
The safest progression rule is boring but reliable: change one thing at a time. Add reps, add a set, add a new exercise, or make the movement slightly harder. Do not add all four in the same week.
| If this happens | Your next move |
|---|---|
| Pain stays 0–3 during exercise and later that day | Keep the same plan or add a small progression next session |
| Pain reaches 4–5 but settles quickly when you reduce the movement | Stay in the same phase and use the easier version for several sessions |
| Pain reaches 6–10, feels sharp, or changes your walking | Stop that exercise and return to a tolerated movement; seek guidance if it repeats |
| Swelling increases later that day or the next morning | Reduce total volume and stay in the previous phase until the knee is calm |
| The knee gives way, locks, or cannot bear weight normally | Do not progress; contact a clinician |
If you are following a broader rehab plan after a sports injury, this knee sequence can sit inside a larger home-rehab structure. FitAtHome’s home rehabilitation after a sports injury guide is a better place for organizing rest days, return-to-training decisions, and general recovery habits.
If you had a cartilage-specific procedure or were told to follow special weight-bearing restrictions, use a condition-specific plan instead. The phased knee cartilage rehab exercises article is the more appropriate exit for that situation.
After the 6-week window
Six weeks is a checkpoint, not a certificate. If you can move through Phase 3 with green-light pain, no swelling response, steady step-ups, and quiet single-leg balance, the next step is usually low-impact maintenance or clinician-guided return to more demanding activity.
For ongoing knee-friendly exercise after this recovery block, move toward a low-impact workout for knee pain or a gradual cardio-at-home plan. If you are still living in yellow or hitting red, the correct result is not to push harder. It is to pause, scale back, and get professional guidance.
References
- Traffic Light Pain Scale, Joint Ventures PT / Highbar Health, 2026.
- Frequent knee pain affects 25% of adults, MedBridge.
- Exercises for knee problems, NHS inform.
- Knee Conditioning Program, AAOS OrthoInfo.
- Meniscus tear: Rehabilitation exercises, Kaiser Permanente.
- Strength and Power Exercise for Osteoarthritis, ACSM, 2025.
- Exercises to Strengthen Knees, HSS, April 2026.
- Knee Exercises, Arthritis Foundation.
Routines this build supports

12-Week At-Home Bodyweight Workout Plan (No Equipment Needed)
This 12-week bodyweight workout plan provides a progressive structure for beginners to build strength at home without any equipment. Each phase includes clear level-up gates so you know exactly when to advance to harder exercises.
12-Week Postpartum Exercise Plan for Core Recovery & Skin Firmness
This 12-week postpartum exercise routine guides you through a phased progression from pelvic floor reconnection to resistance training, designed to rebuild the muscle beneath loose belly skin while setting realistic expectations about what exercise can achieve.

Why 20-Minute Home Workouts Work for Beginners
A 20-minute home workout for beginners can deliver real fitness gains—when structured for intensity. This article explains the science behind short workouts and provides a complete follow-along routine.
Build Muscle with This 3-Day Dumbbell-Only Full-Body Plan
A complete 3-day full-body dumbbell workout plan with exercise selection, weight guidance, and a double-progression system that helps home gym beginners and intermediates build muscle without needing heavier dumbbells every week.
A 3-Phase Routine for Your Baseball Injury Comeback
Most baseball players leave physical therapy cleared to move but not ready to play. This 3-phase training routine bridges the gap from post-rehab to game readiness with progressively loaded strength, power, and sport-specific drills you can do at home with minimal equipment.
Your First 30 Days with a Workout App: A Week-by-Week Roadmap for Beginners
A week-by-week guide for absolute beginners using a workout app for the first time, covering the typical physical and psychological changes across the first month and how to choose the right session structure and app to build a lasting habit.
Spotted a stale price or an item that's no longer available? Say so below — this is our correction channel, not just a discussion thread.
Comments
Join the discussion with an anonymous comment.