
Your Home Workout Plan for Training Camp Injury Recovery
A phased, evidence-based home workout plan helps athletes recover from mild-to-moderate training camp injuries — hamstring strains, ankle sprains, groin pulls — using bodyweight exercises and minimal gear, guided by the PEACE & LOVE framework and return-to-sport thresholds.
- Citation source
- ACSM
- Evidence level
- general guideline
Training camp injuries rarely feel random when you have watched the pattern long enough. The first few days are excitement and fresh legs. Then the volume stacks up, soreness gets normalized, sprint mechanics get a little sloppy, and a tight hamstring or rolled ankle suddenly becomes the thing deciding whether you are in practice or watching from the side.
That timing shows up in football data, too. Work from the NFL Lower Extremity Injury Reduction Task Force has described a lower-extremity soft-tissue injury spike between days 5 and 10 of training camp, with hamstring and groin strains among the most common time-loss injuries and a median of 7 days missed per incident.[1] The numbers come from football, so they should not be stretched across every sport as if soccer, track, basketball, and volleyball all behave the same way. But the camp problem is familiar: a sudden rise in running, cutting, lifting, and competition before the body has fully adapted.
If you are sitting in a dorm room or apartment with a tender hamstring, swollen ankle, or tight groin, the answer is not to pretend nothing happened. It is also not to freeze for a week and hope the tissue magically becomes ready for sprinting. A useful home plan has to do two things at once: protect the injury early and keep the rest of the system moving enough that you do not come back deconditioned, stiff, and scared to load the area.
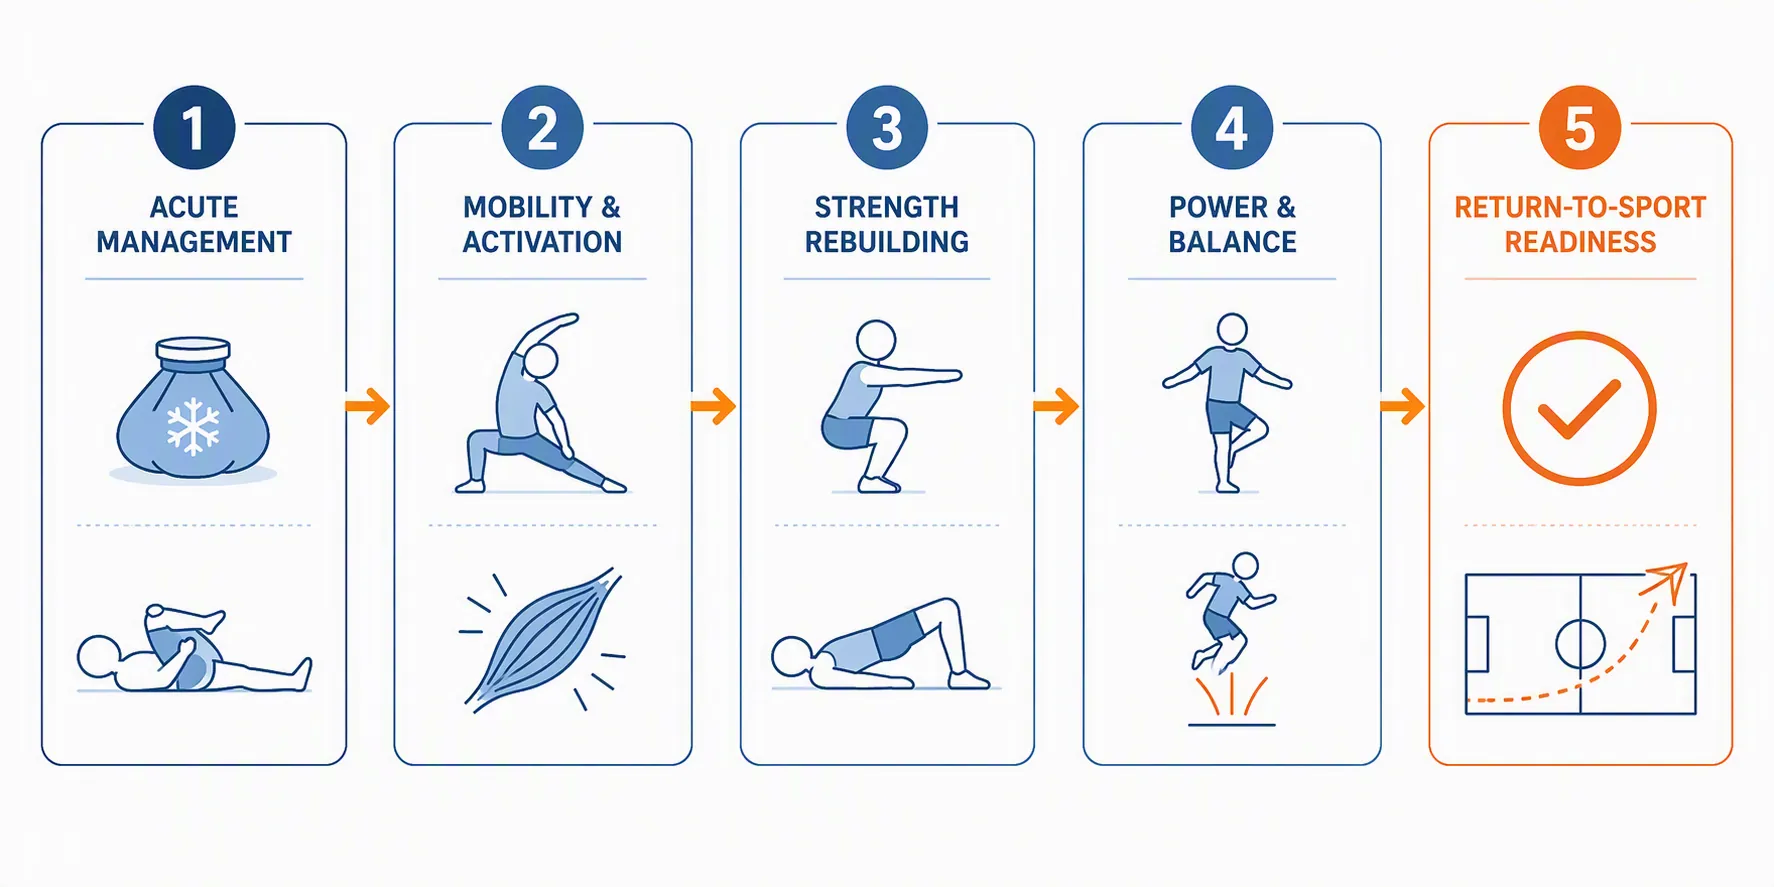
The whole recovery flow, before you start picking exercises
The safest home workout plan for a mild-to-moderate training camp injury is a sequence, not a random menu. The exercise that is smart on day 3 may be useless on week 5. The drill that belongs in return-to-sport work may be a re-injury trap if swelling is still changing overnight.
| Phase | Usual range | Main job | Examples that may fit |
|---|---|---|---|
| Acute management | Days 1–7 | Calm symptoms, protect the injured tissue, preserve pain-free motion | Relative rest, elevation, gentle range of motion, easy upper-body or non-irritating movement |
| Mobility and activation | Weeks 2–3 | Restore comfortable movement and low-level muscle contraction | Isometric holds, glute bridges, standing hamstring curls, ankle alphabet, gentle adductor squeezes |
| Strength rebuilding | Weeks 3–6 | Reload the tissue with control and gradually increase capacity | Squats, split squats, single-leg deadlifts, band work, controlled calf raises |
| Power and balance | Weeks 6–10 | Rebuild landing, hopping, deceleration, and single-leg control | Single-leg balance, pogo jumps, ladder-style footwork, low-amplitude hops |
| Return-to-sport readiness | Week 10+ for many injuries, but not by calendar alone | Prove that the athlete can tolerate sport-specific speed, direction, and fatigue | 25%–50%–75%–100% practice reintroduction, hop testing, strength symmetry checks |
A Grade 3 tear, suspected fracture, post-surgical injury, major swelling, worsening pain, repeated giving way, numbness, or an injury you cannot clearly identify does not belong in a do-it-yourself plan. Get evaluated. Home rehab is for the athlete with a mild-to-moderate problem who can walk, monitor symptoms honestly, and progress without forcing the next phase.
Days 1–7: protect the injury without shutting the body down
The old reflex was simple: rest, ice, compression, elevation. That may still show up in plenty of training rooms, and short-term symptom control is not the enemy. The problem is prolonged rest as the whole plan. The American College of Sports Medicine has highlighted the shift away from treating rest as the centerpiece of recovery, noting that Dr. Gabe Mirkin, who popularized RICE, later retracted those recommendations in 2015 and that the 2019 PEACE & LOVE framework emphasizes protection early and active recovery as healing progresses.[2]
For the first few days, PEACE is the useful part to remember: protect the area, elevate when swelling is present, avoid anti-inflammatory overkill unless directed by a clinician, use compression when appropriate, and get educated enough not to chase every quick fix. LOVE follows as symptoms settle: load, optimism, vascularization, and exercise.[2] That does not mean “train through it.” It means the injured tissue gets the amount of motion and load it can currently handle without a symptom spike.
In the acute phase, your home workout is deliberately boring. That is a compliment. Boring keeps you from converting a one-week strain into a recurring camp problem.
- Use relative rest, not total bed rest: stop sprinting, jumping, cutting, heavy lower-body lifting, and any movement that reproduces sharp pain.
- Move through pain-free range of motion several times per day: ankle circles, heel slides, gentle knee bends, easy hip motion, or slow walking if walking is clean.
- Watch swelling behavior: if the ankle or knee is more swollen later that day or the next morning, the previous dose was too much.
- Keep conditioning away from the injury: seated upper-body circuits, core work that does not tug on the injured area, or easy stationary movement if available and pain-free.
- Do not test the injury every hour. A hamstring does not need repeated hallway accelerations to prove it is still hurt.
Low-intensity movement can support circulation and recovery when it stays truly low. Active recovery is commonly described as easy work rather than training, and NASM discusses low-intensity movement around 30%–60% of maximum heart rate as a range used for active recovery.[3] Cleveland Clinic similarly distinguishes active recovery from passive rest and describes it as light movement that can increase blood flow without adding a heavy training stress.[4] For an injured athlete, the missing word is “non-irritating.” If the movement makes the injured area throb, limp, tighten, or swell, it is no longer recovery work.
What “pain-free” means this week
Pain-free does not mean you feel nothing anywhere in your body. It means the injured structure is not producing sharp pain, increasing ache, protective limping, or next-day swelling from the movement. A mild awareness during gentle motion may happen with some injuries, but the trend should be calmer afterward, not louder. If you need to change your gait, hold your breath, or convince yourself it is fine, it is not fine enough for that drill yet.
Weeks 2–3: mobility and activation are not a secret workout
This is where athletes get into trouble. The first few days are scary enough that most people behave. Then walking improves, the group chat starts asking when you are back, and “activation” quietly turns into a full lower-body session. The goal in this phase is to restore clean motion and low-level contraction, not prove fitness.
Houston Methodist’s rehab guidance puts the same idea in practical terms: start slowly, avoid pushing through pain, pay attention to form, and progress with the help of a medical professional when needed.[5] Those points matter more in a dorm-room rehab session than in a clinic, because nobody is standing there to stop the extra set.
Your entry rules for this phase are simple: walking is close to normal, swelling is stable or decreasing, gentle range of motion is improving, and daily activities are not making symptoms worse. If those are not true, stay in acute management and get evaluated if the trend is going the wrong direction.
| Injury example | Early mobility and activation options | Hold back if... |
|---|---|---|
| Hamstring strain | Glute bridges, pain-free heel digs into the floor, standing hamstring curls through a short range | You feel a sharp grab, pain rises during the set, or walking feels worse afterward |
| Ankle sprain | Ankle alphabet, seated heel raises, controlled weight shifts, supported single-leg stance if pain-free | Swelling increases, the ankle feels unstable, or you cannot load the foot without guarding |
| Groin pull | Gentle adductor squeezes with a pillow, short-range side steps, pain-free hip mobility | Squeezing reproduces sharp inner-thigh pain or cutting motions still feel tempting but unsafe |
For hamstring injuries, at-home progressions often begin with low-load options such as bridges, isometric contractions, and controlled hamstring curls before moving toward longer-lever and single-leg work.[6] For ankle sprains, athlete-focused rehab progressions commonly start with restoring range of motion, then build toward balance, calf strength, and hopping only after the ankle can tolerate earlier loading.[7] The exercise names are less important than the order.
A small home session for this phase
- Five minutes of easy, non-limping movement: slow walking around the room, gentle cycling if available, or relaxed marching in place.
- Pain-free mobility: 1–2 movements for the injured area, kept slow and controlled.
- Two activation exercises: for example, glute bridges and heel digs for a hamstring, ankle alphabet and seated heel raises for an ankle, or pillow squeezes and short-range hip motion for a groin pull.
- Stop while the movement still looks clean. Do not chase fatigue in the injured tissue yet.
The next phase is earned when you can move through near-full comfortable range, complete low-level activation without symptom increase, and wake up the next day no worse. If you are still negotiating with pain during basic drills, strength work is premature.
Weeks 3–6: rebuild strength before you rebuild speed
Strength rebuilding is where the home workout begins to feel like training again, but it still has a different job. You are teaching the injured side to accept load with control. That means tempo, alignment, and symmetry matter more than how tired you can make yourself.
Start with two to four lower-body strength exercises that you can perform without pain, compensation, or next-day swelling. Bodyweight is enough at first. A backpack, resistance band, or towel can be added later, but load is not the milestone. Clean reps are.
| Movement pattern | Home exercise options | What to watch |
|---|---|---|
| Squat pattern | Box squat to a chair, bodyweight squat, slow split squat | Equal weight through both legs; no hip shift away from the injured side |
| Hinge pattern | Hip hinge, wall tap hinge, single-leg deadlift with fingertip support | Hamstring tension should feel controlled, not sharp or sudden |
| Bridge pattern | Double-leg bridge, march bridge, single-leg bridge when earned | Pelvis stays level; no cramping or aggressive hamstring grabbing |
| Calf and ankle strength | Seated calf raise, standing calf raise, slow eccentric calf raise | No rolling to the outside of the foot; swelling does not increase afterward |
| Groin and hip control | Adductor squeeze, side-lying hip adduction, short-range lateral lunge | Inner-thigh pain stays quiet; no forced wide stance early |
A hamstring strain usually needs progressive exposure to both hip-dominant work and knee-flexion work. Bridges and controlled curls can come before single-leg deadlifts and longer-lever bridge variations.[6] An ankle sprain usually needs calf strength, balance, and gradual tolerance to single-leg loading before the athlete earns hopping or cutting.[7] A groin pull needs adductor loading, but the early mistake is forcing wide lateral movements before simple squeezing and short-range control are comfortable.
For more detailed lower-leg progressions, apartment-friendly ankle work can be paired with an ankle rehab exercise plan, while athletes dealing with nearby calf issues may need a separate calf strain recovery progression. Do not borrow calf or ankle drills blindly if they change the symptoms of the original injury.
Progression rules for strength work
- Add range before speed: a deeper squat comes before a jump squat.
- Add control before load: a stable single-leg hinge with fingertip support beats a wobbly weighted version.
- Add volume only if the next day is quiet: soreness in general muscles is different from the injured spot becoming more painful or swollen.
- Train both sides, but compare them: the uninjured side gives you a useful reference for range, balance, and confidence.
- Keep conditioning separate: if a strength session becomes a fatigue test, mechanics will usually fail before the tissue is ready.
You are ready to move toward power and balance when basic strength work is pain-free, single-leg control is improving, swelling is not reacting, and the injured side no longer looks like it is being protected during ordinary movements.
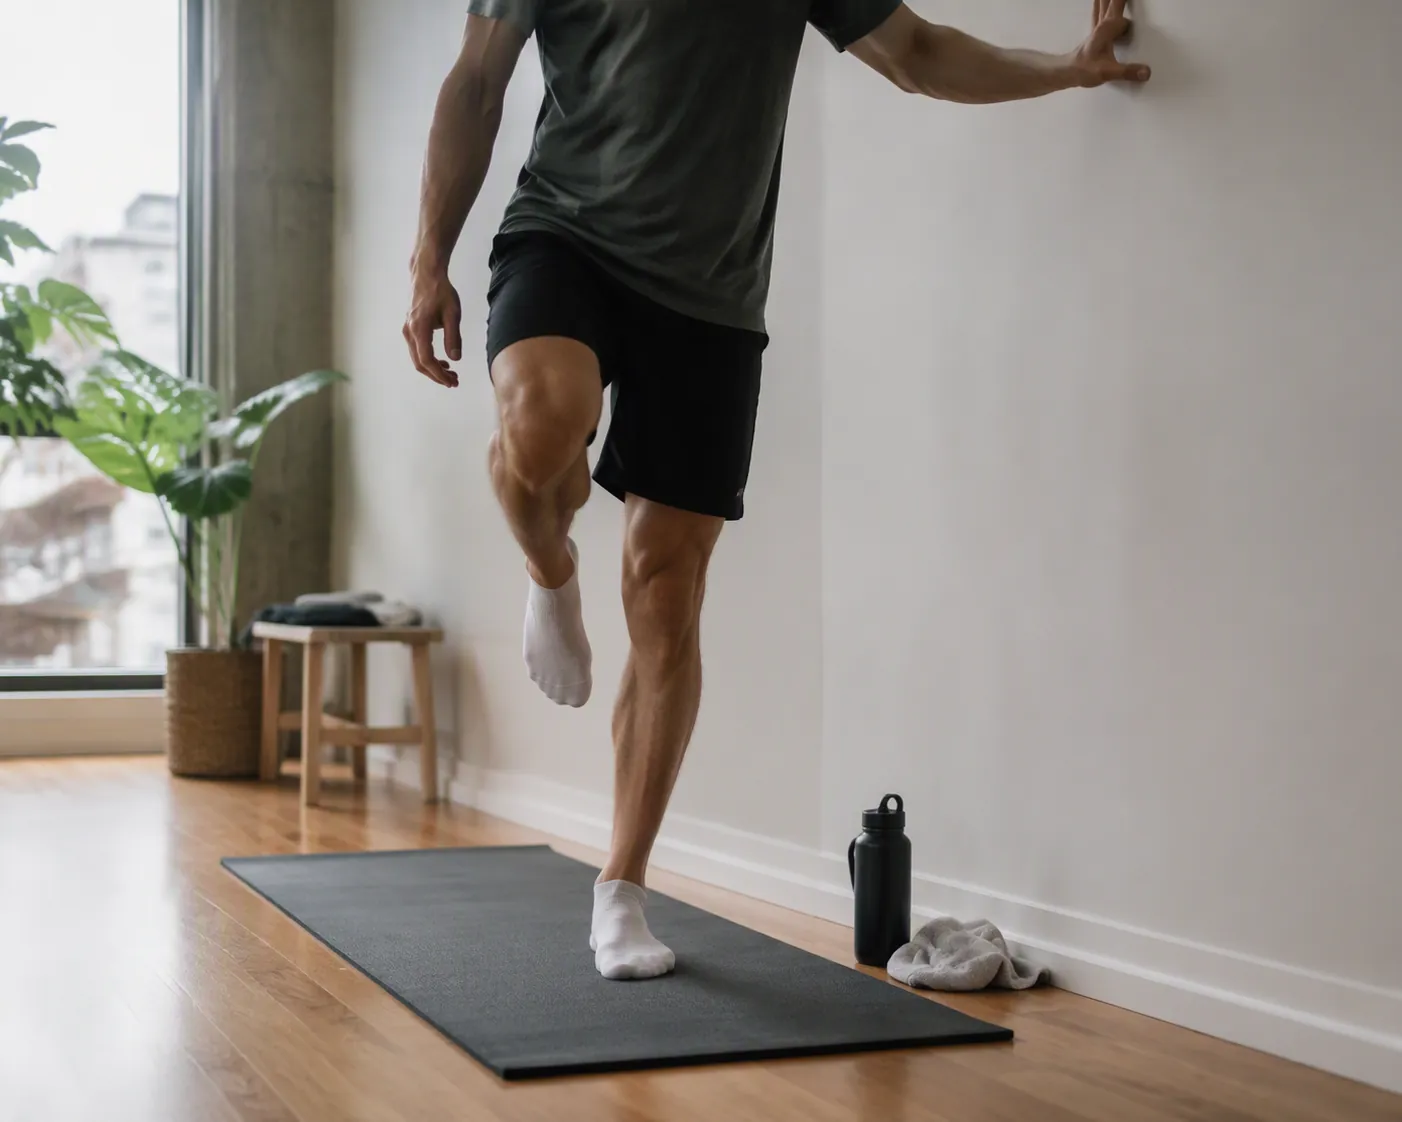
Weeks 6–10: power and balance expose what strength work hides
An athlete can look fine in squats and still be unready for practice. Camp injuries are not usually challenged by slow strength alone. They show up when the foot hits the ground, the body decelerates, the hip has to stabilize, or the hamstring has to tolerate faster lengthening.
This phase starts with balance and low-amplitude elastic work, not full sprinting. For a home setup, you only need floor space, a wall, and enough honesty to stop when quality drops.
| Drill | When it belongs | What ends the set |
|---|---|---|
| Supported single-leg balance | When walking and basic strength are pain-free | Foot collapse, hip drop, ankle wobble that gets worse, or pain |
| Single-leg balance with reach | When supported balance is steady | Loss of control or reaching by twisting around the injury |
| Pogo jumps, double-leg | When calf, ankle, hamstring, or groin symptoms stay quiet with strength work | Heavy landings, asymmetry, pain, or next-day swelling |
| Pogo jumps, single-leg | Only after double-leg pogo work is quiet and single-leg strength is controlled | Any limp, protective landing, or visible side-to-side difference |
| Ladder-style footwork | When low-level hopping and balance are clean | Rushing the drill, cutting sharply too soon, or symptoms during direction change |
This is the handoff where symptom-free athletes often fool themselves. No pain during the day is good news. It is not the same as being ready to sprint, cut, absorb contact, or handle repeated high-speed efforts while tired. The gap between “I can walk normally” and “I can survive practice” is where many re-injuries live.
Contact-sport athletes may need extra time in this bridge because the return is not just running; it is bracing, reacting, colliding, and changing direction under pressure. Position-specific work, such as pass rusher injury recovery exercises, can help later, but only after the base criteria are met.
Simple readiness checks before sport drills
- Can you hold single-leg balance on the injured side without grabbing, leaning, or collapsing?
- Can you perform controlled single-leg strength work with similar range and confidence on both sides?
- Can you do low-level hopping without pain during the drill or swelling later?
- Can you accelerate and decelerate at low intensity without changing mechanics?
- Does the injured side feel trustworthy when you are mildly tired, not just fresh?
Return-to-sport readiness: the calendar gets a vote, not control
The cleanest return decision uses symptoms, strength, control, and sport-specific exposure together. A date alone is weak evidence. So is confidence alone. The athlete who feels good but has a clear side-to-side deficit is not finished with rehab; they are just out of the painful part.
Return-to-sport protocols commonly use objective benchmarks such as at least 90% strength or hop symmetry compared with the uninjured side before full return, along with a gradual reintroduction to sport demands.[8] That 90% idea is not magic, and different injuries may require different tests, but it is a better standard than “it doesn’t hurt today.”
The practice ramp should look more like 25%–50%–75%–100% than zero-to-full-go.[8] At 25%, you may be doing warmups, controlled position drills, and low-speed movement. At 50%, you add more volume and moderate speed without full chaos. At 75%, you approach sport rhythm while still limiting the riskiest exposures. Full return comes only after the previous steps are quiet during the session and the next day.
| Return step | What it might include | Do not advance if... |
|---|---|---|
| 25% | Warmup, low-speed technique, controlled linear movement | Pain appears, mechanics change, or swelling returns |
| 50% | Moderate-speed drills, more repetitions, predictable direction changes | The injured side feels weaker, slower, or less coordinated |
| 75% | Near-practice pace, limited reactive work, partial team integration | Fatigue causes guarding, limping, or loss of single-leg control |
| 100% | Full practice demands after passing prior steps | Strength, hop, or control checks remain clearly asymmetric |
If you need a deeper checklist for testing and practice progression, use a full return-to-sport after injury guide. If the whole home rehab sequence still feels hard to organize, a broader sports injury home rehab framework can help you place each workout in the right phase instead of guessing.
When to stop the home plan and get help
A good home plan should make the trend easier to read. If the trend is getting worse, do not keep adding exercises and call it rehab. Get medical help if pain increases across several days, swelling is large or persistent, bruising spreads significantly, the joint feels unstable, you cannot walk normally, you suspect a complete tear or fracture, or you are returning from surgery.
Also get help if you keep failing the same transition. If basic activation repeatedly causes a flare-up, the injury may not be as mild as you hoped. If strength work looks clean but hopping always brings symptoms back, you may need a more specific assessment. The answer is not always more toughness; sometimes it is a better diagnosis, a smaller step, or a clinician watching the movement you cannot feel clearly from the inside.
Training camp creates pressure because everyone wants a return date. The tissue does not care who is asking. Move early when movement is appropriate, load gradually when the phase has been earned, and keep the next step out of the plan until pain, swelling, strength, control, and sport-specific readiness say it belongs there.
References
- Minimizing Injury During Training Camp — NFL.com
- Resting After an Injury — A Thing of the Past — ACSM
- Active Recovery Benefits & Best Practices — NASM
- Active Recovery — Cleveland Clinic
- 5 Tips for Exercising Safely While Rehabbing an Injury — Houston Methodist, April 2023
- Top 5 At-Home Rehab Exercises for Hamstring Injuries — Elite HP
- Ankle Sprain Best Rehab Exercises for Athletes — Kime Performance
- Return to Sports After Injury Complete Rehabilitation Timeline — OSSO
This is general fitness education, not medical advice. For diagnosis or treatment of pain or injury, consult a qualified clinician.
Pick your next session
Browse all routines to find an appropriately-spaced next session.
Spot something off?
This content sits adjacent to health guidance — tell us if a citation or figure needs a correction.