
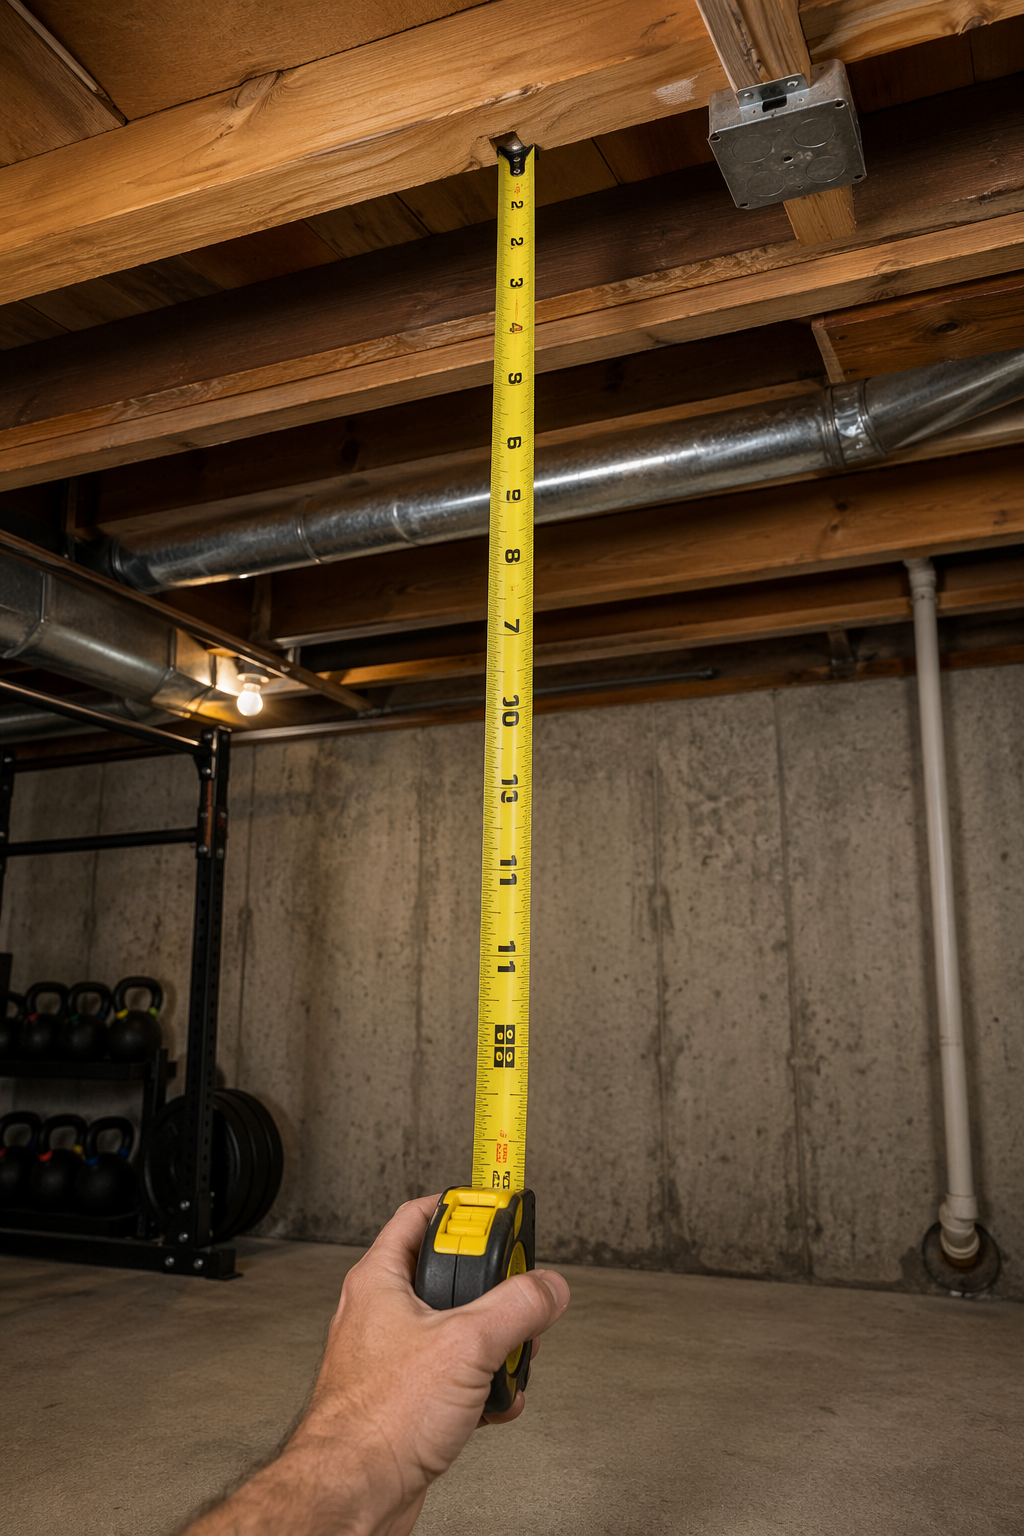
Before shopping for a compact squat rack for low ceiling rooms, stand in the exact spot where the rack would go and find the lowest usable ceiling height. Not the ceiling height listed on the house plan. Not the tallest part of the basement. The lowest point above the rack footprint.
Then use this formula:
True usable ceiling height - flooring thickness - 15 inches = maximum rack heightThat 15-inch clearance is the part people usually skip because a product page says the rack is 80 inches tall and the room is 84 inches tall. On paper, it fits. In a real room, that leaves almost no space for flooring, pull-up headroom, or a barbell moving anywhere near the top of the rack.
The 15-Inch Clearance Rule
The practical minimum clearance above and around a low-ceiling rack is about 15 inches: roughly 12 inches for pull-up headroom, 1–2 inches for flooring, and 1–2 inches for barbell or plate clearance. This is a field rule synthesized across low-ceiling rack guides from TwoRepCave, BestHomeGymRacks, and StrongHomeGym, not a universal building-code standard or a substitute for the manufacturer’s installation guide.[1][2][3]
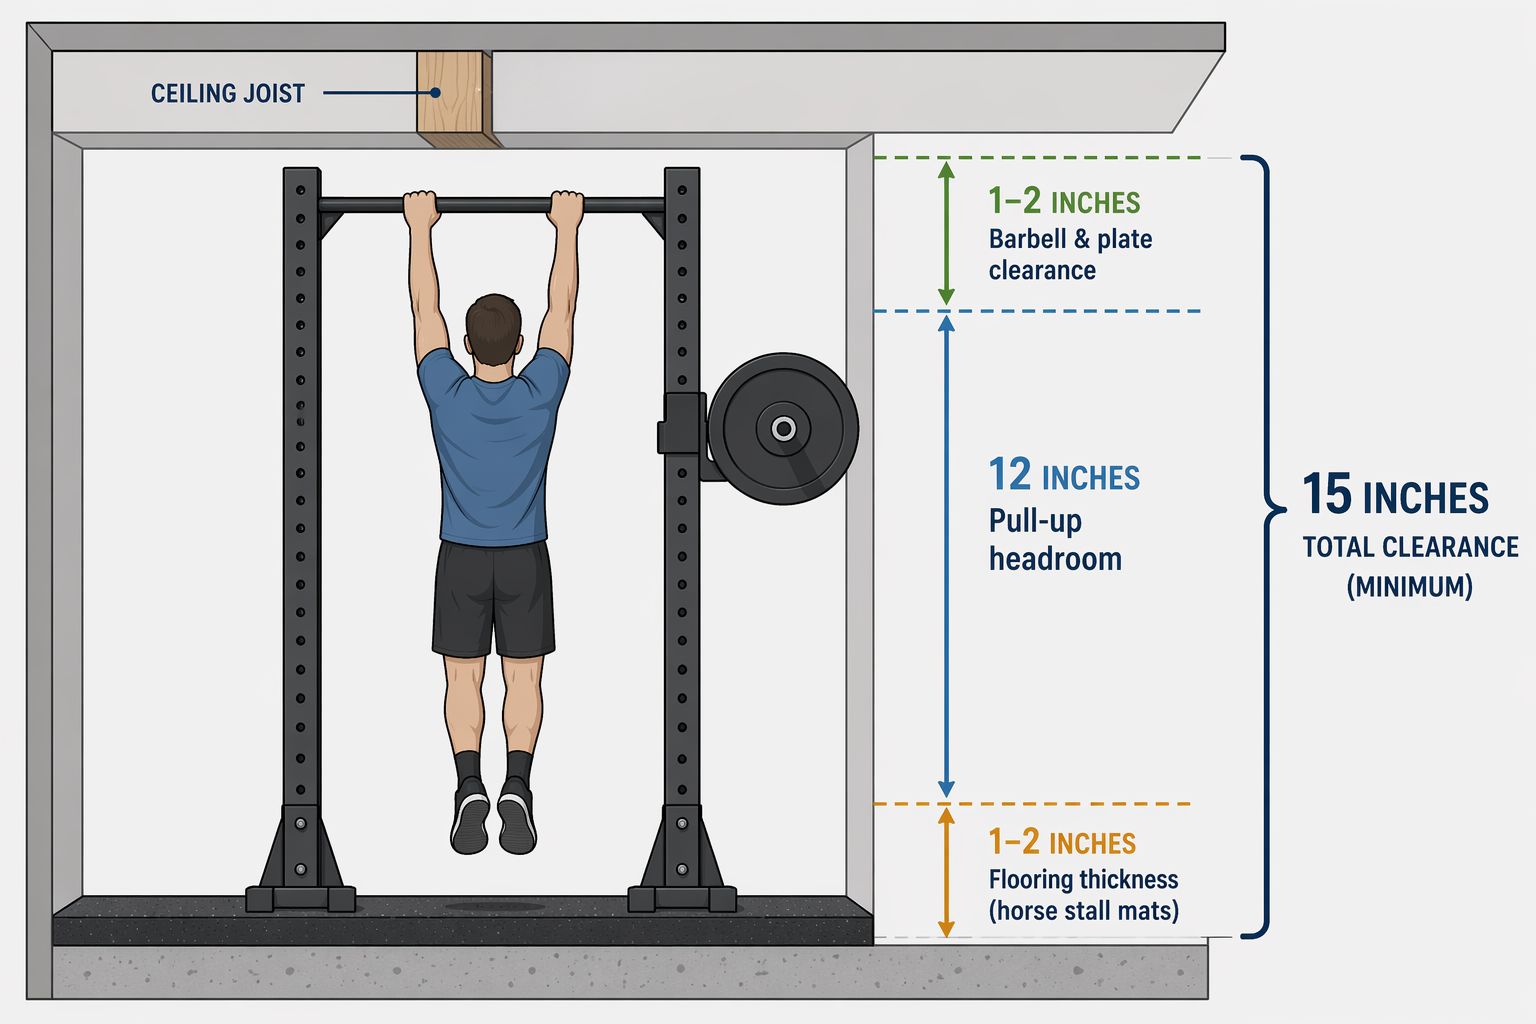
The 12-inch pull-up allowance is there because the top of the rack is not the top of your body. If the pull-up bar sits near the rack’s top crossmember, your head still needs room above the bar. If you are forced to bend your neck, dodge a joist, or stop every rep early because your forehead is approaching drywall, the rack technically fits but the pull-up station does not.
Flooring is the quiet inch that ruins optimistic math. A bare concrete measurement is not the same as a finished gym measurement. Many home gyms use stall mats, and 0.75-inch horse stall mats are commonly cited in home-gym flooring discussions.[1] Add a platform, a second mat layer, or uneven garage flooring, and the rack effectively gets taller because you are lifting the entire training surface closer to the ceiling.
The last 1–2 inches are for the movements that happen around the rack, not just the rack frame. A barbell coming out of the J-hooks, plates racked high, or an overhead press setup near the uprights can all need a little margin. This does not mean every low-ceiling gym can perform every overhead movement inside the rack. It means the rack-height calculation should leave enough room that normal use is not constantly flirting with the ceiling.
| Ceiling or clearance item | What to subtract | Why it matters |
|---|---|---|
| Lowest usable ceiling point | Start here | Ducts, joists, lights, and garage-door tracks can be lower than the finished ceiling |
| Gym flooring | Usually 0.5–1 inch per layer | Mats and platforms raise the rack and the lifter |
| Functional clearance | 15 inches | Allows for pull-up headroom plus small overhead barbell and plate margin |
| Result | Maximum rack height | Use this number before comparing rack models |
Measure the Room Where the Rack Will Actually Stand
A basement or garage rarely gives you one honest ceiling number. Measure the rack footprint, then measure above each corner of that footprint. If the rack would be 48 inches deep and 49 inches wide, do not measure one clear spot in the middle of the room and call it done. Measure the front uprights, back uprights, and the area where the pull-up bar would sit.
In a basement, the lowest usable point may be an exposed joist, a duct, a pipe, a light fixture, or a junction box. The joist bay beside it may look generous, but the rack does not care about the generous bay if the pull-up bar lands under the obstruction. In a garage, check the open garage-door path, the horizontal tracks, the opener rail, hanging storage, and any slope in the slab. Roombldr’s rack-space guidance also treats vertical clearance as one part of a larger footprint and movement-zone problem, which is the right way to think about a rack that has to be used, not merely parked.[4]
Write down the smallest number you find over the rack footprint. That number is your true usable ceiling height. It may be lower than the room’s advertised ceiling height by several inches, and that is the number that matters.
- Measure from the finished training surface if flooring is already installed.
- If flooring is not installed yet, measure from concrete, then subtract the planned mat or platform thickness.
- Use the lowest obstruction above the rack footprint, not the highest open ceiling nearby.
- Check the pull-up bar location separately if the rack has multiple mounting positions.
Run the Numbers Before You Compare Racks
An 84-inch ceiling is the classic trap. With the 15-inch rule, the rough maximum rack height is 69 inches before flooring. Add 0.75-inch mats and the real maximum drops closer to 68 inches. In practice, low-ceiling guides commonly place a 7-foot ceiling in the roughly 69–72-inch short-rack range, which rules out most standard power racks.[1][2][3]
84-inch ceiling - 0.75-inch flooring - 15-inch clearance = 68.25-inch maximum rack heightThat does not mean nobody can train under an 84-inch ceiling. It means an 84-inch ceiling is not an 84-inch rack opportunity. You are probably looking at a very short rack, a squat stand without a normal pull-up setup, or a different training layout.
A 96-inch ceiling changes the conversation. Subtract 0.75-inch flooring and 15 inches of functional clearance, and the maximum rack height lands around 80 inches. That opens the 80–83-inch category discussed in short-rack guides, including examples such as the 79-inch Body Solid GPR400 and the 80-inch REP PR-4000 configuration.[2][3]
96-inch ceiling - 0.75-inch flooring - 15-inch clearance = 80.25-inch maximum rack height| Measured ceiling | Typical flooring assumption | Practical rack-height outcome |
|---|---|---|
| 84 inches | 0.5–1 inch | Roughly 69–72 inches at most; many standard racks are too tall |
| 96 inches | 0.5–1 inch | Roughly 80–83 inches may become realistic, depending on obstructions and use |
These are buying thresholds, not recommendations. If your calculated maximum is 80 inches, a rack listed at 80 inches still deserves scrutiny: pull-up bar placement, top crossmember shape, bolt heads, plate storage, and manufacturer clearance requirements can all change whether it works in your room.
Test Pull-Ups Before You Trust the Pull-Up Bar
The simplest pull-up feasibility test does not require a rack. Kneel where the pull-up bar would be, reach both arms overhead as if gripping the bar, and check whether your hands, head, and upper body have usable room. If you cannot fully extend without contacting the ceiling or an obstruction, a standard pull-up bar mounted at that height is already compromised.
This test is crude, but useful. It catches the difference between a rack that can be assembled and a rack that can be trained on. It also tells you whether a multi-grip bar, a lower-mounted straight bar, or no pull-up bar at all would make more sense.
For overhead pressing, be just as literal. Stand where you would press, mimic the bar path, and remember that plates are wider than the shaft of the bar. If the ceiling forces you into seated pressing, landmine pressing, or partial-range work, treat that as a programming compromise rather than pretending the room supports full standing overhead work. Fitness blogs commonly suggest these modifications for low ceilings, but the available sources here do not establish them as equivalent substitutes in a research sense.
When the Ceiling Fails the Calculation
If the formula gives you a maximum rack height that is shorter than the racks you want, do not round up and hope. Hope is expensive when the freight box is already open.
The fallback paths are straightforward: choose a shorter squat stand, skip the pull-up bar, use seated or landmine pressing, consider kneeling pull-up variations, or move the rack to a different part of the room. Wall-mounted folding racks can help with footprint and parking space, but they do not magically erase ceiling clearance; their own installation dimensions still need to be checked against the same lowest-point measurement.[5]
If height is only one of several constraints, broader small-space planning matters too. A rack that clears the ceiling can still fail because the bench path is blocked, plates have nowhere to live, or the garage door cuts through the training zone. That is where resources like garage workout equipment for small spaces and how to fit a full strength garage gym in under 100 square feet become more useful than another rack comparison table.
A Note on Short-Rack Recommendations
Short-rack advice ages quickly. StrongHomeGym’s May 2026 update notes that the REP Fitness PR-1050 short rack has been discontinued, which is exactly why old “best low-ceiling rack” lists should not be treated as current buying instructions.[3]
Use product roundups only after you know your maximum rack height. Then verify the current manufacturer specs, installation manual, pull-up bar position, anchoring requirements, and availability before ordering. Some rack guides use affiliate links, so a model appearing often is not the same as that model fitting your room.
Once your measured maximum is written down, shopping gets much cleaner. If the number is 68 inches, you are not talking yourself into an 80-inch rack. If the number is 80 inches, the 80-inch category is worth comparing carefully. And if the number changes after flooring, ducts, or garage-door tracks enter the picture, the room has already given you the answer.
References
- Some Shortie Power Racks for Low Ceilings and Basements, TwoRepCave
- Best Power Racks for Low Ceilings (Basement Rack Guide), BestHomeGymRacks
- 5 Best Short Power Racks [Buying Guide], StrongHomeGym, May 2026
- How Much Space Do I Need for a Power Rack?, Roombldr
- Wall-Mounted Folding Squat Racks Comparison, TwoRepCave
Comments
Join the discussion with an anonymous comment.