
Yes, you can do meaningful MMA-style conditioning at home with no equipment. You need enough floor space to sprawl, stand up, move your hips, and throw shadowboxing combinations without hitting furniture. About 4 square meters is enough for the version in this program.
The caveat matters: this is conditioning for MMA-style demands, not a substitute for coached combat training. It can build your aerobic base, repeat-sprint tolerance, trunk and leg endurance, and the ability to keep moving when breathing gets ugly. It cannot teach you range, defensive reactions, contact comfort, clinch feel, takedown defense, or sparring timing. Those eventually require a coach, partners, and a real training room.
That is also why this belongs in workout routines rather than a technique guide. The goal is to give you a complete plan you can start today: warm-ups, weekly sessions, intensity cues, substitutions, and a progression that does not collapse into random burpees with fight music playing in the background.
What Makes a Home MMA Workout Different From Generic HIIT
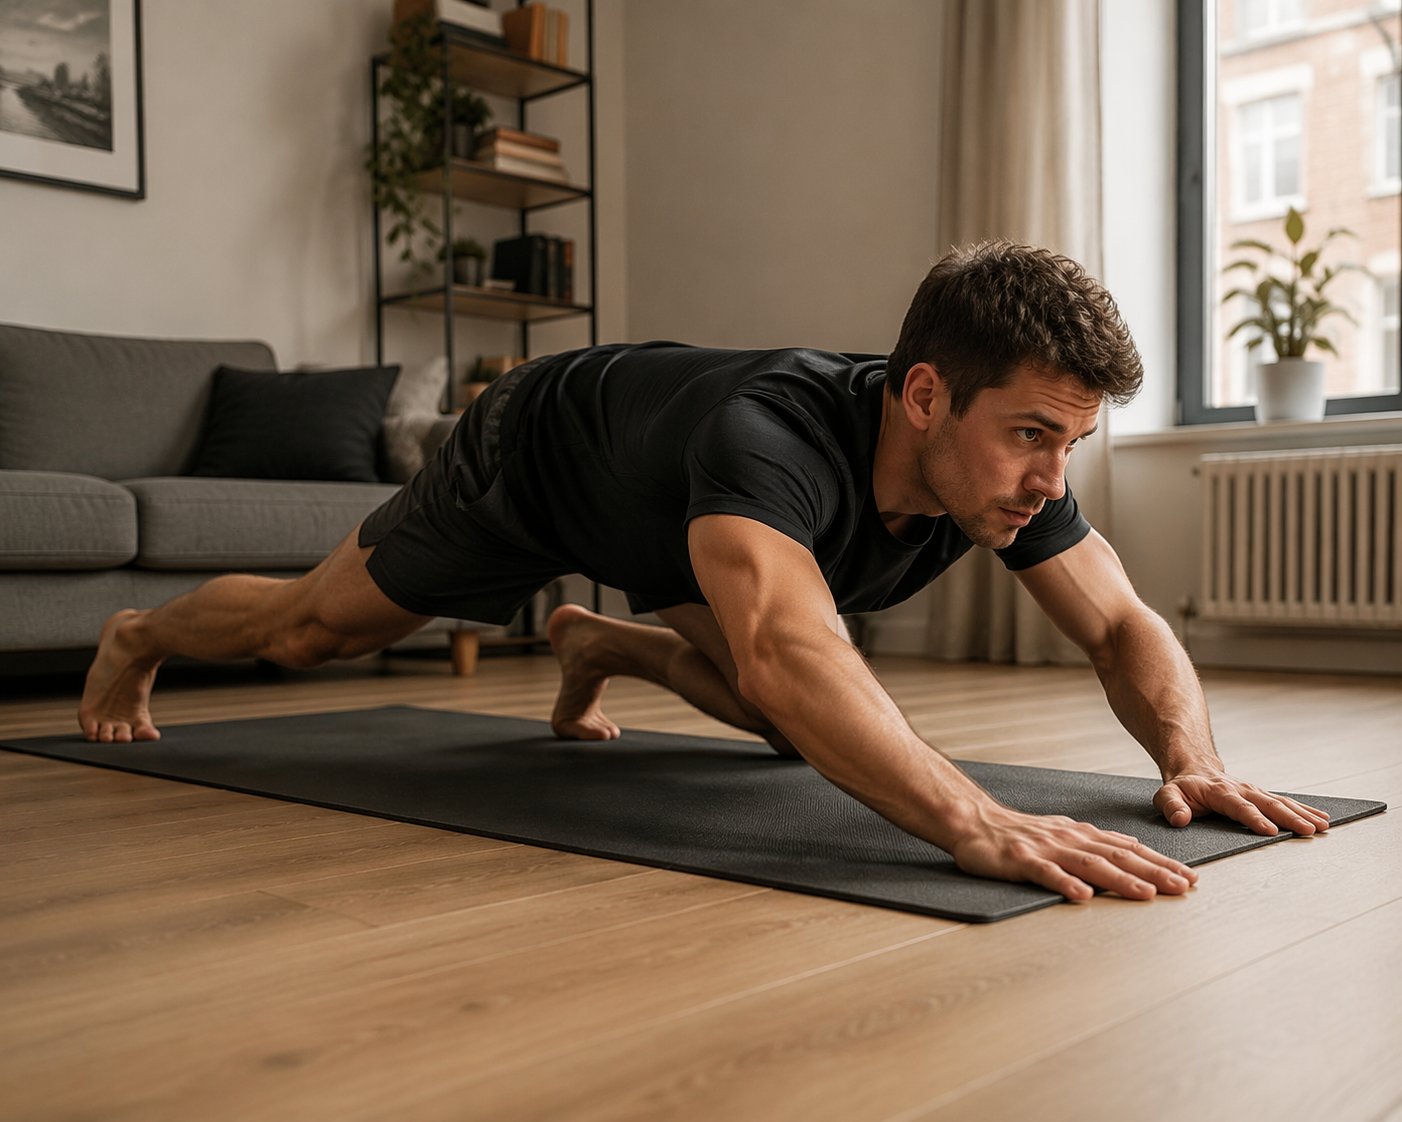
A hard circuit can make you tired. An MMA conditioning session should make you tired in patterns that resemble the sport: bursts from stance, level changes, floor-to-feet transitions, hip movement, bracing, and fast decisions under fatigue. That is why this plan uses shadowboxing, sprawls, shrimps, technical stand-ups, wrestling-flow transitions, and bodyweight strength work instead of only squats, push-ups, and mountain climbers.
The strongest research support here comes from a 2018 study by Kostikiadis and colleagues. In 17 male national-level MMA athletes with at least 3 years of training, 4 weeks of sport-specific low-volume high-intensity training improved VO2max by 13%, maximal strength by 16-20%, and takedown speed by 22%.[1]
Those numbers should not be copied onto a beginner training in a living room. The participants were trained fighters, not first-week home exercisers. The useful lesson is narrower and more credible: when conditioning is built around the actual movement demands of MMA, it can improve qualities that matter for MMA performance. This program applies that principle with bodyweight-only movements and a slower 6-week progression.
The practical structure follows a Foundation, Build, and Peak model used in a 6-week no-equipment MMA home workout plan from 369MMAFIT, while avoiding unsupported claims attached to the commercial page.[2] The structure is useful because it solves the home trainer's main problem: you are not just choosing today's sweat session; you are deciding what the next session should build on.
The 6-Week Progression at a Glance
| Weeks | Phase | Main Target | Intensity Cue | Session Feel |
|---|---|---|---|---|
| 1-2 | Foundation | Aerobic base, joint preparation, movement fluency | Talk test: you can speak in short sentences | Controlled, repeatable, never desperate |
| 3-4 | Build | Intervals, repeated power, faster transitions | RPE 4-7 | Hard efforts with enough control to keep form |
| 5-6 | Peak | Fight-simulation rounds and fatigue management | RPE 7-9 during work, deliberate recovery between rounds | Round-based, uncomfortable, still technically organized |
RPE means rate of perceived exertion on a 1-10 scale. A 4 feels like steady work. A 7 feels hard but repeatable. A 9 is near-max effort that you cannot hold for long. If you do not have a coach watching you, RPE and the talk test are not soft details; they are the tools that keep the plan from turning into six weeks of guessing.
The foundation phase is deliberately less dramatic than many MMA-themed workouts. That is not a lack of intensity. It is sequencing. If you cannot move for 20-30 minutes without your shoulders tightening, your stance collapsing, or your breathing spiking too early, the later interval work becomes sloppy survival. For a deeper comparison of base work and interval work, see HIIT vs steady-state cardio at home.
Before You Start: Space, Timing, and Safety
Clear a rectangle where you can lie down, kick your legs back into a sprawl, rotate your hips, and stand without reaching for support. Shoes are optional if your floor is stable and not slippery. A mat helps, but the program does not require one. Use a timer on your phone and keep water nearby.
- Stop the session if you feel chest pain, dizziness, sharp joint pain, or symptoms that do not match normal exertion.
- Keep shadowboxing strikes loose. You are conditioning rhythm and posture, not trying to knock out the air.
- Step back instead of jumping back on sprawls if your wrists, shoulders, or low back are not ready.
- Use the lower-intensity option whenever form breaks before the interval ends.
- Leave at least 1 rest day between the harder sessions in Weeks 3-6.
If Week 1 already feels too aggressive, start with a gentler base. The 7-minute workout beginner modifications are a better first step than forcing sprawls when your wrists, hips, or breathing are not ready.
Warm-Up Used Before Every Session
Use this 6-8 minute warm-up before every workout. It is short enough that you will actually do it, but specific enough to prepare the joints and positions used later.
- March or bounce lightly in stance for 60 seconds.
- Arm circles, shoulder rolls, and scapular push-ups for 60 seconds total.
- Hip circles, alternating lunges, and ankle rocks for 90 seconds total.
- Slow technical stand-ups, 3 per side.
- Easy shadowboxing: jab-cross, jab-cross-hook, and defensive slips for 2 minutes.
- Two practice sprawls or step-back sprawls, then begin the session.
Movement Library for the Program
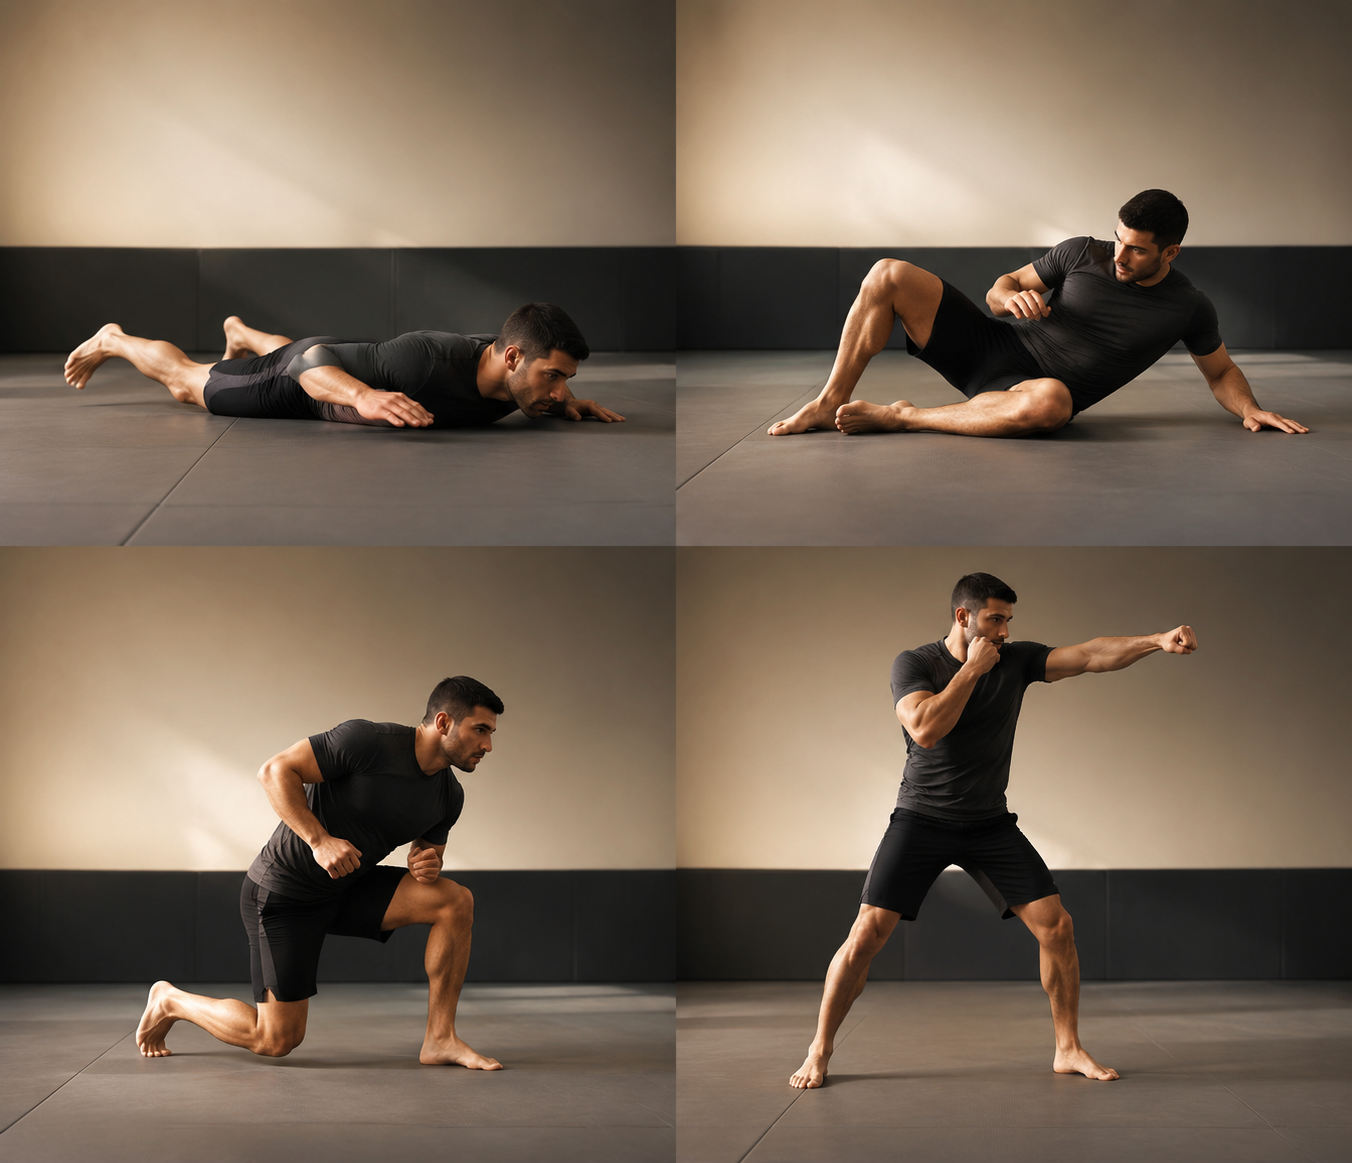
These are conditioning versions of MMA movements. Keep them crisp and safe, but do not pretend a paragraph can replace a coach correcting your stance, guard, or grappling mechanics.
Shadowboxing Combinations
Stand with one foot slightly forward, knees soft, hands high, and chin tucked. Throw relaxed combinations such as jab-cross, jab-cross-hook, cross-hook-cross, or jab-cross-sprawl. Bring each hand back to guard instead of letting the arms drift. Move your feet a little after each combination so you are not punching from a frozen position.
Sprawl
From stance, place your hands down, send the legs back, and drop the hips toward the floor without collapsing through the low back. Pop back to stance under control. If the full version is too much, step one leg back at a time and stand tall before repeating. The point is a fast level change, not smashing your wrists into the floor.
Shrimp Hip Escape
Lie on your back with knees bent. Push through one foot, lift your hips slightly, and slide your hips away as if making space from an opponent. Reset and alternate sides. In this program, shrimps train hip movement, trunk control, and the ability to keep working from the floor when breathing is elevated.
Technical Stand-Up
Start seated with one hand posted behind you and the opposite foot planted. Lift your hips, pull the free leg underneath you, and rise into stance while keeping your head up. Move slowly at first. A rushed technical stand-up usually turns into an awkward squat with a hand on the floor.
Bodyweight Strength Movements
Squats, reverse lunges, push-ups, plank shoulder taps, and squat thrusts support the MMA-specific work. They build the legs, trunk, and shoulders that keep your stance from falling apart late in a round. If your legs need a separate progression after this program, use the home leg workout progression guide rather than adding random jump squats to every session.
Weeks 1-2: Foundation Phase
The first 2 weeks build the floor under everything else. Keep most work conversational: you should be able to speak in short sentences. If you can only gasp single words, slow down. If you can chat comfortably, increase movement quality, range, or pace slightly.
| Day | Session | Work |
|---|---|---|
| Day 1 | MMA Aerobic Flow A | 3 rounds: 2 min easy shadowboxing, 1 min squats, 1 min shrimps, 1 min technical stand-ups, 1 min easy footwork. Rest 60 sec between rounds. |
| Day 2 | Mobility or Rest | 10-20 min easy walking or light mobility if desired. |
| Day 3 | Strength Base | 3 rounds: 10 squats, 6-10 push-ups, 8 reverse lunges per side, 20-sec plank, 4 technical stand-ups per side. Rest as needed. |
| Day 4 | Rest | No conditioning. |
| Day 5 | MMA Aerobic Flow B | 4 rounds: 90 sec shadowboxing, 30 sec step-back sprawls, 60 sec shrimps, 60 sec stance movement, 60 sec rest. |
| Day 6 | Optional Easy Session | 15-25 min easy walk, mobility, or very light shadowboxing. |
| Day 7 | Rest | No conditioning. |
Repeat the same weekly layout for Week 2, but add only one small progression: either add 1 round to Day 1, add 1 round to Day 5, or reduce rest by 15 seconds. Do not do all three. The boring restraint is what lets Week 3 feel like a build instead of a rescue mission.
Foundation Phase Adjustments
- If sprawls spike your breathing too fast, use step-back sprawls.
- If push-ups are too hard, elevate your hands on a stable surface.
- If technical stand-ups bother your wrist, post on your fist or slow the movement down.
- If your downstairs neighbor exists, remove jumps and keep footwork quiet.
Weeks 3-4: Build Phase
Now the sessions become more interval-based. Work periods should mostly land between RPE 4 and 7. The best sign is not that you feel destroyed after the first round; it is that your fourth round still looks recognizably like MMA conditioning.
| Day | Session | Work |
|---|---|---|
| Day 1 | Interval Flow A | 5 rounds: 45 sec shadowboxing combination work, 30 sec sprawls or step-back sprawls, 45 sec shrimps, 30 sec rest. |
| Day 2 | Rest or Mobility | Keep it easy. |
| Day 3 | Strength and Transitions | 4 rounds: 12 squats, 8-12 push-ups, 10 reverse lunges per side, 6 technical stand-ups per side, 20 sec plank shoulder taps. Rest 60-90 sec. |
| Day 4 | Rest | No conditioning. |
| Day 5 | Interval Flow B | 6 rounds: 30 sec jab-cross-hook, 30 sec squat thrusts, 30 sec defensive slips and footwork, 30 sec sprawls, 60 sec rest. |
| Day 6 | Optional Aerobic Flush | 15-20 min easy shadowboxing, walking, or mobility at talk-test pace. |
| Day 7 | Rest | No conditioning. |
In Week 4, progress by tightening the transitions. Start the next movement within 3-5 seconds instead of wandering around the room. If you already move cleanly, add 1 round to Day 1 or Day 5. If your form is fraying, keep the same volume and make the rounds cleaner.
How Hard Should the Build Phase Feel?
During the work intervals, you should breathe hard enough that talking is limited, but not so hard that you lose the sequence. If the combination is jab-cross-hook-sprawl and you keep forgetting where the sprawl goes, the session has stopped training repeatable output and started training panic. Back off one notch.
Weeks 5-6: Peak Phase
The final phase uses round-based sessions. MMA rounds are not just a collection of hard exercises; they involve changes in posture, direction, level, and decision speed. These sessions are still solo conditioning, but they ask you to manage fatigue across a longer block instead of attacking one interval at a time.
| Day | Session | Work |
|---|---|---|
| Day 1 | Fight-Simulation Rounds A | 4 rounds of 3 min: 45 sec shadowboxing, 30 sec sprawls, 45 sec shrimps, 30 sec technical stand-ups, 30 sec shadowboxing, 60 sec rest between rounds. |
| Day 2 | Rest or Mobility | Easy only. |
| Day 3 | Power-Endurance Circuit | 5 rounds: 20 sec fast shadowboxing, 20 sec squat thrusts, 20 sec sprawls, 40 sec easy movement. Rest 90 sec after each round. |
| Day 4 | Rest | No conditioning. |
| Day 5 | Fight-Simulation Rounds B | 5 rounds of 3 min: 60 sec combination work, 30 sec sprawls, 30 sec technical stand-ups, 30 sec shrimps, 30 sec footwork and defense, 60-90 sec rest. |
| Day 6 | Optional Recovery | Walking, mobility, or complete rest. |
| Day 7 | Rest | No conditioning. |
Most work in this phase should sit at RPE 7-9 during the hard parts. That does not mean every second is a sprint. A good round has waves: you attack a combination, change level, get off the floor, recover just enough while moving, then surge again. If every movement is maximal from the first 20 seconds, the round becomes less specific because you lose the ability to choose pace.
For Week 6, keep the same weekly layout and improve one variable: cleaner rounds, slightly faster transitions, or shorter rest. If Day 5 in Week 5 was already near your limit, do not add volume. Repeat it and make the last round look less desperate.
How to Scale the Program Without Breaking It
The easiest mistake is to make every movement harder at once. That usually creates a short, dramatic workout and a poor 6-week program. Change one variable at a time.
| If This Happens | Change This |
|---|---|
| You cannot finish the planned rounds | Keep the same number of rounds but reduce sprawls to step-back sprawls. |
| Your breathing is fine but muscles fatigue early | Shorten strength sets or use easier push-up and lunge variations. |
| Your form is clean and RPE stays below the target | Reduce rest by 10-15 seconds or add 1 round to one session. |
| Your knees or wrists feel irritated | Remove jumping, slow the transitions, and use the lower-impact options. |
| You feel worse from session to session | Take an extra rest day and repeat the previous week instead of progressing. |
A small apartment does not punish you for being undertrained; it punishes you for being careless. In a gym, you can drift between stations and hide sloppy pacing. At home, the timer, floor, and your breathing tell the truth quickly.
What Results Should You Expect?
After 6 weeks, a realistic win is that you recover faster between rounds, keep your stance better while tired, move from floor to feet with less hesitation, and tolerate repeated bursts without immediately redlining. Those are meaningful conditioning changes.
It would be irresponsible to promise the same improvements reported in trained MMA athletes. The Kostikiadis study showed large gains over 4 weeks, but it studied national-level male fighters using a sport-specific high-intensity protocol, not recreational beginners doing bodyweight work in a living room.[1] Use the study as proof that specificity and structure matter, not as a guarantee that your VO2max or takedown speed will change by the same percentage.
FAQ
Is this one of the best home workouts for MMA fighting if I have no equipment?
For no-equipment conditioning, yes, this is the kind of structure to look for: progressive weeks, MMA-specific movement patterns, clear intensity targets, and recovery days. For learning how to fight, no home circuit is enough. Conditioning can be built alone; fighting skill needs feedback and contact.
Can I do this every day?
Do not run the hard sessions every day. The program already includes 3 main training days, optional easy work, and rest. If you want daily movement, make the extra days walking, mobility, or light shadowboxing. The harder sessions need recovery so the next round is actually trainable.
What if I only have 20 minutes?
Do the warm-up, complete the main rounds, and skip optional accessories. In Weeks 1-2, use 2-3 rounds. In Weeks 3-4, use 4-5 rounds. In Weeks 5-6, use 3 quality fight-simulation rounds rather than rushing through 5 bad ones.
Can I combine this with running or other cardio?
Yes, but keep extra cardio easy at first. If you add hard running intervals on top of the Build or Peak phase, you may interfere with recovery. For a broader framework on choosing cardio formats at home, use the complete guide to cardio at home.
When should I transition to equipment-based MMA training?
Consider adding equipment when the no-equipment rounds feel organized and repeatable, not merely survivable. A heavy bag, jump rope, bands, or dumbbells can add variety and loading, but they are not required for the first 6 weeks. If you are ready for equipment tiers and more variety, move to the 4-week MMA home training routine.
Where This Program Ends
Six weeks of no-equipment training can give you a noticeably more MMA-specific engine. You can become better at changing levels, getting off the floor, controlling your breathing, and producing repeated bursts in a small space. That is not imaginary, and it is not just generic fitness with a fight label.
The next leap is different. Skill, timing, range, defense, clinch pressure, and contact confidence do not arrive because you completed another solo round in your apartment. When you want those, the answer is no longer a harder home workout. It is coaching, partners, and eventually a gym.


Comments
Join the discussion with an anonymous comment.