
Do this beginner home strength routine with no equipment 3 days per week for 8 weeks, leaving at least 48 hours between sessions. Monday-Wednesday-Friday works. Tuesday-Thursday-Saturday works. If life is crowded, 2 days per week is the minimum worth protecting, because federal physical activity guidance recommends strength training all major muscle groups at least twice weekly.[1]
You will not repeat the same circuit for 8 weeks. The plan changes every 2 weeks: first you learn the movements, then you add volume, then you slow the lowering phase, then you move to harder variations. At the end of each week, you make one decision: advance, repeat, or choose an easier version.
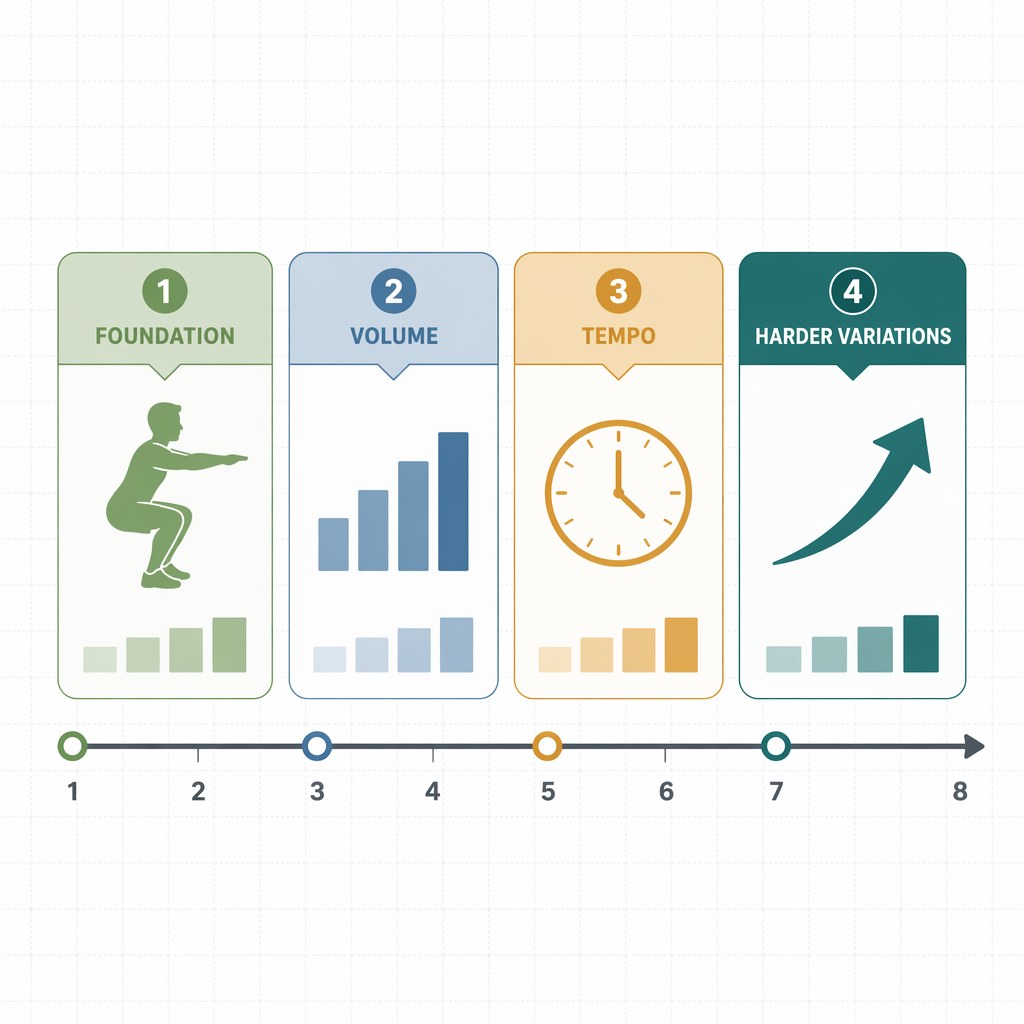
| Weeks | Phase | Main Goal | Sessions | How It Gets Harder |
|---|---|---|---|---|
| 1-2 | Foundation | Learn clean reps and safe range of motion | 2-3 per week | 2 circuits, controlled reps, 90 seconds rest |
| 3-4 | Volume | Do more total work without rushing | 3 per week | 3 circuits, slightly harder variations, 10-12 reps |
| 5-6 | Tempo | Make each rep more demanding | 3 per week | 3-4 circuits, 2-second lowering phase, 60-90 seconds rest |
| 7-8 | Harder Variations | Use leverage and single-leg work to increase difficulty | 3 per week | 4 circuits, 3-second lowering phase, harder exercise choices |
The Weekly Schedule
Use the same weekly rhythm throughout the plan:
- Day 1: Full-body strength session
- Day 2: Rest or easy walking
- Day 3: Full-body strength session
- Day 4: Rest or light mobility
- Day 5: Full-body strength session
- Days 6-7: Rest, walking, or gentle stretching
If 3 sessions leaves you sore for more than 48 hours, do 2 sessions that week and keep the same phase. That is not failure. It is the plan doing its job: giving your body enough stress to adapt, then enough time to recover.
Your Level-Up Rule
At the end of each week, check your final two sessions. If you completed every target rep with clean form and felt you could have done at least 2 more reps on the main exercises, advance next week. If form broke down, pain showed up, or you missed the target, repeat the same week.
This uses the same practical idea as the NSCA 2-for-2 rule: when you can perform 2 or more reps above the target for 2 consecutive sessions, it is time to increase difficulty.[2] In this plan, “increase difficulty” usually means a harder variation, slower lowering, less rest, or one more circuit—not adding random exercises because you got bored.
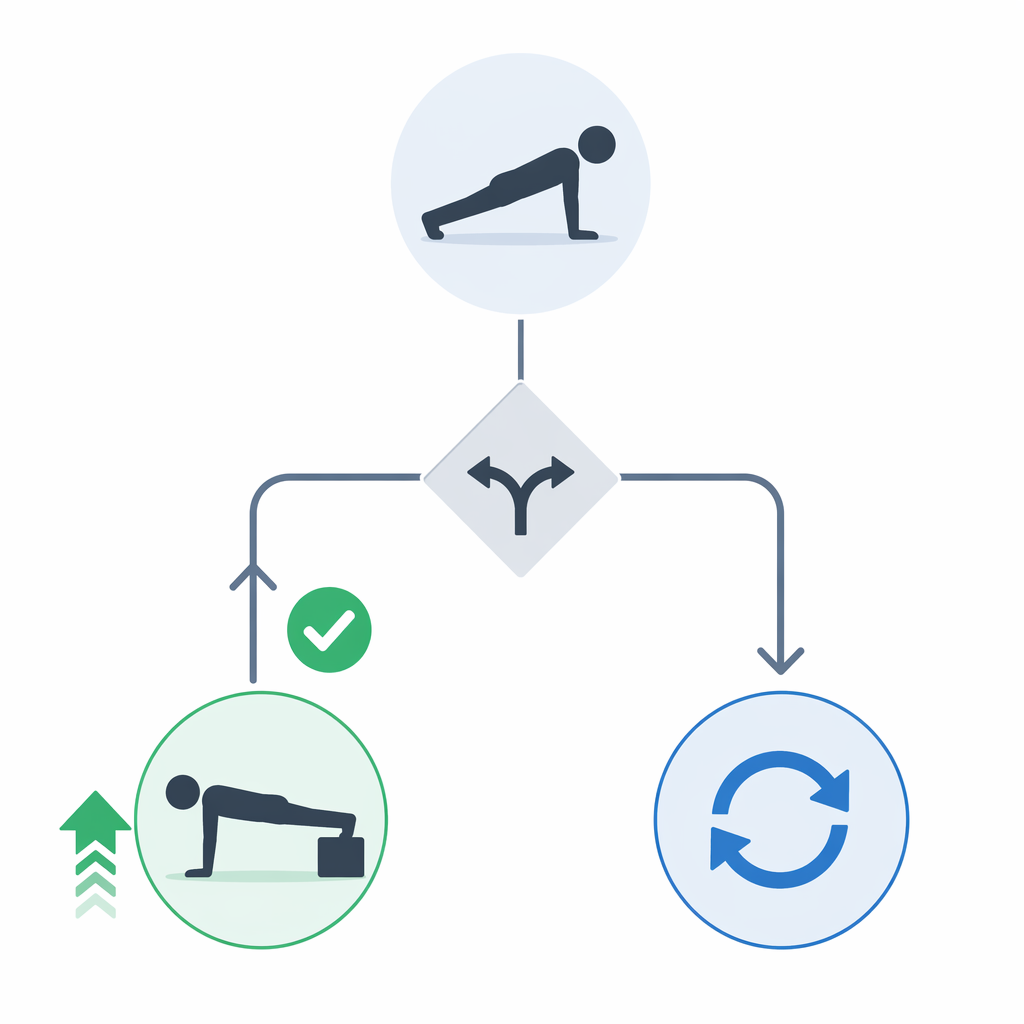
| If This Happens | Do This Next |
|---|---|
| You hit the target reps and had 2 clean reps left in reserve for 2 sessions | Advance to the next week or harder variation |
| You hit the reps but your last reps were shaky | Repeat the week before advancing |
| You cannot reach the lower end of the rep range | Use the easier variation listed for that movement |
| You feel joint pain rather than muscle effort | Stop that exercise, reduce range of motion, or choose the easier option |
| You can do more than 30-40 clean reps of an exercise | Move to a harder variation instead of adding more reps |
That last line matters. Very light resistance can still build muscle when sets are taken close to failure; research summarized by Built With Science notes that loads as low as about 30-40% of one-rep max can stimulate comparable growth to heavier loads when performed near failure, which often translates to roughly 30-40 reps for bodyweight movements.[3] Past that point, more reps usually become a patience test. For strength work, make the exercise harder.
Before Every Session: The 5-Minute Warm-Up
Do this before every workout. It should feel easy, not like a secret extra circuit.
- March in place: 60 seconds
- Arm circles: 30 seconds forward, 30 seconds backward
- Hip hinges with hands on hips: 10 slow reps
- Easy bodyweight squats to a comfortable depth: 10 reps
- Incline or wall push-ups: 8 easy reps
- Glute bridges: 10 reps
Range of motion means how far you move through an exercise. In week 1, use the largest range you can control without pain, wobbling, or collapsing. A half-depth squat with steady knees is more useful than a deep squat you fall into and escape from.
Weeks 1-2: Foundation
The first 2 weeks are not a test of toughness. They are where you learn what a clean rep feels like. Rest 90 seconds between exercises if you need it, and rest 90 seconds between circuits. If your breathing is still out of control after 90 seconds, take more time.
| Exercise | Weeks 1-2 Target | Clean-Form Cue | Too Hard Looks Like |
|---|---|---|---|
| Wall push-up | 2 circuits x 12-15 reps | Body straight, hands at chest height, chest moves toward wall | Shoulders shrug to ears or hips sag |
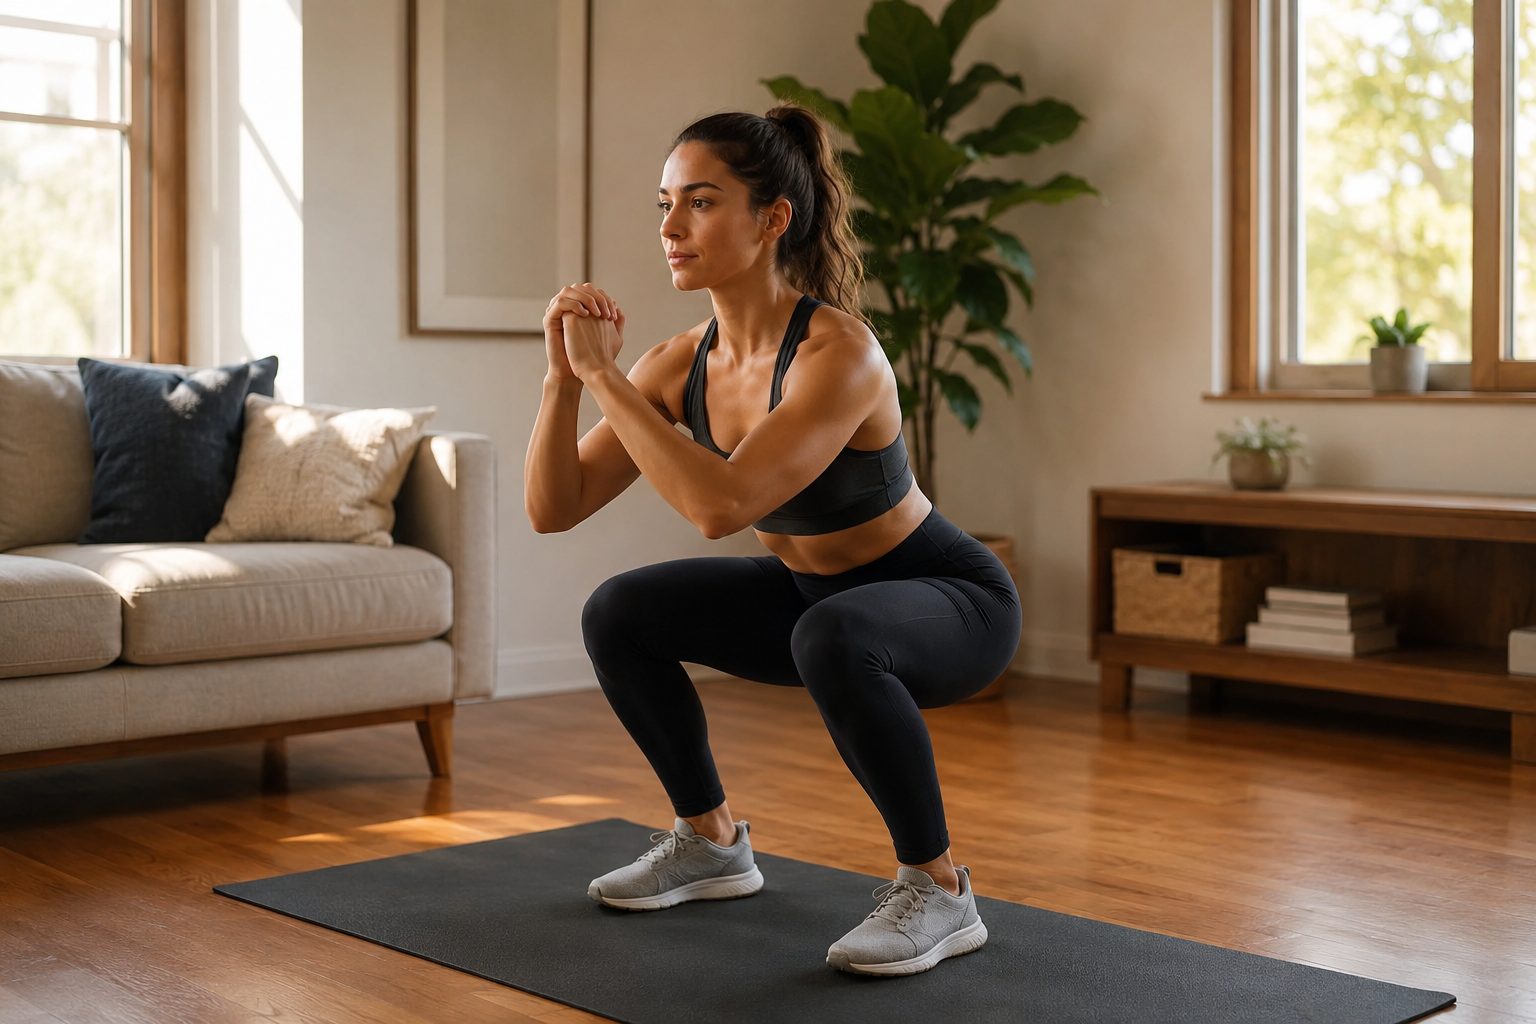
| Chair-assisted squat | 2 circuits x 12-15 reps | Sit back toward the chair, stand without bouncing | Knees cave inward or you drop onto the chair |
| Glute bridge | 2 circuits x 12-15 reps | Squeeze glutes at the top, ribs stay down | Lower back cramps or arches hard |
| Supported reverse lunge | 2 circuits x 8-10 reps per side | Step back softly, front foot stays planted | You push off the wall or chair more than your leg |
| Knee plank | 2 circuits x 15-25 seconds | Straight line from shoulders to knees | Lower back sags or breath is held |
On every rep, lower with control and come up without rushing. “Control” does not mean moving in slow motion yet. It means you could stop the rep at any point without falling into the next position.
If this phase is already too much, step down rather than quitting the plan. Use fewer reps, do only 1 circuit for the first session, or start with a simpler 4-week base such as Your First 4 Weeks of No-Equipment Strength Training. The right starting point is the one you can repeat.
Week 1 Checkpoint
Repeat week 1 if you cannot complete 2 circuits with steady form. Move to week 2 if the exercises feel controlled and you finish with a little energy left.
Week 2 Checkpoint
Advance to Phase 2 if you can complete the top end of the targets for 2 sessions: 15 wall push-ups, 15 chair-assisted squats, 15 glute bridges, 10 supported reverse lunges per side, and a 25-second knee plank. If you miss one exercise, repeat week 2 and keep the others the same.
Weeks 3-4: Volume
Now the plan asks for more total work. You move from 2 circuits to 3 circuits, but the rep targets come down slightly so you can keep form clean. Rest 90 seconds between circuits. If the first session of week 3 feels surprisingly hard, that is normal; one extra circuit changes the workout more than beginners expect.
| Exercise | Weeks 3-4 Target | Progression Option |
|---|---|---|
| Knee push-up or low-incline push-up | 3 circuits x 10-12 reps | Use full push-ups only if knee push-ups are clearly easy |
| Bodyweight squat | 3 circuits x 10-12 reps | Remove the chair or only lightly tap it |
| Glute bridge | 3 circuits x 12-15 reps | Pause 1 second at the top |
| Forward lunge | 3 circuits x 8-10 reps per side | Use reverse lunges if forward lunges bother your knees |
| Full plank or knee plank | 3 circuits x 20-35 seconds | Use full plank only if your hips do not sag |
This is also where the phrase “near failure” becomes useful. Near failure means you stop with about 1-3 good reps left before form breaks. It does not mean grinding until your elbows buckle or your knees twist. For a beginner, the last few reps should be difficult enough to demand attention, not ugly enough to need a rescue plan.
Week 3 Checkpoint
Stay in week 3 if the third circuit causes sloppy reps. Advance to week 4 if all 3 circuits are steady and your last set lands within the target range.
Week 4 Checkpoint
Advance to Phase 3 if you can complete 3 circuits at the top of the target range for 2 sessions. If push-ups lag behind but squats and bridges are ready, keep the easier push-up variation while progressing the lower-body work.
Weeks 5-6: Tempo
Tempo is how fast you perform a rep. In this phase, the important part is the eccentric, which means the lowering phase: lowering your chest in a push-up, sitting down into a squat, or lowering into a lunge. You will use a 2-second lowering phase on the main strength exercises.
| Exercise | Weeks 5-6 Target | Tempo |
|---|---|---|
| Standard push-up, knee push-up, or incline push-up | 3-4 circuits x 8-12 reps | Lower for 2 seconds, press up normally |
| Split squat | 3-4 circuits x 8-12 reps per side | Lower for 2 seconds, stand up normally |
| Single-leg supported glute bridge or regular glute bridge | 3-4 circuits x 10-12 reps per side or 12-15 regular reps | Lower for 2 seconds |
| Pike push-up or incline pike push-up | 3 circuits x 6-10 reps | Lower head slowly, press away from floor |
| Side plank | 3 circuits x 15-25 seconds per side | Hold steady, no hip sag |
Rest drops to 60-90 seconds. Use 90 seconds after split squats and push-ups if needed. Use 60 seconds after planks or bridges if you recover quickly. The point is not to turn strength work into breathless cardio; the point is to keep enough fatigue that the workout progresses without stealing your form.
This is the phase where many people accidentally cheat. They count “one-two” too fast, shorten the squat, or drop the last few inches of a push-up. If the tempo makes you lose range of motion, use the easier variation and keep the tempo honest.
Week 5 Checkpoint
Stay with 3 circuits if the 2-second lowering phase is new and demanding. Add a fourth circuit in week 6 only if your third circuit still looks like your first.
Week 6 Checkpoint
Advance to Phase 4 if you can keep the 2-second lowering phase through every set and still finish inside the target range. Repeat week 6 if you are hitting the reps only by speeding up.
Weeks 7-8: Harder Variations
The last phase uses leverage and single-limb work. Leverage is why a decline push-up is harder than a standard push-up and why a Bulgarian split squat is harder than a regular squat: more of your bodyweight shifts onto the working muscles.
| Exercise | Weeks 7-8 Target | Easier Option |
|---|---|---|
| Decline push-up or standard push-up | 4 circuits x 6-10 reps | Standard, knee, or incline push-up |
| Bulgarian split squat or split squat | 4 circuits x 8-10 reps per side | Regular split squat with shorter range |
| Single-leg glute bridge | 4 circuits x 8-12 reps per side | Regular glute bridge with 2-second lowering |
| Bear crawl | 4 circuits x 20-30 seconds | Bear hold for 10-20 seconds |
| Side plank with reach or regular side plank | 4 circuits x 15-25 seconds per side | Knee side plank |
Use a 3-second lowering phase on decline push-ups, split squats, and single-leg glute bridges. Three seconds means a real count: one, two, three, then return. If the 3-second lowering phase cuts your reps in half, keep the easier variation. That is the correct adjustment.
Week 7 Checkpoint
Your goal is to survive the harder variations without losing positions. Do not chase the top of the rep range yet. If you can do the lower number cleanly, week 7 is successful.
Week 8 Checkpoint
Finish the plan by testing the same rule you have used all along. If you can complete 4 circuits inside the target range with clean form and about 2 reps left on the main exercises, you are ready for a harder version of this plan. If not, repeat weeks 7-8.
The Pulling Problem in No-Equipment Training
Push-ups, squats, lunges, bridges, and planks cover a lot, but they do not solve everything. True pulling is the weak spot in a strict no-equipment plan. Your back and biceps are harder to train without something to pull against.
If you have a sturdy table, you can add an inverted table row. If you have a secure doorframe and know it can tolerate force, you can use careful doorframe rows. If you have a towel and a safe anchor point, towel rows may work. None of those are truly “no equipment,” and none are worth doing on a flimsy surface.
For this 8-week beginner plan, the honest compromise is to finish the program as written and add pulling only when you have a safe setup. If your shoulders already feel rounded or you want a more balanced upper-body plan, use The No-Equipment Upper Body Workout That Trains Both Push and Pull as the next layer rather than pretending push-ups train every upper-body direction.
Can Bodyweight Training Really Build Strength?
For beginners, yes—when the plan progresses. A controlled study discussed by Harvard Health found that 10 weeks of bodyweight exercise in young women improved aerobic capacity by 33%, core muscle endurance by 11%, and lower-body power by 6%.[4] Those exact results belong to that study population, not to every person doing squats in a living room, but they are enough to retire the idea that bodyweight training is only a warm-up.
An 8-week PeerJ study comparing calisthenics and traditional weight training found comparable improvements in muscle strength and body composition when progressive overload was applied.[5] The useful phrase there is “when progressive overload was applied.” A random circuit repeated forever is not the same thing as training.
Progressive overload simply means the training challenge increases over time. In this plan, the increase comes from more circuits, harder angles, slower lowering, shorter rest, single-leg work, and stricter range of motion. You do not need to know the term before you start. You just need the next Tuesday’s workout to be slightly more demanding than the one your body has already adapted to.
How to Choose Easier or Harder Variations
Use the variation that lets you finish the assigned reps with clean form and near-failure effort. Too easy means you could keep going well past the target. Too hard means you cannot control the lowering phase, shorten the movement dramatically, or feel strain in joints instead of working muscles.
| Movement | Easier | Middle | Harder |
|---|---|---|---|
| Push | Wall push-up | Knee or incline push-up | Standard or decline push-up |
| Squat | Chair-assisted squat | Bodyweight squat | Split squat or Bulgarian split squat |
| Hinge / glutes | Glute bridge | Paused glute bridge | Single-leg glute bridge |
| Core | Knee plank | Full plank | Side plank, bear hold, or bear crawl |
| Lunge | Supported reverse lunge | Reverse or forward lunge | Split squat with tempo |
Do not upgrade every exercise on the same day just because the calendar moved. It is normal to use a harder squat variation while keeping an easier push-up variation. Your body does not progress in neat columns.
What to Do After Week 8
If week 8 was challenging, repeat weeks 7-8 until the top of the rep range is clean. If week 8 felt strong, repeat the full 8-week plan with harder starting variations: incline push-ups become knee or standard push-ups, chair squats become bodyweight squats, regular bridges become single-leg bridges, and planks become longer or more demanding core holds.
If you want a longer runway, move into a 12-week at-home bodyweight workout plan. If you want another 8-week structure with a different phase emphasis, try the 8-week no-equipment bodyweight workout plan for home.
Eventually, some exercises will stop giving you a clear challenge unless you add load. That is not a weakness of this plan; it is a sign that it worked. When bodyweight leg work no longer gives you a useful strength stimulus, compare bodyweight vs. dumbbell leg workouts at home before buying equipment.
For the next 8 weeks, the job is simpler: show up 2-3 times per week, keep the reps clean, use the checkpoint honestly, and let the plan get harder only when your body has earned it.
References
- Physical Activity Guidelines for Americans, 2nd edition, U.S. Department of Health and Human Services, 2018.
- Essentials of Strength Training and Conditioning, National Strength and Conditioning Association.
- The Best Full Body Workout At Home, Built With Science.
- The advantages of body-weight exercise, Harvard Health Publishing, January 2026.
- Effects of a calisthenics training intervention on posture, strength and body composition, PeerJ, 2017.


Comments
Join the discussion with an anonymous comment.