“I can’t even do one push-up” is not a confession. It is useful starting data. A real at home workout plan without equipment has to begin before the floor push-up, before the full squat, and before the plank that makes your shoulders shake after eight seconds.
Most beginner plans quietly assume you can already do the exercises they call basic. If you cannot, the plan does not need more motivation sprinkled on top. It needs lower rungs, clear form standards, and a way to know when you are actually ready to move up.
This plan uses five movement families: push-ups, squats, planks, lunges, and glute bridges. Each one has an easiest version, a progression ladder, and an advancement gate. Your first job is not to prove you are fit. Your first job is to find the version you can repeat with control.
The Rule That Makes This Plan Work
A set only counts if you can do it with control, without sharp pain, and without your form collapsing before the final rep. Mild muscle effort is fine. Light shaking near the end of a set is fine. Shoulder shrugging, dropping into the bottom position, twisting to one side, or holding your breath through every rep means the variation is too hard today.
Use this advancement gate for every exercise in the plan: move to the next rung only when you can complete the assigned sets and reps with good form, steady breathing, and no more than light shaking. NASM’s progressive overload framework supports increasing training difficulty gradually rather than jumping to a harder version before the body can tolerate it.[1]
| Movement | Start here if you are unsure | Move up when you can complete |
|---|---|---|
| Push-up | Wall push-up | 3 sets of 12 controlled reps |
| Squat | Assisted chair squat | 3 sets of 10 controlled reps |
| Plank | Wall plank | 3 holds of 20–30 seconds |
| Lunge | Assisted split-stance hold or assisted reverse step | 2 sets of 8 controlled reps per side |
| Glute bridge | Two-leg floor bridge | 3 sets of 12 controlled reps |
Why Wall Push-Ups and Chair Squats Count
Regression is not cheating. It is how you match the exercise to the body in front of you. Beginner bodyweight resources commonly use easier variations such as wall push-ups, incline push-ups, squats, lunges, and glute bridges to make training accessible before full floor versions are realistic.[2][3]
There is also enough evidence to take beginner bodyweight training seriously. Nike’s guide cites a 10-week study in women using only bodyweight training that reported improvements in strength, endurance, and flexibility.[4] Schoenfeld and colleagues’ resistance-training research also supports the broader idea that lighter loads taken close to failure can produce hypertrophy comparable to heavier loading, though that does not mean bodyweight work is unlimited for advanced muscle gain.[5]
For a new exerciser, the practical takeaway is narrow but useful: no-equipment training can be a legitimate starting point if the exercise is hard enough for your current level and repeatable enough that you can practice it again in two days. If you want the longer evidence discussion before committing, read Can You Build Muscle Without Weights? The Evidence for Bodyweight Training.
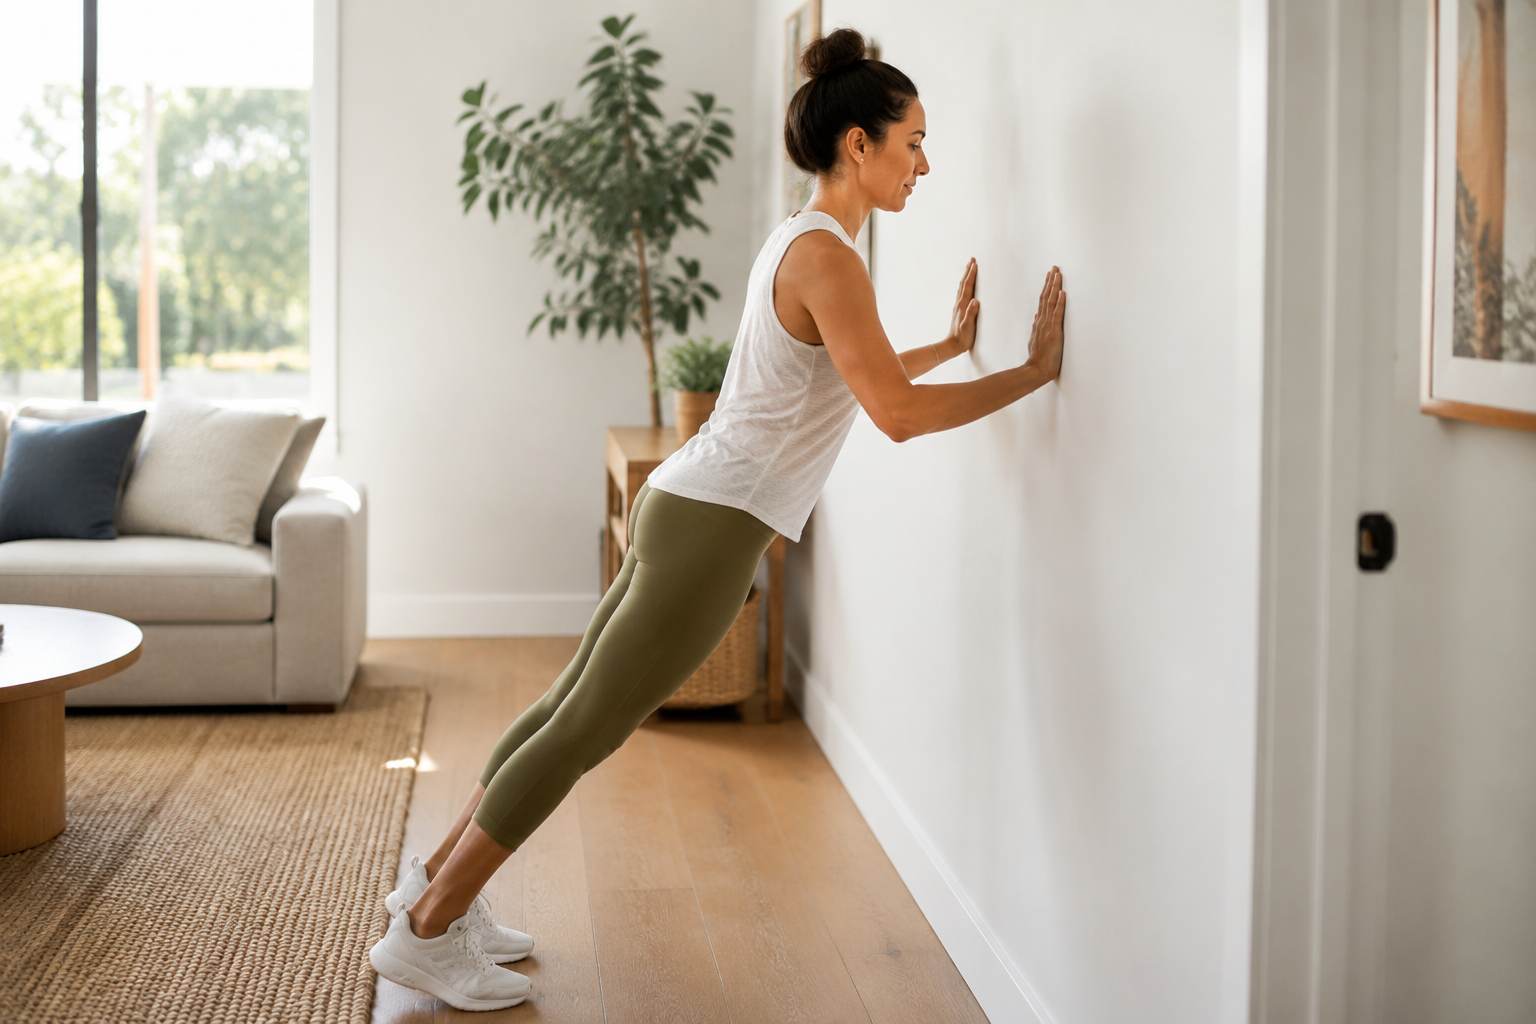
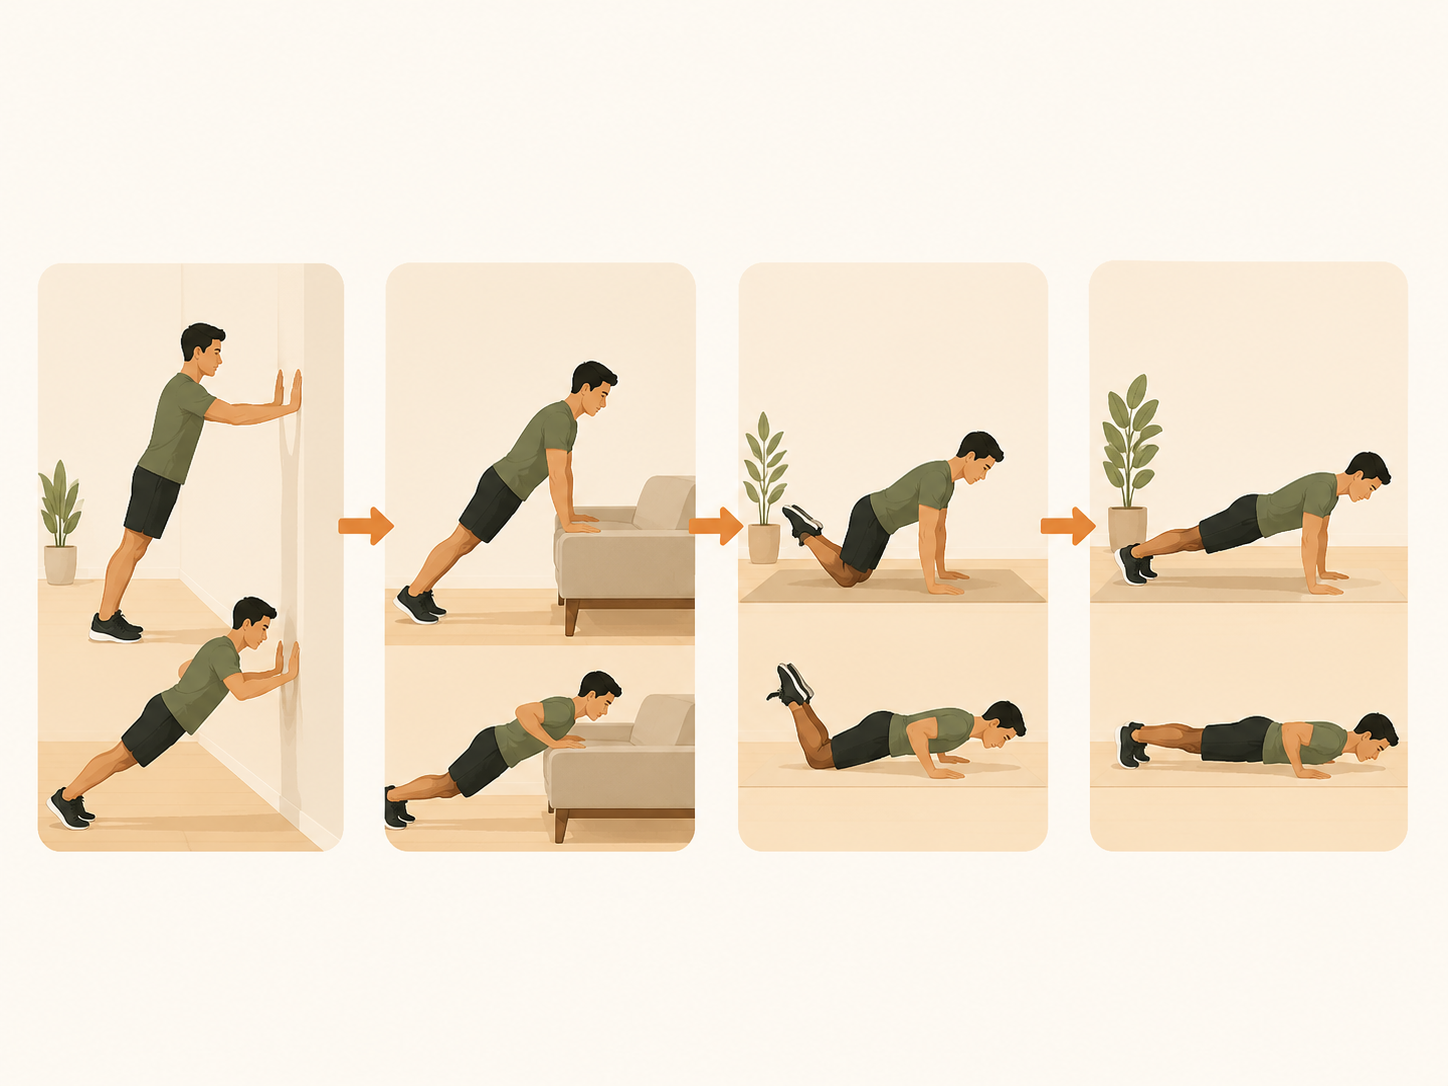
Push-Up Progression: Start Higher Than You Think
Push-ups are where many beginners decide they are “bad at exercise.” Usually they were just started on the wrong rung. A knee push-up can still be too hard if your shoulders collapse, your elbows flare, or you can only bend two inches before dropping.
| Rung | Variation | How to do it | Advance when |
|---|---|---|---|
| 1 | Wall push-up | Stand facing a wall, hands at chest height, body in one straight line, bend elbows to bring chest toward wall. | You can do 3×12 without shrugging shoulders or losing body position. |
| 2 | High incline push-up | Hands on a sturdy countertop-height surface, feet back, body straight, chest lowers toward the edge. | You can do 3×10–12 with full control and no hip sag. |
| 3 | Lower incline push-up | Hands on a lower stable surface, such as a heavy table or bench-height surface. | You can do 3×8–10 with a smooth lower and press. |
| 4 | Knee push-up | Hands on floor, knees down, body straight from shoulders to knees, elbows bend under control. | You can do 3×8–12 without half-reps or shoulder shrugging. |
| 5 | Full push-up | Hands and toes on floor, body straight from head to heels. | Build reps gradually; do not rush volume. |
The surface must be stable. A wall is better than a wobbly chair. A countertop is better than a coffee table that slides. If your wrists complain on the floor, stay on wall or incline versions longer; those angles usually reduce wrist extension compared with floor push-ups.
Good form is boring in the best way: ribs down, hips not sagging, shoulders not jammed into your ears, elbows bending and straightening through the same path each rep. Stop the set when that changes. The last clean rep is more useful than three messy ones.
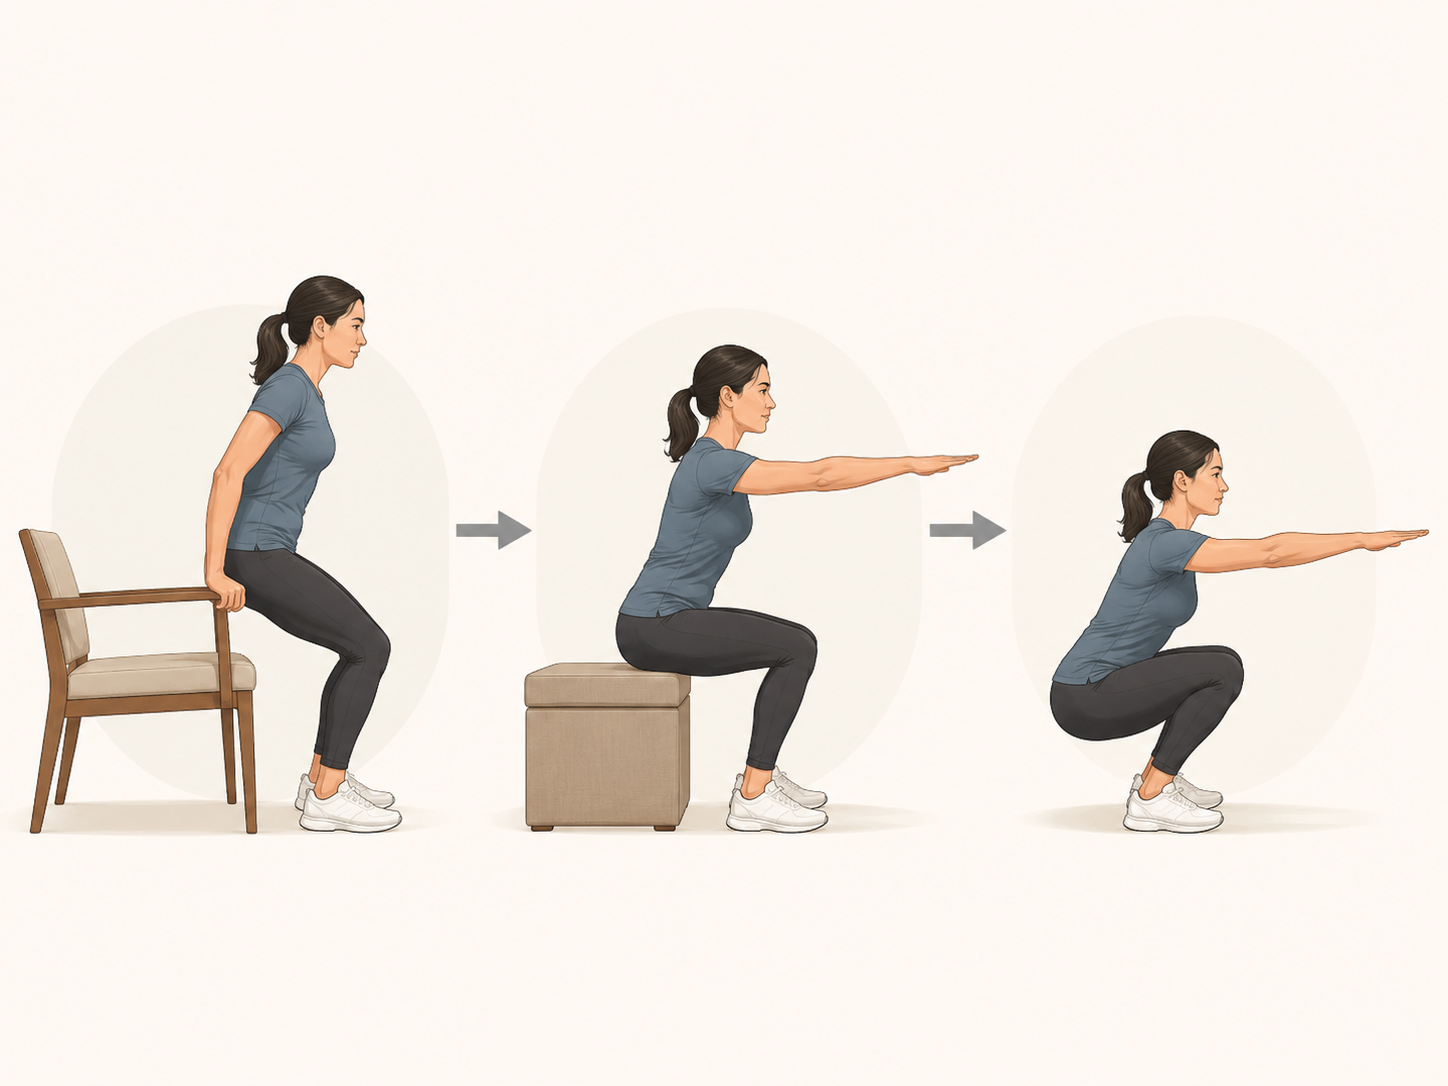
Squat Progression: Use the Chair Without Apologizing
A full bodyweight squat asks for ankle mobility, hip control, balance, leg strength, and confidence lowering your body toward the floor. That is a lot to ask from someone who has not trained. Chair squats are not a lesser exercise; they are the safest place to learn the pattern.
| Rung | Variation | How to do it | Advance when |
|---|---|---|---|
| 1 | Assisted chair squat | Stand in front of a chair, lightly hold the chair arms, a table edge, or a doorframe, sit back until you touch the chair, then stand. | You can do 3×10 without dropping onto the seat or pulling hard with your arms. |
| 2 | Chair squat without hand support | Use the chair as a target only. Touch down lightly, then stand. | You can do 3×10 with knees tracking over toes and no rocking to stand. |
| 3 | Box squat to a lower target | Use a lower stable surface if available, or reduce how much you rely on the chair contact. | You can do 3×10 with the same control at the lower depth. |
| 4 | Full bodyweight squat | Lower as far as you can while heels stay down, torso stays controlled, and knees track comfortably. | Build toward 3×12 before adding harder leg variations. |
The chair should not become a crash pad. Lower slowly enough that you could pause just before touching it. If you have to grip the table hard to stand up, keep the assistance but reduce how much you use it over time. If your knees cave inward or your heels lift every rep, shorten the range for now and practice a cleaner descent.
Lower-body progressions are less standardized than push-up progressions, so your best guide is repeatability. Same stance, same depth, same control. When that becomes ordinary, make the movement a little deeper or less assisted. For more lower-body options later, use 5 Progression Levers for Home Leg Workouts.
Plank Progression: Train the Shape Before the Floor
A plank is not a punishment for your wrists and shoulders. It is a body-position drill. If the floor version turns into sagging hips and clenched teeth after a few seconds, take it back to the wall.
| Rung | Variation | How to do it | Advance when |
|---|---|---|---|
| 1 | Wall plank | Hands on wall, step feet back, make a straight line from head to heels, gently brace your midsection. | You can hold 3×20–30 seconds without shoulder shrugging. |
| 2 | Incline plank | Hands on a stable elevated surface, feet back, body straight. | You can hold 3×20–30 seconds without hips sagging. |
| 3 | Knee plank | Forearms or hands on floor, knees down, body straight from shoulders to knees. | You can hold 3×20–30 seconds while breathing steadily. |
| 4 | Full plank | Forearms or hands on floor, toes down, body straight from head to heels. | Build time gradually while keeping the same shape. |
Stop the hold when your position changes, not when the timer wins. Ten honest seconds beat thirty seconds of hanging on your lower back.
Lunge Progression: Balance Comes First
Lunges are often labeled beginner, but many new exercisers cannot control the step, the knee bend, and the balance demand at the same time. If you wobble through every rep, your legs are not getting a clean strength signal. They are negotiating a fall.
| Rung | Variation | How to do it | Advance when |
|---|---|---|---|
| 1 | Assisted split-stance hold | Stand with one foot forward and one foot back, hold a wall or chair lightly, bend both knees a small amount, then stand tall. | You can do 2×8 per side with balance and no hard pulling. |
| 2 | Assisted static lunge | Keep feet planted, hold support lightly, lower a little farther, then stand. | You can do 2–3×8 per side with smooth knee tracking. |
| 3 | Static lunge without support | Same planted-foot pattern, hands free or lightly out for balance. | You can do 3×8 per side without tipping or twisting. |
| 4 | Alternating reverse lunge | Step one foot back, lower under control, return to standing, alternate sides. | Build reps slowly; do not chase speed. |
Reverse lunges are usually friendlier than forward lunges because the stepping leg moves backward and the front foot stays planted. Still, there is no prize for rushing them. If the assisted version lets you keep your front knee steady and your torso quiet, that is the version that belongs in your workout.
Glute Bridge Progression: Simple, Useful, Easy to Rush
Glute bridges are often the most approachable exercise in the first month. They train hip extension without asking you to balance, support your body on your wrists, or lower into a deep squat. That does not mean they should be sloppy.
| Rung | Variation | How to do it | Advance when |
|---|---|---|---|
| 1 | Two-leg floor bridge | Lie on your back, knees bent, feet flat, press through feet, lift hips until your body forms a line from shoulders to knees. | You can do 3×12 without arching your lower back. |
| 2 | Elevated glute bridge | Place feet on a stable low surface, lift hips with the same control. | You can do 3×10–12 and feel the work in hips and thighs, not the low back. |
| 3 | Single-leg bridge | Keep one foot down and one leg lifted, raise hips without twisting. | Use only when both sides stay level. |
Pause briefly at the top. If you feel your lower back doing most of the work, reduce the height of the lift and think about bringing your ribs down before the next rep.
Your Four-Week Starter Routine
Train three days per week on nonconsecutive days, such as Monday, Wednesday, and Friday. The other days can be rest days or easy walking days. Each session should feel like practice plus effort, not like a test you barely survive.
| Week | Sessions | Main goal | Workout |
|---|---|---|---|
| 1 | 3 | Find your starting rung | 1–2 sets each: wall push-up 8–10 reps, assisted chair squat 8 reps, wall plank 15–20 seconds, assisted split-stance hold 6 reps per side, glute bridge 10 reps |
| 2 | 3 | Repeat clean reps | 2 sets each: wall or incline push-up 8–12 reps, assisted chair squat 8–10 reps, wall or incline plank 20 seconds, assisted lunge pattern 6–8 reps per side, glute bridge 10–12 reps |
| 3 | 3 | Add volume only where form holds | 2–3 sets each: current push-up rung 8–12 reps, current squat rung 10 reps, current plank rung 20–30 seconds, current lunge rung 8 reps per side, glute bridge 12 reps |
| 4 | 3 | Test advancement gates | 3 sets each where appropriate: push-up 10–12 reps, squat 10 reps, plank 20–30 seconds, lunge 8 reps per side, bridge 12 reps |
Rest 60–90 seconds between sets. Rest longer if your breathing is still rushed or your next set would be worse because you hurried. The goal is not to turn this into cardio by accident.
Before each session, do three to five minutes of easy movement: marching in place, gentle arm circles, standing hip hinges, and a few slow sit-to-stands. You do not need a complicated warm-up. You need your joints to know the session has started.
If an exercise is too hard that day
- Move one rung easier and finish the planned sets there.
- Reduce the reps by two to four per set if the first few reps are clean but fatigue arrives early.
- Shorten the range of motion for squats and lunges if depth is the problem.
- Stop any movement that creates sharp pain, numbness, or joint pain that changes how you move.
If the workout feels too easy
Do not jump three rungs because one session went well. First complete the advancement gate twice, on two separate workout days. If wall push-ups are easy on Monday and still clean on Wednesday, try the incline version on Friday. That keeps confidence from turning into a form problem.
How to Choose Your Starting Rung
On your first day, test the easiest version of each movement. Do not test the hardest version first. That usually gives beginners one of two bad outcomes: a failed rep that feels discouraging, or a messy rep that gets mistaken for readiness.
- For push-ups, start at the wall unless you already know incline push-ups are controlled.
- For squats, start with a chair and hand support if lowering makes you nervous.
- For planks, start at the wall if floor planks bother your wrists, shoulders, or low back.
- For lunges, start with support because balance can hide the strength work.
- For glute bridges, start with the two-leg floor version and make it clean before making it harder.
Write down the rung you used, the sets and reps you completed, and one form note. A useful note sounds like “wall push-ups: 2×10, shoulders stayed down” or “chair squats: 2×8, used hands heavily on last two reps.” That is enough information to make the next session better.
When You Are Ready to Leave This Plan
Four weeks will not turn everyone into someone who loves exercise. It can do something more useful: show you exactly where you are, give you a repeatable routine, and make the next step obvious.
You are ready for a longer beginner bodyweight plan when you can perform controlled versions of the main movements without needing the easiest regressions for everything. That might mean incline push-ups instead of wall push-ups, chair squats without hand support, a stable knee or full plank, controlled static lunges, and clean bridges for multiple sets.
At that point, move into the 12-Week At-Home Bodyweight Workout Plan or the 8-Week No-Equipment Bodyweight Workout Plan for Home. If your upper body reaches full push-ups and then stalls, use How to Progress Your No-Equipment Upper Body Workout When Push-Ups Stop Working. If your legs need a dedicated track, go to Your First 8 Weeks of Home Leg Workouts.
If you only have a few minutes on a low-motivation day, a modified short session can keep the habit alive; The 7-Minute Workout for Beginners: How to Modify It Safely is better suited for that than trying to compress this whole routine into a rushed circuit.
Once you can do 3×12 of the full versions with good form, bodyweight basics may stop being enough for continued strength or muscle gain. Then you can make exercises harder with more advanced calisthenics, slower tempo, greater range of motion, unilateral work, or added equipment. The bodyweight tier in A Home Gym Workout Plan That Grows With Your Equipment can help you choose that next direction.
The missing piece was not a dumbbell, a perfect app, or a tougher mindset. It was a progression system that started where you actually are.
References
- Progressive Overload Explained — NASM
- Beginner Bodyweight Workout — Nerd Fitness
- 11 Bodyweight Workouts for Beginners — Planet Fitness
- Are Bodyweight-Only Exercises Enough? — Nike.com
- Effects of Resistance Training Overload Progression Protocols — PubMed / Schoenfeld et al. — 2017
Comments
Join the discussion with an anonymous comment.