
The hardest part of a backflip at home is usually not the jump. It is the second before takeoff, when your body understands that you are about to leave the floor backward without being able to see where you will land. Strong legs do not erase that. Watching a clean tutorial does not erase it either.
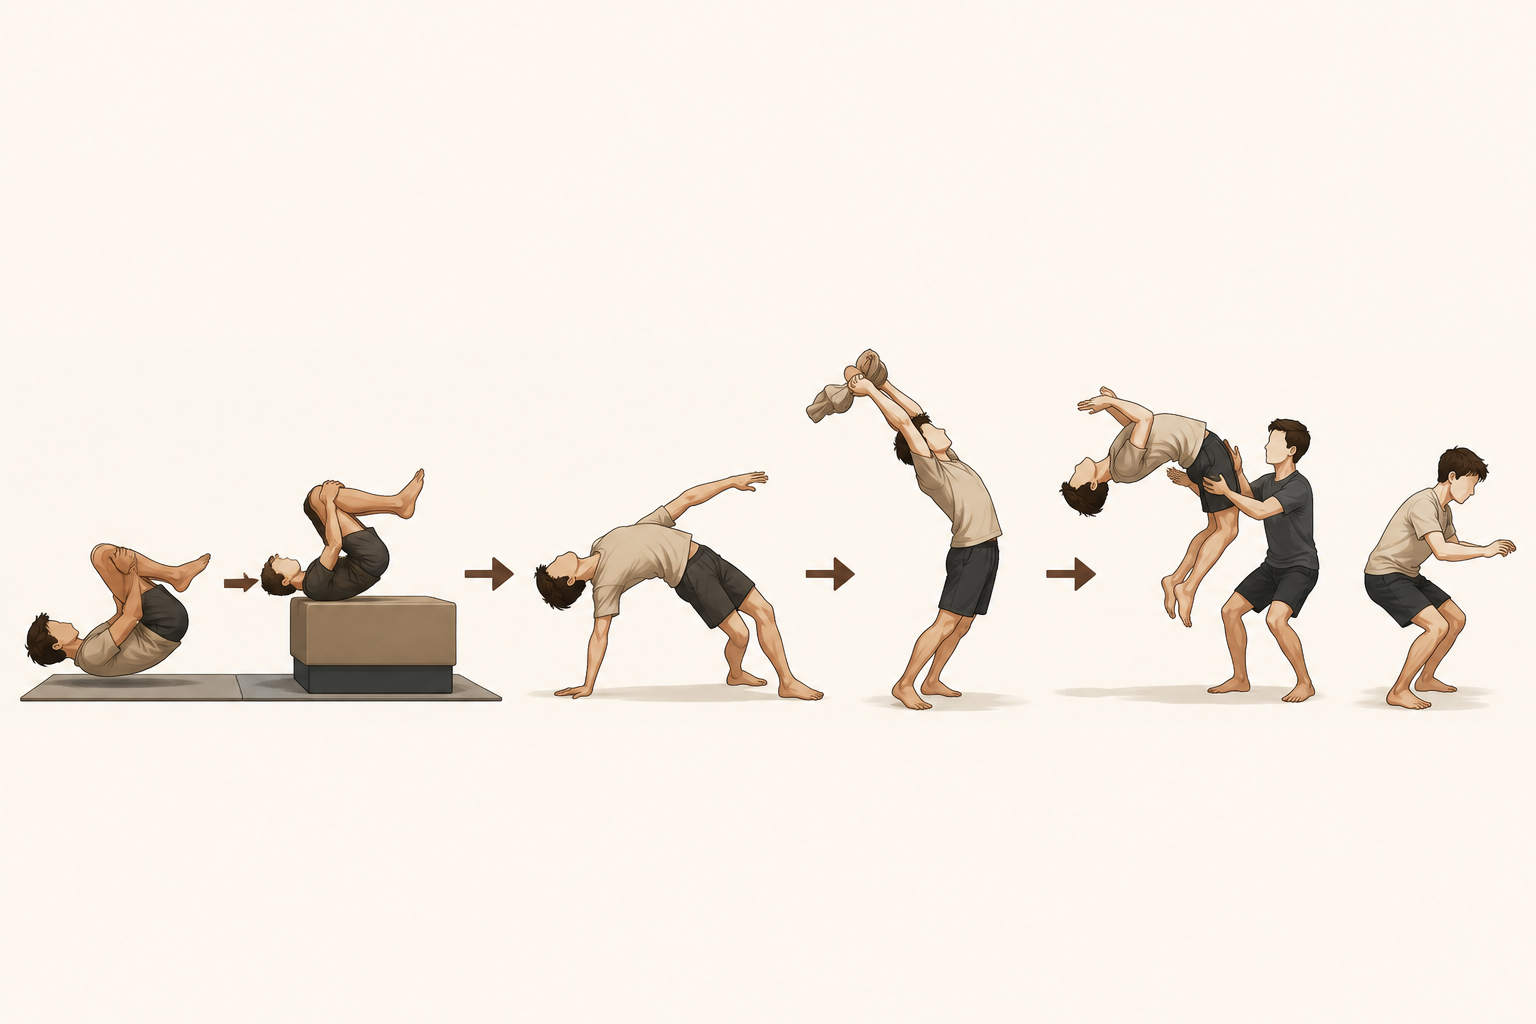
So the goal is not to “commit harder.” The goal is to build a chain of drills where each step teaches one part of the backflip and also decides whether you are allowed to continue. A useful home progression starts low and slow: back rolls, elevated back rolls, macaco, t-shirt drill, assisted flips, then carefully chosen solo attempts. Berg Movement lays out this kind of sequence and identifies fear, rather than raw physical inability, as the common reason people fail to take the skill from theory into movement [1].
This article assumes you are an intermediate home fitness reader: you can squat, jump, brace your trunk, support some weight through your hands, and train without current injuries or major mobility restrictions. If your ankles, knees, back, neck, wrists, or shoulders are already irritated, backflip training is not the place to test whether they will tolerate impact.
Why the Progression Matters More Than the Flip
A backflip is brief, but the consequences concentrate at the landing. Gymnastics injury data is not perfectly specific to adults learning in a backyard, so it should not be treated as a direct prediction of your personal risk. It does, however, point to the parts of training that deserve respect: poor landing technique is associated with a 3.7 times higher ankle sprain risk, inadequate warm-up is associated with twice the risk of acute injury, and 65% of gymnastics injuries are reported as overuse-related in the Gitnux compilation [2].
Landing forces are another reason to be conservative. Mass General Brigham notes that landing forces during a backflip can reach up to 18 times bodyweight [3]. That does not mean every home attempt produces that load, and it does not mean the skill is forbidden. It means you should earn the right to experience higher forces by first proving that you can rotate, spot, brace, and land under easier conditions.
The injury-prevention question is therefore practical: can each drill reduce the chance of an uncontrolled landing before you add height, speed, and fear? If the answer is no, the drill is either too advanced or being done in the wrong environment.
Set the Training Space Before You Test Your Nerve
Home training can be useful, but a living room is not automatically a training facility. You need soft, stable padding; open space around you; no furniture edges; no low ceiling; no loose rugs; and no surface that slides when you jump. There is no authoritative home-ceiling minimum that applies to every body size and jump style, so clearance has to be judged conservatively. If you have to wonder whether your feet might hit a fan, light fixture, branch, shelf, or ceiling, that space is not suitable for backflip attempts.
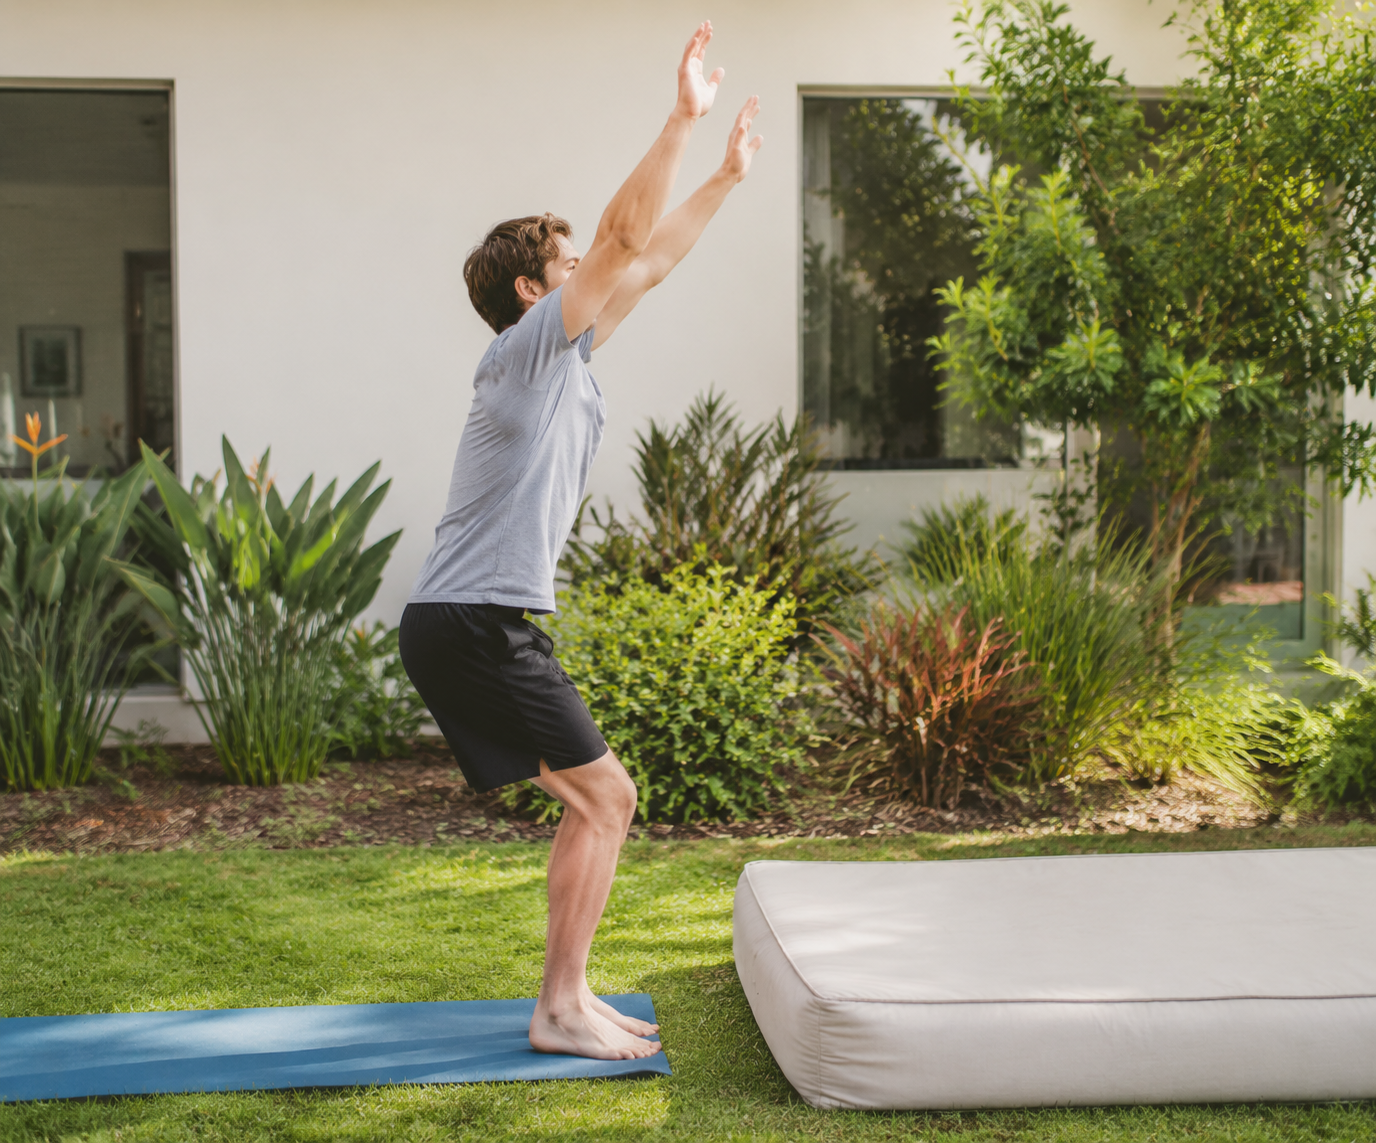
The warm-up is part of the progression, not a decorative beginning. You are asking ankles, knees, hips, spine, shoulders, and neck to coordinate quickly under stress. A rushed warm-up is especially foolish when inadequate warm-up is associated with doubled acute injury risk in gymnastics injury data [2].
- Raise temperature first: light jogging in place, jump rope without the rope, or low pogo hops.
- Prepare the landing joints: calf raises, ankle circles, squat-to-stand reps, and controlled two-foot jumps.
- Prepare the trunk: hollow holds, dead bugs, or slow tuck rocks.
- Prepare inversion: easy backward rolls or rocking drills before anything fast.
- Stop the session if your first few landings get louder, wider, or less balanced instead of cleaner.
The Home Backflip Progression
Treat the sequence as a set of gates. Passing a gate does not mean you performed it once while excited. It means you can repeat it with control, stop before fatigue changes the movement, and explain what the drill is teaching.
| Stage | What it teaches | Readiness signal |
|---|---|---|
| Back rolls | Comfort going backward and rounding through the spine | You roll smoothly without turning your head, panicking, or crashing onto the neck |
| Elevated back rolls | Earlier rotation and a stronger tuck shape | You leave the raised surface under control and land predictably on the mat |
| Macaco | Backward commitment with shoulder support and spatial awareness | You can perform it both confidently and cleanly without collapsing through the arm or twisting blindly |
| T-shirt drill | Arm swing timing without flipping | You can jump upward and throw the arms without arching backward too early |
| Assisted flips | Full rotation with reduced fear and external control | The helper guides; they do not save a failed jump |
| Solo attempts | Independent takeoff, rotation, and landing | Previous stages stay consistent, and the first attempts happen only in a forgiving setup |
Back Rolls: Make Going Backward Ordinary
Back rolls look too simple to matter until you notice what they remove: height, hard impact, and the need to land on your feet. That leaves the first problem exposed. Can you go backward, round your spine, keep your chin safe, and finish the rotation without stiffening or twisting out?
Start on a padded surface. Sit in a tucked position, round your back, roll to your shoulders, and return. Keep the movement small at first. The goal is not to fling your legs overhead. The goal is to teach your nervous system that backward rotation has a shape and an exit.
Your neck should not be the landing surface. If you feel pressure on the neck, if you turn your head to escape the roll, or if you cannot keep the tuck shape, stay here. That is not a failure; it is the progression doing its job before the stakes rise.
Elevated Back Rolls: Add Drop Without Adding Panic
The elevated back roll is where the drill starts to feel less like a floor exercise and more like a backflip ingredient. Using a low, stable raised surface, you roll backward off the edge onto a padded landing area. The small drop helps rotation happen earlier, while the mat still protects you from the consequences of an incomplete flip.
Keep the setup boring. The raised surface should not wobble. The landing area should not slide. The height should be low enough that you are practicing rotation, not testing courage. If you need a dramatic drop to make the roll work, the shape is not ready.
This stage teaches one of the most important home-training lessons: more intensity is not the same as better progression. You should feel the timing of backward rotation becoming more familiar, not feel that every repetition is a bargain with the floor.
Macaco: The Drill That Tells the Truth
The macaco deserves patience because it is both a skill drill and a diagnostic. In Berg Movement’s progression, the macaco sits before full backflip work, and inability to perform a controlled standing macaco is a sign that the learner is not ready for the full backflip [1]. That is a useful boundary for home training.
A macaco asks you to sit or dip back, reach one hand behind you, pass through a bridge-like position, and kick over to your feet. It is not the same movement as a backflip, but it contains several qualities a backflip needs: willingness to travel backward, shoulder support, trunk control, and awareness while the world is upside down.
Do not rush from a barely survived macaco into assisted flips. Look at the details. Does your support arm bend and collapse? Do your feet scrape through because the hips never rise? Do you twist away from the backward path because you do not trust the position? Does one side feel controlled while the other feels like a fall? Those are not cosmetic flaws. They are information.
If the macaco exposes missing shoulder strength or trunk control, step sideways instead of forcing forward. The existing Home Fitness routine, Build Gymnast Strength at Home with a 4-Week Bodyweight Routine, is a better use of training time than collecting ugly attempts. You can keep the back-roll work warm while building the support capacity that the macaco is asking for.
T-Shirt Drill: Separate the Arm Throw From the Fear
The t-shirt drill is simple: hold a shirt or similar light object, jump upward, and throw the arms as if initiating the backflip. You are rehearsing the arm drive without actually inverting. That matters because many beginners throw their head back too early, arch hard, and turn the takeoff into a blind fall.
A clean takeoff feels more vertical than beginners expect. You dip, swing, jump up, and then tuck. If the drill makes you travel backward immediately, or if your chest opens so much that you cannot jump tall, stay with the drill until the arm swing helps your jump instead of stealing it.
Assisted Flips: Exposure, Not Rescue
Assisted flips are where home learners often blur the line between controlled exposure and uncontrolled falling. A good assist reduces fear and guides rotation. A bad assist catches a person who had no realistic chance of completing the movement. Those are very different sessions, even if the video clip looks similar.
If you use a helper, choose someone strong enough to guide you and calm enough not to yank you sideways. The helper needs to understand the job before the jump starts: support the rotation, keep the movement organized, and prevent a dangerous landing. They should not be learning their role at the same time you are learning to flip.
This is also the stage where a single coached session can be worth the money. That does not mean every home learner must train in a gymnastics gym. It means that if fear stays high, if the assist has to save you, if the landing area is questionable, or if your helper cannot give consistent support, a proper facility with a coach and safer landing equipment changes the risk calculation.
FitApp’s “30 Days to Backflip” program is an example of commercial programming using similar progression logic, but its “30 days” and “no spotter” framing should be treated as marketing rather than independent evidence that a specific timeline or solo path is safe for you [4]. A calendar cannot see your landing.
Solo Attempts: Earn the First One, Then Keep Auditing It
The first solo attempt should not arrive because you are tired of drills. It should arrive because the earlier gates have stopped being dramatic. Back rolls are smooth. Elevated rolls are controlled. Macacos are repeatable. The arm swing is vertical and organized. Assisted flips feel guided rather than saved. Your warm-up is complete. Your landing surface is forgiving. Your space is clear.
Even then, the first attempts should be few. Overuse is not only a problem for elite athletes; repetitive impact, repeated failed landings, and stubborn sessions are exactly how a home learner turns one exciting skill into a sore ankle, irritated knee, or angry back. The Gitnux figure that 65% of gymnastics injuries are overuse-related is a reminder to count total stress, not just dramatic crashes [2].
- Stop if landings get louder or more staggered.
- Stop if you begin throwing your head back to force rotation.
- Stop if fear increases with each attempt instead of settling.
- Stop if your warm-up quality drops because you are eager to “just try one.”
- Stop if soreness changes how you jump, tuck, or land.
A landed backflip is not automatically a safe backflip. If you land low, folded, twisted, or surprised, that attempt still belongs in the learning category. Reduce the difficulty again: more assisted reps, more elevated rolls, more macaco work, or a coached session before you keep adding repetitions.
Use Readiness Gates Instead of a Timeline
A useful backflip plan has permission to be uneven. You might spend a few sessions on back rolls and much longer on macaco control. You might have the strength to jump high but not the shoulder confidence to pass backward through space. You might be physically ready before your training space is ready. None of that fits neatly into a 30-day promise.
The readiness gates are more honest than the calendar:
- Inversion gate: you can roll backward without neck pressure, panic, or twisting out.
- Rotation gate: elevated rolls create a predictable tuck and landing path.
- Support gate: the macaco is controlled enough to show shoulder and trunk readiness.
- Takeoff gate: the arm swing sends you upward before rotation begins.
- Landing gate: assisted and early solo landings stay quiet, balanced, and repeatable.
- Recovery gate: joints feel better after rest, not progressively more irritated.
When one gate fails, do not negotiate with it. That failed gate tells you where the next training block belongs.
When Home Training Is No Longer the Safer Option
Home progressions are useful because they break fear into pieces. They let you practice inversion, rotation, arm timing, and landing mechanics without pretending that bravery is a training method. But home training has a boundary: if the progression stops reducing fear or starts increasing risk, the smart move is not another attempt in the same setup.
Get coached help if your macaco never becomes controlled, if assisted flips require saving, if you cannot create a safe landing area, if your landings repeatedly twist or collapse, or if you feel compelled to rush because the skill is “almost there.” A coach in a proper facility can give feedback and landing support that a backyard mat and a motivated friend cannot reliably provide.
References
- How to Backflip! — Berg Movement.
- Gymnastics Injuries Statistics — Gitnux, 2026.
- Reducing the Risk of Gymnastics Injuries — Mass General Brigham.
- 30 Days to Backflip — FitApp.


Comments
Join the discussion with an anonymous comment.