
The useful version of tennis fitness training at home does not start with finding one perfect workout. It starts with making sure your small-space sessions cover the movements tennis keeps asking for: warm up, get strong on both sides, rotate under control, move your feet, produce power, and recover enough to do it again.
You can build that with less room than most people assume. Tennis Fitness presents a home setup around a clear 3m × 4m space and organizes training into bodyweight, resistance-band, and medicine-ball options, which is a realistic starting point for an apartment living room, garage corner, driveway, or shared family room.[1] TennisNation’s circuit guidance gives the other anchor: 2–3 tennis-specific sessions per week, usually lasting 20–45 minutes depending on how many rounds you complete.[2]
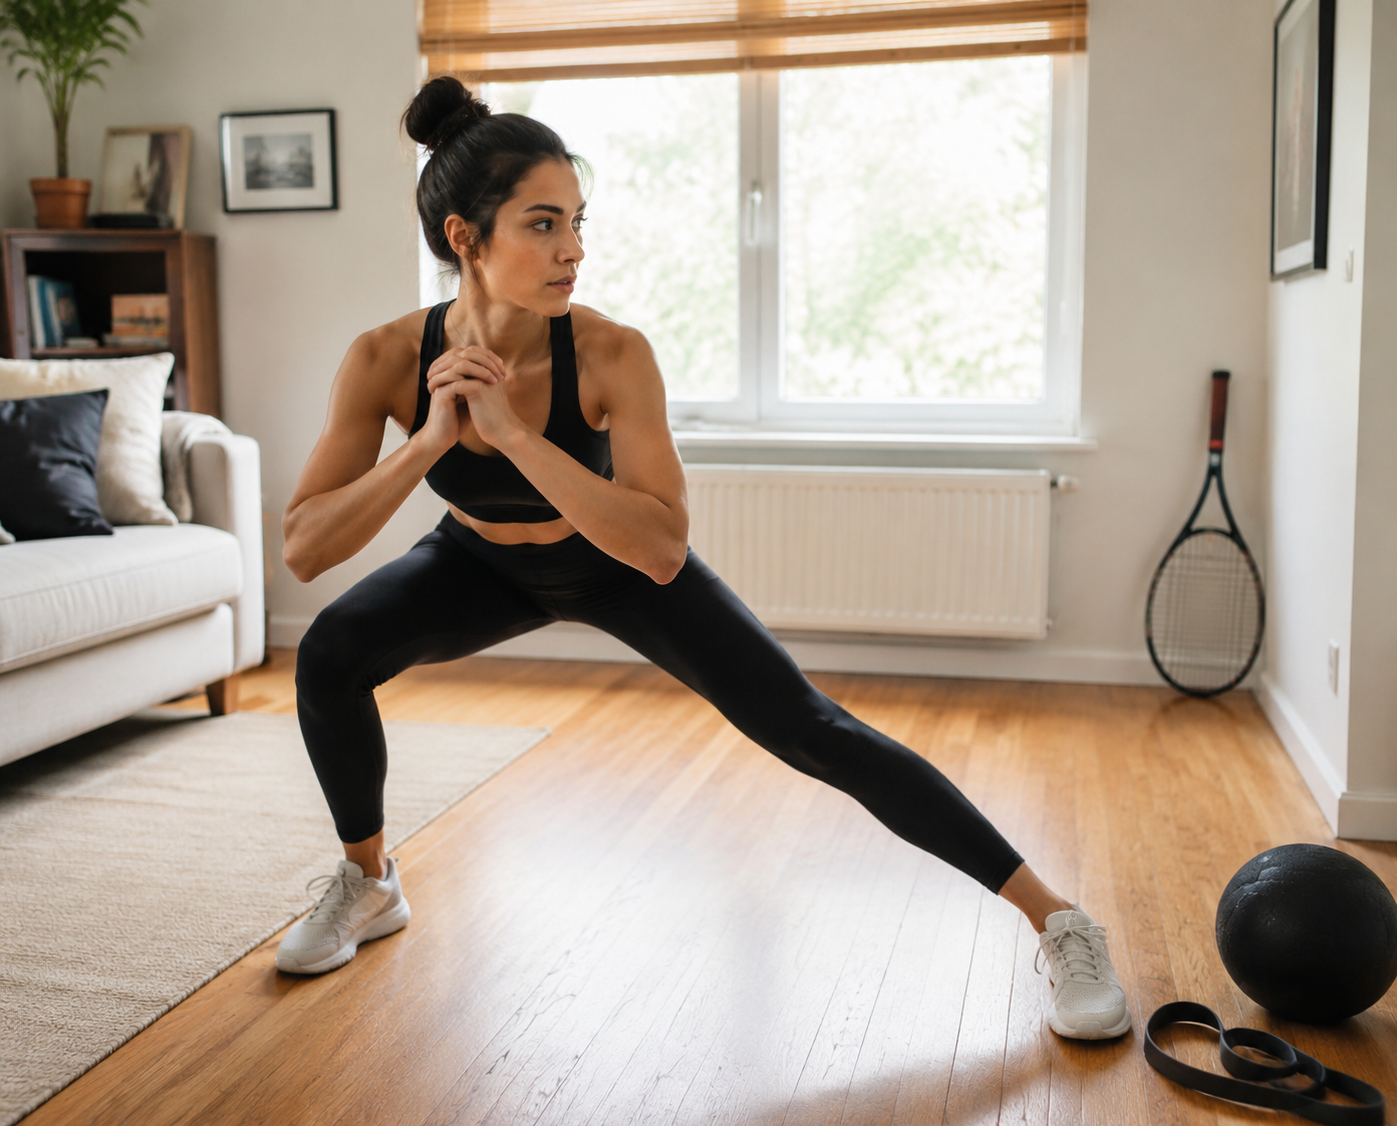
That matters because a home routine can feel brutally hard and still miss tennis. Burpees, random jump squats, and long planks may leave you sweating, but tennis asks for more specific qualities: the ability to split-step, brake laterally, rotate without collapsing through the trunk, push off again, and repeat that pattern while your legs are getting heavy.
The goal is not to copy a gym program in miniature. The goal is to assemble a session that fits your space and still looks like the physical demands of a point.
The Six-Pillar Framework
This six-pillar framework is a practical synthesis, not a standardized coaching system. It pulls from home tennis workout structures, expert exercise selections, circuit programming, and strength-training principles. Used well, it keeps you from building a routine that is all conditioning, all core, or all flashy power work.
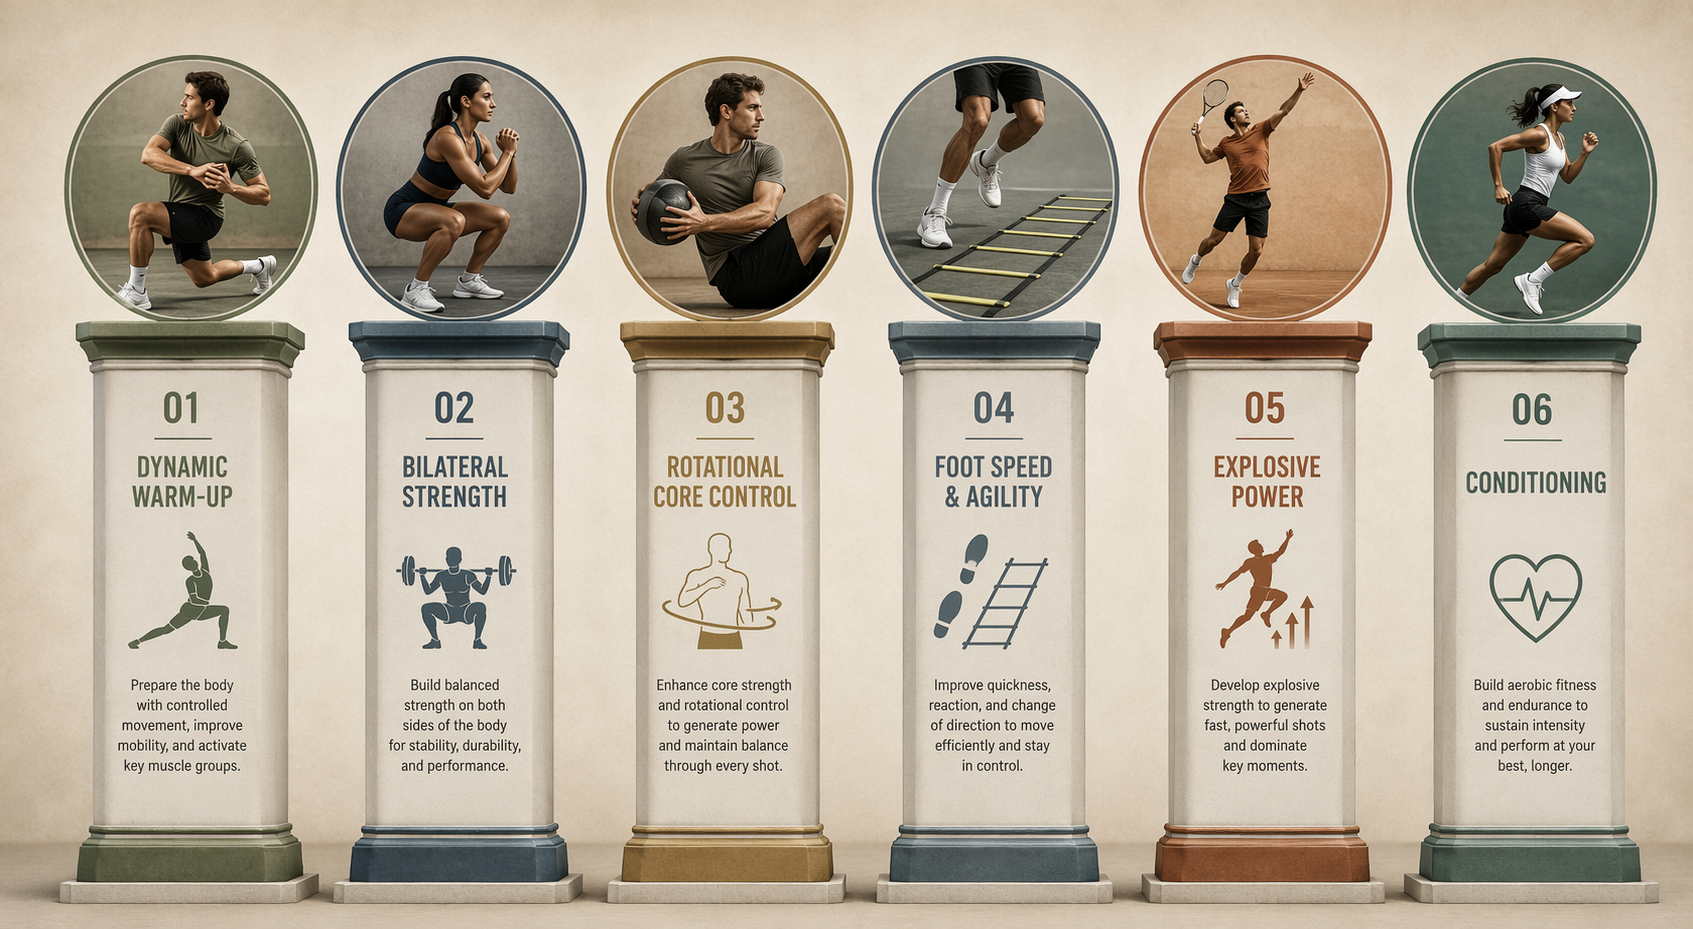
| Pillar | What it supports on court | Home exercise examples |
|---|---|---|
| Dynamic warm-up | Readiness for lunging, rotating, and quick first steps | World’s greatest stretch, inchworms, lateral shuffles, hip openers |
| Bilateral strength | Braking, pushing off, and holding posture under fatigue | Squats, split squats, lunges, push-ups, band rows |
| Rotational core control | Serve and groundstroke transfer without leaking force through the trunk | Pallof press, dead bug variations, side plank, controlled medicine-ball rotations |
| Foot speed and agility | Split-step timing, small adjustment steps, recovery footwork | Line hops, shadow split-steps, cone shuffles, ladder-style patterns |
| Explosive power | First-step push-off, serve rhythm, and short bursts | Medicine-ball throws, squat jumps, lateral bounds, jump-rope bursts |
| Conditioning | Repeat-sprint endurance across games and sets | Timed circuits, shuttle intervals, jump-rope intervals, movement complexes |
A simple way to use the table: every session should touch at least four pillars, and your full training week should touch all six. If you only have 15 minutes, you may not train everything deeply. If you have 30 or 45 minutes, there is no excuse for skipping the qualities that make the work feel like tennis.
Dynamic Warm-Up: Make the First Point Less Abrupt
The warm-up is not filler. Tennis begins with fast posture changes: hips opening for a wide ball, trunk turning for a forehand, calves loading for a split-step, and shoulders preparing for serves. A home warm-up should move you through those shapes before the circuit starts.
Use 3–6 minutes. Start with joint motion, then add tennis rhythm: ankle bounces, hip circles, bodyweight lunges with rotation, lateral shuffles, and low-intensity split-steps. If space is tight, mark two points on the floor and shuffle between them rather than trying to sprint.
The mistake is treating the warm-up like a separate mobility class. It should prepare the exact things the session will demand. If the workout includes lateral bounds, the warm-up needs lateral loading. If it includes medicine-ball rotation, the warm-up needs trunk rotation before speed enters.
Bilateral Strength: Build the Brakes Before the Bounce
A player who cannot decelerate cleanly will eventually rush every recovery step. Bilateral and basic lower-body strength work gives you the base for braking, pushing off, and staying balanced when a rally stretches wider than expected.
Verywell Fit’s tennis strength program describes a foundation phase using 8–10 reps, 2–4 sets, and 1–2 minutes of rest, which is a useful middle ground for home strength work when the goal is control rather than exhaustion.[3] With bodyweight or bands, that might mean squats, reverse lunges, split squats, push-ups, band rows, or band-resisted hinges.
Do not rush these just because you are training at home. A slow split squat with a stable knee and full foot pressure has more tennis value than a sloppy jumping lunge done while your hips twist all over the room. Strength work earns its place when it improves the positions you need for movement.
Good Small-Space Strength Choices
- Squat or tempo squat: useful for general lower-body strength and knee tracking.
- Reverse lunge: easier to control in a small room than forward lunges.
- Split squat: close to the single-leg positions tennis players use when reaching and recovering.
- Push-up: supports upper-body strength without needing a bench or machine.
- Band row: balances pressing work and supports posture through the upper back.
Rotational Core Control: Turn Without Spilling Power
Tennis rotation is not just twisting harder. On serves and groundstrokes, the trunk has to transfer force from the ground through the hips and torso while the player stays balanced enough to recover. That requires both rotation and anti-rotation.
On Running’s expert-curated tennis workouts include medicine-ball throws for serve power and lateral movement drills, which fit this idea when used with enough control and recovery.[4] Tennis Fitness’s exercise list also includes movements for bilateral strength, unilateral power, and rotational control, making it useful for choosing exercises that resemble actual tennis demands rather than isolated ab work.[5]
At home, begin with control: dead bugs, side planks, bird dogs, and Pallof presses with a resistance band. Then add controlled medicine-ball rotations or scoop throws only if you have a safe wall, enough clearance, and a ball designed for throwing. If not, a banded rotation or slow shadow swing with trunk control is the better choice.
The mistake is chasing speed before alignment. If your knees cave, your low back arches, or your shoulders do all the work, the drill is no longer teaching usable rotation. Rotational exercises should feel athletic, but they should not turn into uncontrolled spinning.
Foot Speed and Agility: Train the Steps Between the Shots
Most recreational players train the big movements and ignore the steps that actually decide spacing. The split-step, the adjustment step, the crossover recovery, and the small brake before contact are not dramatic, but they determine whether you hit balanced or late.
The LTA’s at-home tennis drills are especially useful here because they keep footwork beginner-friendly and home-compatible instead of assuming a full court.[6] In a 3m × 4m space, you can still practice split-step to side shuffle, line hops, forward-back taps, cone touches, shadow recovery steps, and racket-free movement patterns.
Keep these sets short enough that your feet stay sharp. A 15-second footwork burst with clean rhythm beats a 60-second scramble that turns into flat-footed stomping. Tennis rewards repeatable quickness, not just noise on the floor.
Explosive Power: Separate Quality From Fatigue
Explosive work belongs in a tennis routine, but it is the easiest part to misuse at home. Jumps, bounds, and medicine-ball throws are power drills. They need space, good landings, and enough recovery to stay powerful. If you bury them at the end of a conditioning circuit, they usually become tired movement practice.
Good options include squat jumps, lateral bounds, broad-jump stick landings, split-step to push-off, and medicine-ball chest passes, scoop throws, or overhead slams where the space is safe. Keep the reps low. Stop the set when the landing gets loud, the knees drift, or the throw loses snap.
This is where athletic teens, busy adults, and returning players may need different choices. A fit 16-year-old with jumping experience may handle lateral bounds well. A 45-year-old coming back after years away may get more from fast band rows, controlled squat jumps, or medicine-ball work with conservative volume. The movement goal can be the same while the intensity changes.
Conditioning: Repeat the Point, Not Just the Pain
Tennis conditioning is not one long burn. Points ask for short bursts, partial recovery, and another burst. A useful home conditioning block should make you recover your feet and posture under fatigue, not just survive a random finisher.
TennisNation’s circuit model supports 20–45 minute workouts based on completed rounds, which maps well to home training because you can scale the same structure without inventing a new routine every week.[2] A conditioning block might use 20 seconds of shuttle touches, 20 seconds of rest, 20 seconds of jump rope, 20 seconds of rest, then 20 seconds of shadow split-step recovery. Another option is a simple 30-second work, 30-second rest rotation through three or four exercises.
If you want a deeper look at how little cardio can still be useful when the intervals are chosen well, the conditioning pillar pairs naturally with the minimum effective dose of at-home cardio. For tennis, the key is keeping movement quality visible even when breathing gets uncomfortable.
Choose Exercises by Pattern, Not by Equipment
Equipment helps, but it should not drive the routine. Start with the tennis pattern you need, then choose the tool that fits your space.
| Training need | Bodyweight option | Band option | Medicine-ball option |
|---|---|---|---|
| Lower-body strength | Squat, split squat, reverse lunge | Band-resisted squat or lateral walk | Goblet squat hold if ball is heavy enough |
| Upper-body support | Push-up, plank shoulder tap | Band row, band press | Chest pass if a safe wall is available |
| Rotational control | Dead bug, side plank with reach | Pallof press, band rotation | Controlled scoop throw or rotational slam |
| Foot speed | Line hops, split-step repeats | Band-resisted shuffle | Not usually needed |
| Explosive power | Squat jump, lateral bound | Fast band row or press | Overhead slam, scoop throw, chest pass |
| Conditioning | Shuttle touches, mountain climbers, shadow footwork | Band movement complex | Light slam intervals only if form stays sharp |
This is also why bodyweight training should not be dismissed as a beginner-only choice. If you control tempo, range of motion, leverage, rest, and speed, bodyweight work can be progressed deliberately. Readers who want the broader training argument can use Bodyweight Training Actually Works as a next stop, but for this routine the rule is simpler: pick the movement pattern first.
Build the Session Around Your Time
The same framework can produce a 15-, 30-, or 45-minute session. The difference is not that the short session becomes random and the long session becomes “serious.” The difference is how many pillars you touch, how many sets you complete, and how much recovery you protect for power work.
15 Minutes: Minimum Useful Dose
Use this when the alternative is doing nothing. It should feel crisp, not crushed.
| Time | Block | Example |
|---|---|---|
| 3 minutes | Dynamic warm-up | Hip openers, ankle bounces, lateral shuffle, split-step rhythm |
| 5 minutes | Strength plus core | Alternate split squats and Pallof presses |
| 4 minutes | Foot speed | 15 seconds line hops, 15 seconds rest; 15 seconds shuffle touches, 15 seconds rest |
| 3 minutes | Conditioning finish | Shadow point pattern: split-step, shuffle, recover, reset |
Skip high-skill plyometrics in this version unless you are already warm and experienced. There is not much room for a long ramp-up, and tired jumps in a hurry do not add much.
30 Minutes: Balanced Default
This is the best default for most recreational players because it gives each major quality enough attention without turning the session into a grind.
| Time | Block | Example |
|---|---|---|
| 5 minutes | Dynamic warm-up | Mobility flow, lateral shuffle, split-step timing |
| 8 minutes | Bilateral strength | 2 rounds of squats, reverse lunges, push-ups, band rows |
| 5 minutes | Rotational core control | Pallof press, side plank reach, controlled band rotation |
| 5 minutes | Foot speed and agility | Line hops, cone touches, split-step to recovery |
| 4 minutes | Explosive power | Low-rep squat jumps or medicine-ball throws with full reset |
| 3 minutes | Conditioning | Short shadow-point intervals |
Notice the order: power does not come after 20 minutes of all-out conditioning. You can place explosive work earlier if it is the priority that day. If you leave it late, keep the volume low and the movement clean.
45 Minutes: Full Circuit Option
A 45-minute version lets you run the full system, but it should still have boundaries. More time does not mean every exercise becomes a conditioning exercise.
| Time | Block | Example |
|---|---|---|
| 6 minutes | Dynamic warm-up | Mobility, activation, lateral rhythm, split-step timing |
| 10 minutes | Strength circuit | 2–3 rounds of lower-body, push, pull, and trunk stability |
| 7 minutes | Rotational core | Anti-rotation press, dead bug, controlled rotation |
| 7 minutes | Foot speed | Short bursts with enough rest to keep rhythm |
| 6 minutes | Explosive power | Low-rep throws, jumps, or bounds with full reset |
| 7 minutes | Conditioning circuit | Timed point-style intervals using shuffles, rope, or shuttle touches |
| 2 minutes | Reset | Breathing, easy mobility, note what to progress next time |
For a 45-minute circuit, keep at least one block submaximal. If every section is performed at redline intensity, the later exercises stop teaching tennis movement and start testing survival.
How to Progress Without Turning It Into Random HIIT
Progression should be visible, but it does not have to mean adding more reps to everything. The cleaner options are adding sets, reducing rest intervals, or increasing movement speed once form is stable. Those changes move the workout forward without automatically making it sloppier.
- For strength: add a set, slow the lowering phase, or use a harder variation before chasing high reps.
- For core control: increase band tension or extend the lever, but keep the ribs, pelvis, and shoulders organized.
- For foot speed: increase speed only while the steps stay light and accurate.
- For explosive work: add rest before adding volume; power needs quality.
- For conditioning: reduce rest slightly or add one round, but stop before mechanics collapse.
If you want a fuller progression system for small-space workouts, use How to Use Progressive Overload at Home Without a Gym. The important tennis-specific point is that progression should protect the movement pattern you are trying to improve.
A Sample Training Week
With 2–3 sessions per week, you can rotate emphasis without abandoning the six pillars.[2] The court work you already do should influence the choices. If you played a long singles match yesterday, the next home session does not need to punish your legs. If you have not moved laterally all week, footwork deserves more space.
| Day | Session focus | How it might look |
|---|---|---|
| Session 1 | Strength and rotational control | Warm-up, split squats, band rows, push-ups, Pallof press, side plank, short conditioning |
| Session 2 | Foot speed and conditioning | Warm-up, split-step drills, shuffle touches, line hops, shadow-point intervals, light core |
| Optional Session 3 | Power and movement quality | Warm-up, low-rep jumps or medicine-ball throws, lateral movement drills, controlled strength |
This setup leaves room for age, schedule, and training history. An athletic teen might use the optional third day for power. A busy adult might alternate two 30-minute sessions. An intermediate club player in a heavy match week might make one session mostly mobility, core control, and foot speed rather than loading the legs again.
Safety and Setup Notes That Actually Matter
Clear the floor before you start. A 3m × 4m space is enough only if it is truly clear: no rug edges catching your shoes, no coffee table corner near a lateral bound, no medicine-ball throws toward a fragile wall.[1]
Plyometric and rotational exercises deserve the most caution when you are training without a coach. Use lower intensity first, film a set if you are unsure, and stop when form changes. Pain is not a useful coaching cue. If an exercise produces joint pain, dizziness, or repeated loss of control, replace it with a lower-impact pattern.
Minimal equipment is enough for the framework, but bands, a jump rope, and a medicine ball can expand the menu. If you later want a broader small-space setup, the Garage Gym Equipment Tier System and Cable Machine Alternatives That Save Space and Money are better next steps than buying random gear because it appeared in a workout video.
A home routine will not guarantee better match results by itself. Court time, skill practice, recovery, and individual movement limits still matter. But if you train 2–3 times per week, deliberately cover the six pillars, progress by adding sets, reducing rest, or increasing movement speed, and protect form during plyometric and rotational drills, a small-space routine can become a credible tennis-specific supplement instead of generic HIIT with a racket nearby.
References
- Tennis Fitness Workout for Home, Tennis Fitness
- Tennis Fitness Circuit Workouts, TennisNation
- Weight Training for Tennis, Verywell Fit
- Tennis Workouts, On Running
- 9 Best Exercises for Tennis Players, Tennis Fitness
- At Home Tennis Drills, LTA


Comments
Join the discussion with an anonymous comment.