
Search for basketball conditioning for older players and you usually land in the wrong locker room. The workouts are built for kids who can run suicide sprints on Monday, lift heavy on Tuesday, practice Wednesday, and still bounce into a tournament on Saturday. That is not the same problem as being 48, getting one open-gym window every other week, and wanting your legs to answer when somebody drives baseline.
The goal after 40 is not to make basketball soft. You still need to slide, stop, cut, jump, backpedal, absorb contact, and play three possessions after your breathing gets ugly. The difference is that your conditioning has to respect the cost of those actions. A plan that leaves your Achilles barking, your knees swollen, or your lower back locked up did not prepare you for basketball. It just spent the week's recovery budget too early.
The best available load data on masters basketball is not perfect, but it is useful. In an IMU-based study of 13 male masters players ages 65-79 in a Lithuanian league, players averaged 6.54 ± 1.29 arbitrary units of player load per minute, reached 81.7 ± 8.1% of peak heart rate during games, made 160.2 ± 79.1 changes of direction per game, and performed 38.8 ± 24.8 jumps per game. Most of those direction changes, 84.5%, were low intensity.[1]
That is the shape of the work: real cardiovascular demand, lots of low-grade direction changes, some jumping, and far less total explosive load than elite basketball. It also explains why a home program should not be a watered-down college workout. It should build an engine, keep the hips and calves available, rehearse basketball footwork under control, and expose the legs to small amounts of jumping without turning every session into a tryout.
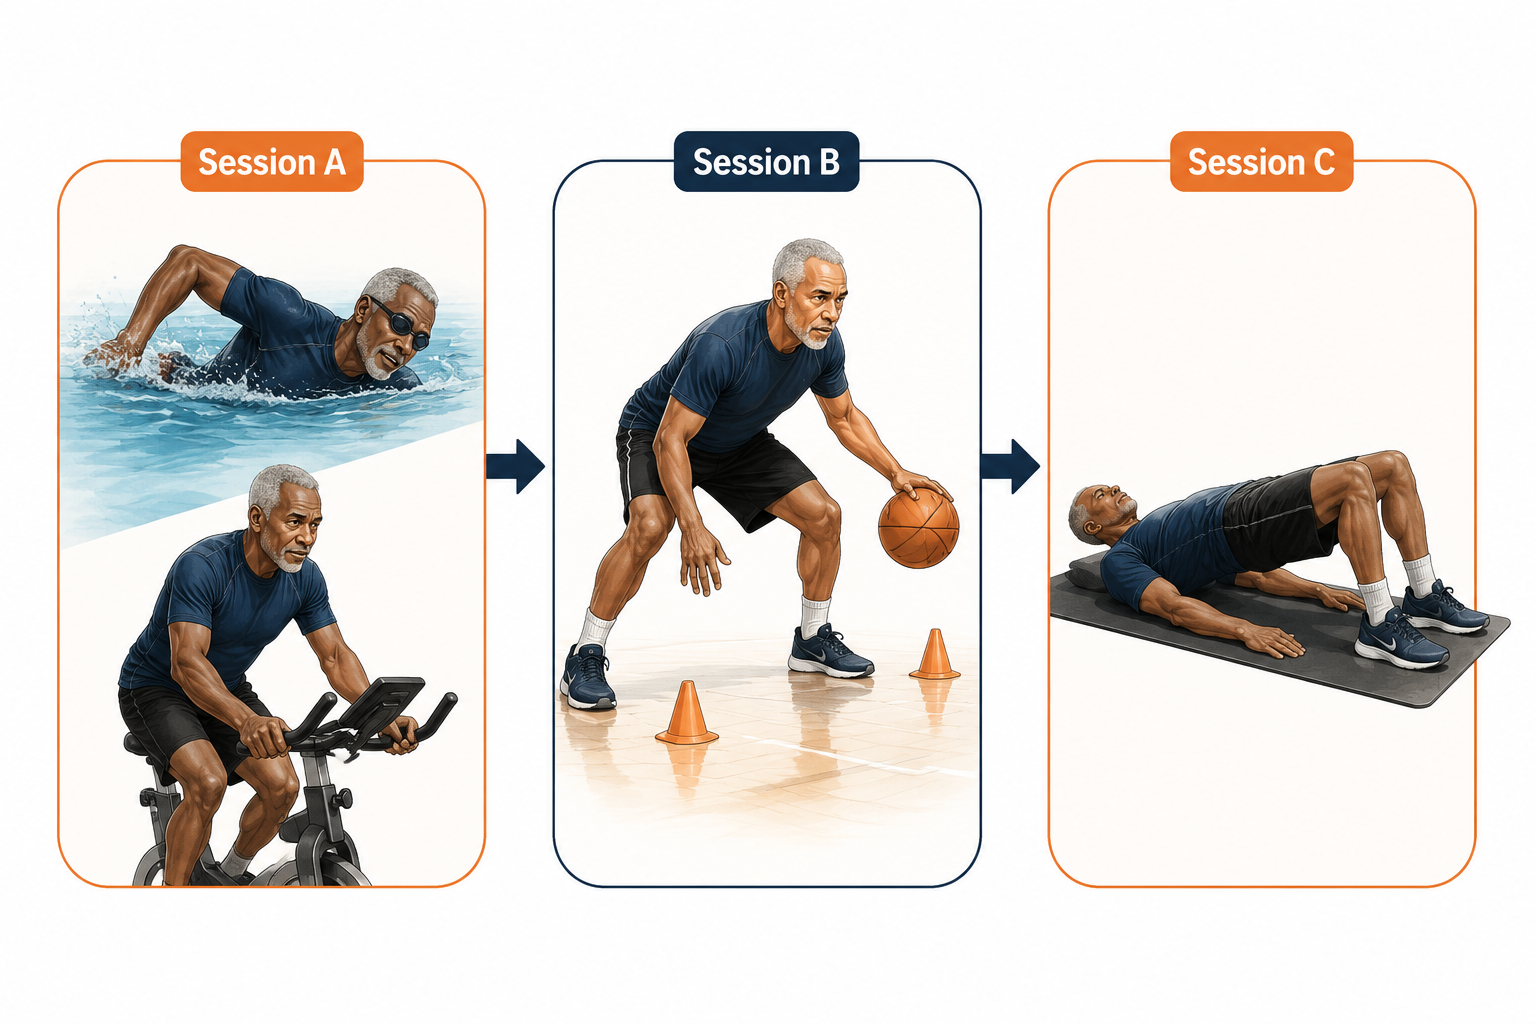
The 3-Day Home Week
This routine uses three sessions per week, each about 30-45 minutes. Leave at least one day between Session B and your next hard basketball run if you can. If you play pickup that week, count the game as your highest-impact session and trim the jump or change-of-direction work rather than pretending recovery is unlimited.
| Day | Session | Main job | Intensity target |
|---|---|---|---|
| Day 1 | Session A: Aerobic base | Build game stamina with lower joint cost | Moderate, conversational in parts |
| Day 2 | Session B: Basketball movement prep | Practice slides, controlled cuts, dribble intervals, and low jumps | Sub-maximal and crisp, not all-out |
| Day 3 | Session C: Strength and mobility | Support knees, hips, calves, core, and single-leg control | Controlled effort, clean reps |
Before every session, take 3-5 minutes for light movement and dynamic stretching. The American Academy of Orthopaedic Surgeons recommends warming up and stretching before basketball activity, and its injury-prevention guidance names the usual suspects: ankle sprains, MCL and ACL injuries, patellofemoral pain, and Achilles ruptures. It also reported nearly 314,000 basketball-related emergency room visits in 2022.[2] None of that means older players should stop playing. It means the warm-up is part of the workout, not decoration.
- Warm-up: 3-5 minutes of brisk walking, easy cycling, marching, or light jump rope without speed work.
- Dynamic prep: ankle circles, leg swings, hip circles, bodyweight squats, walking lunges, and easy lateral shuffles.
- Basketball-specific ramp: two or three short rounds of relaxed defensive stance, controlled backpedal, and slow change-of-direction steps.
- Cool-down: 3-5 minutes easy walking, then light calf, quad, hip flexor, hamstring, and glute stretching.
Session A: Build the Engine Without Beating Up the Chassis
Plenty of players are in "cardio shape" until the game asks for six accelerations, two defensive slides, a rebound, and a closeout inside 40 seconds. Session A does not try to copy that chaos. It builds the base that lets you recover between possessions and between games.
Pick one low-impact option: stationary bike, swimming, brisk walking intervals, elliptical, or jump rope if your calves and Achilles tolerate it. Walking lunges can be used as a strength-aerobic hybrid, but they should not become a knee-grinding marathon.
| Block | Work |
|---|---|
| Warm-up | 5 minutes easy movement |
| Main set | 20-30 minutes steady moderate work, or 6-10 rounds of 1 minute brisk / 1 minute easy |
| Optional finisher | 5 minutes easy dribbling, stationary ball handling, or relaxed footwork |
| Cool-down | 3-5 minutes easy movement and light stretching |
The bike is the cleanest choice for many knees because you can push the heart rate without landing. Swimming is even friendlier for sore joints if you have access. Brisk walking intervals are underrated because they can be repeated consistently, and consistency matters more than proving you can survive one heroic conditioning day.
Jump rope belongs here only if it stays low and quiet. Think small contacts, soft knees, and short sets. If your Achilles feels thick or irritable the next morning, swap it for cycling or walking. Basketball already gives the tendon enough surprises.
Session B: Rehearse Basketball Movement, Not Punishment
This is the session that keeps the program from becoming generic fitness. Basketball conditioning needs lateral work, deceleration, low stance tolerance, and the ability to make another decision after your legs start asking questions. The trick is dosing those qualities without copying a 19-year-old's preseason practice.
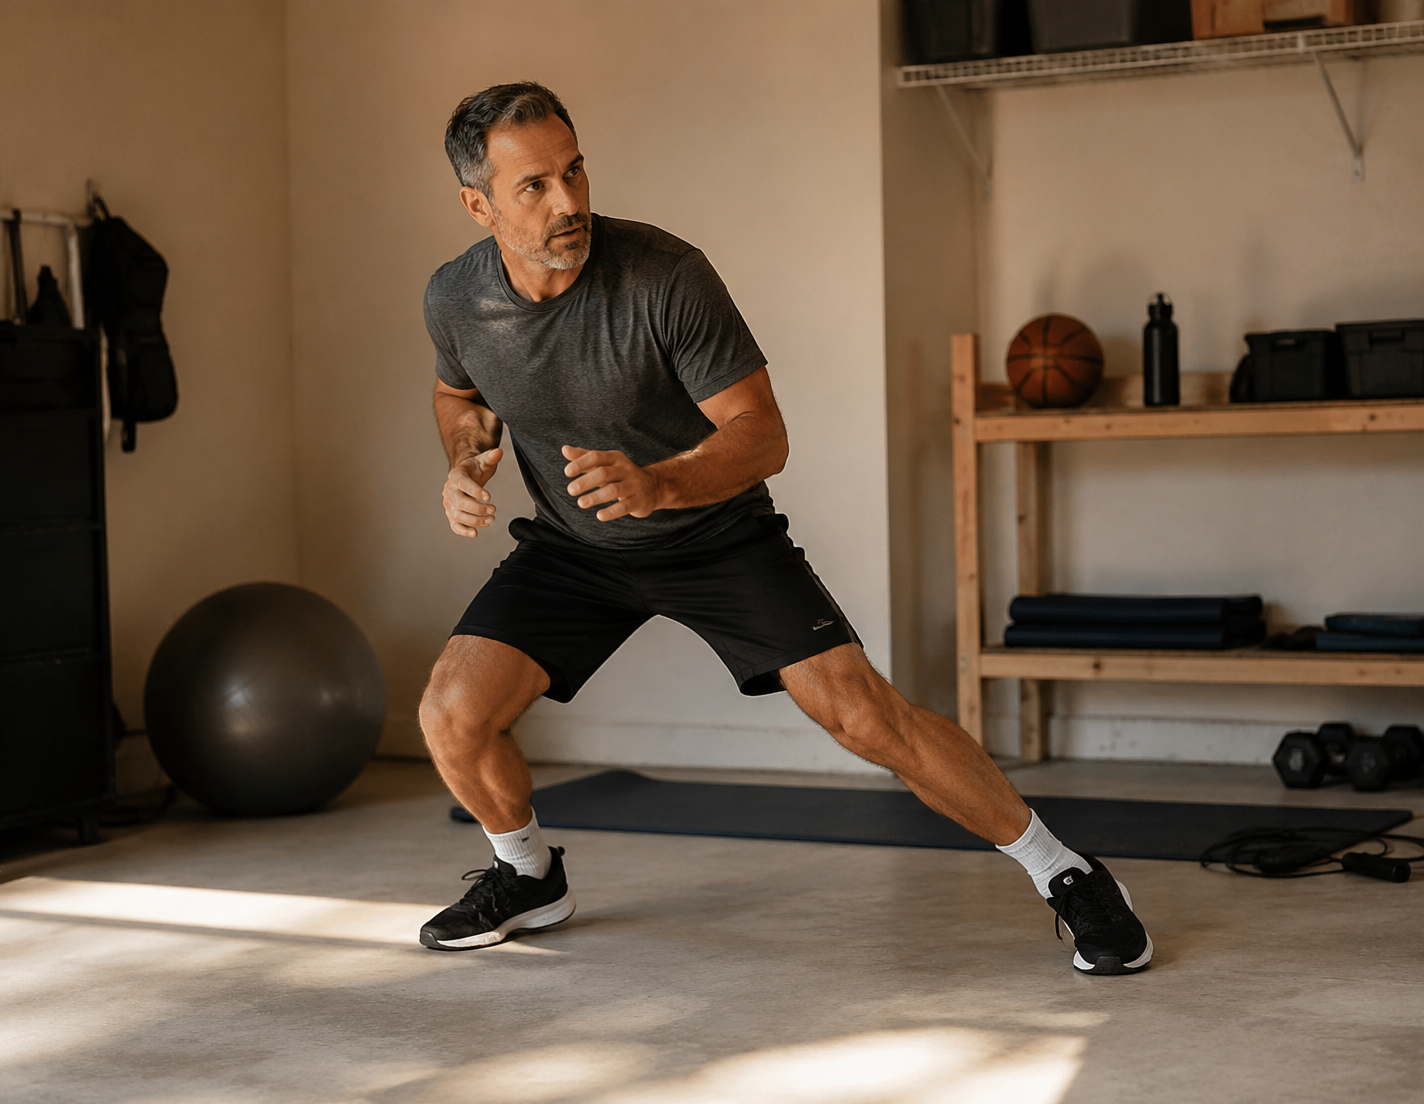
Use a driveway, garage, basement, patio, hallway, or any flat space where you can move safely. You do not need a full court. You need enough room to slide two or three steps, plant under control, and repeat without slipping.
| Block | Work | Coaching point |
|---|---|---|
| Warm-up | 5 minutes light movement plus dynamic prep | Do not start cold in a defensive stance |
| Defensive slides | 4-6 rounds of 15-20 seconds, 40-60 seconds rest | Stay low enough to play, not so low your back takes over |
| Controlled change of direction | 4-6 rounds through a T, L, or square pattern | Plant softly, turn the hips, keep the knee tracking over the foot |
| Dribble intervals | 6-10 rounds of 20 seconds work / 40 seconds easy | Mix stationary pounds, retreat dribbles, crossovers, and short bursts |
| Low-box jumps or step-off landings | 2-4 sets of 3-5 reps | Land quietly; stop before height or fatigue changes the landing |
| Cool-down | 3-5 minutes easy walking and stretching | Let the nervous system come down before you sit |
Defensive slides should feel like basketball, not like a punishment drill. Keep the chest up, hips back, feet outside the shoulders, and hands active. Push off the inside edge of the foot instead of reaching with the lead leg. If your feet click together or your upper body rocks side to side, slow down.
The change-of-direction block should stay below sprint speed. Use cones, shoes, tape marks, or imaginary spots. A simple square works: shuffle right, backpedal, shuffle left, forward jog. An L pattern works too: forward, plant, lateral shuffle, reverse. The point is to practice braking and re-accelerating cleanly, because that is where older players often lose the possession or feel the knee complain.
The masters load study is helpful here because it shows a lot of direction changes, but mostly low-intensity ones.[1] That supports a steady diet of controlled cuts and slides, not a weekly menu of max sprint ladders. A player in his early 40s who is already training may tolerate harder bursts than a player in his 60s, but the progression still starts with clean mechanics.
The jump work is deliberately small. Tessitore and colleagues reported that senior players, averaging 55 ± 5 years old, showed 62% lower jumping ability compared with elite players.[3] That comparison does not tell every 42-year-old what he can jump, but it does warn against building the week around repeated max jumps. Use low boxes, controlled snap-downs, or small two-foot hops. If you cannot land quietly, the set is over.
Session C: Keep the Support System Honest
The strength day is not bodybuilding, and it is not rehab unless you are actually rehabbing. Its job is to keep the parts that basketball leans on from checking out: glutes, calves, hips, trunk, and single-leg balance. A good Session C makes Session B cleaner and your next pickup run less expensive.
| Exercise | Sets and reps | Why it matters |
|---|---|---|
| Glute bridge | 2-4 sets of 8-12 | Hip extension for running, sliding, and reducing low-back takeover |
| Step-up | 2-3 sets of 6-10 each leg | Single-leg strength for layups, rebounds, and stairs after the game |
| Single-leg Romanian deadlift | 2-3 sets of 6-8 each leg | Hamstring, glute, and balance control for deceleration |
| Calf raise | 2-4 sets of 8-15 | Calf and Achilles capacity for repeated push-offs |
| Side plank or dead bug | 2-3 sets | Trunk control so the hips and knees are not chasing a loose torso |
| Hip mobility flow | 5 minutes | Hip rotation and flexor mobility for stance and stride length |
Load can be bodyweight, a backpack, dumbbells, bands, or whatever you can control. The standard is not how much you can lift once. It is whether the last rep looks like something your knee, hip, and back would trust in a game.
Step-ups deserve patience. Choose a height that lets the working leg do the job without a big push from the back foot. Single-leg RDLs can be shallow at first. If balance is the limiter, touch a wall or chair. Calf raises should include a slow lower, because basketball asks the lower leg to absorb force, not just pop up.
If knee history is already part of your story, strength work should be conservative and consistent. For a more recovery-specific approach, see meniscus tear recovery exercises you can do at home. That kind of work is not a substitute for medical care, but it is a better neighborhood than guessing your way through knee pain.
How to Progress Without Turning It Into a College Workout
Progress one variable at a time. That is the boring rule that keeps you playing. Add minutes, rounds, speed, jump volume, load, or shorter rest, but do not add all of them in the same week.
| If this feels easy for 2 weeks | Progress by |
|---|---|
| Session A feels comfortable and recovery is normal | Add 3-5 minutes, or add 1-2 moderate intervals |
| Slides stay crisp and knees feel normal the next day | Add one round, or slightly increase speed |
| Change-of-direction patterns are smooth | Add one pattern or one round, not max speed |
| Low jumps land quietly | Add one set, or add a slightly higher but still low box |
| Strength reps look controlled | Add 2 reps per set, a set, or light external load |
Use the next morning as your scoreboard. Normal muscle soreness is one thing. A joint that is sharper, warmer, swollen, unstable, or more painful than it was before training is a different message. So is Achilles stiffness that changes how you walk when you get out of bed.
- Hold the current level if soreness lasts more than 24-48 hours.
- Replace jumps with step-ups or cycling if the Achilles or patellar tendon feels irritated.
- Cut Session B volume in half during weeks when you play full-court pickup.
- Skip lateral work for the day if the knee feels unstable, swollen, or painful during warm-up.
- Stop training and seek appropriate medical guidance for chest pain, sudden calf pain, a pop, new swelling, or pain that changes your gait.
Players in their 40s may be able to push the dribble intervals harder or handle more loaded strength work. Players in their 60s may need longer ramps and more low-impact aerobic work between basketball days. The age number matters less than the recovery pattern, but ignoring the pattern is how a useful plan becomes an injury story.
Recovery Is Part of the Conditioning
Under-fueling shows up on the court as heavy legs, slow first steps, and a bad attitude disguised as toughness. ACSM recovery guidance for active older adults cites protein intake around 1.0-1.2 grams per kilogram of body weight per day, with up to 1.5 grams per kilogram during heavier training periods.[4] That does not make soreness disappear. It gives your body the material to adapt to the work you are asking it to repeat.
The same goes for carbohydrates, fluids, and sleep. If you train Session B after a long workday, skip dinner, sleep badly, and then blame age for flat legs, you may be blaming the wrong thing. For a broader recovery-fueling setup, use The Home Gym Athlete's Nutrition Plan as the next layer.
A simple weekly rhythm works well: do Session A after a rest day or light day, place Session B farthest from your hardest basketball run, and use Session C as the support day rather than a max-effort lifting day. If pickup appears unexpectedly, take it. Then adjust the rest of the week like a grown-up.
A Practical Week If You Also Play Pickup
| Weekly situation | How to adjust |
|---|---|
| No basketball this week | Run all three sessions as written |
| One light half-court run | Keep all three sessions, but reduce Session B jumps by one set |
| One hard full-court run | Count pickup as the high-impact day; do Session A and a lighter Session C |
| Tournament or multiple runs | Use only warm-ups, mobility, easy aerobic work, and recovery between games |
| Knee, ankle, or Achilles irritation | Remove jumps and hard cuts until warm-up and next-day walking are normal |
The home work is there to make the game available, not to compete with the game. If you only have one good lower-body day left in the week, spend it on basketball and let the conditioning become maintenance.
For similar sport-specific home conditioning models, the same logic shows up in How to Do Kamaru Usman's Strength and Conditioning at Home, A Weekly Pickleball Training Plan with Nike Gear, and How to Build a Tennis Fitness Routine at Home Without a Gym. The details change by sport, but the useful question stays the same: what demands need to be trained, and what cost can the body actually recover from?


Comments
Join the discussion with an anonymous comment.