
You can use BFR strap training for home workouts with light dumbbells, bands, or bodyweight movements, but the straps are not the workout. They are the part that changes the conditions of the set. Put them too low, pull them too tight, or leave them on too long, and the routine stops being clever and starts being careless.
Before the first set, clear the obvious safety gate: if you have cardiovascular disease, a history of deep vein thrombosis, clotting concerns, uncontrolled blood pressure, pregnancy, recent surgery, or any medical condition where circulation restriction could be risky, get medical clearance before using BFR. Cleveland Clinic describes BFR as a method that can be useful, including in rehab settings, but not as something everyone should casually add without screening.[1]
For a healthy home exerciser, the workable version is simple: cuffs high on the limb, light load, high reps, short rests, moderate pressure, and a hard stop if you feel numbness, tingling that does not quickly resolve, sharp pain, unusual swelling, dizziness, chest symptoms, or a limb that looks or feels wrong. BFR should feel like a deep local burn during the set. It should not feel like nerve pain or a circulation emergency.
Set the cuffs before you choose the exercises
BFR cuffs go at the top of the limb, not around the muscle you are trying to feel. For upper-body work, place one cuff high on each upper arm, close to the shoulder. For lower-body work, place one cuff high on each thigh, close to the hip. Do not wrap over elbows, knees, forearms, calves, or the middle of a muscle belly.
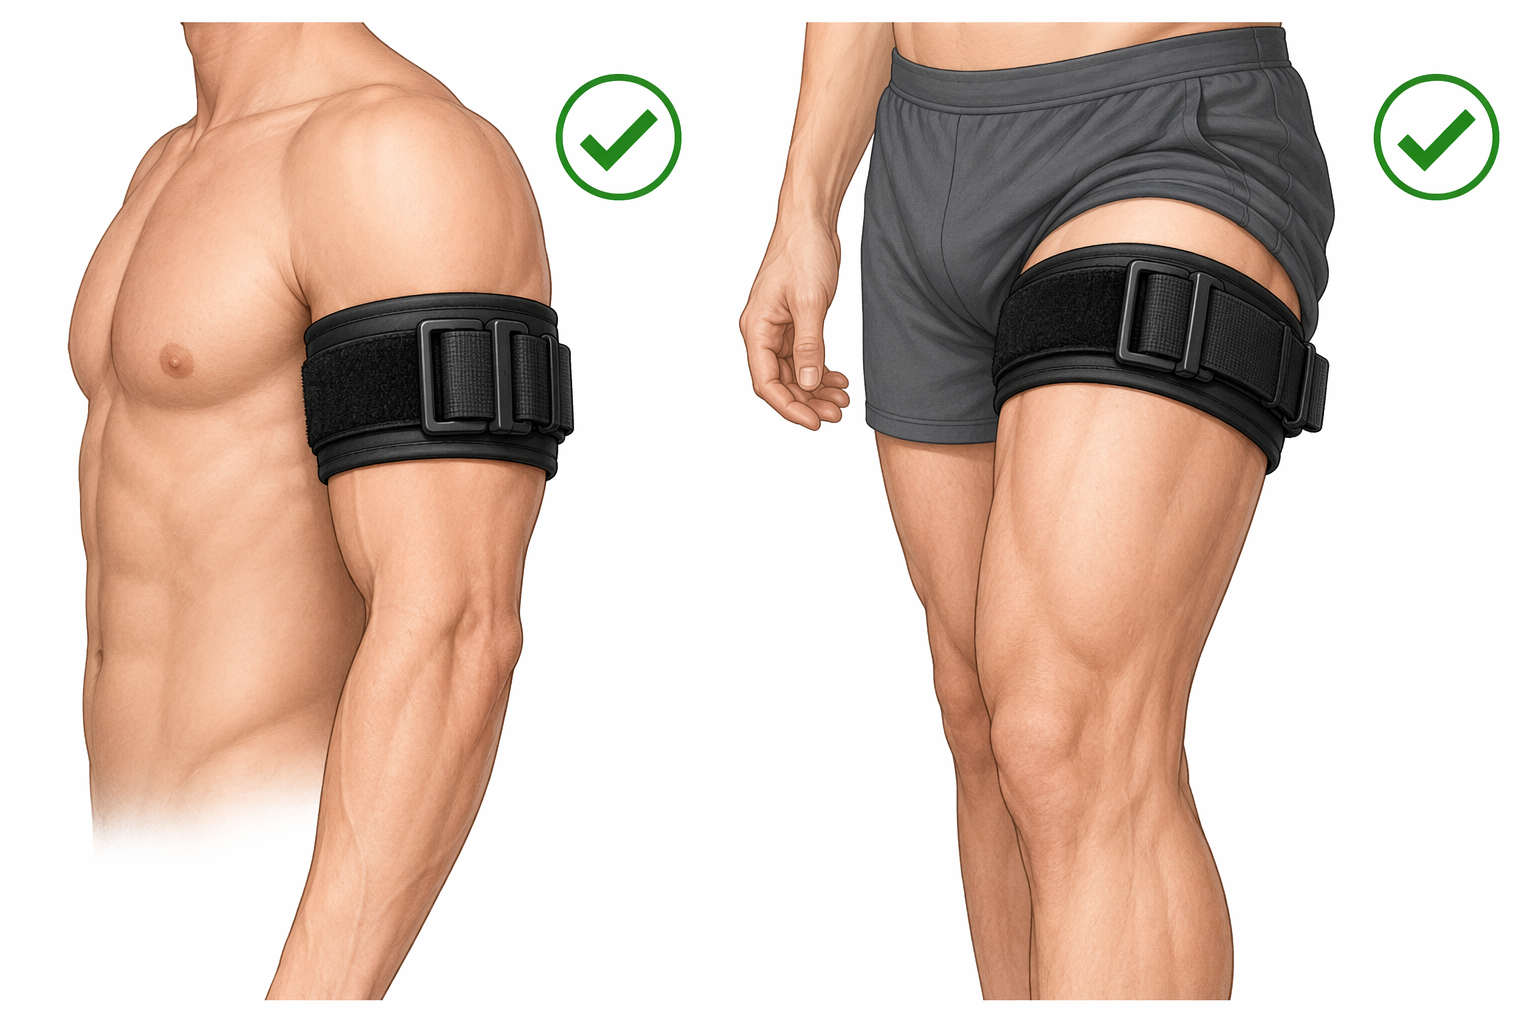
Cuff width matters because the same tightness does not create the same pressure on every strap. Wider cuffs generally require less absolute pressure to restrict blood flow than very narrow bands, which is one reason clinical implementation reviews pay attention to cuff size rather than treating all straps as interchangeable.[2] A practical home setup is about 1.25 inches wide for arms and about 2 inches wide for legs. If your straps are much narrower, the margin for over-tightening gets smaller.
Inflatable cuffs with pressure gauges can be more precise, but many home users start with elastic straps. That is fine if you do not pretend the number printed on the strap is a medical measurement. Use a subjective tightness of about 4 to 7 out of 10: snug enough that the working muscle floods and burns, loose enough that you can keep moving normally and do not feel numbness or sharp pain. Cleveland Clinic and sports-medicine guidance both caution that tighter is not better; excessive pressure increases risk without making the session more productive.[1][3]
| Check | Use this rule at home |
|---|---|
| Arm placement | High on the upper arm, near the shoulder |
| Leg placement | High on the thigh, near the hip |
| Cuff width | About 1.25 in. for arms; about 2 in. for legs |
| Pressure | About 4-7/10: tight, never numb or sharp |
| Load | Bodyweight, bands, or roughly 20-40% of 1RM |
| Set structure | 30 reps, then 15, 15, 15 with 30-second rests |
| Occlusion time | Keep continuous restriction to about 8-20 minutes per body part |
The home BFR protocol: 30-15-15-15
The cleanest starting protocol is four sets: 30 reps, rest 30 seconds, 15 reps, rest 30 seconds, 15 reps, rest 30 seconds, then 15 reps. That gives you 75 total reps for one exercise while the cuff stays on. ACSM’s BFR resistance-exercise guidance uses low loads, commonly around 20-40% of one-repetition max, with high repetitions and short rest periods.[4]
If you do not know your one-rep max at home, do not test it just to use BFR. Choose a load you could normally lift for about 30 to 40 smooth reps without straps. With BFR, the first 30 should feel manageable but not empty. The second and third sets should burn. The last set should be ugly in the muscle, not ugly in the joints.
- Place cuffs high on the limbs you are training.
- Tighten to about 4-7/10, then check for normal movement and no numbness.
- Perform 30 reps with a light load or bodyweight movement.
- Rest 30 seconds while keeping the cuffs on.
- Perform 15 reps, rest 30 seconds, perform 15 reps, rest 30 seconds, then perform 15 final reps.
- Release the cuffs before moving to another body part or if the total restricted time is approaching your limit.
Keep the tempo controlled. You do not need painfully slow reps, but bouncing through squats or swinging dumbbells turns a good BFR set into a messy cardio drill. Use a range of motion you can repeat, keep joints stacked, and stop one or two reps early if form starts collapsing.
Why light loads can work with BFR
Traditional hypertrophy training usually leans on heavier mechanical tension. BFR changes the environment by partially restricting blood flow out of the working limb, which makes light sets feel metabolically expensive much sooner. Plainly: the muscle gets tired under conditions that make 20-pound dumbbells, a band, or bodyweight squats feel less like filler.
The strongest evidence is for low-load resistance training, not for every possible bodyweight routine. Reviews and summaries of the literature report that BFR performed with about 20-30% of 1RM can produce hypertrophy outcomes comparable to traditional heavier lifting around 60-80% of 1RM.[5][6] That does not mean any easy movement becomes a muscle-building program once you add straps. It means a light movement that is already targetable and repeatable can become more useful when the BFR setup is correct.
The bodyweight extension is plausible because BFR relies heavily on metabolic stress: lactate accumulation, local fatigue, and reduced oxygen availability in the restricted limb. Men’s Health, quoting exercise scientist Shawn Arent, describes the value as coming from creating a demanding muscle environment with lighter work, and Mike Reinold’s guide explains the same general mechanism in practical training terms.[7][8] Still, bodyweight-only claims should be kept honest. BFR push-ups and squats can be useful, but the best-supported comparison is low-load resistance exercise versus heavier resistance exercise.
Choose movements that match the cuff
Use arm cuffs for upper-body movements where the arms are doing meaningful work. Use leg cuffs for lower-body movements where the thighs are doing meaningful work. BFR does not have to sit on the exact muscle you are targeting, but the exercise still needs to make sense. A high-arm cuff can support push-ups, band rows, curls, and triceps extensions. A high-thigh cuff can support squats, split squats, glute bridges, step-ups, and leg extensions if you have the setup.
| Goal | Good home options | Cuff placement |
|---|---|---|
| Quads and glutes | Bodyweight squat, goblet squat, split squat, step-up | Top of thighs |
| Hamstrings and glutes | Glute bridge, hip thrust, banded hinge | Top of thighs |
| Chest and triceps | Incline push-up, floor push-up, light dumbbell floor press | Top of upper arms |
| Back and biceps | Band row, one-arm dumbbell row, band pulldown, curl | Top of upper arms |
| Shoulders | Light lateral raise, band press, light dumbbell press | Top of upper arms |
Do not start with the hardest version of a movement. For lower body, a supported split squat may be better than a fast walking lunge because you can keep tension where you want it. For upper body, an incline push-up may be better than a floor push-up if the floor version turns into a shoulder grind by set three. BFR makes fatigue arrive quickly; pick exercises that still look like training when you are tired.
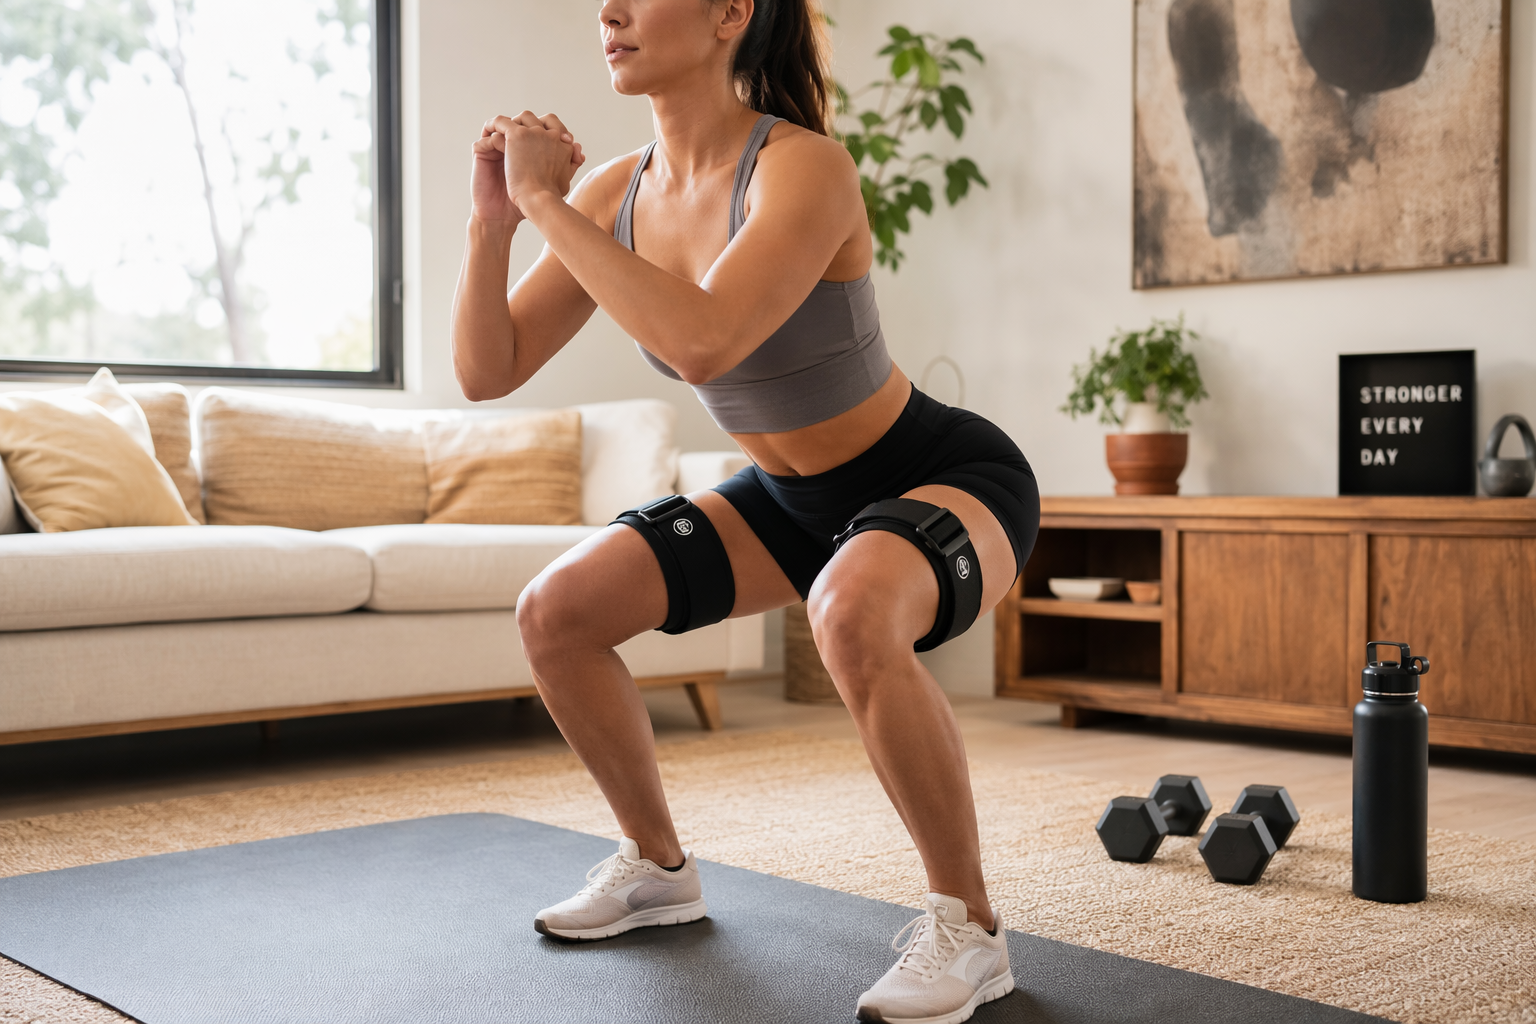
A complete lower-body BFR home workout
This is the easiest place for most home exercisers to start because leg cuffs stay out of the way and bodyweight lower-body exercises are simple to scale. Put the cuffs high on both thighs, tighten to 4-7/10, walk around for a few seconds, and make sure there is no numbness or sharp sensation.
| Exercise | Sets and reps | Rest | Load |
|---|---|---|---|
| Bodyweight squat or goblet squat | 30-15-15-15 | 30 sec between sets | Bodyweight or light dumbbell |
| Glute bridge or hip thrust | 30-15-15-15 | 30 sec between sets | Bodyweight, band, or light dumbbell |
| Supported split squat | 15-15 per side or 20-10-10-10 per side | 30 sec between efforts | Bodyweight or light dumbbells |
For your first session, do only the squat pattern and glute bridge pattern. That is enough restricted time to learn how your legs respond. Keep continuous occlusion per lower-body block in the 8-20 minute range, then release the cuffs. If the split squat pushes you past that window, save it for a non-BFR finisher or the next session.
A good first lower-body session might look like this: cuffs on, squats for 75 total reps, 60-90 seconds to transition, bridges for 75 total reps, cuffs off. If you recover well and your form stays clean, add the supported split squat in a later workout. Do not earn your confidence by seeing how much discomfort you can tolerate on day one.
A complete upper-body BFR home workout
Upper-body BFR usually feels more awkward at first because the cuffs sit high near the shoulders and the arms can pump up fast. Start lighter than you think. If your hands tingle, your grip feels strange, or the cuff edge creates sharp discomfort, loosen or stop.
| Exercise | Sets and reps | Rest | Load |
|---|---|---|---|
| Incline push-up or light dumbbell floor press | 30-15-15-15 | 30 sec between sets | Bodyweight angle or light dumbbells |
| Band row or light dumbbell row | 30-15-15-15 | 30 sec between sets | Band or light dumbbell |
| Biceps curl | 30-15-15-15 | 30 sec between sets | Light dumbbells or band |
| Triceps pressdown or overhead extension | 30-15-15-15 | 30 sec between sets | Band or light dumbbell |
Do not try to run all four exercises under one uninterrupted cuff block the first time. Pair one push with one pull, then release. If you want arm isolation work, put the cuffs back on after circulation feels normal and run curls and triceps work as a separate short block. The smaller the limb, the less patience you should have for odd sensations.
Push-ups deserve a note. If a regular floor push-up makes you fail before you can reach the 30-rep opener, raise your hands on a bench, countertop, or sturdy chair. BFR is already adding stress; your job is to choose a version that lets the target muscles accumulate reps instead of turning the set into a max-strength test.
How to build the week
Use BFR 2-4 times per week. That can mean two full-body sessions, an upper/lower split, or short finishers after regular light training. ACSM’s BFR guidance supports low-load resistance exercise with repeated weekly exposure, but home users still need to manage local fatigue and cuff time rather than chase daily novelty.[4]
| Schedule | Best for | Example |
|---|---|---|
| 2 days per week | New users or cautious return to training | Tue lower BFR, Fri upper BFR |
| 3 days per week | Most home hypertrophy plans | Mon lower, Wed upper, Sat full-body light BFR |
| 4 days per week | Experienced users with good recovery | Mon lower, Tue upper, Thu lower, Fri upper |
Keep at least one simple recovery marker: the next time you train that body part, the muscle should feel ready to contract hard, joints should feel normal, and the limb should not still feel unusually sore or swollen. If two BFR sessions in a week leave your elbows, knees, or hands irritated, do not solve that by loosening form. Reduce exercise count or frequency first.
A practical first week
| Day | Workout |
|---|---|
| Day 1 | Lower body: squat 30-15-15-15, glute bridge 30-15-15-15 |
| Day 2 | No BFR; walking, mobility, or regular non-BFR training |
| Day 3 | Upper body: incline push-up 30-15-15-15, band row 30-15-15-15 |
| Day 4 | No BFR |
| Day 5 | Lower body repeat, or full-body with one lower and one upper movement |
| Days 6-7 | No BFR unless recovery has been easy and technique is consistent |
After two steady weeks, progress one variable at a time. Add a light dumbbell to squats, lower the incline on push-ups, use a slightly stronger band, or add one more BFR exercise. Do not add load, add exercises, tighten the cuffs, and increase frequency in the same week. Pressure is not a progression tool.
What results can you reasonably expect?
The fair promise is this: BFR can make low-load training much more useful for hypertrophy than light training usually feels, and research summaries report muscle-growth outcomes that can be comparable to heavier training when BFR is programmed correctly.[5][6] For a home exerciser with only small dumbbells or bands, that is a real advantage.
Short timelines need more caution. A 2-week bench-press study discussed by NASM reported a 6% strength increase in a group using 30% 1RM with BFR, while a non-BFR control group lost 2%.[9] That is interesting, especially for people stuck with light loads, but it is not a guarantee that every home push-up plan will visibly build muscle in two weeks. Treat fast changes as possible, not owed.
A better first target is four weeks of clean repetition: same cuff placement, same pressure range, same rep scheme, and enough logging to know whether reps, load, or exercise difficulty are improving. If the last 15 reps stop feeling challenging, make the exercise slightly harder or add light load. If you cannot finish the first 30 without form breaking, make it easier.
Safety rules that matter more than toughness
Large survey data are reassuring but not a permission slip to ignore symptoms. A clinical implementation review cites survey data from roughly 13,000 BFR users reporting deep vein thrombosis incidence below 0.06% and rhabdomyolysis below 0.01%.[2] Those rates are low, and they help separate careful BFR training from the fear that any restriction is automatically dangerous. They do not mean risk is zero.
- Stop the set if you feel numbness, pins and needles, sharp pain, dizziness, chest discomfort, or unusual shortness of breath.
- Release the cuffs if your hand or foot changes color in a way that looks abnormal for you.
- Do not sleep, stretch for long periods, or do unrelated chores with cuffs tightened.
- Do not wrap over joints or use knee wraps, floss bands, or random cords as a substitute for cuffs.
- Do not use BFR to train through injury pain unless a qualified clinician has specifically cleared that use.
The 4-7/10 pressure scale is useful because most home straps do not provide true limb occlusion pressure, but it is still imprecise. The Prehab Guys note reliability concerns with subjective pressure scales, meaning the same person may not reproduce the exact same pressure every time.[10] That is another reason to keep a conservative range, check symptoms, and avoid using maximum tightness as proof that you are training hard.
What to buy, without turning this into a shopping project
For home BFR strap training, you mainly need cuffs that are wide enough, easy to tighten consistently, and quick to release. Elastic straps are cheaper, inflatable cuffs are easier to standardize, and smart systems may add pressure feedback. Equipment roundups in 2025-2026 commonly place simple elastic options around $20-40, inflatable options around $80-200, and smart systems around $300-600, though pricing should be verified before purchase because this category changes quickly.[11]
If you already bought straps, do not panic because they are not the fanciest version. Check width, release mechanism, comfort at the top of the limb, and whether you can reproduce the same snug setting without guessing wildly. If the straps are painfully narrow or hard to release quickly, replace them before making BFR a regular part of your week.
Your next BFR session
Start with one lower-body or one upper-body block, not a marathon. Use the correct cuff position, tighten to a moderate 4-7/10, choose a movement you can control, and run 30-15-15-15 with 30-second rests. Keep the cuffed work for that body part inside the 8-20 minute window, then release.
Repeat BFR 2-4 times per week if recovery is normal. Add reps only inside the protocol when needed to complete it cleanly, then progress by making the exercise slightly harder or adding a small load. Stop using BFR during a session if symptoms move beyond ordinary muscle burn, and seek medical guidance if you have risk factors or any concerning response after training.
References
- Blood Flow Restriction Training: What You Need To Know, Cleveland Clinic
- Blood Flow Restriction Training: Implementation into Clinical Practice, PMC, 2017
- Blood Flow Restriction Training: How To, Larson Sports Ortho
- Blood Flow Restriction (BFR) Resistance Exercise 101, ACSM, 2024
- Blood Flow Restriction Training, Science for Sport
- Blood Flow Restriction Training, PMC
- Blood Flow Restriction Training: The Key to Bigger Arms?, Men's Health
- The Science of Blood Flow Restriction Training, Mike Reinold
- Blood Flow Restriction Training, NASM
- Blood Flow Restriction Training in a Nutshell, The Prehab Guys
- Best Blood Flow Restriction Bands, Powerlifting Technique


Comments
Join the discussion with an anonymous comment.