
Yes: you can get a real workout from BJJ home exercises with no gi required. The honest version is that this is not a shortcut to learning Brazilian Jiu-Jitsu without a coach, partner, or live resistance. It is a bodyweight conditioning session built from BJJ movement patterns: shrimping, bridging, technical stand-ups, sprawls, Granby rolls, leg circles, sit-throughs, and shadow grappling. Those movements do not need gi grips, academy equipment, or another person pulling on you. They need enough floor to move safely, a surface your knees and shoulders can tolerate, and a circuit structure that keeps the work from turning into random crawling around the room.
That boundary matters. Solo drills can teach your hips to move without dragging your shoulders along, make your trunk brace while you change levels, and turn a simple drop to the floor into real conditioning. Grapplearts includes shrimping, bridging, technical stand-ups, sprawls, Granby rolls, sit-throughs, and shadow grappling in its solo-drill library, with the focus on movement patterning and repetition rather than partner technique by itself.[1] For home fitness, that is enough to build a useful session.
What BJJ solo movements train at home
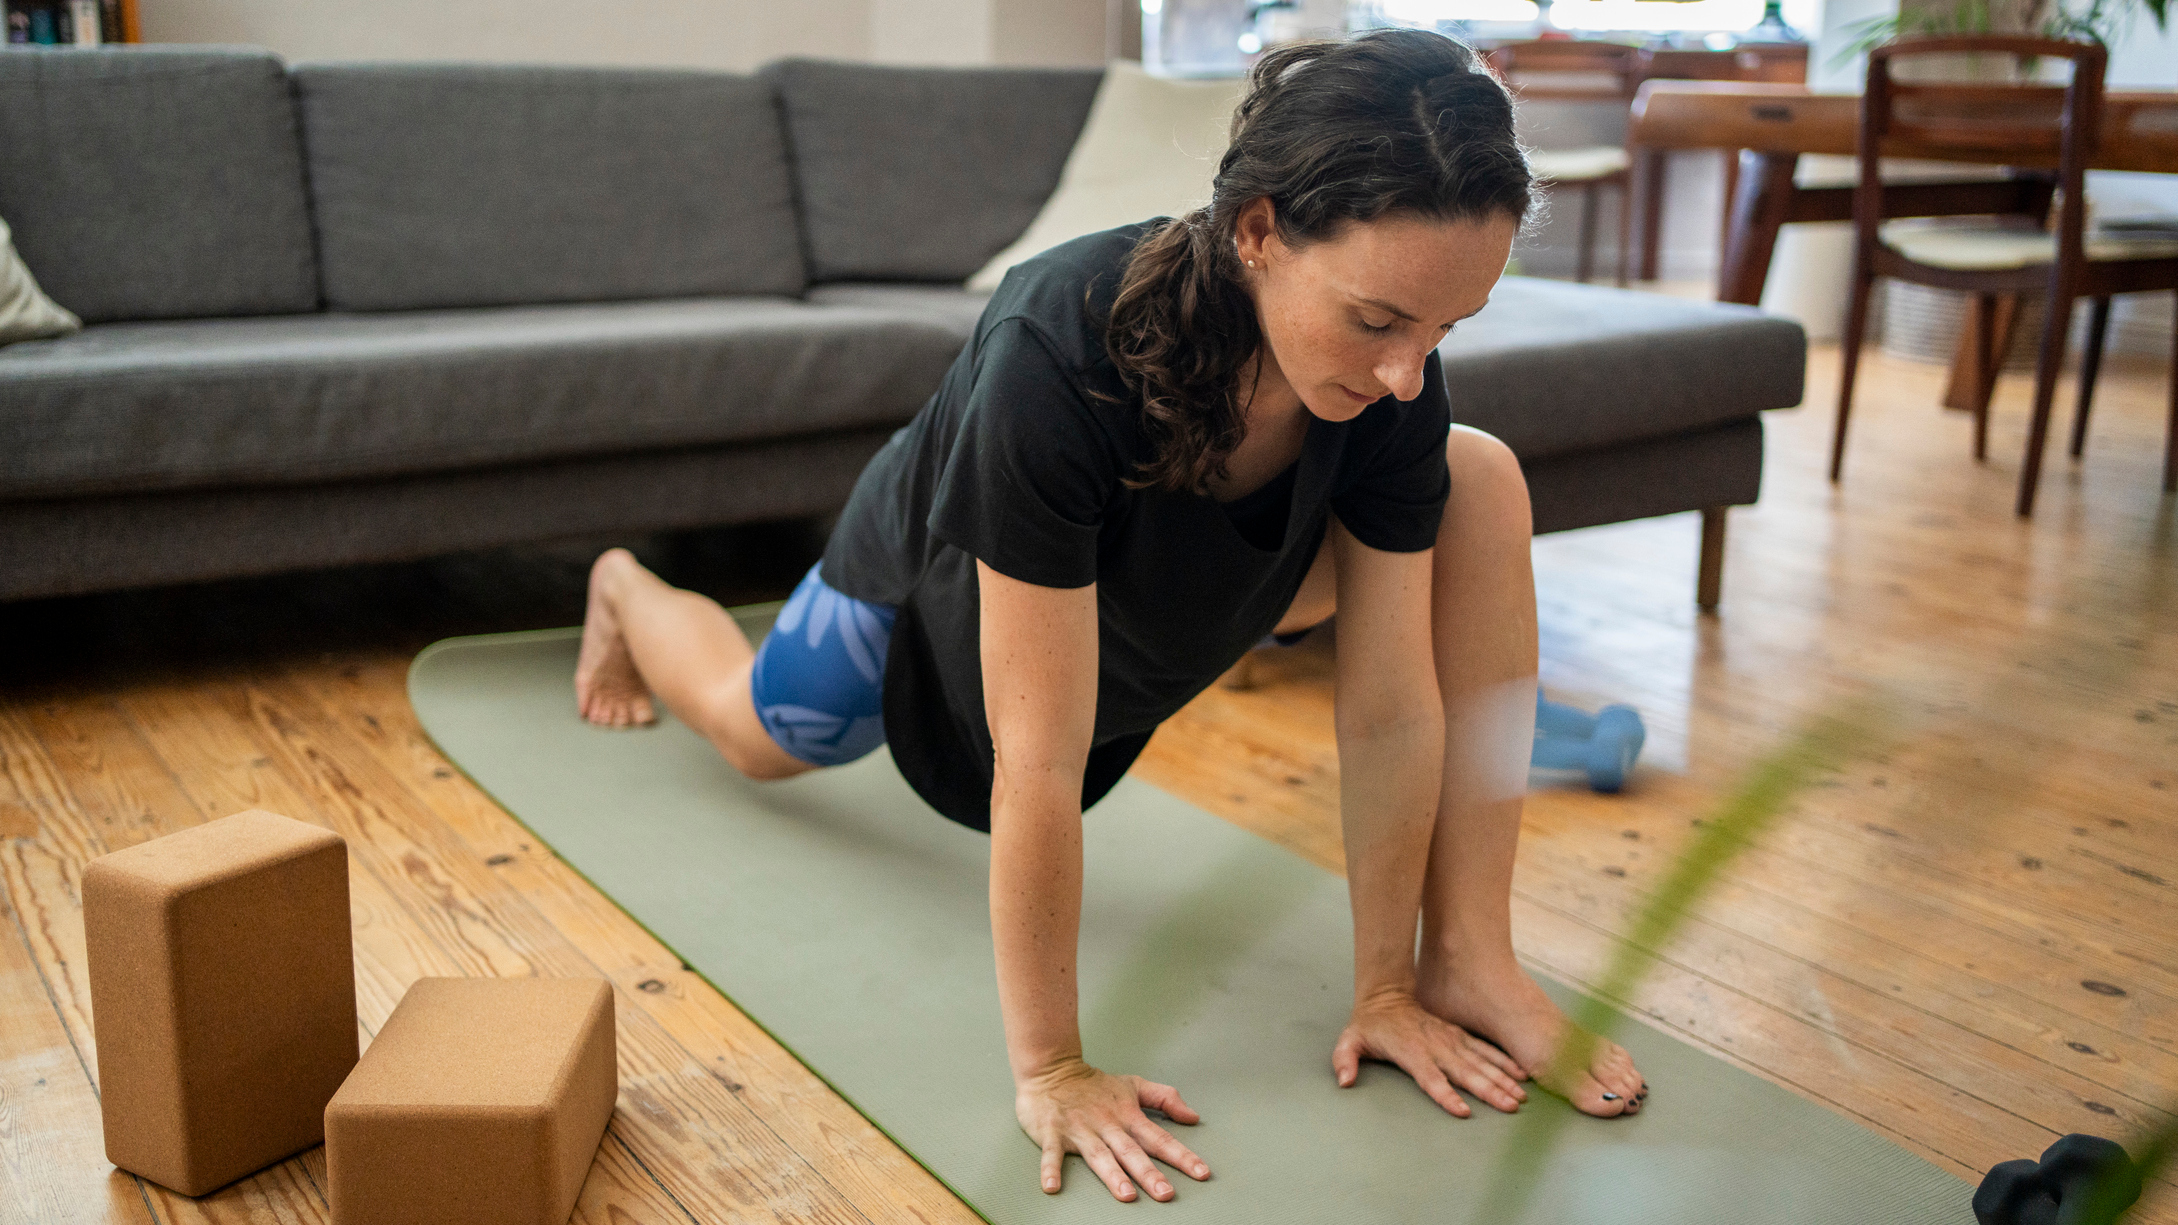
Most home workouts move you up and down: squat, lunge, push up, plank. BJJ-style drills add more floor transitions and rotation. You bridge from your upper back and feet. You shrimp by sliding your hips away from an imaginary opponent. You sprawl by throwing your legs back and dropping your hips. You stand up while keeping one hand posted and one leg protected. The result is still bodyweight training, but the angles feel different from a standard calisthenics circuit.
For a non-grappler, the value is not that every rep looks academy-perfect. The point is that the drills ask for coordination under fatigue. Your hips, shoulders, hands, and feet have jobs to do at the same time. A beginner who cannot make a technical stand-up look smooth can still get meaningful strength, mobility, and conditioning work from practicing the pattern slowly, then faster.
| Movement | Main fitness demand | Beginner focus |
|---|---|---|
| Shrimp | Hip mobility, obliques, trunk rotation | Move the hips first instead of scooting with the shoulders |
| Bridge | Glutes, hamstrings, spinal extension, core bracing | Drive through the feet and lift the hips without cranking the neck |
| Technical stand-up | Coordination, shoulder stability, hip mobility, leg drive | Keep the posted hand strong and stand without collapsing inward |
| Sprawl | Explosive conditioning, hips, shoulders, trunk stiffness | Step back instead of jumping if the full drop is too hard |
| Sit-through | Rotation, shoulder support, core control | Move deliberately before adding speed |
| Granby roll | Rolling mobility, shoulders, spine, spatial awareness | Skip or modify if neck or shoulder tolerance is not there |
Set up the room before you start moving fast
You do not need a gi, and you do not need a full mat room. BJJEE explicitly frames one solo-drill routine as no mats, no equipment, and no large space needed.[2] Other sources give slightly different space targets: JiuJitsu.com suggests about 8 by 8 feet for at-home solo drills, while Kingz describes 6 by 6 feet as workable for no-equipment BJJ strength sessions.[3][4] Treat that as a practical range, not a law of physics. A smaller room can still handle bridges, technical stand-ups, wall drills, and short sprawls; long shrimping lanes and rolling drills simply need more care.
- Clear roughly 6 by 6 to 8 by 8 feet if possible, including side clearance for hips, elbows, and feet.
- Use carpet, a yoga mat, puzzle mats, or another surface that does not slide under your hands.
- Move furniture corners, coffee tables, shoes, dumbbells, and anything your heel could clip during a sprawl.
- Wear regular workout clothes. No gi is needed because this circuit does not use lapel grips, sleeve grips, or partner resistance.
- Keep rolling drills optional if your floor is hard or your neck, shoulders, or back do not like them.
Noise matters too. Sprawls can be quiet if you step back and lower the hips under control. Technical stand-ups can be almost silent. Granby rolls and fast sit-throughs are the drills most likely to thump around, so apartment training may mean replacing them with leg circles, bridges, or wall-based work.
A no-gi BJJ home circuit you can follow
The easiest way to make these drills feel like a workout is to stop counting perfect martial-arts reps and start using timed intervals. Infighting’s at-home plan uses a compact model built around 4 exercises, 4 rounds, 4 minutes of work per round, and 1 minute of rest, creating a 19-minute session.[5] That structure adapts well for home fitness because it is long enough to become uncomfortable and short enough that form does not have to fall apart for half an hour.
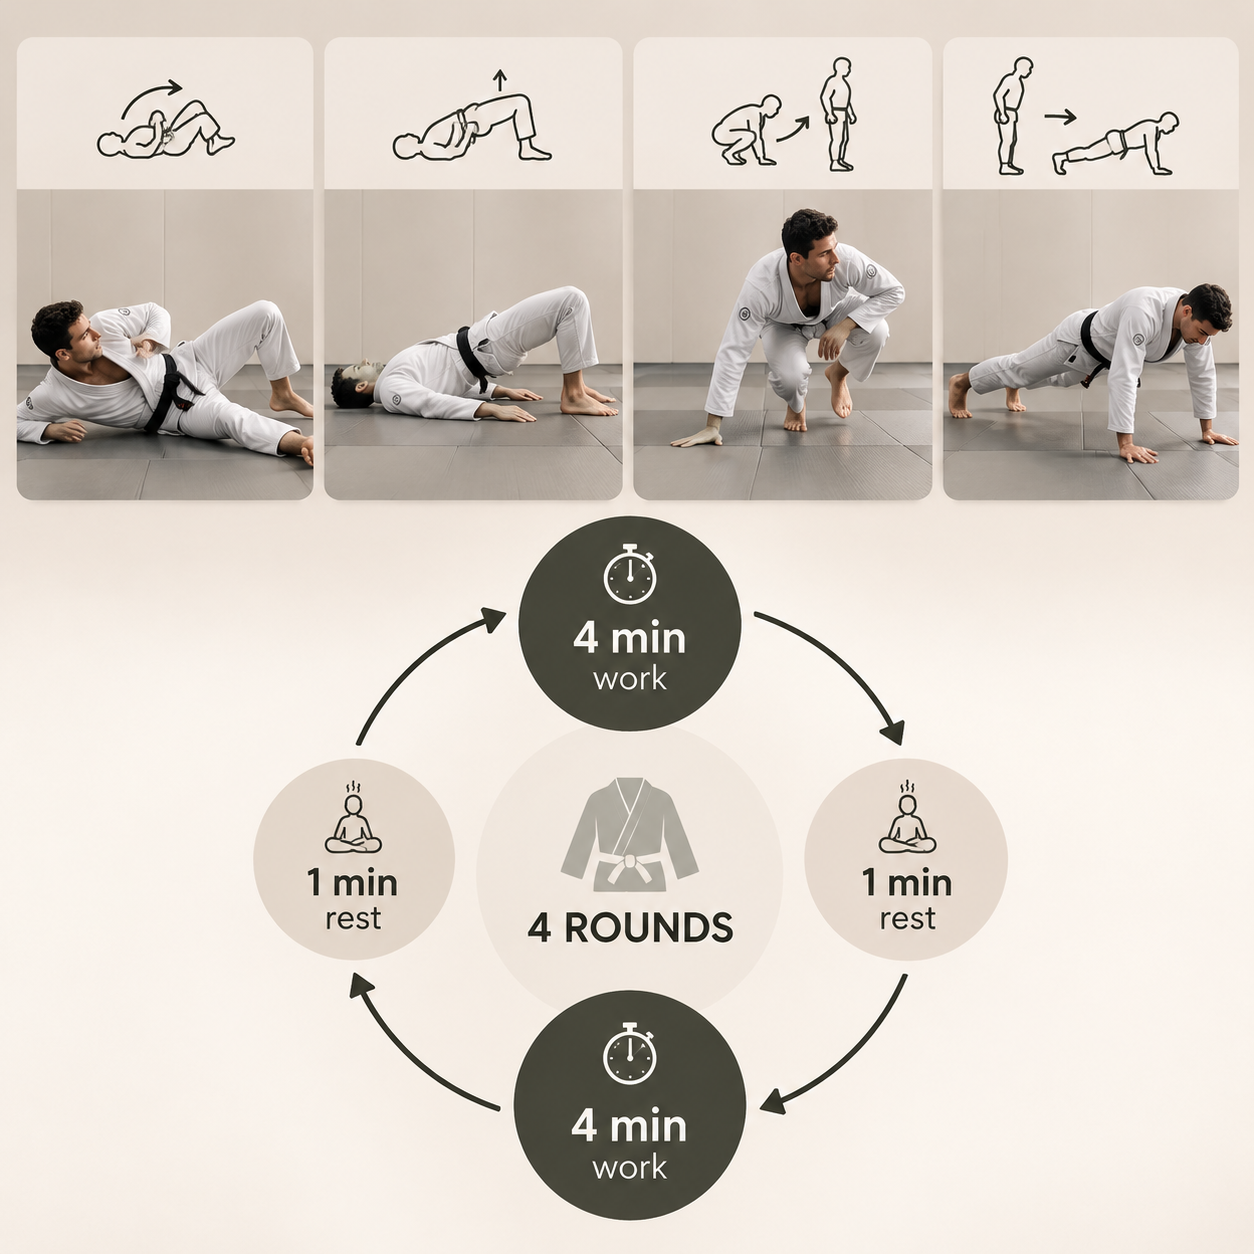
Start with the beginner version if these movements are new. It is not the “easy” version; it is the version that gives your wrists, hips, and coordination a chance to catch up.
| Phase | What to do | Time |
|---|---|---|
| Warm-up | Cat-cow, hip circles, shoulder circles, easy glute bridges, slow squat-to-stand | 4-6 minutes |
| Round 1 exercise 1 | Shrimp, alternating sides | 45 seconds |
| Round 1 exercise 2 | Bridge, controlled reps | 45 seconds |
| Round 1 exercise 3 | Technical stand-up, alternating sides | 45 seconds |
| Round 1 exercise 4 | Step-back sprawl or full sprawl | 45 seconds |
| Between exercises | Shake out and reset position | 15 seconds |
| Between rounds | Walk, breathe, sip water if needed | 60 seconds |
| Total | 4 rounds after the warm-up | About 19 minutes of circuit work |
The 45-seconds-on, 15-seconds-off format sits inside the work-to-rest options Kingz gives for no-equipment BJJ strength workouts, including 30 seconds on/30 seconds off and 45 seconds on/15 seconds off.[4] If you are new to floor transitions, use 30/30 for the first week. If you are already comfortable with bodyweight intervals, 45/15 will feel more like conditioning.
Beginner, intermediate, and hard versions
| Level | Work/rest | Rounds | How it should feel |
|---|---|---|---|
| Beginner | 30 seconds work / 30 seconds rest | 3 rounds | You can still control where your hands and feet land |
| Standard | 45 seconds work / 15 seconds rest | 4 rounds | Breathing is heavy, but reps stay recognizable |
| Hard | 50 seconds work / 10 seconds rest | 4-5 rounds | Only for drills you can perform safely while tired |
Digitsu also discusses heart-rate guidance for solo-drill sessions, including a 120-150 BPM range for 30-minute work.[6] That can be useful feedback if you already track heart rate, but it should not become the point of the workout. These drills vary a lot by body size, surface, skill, and tempo. If chasing a number makes the technical stand-up sloppy or the sprawl crashy, slow down.
The four core drills
These are the movements worth learning first. Add-ons can wait. A clean shrimp, bridge, technical stand-up, and sprawl will give you more useful training than a messy collection of every solo grappling drill on the internet.
Shrimp: move the hips first
Lie on your back with knees bent. Turn slightly onto one side, plant the foot that is closest to your hips, and push the floor away so your hips slide backward. Your shoulders can turn, but the main event is the hip escape. Grapplearts and JiuJitsu.com both treat shrimping as a foundational solo drill, with the movement built around creating space through hip motion.[1][3]
For fitness, shrimping trains obliques, hip flexors, glutes, and the awkward but valuable skill of moving on the floor without simply doing a sit-up. The common beginner mistake is dragging the shoulders and leaving the hips behind. Make it easier by doing one shrimp at a time and resetting. Make it harder by shrimping continuously across the room, then reversing direction without standing.
Bridge: drive through the floor
A BJJ bridge starts like a glute bridge, but it has more intent. Lie on your back, bend your knees, plant your feet, and drive your hips up. For a basic fitness version, keep both shoulders near the floor and focus on a strong hip lift. For a more grappling-flavored version, bridge diagonally over one shoulder, then return under control. Grapplearts includes bridging as a core solo movement, and JiuJitsu.com also describes bridge work among at-home solo drills.[1][3]
The bridge lights up the back line: glutes, hamstrings, spinal erectors, and trunk. Do not throw your head backward to fake height. Keep the neck long, push through the feet, and let the hips create the lift. Make it easier by using standard glute bridges. Make it harder by adding a diagonal bridge, a shoulder walk, or a brief hold at the top of each rep.
Technical stand-up: getting off the floor without folding in half
Sit with one hand posted behind you, the opposite foot planted, and the other leg extended. Lift your hips slightly, pull the extended leg back underneath you, and stand while keeping your chest from collapsing. Then reverse the path back to the floor or reset and alternate sides. Technical stand-ups appear in solo-drill libraries because they teach a coordinated, protected way to rise from the ground.[1][3]
In a home workout, this drill is a coordination test disguised as leg and core work. The posted shoulder stabilizes. The planted leg drives. The hips have to clear enough space for the trailing leg. The usual mistake is rushing the stand-up and letting the knee cave inward or the posted hand slide too far behind the body. Make it easier by practicing only the seated-to-hip-lift portion. Make it harder by making each rep continuous: sit, post, stand, return, switch.
Sprawl: conditioning with a purpose
From standing, place your hands toward the floor and send your legs back so your hips drop and your body lengthens. Then come back to standing. In grappling, the sprawl has a defensive purpose; in this circuit, it is the movement most likely to push your breathing hard. Grapplearts includes the sprawl among solo drills, and it fits naturally into bodyweight conditioning because it combines a level change, plank-like stiffness, and a fast return to standing.[1]
The beginner mistake is treating the sprawl like a sloppy burpee: hands slap down, feet crash back, lower back sags, then everything scrambles up. Step one leg back at a time if needed. Keep the ribs from flaring and the hands under control. Make it harder by jumping both legs back, popping up quickly, or adding a short lateral shuffle between reps.
Add-ons once the base circuit feels smooth
After a week or two, you may want more variety. Add one new drill at a time rather than replacing the whole workout. The standard circuit already covers enough ground; these options change the flavor.
- Granby roll: useful for rolling mobility, but optional if your neck, shoulders, or floor surface make it uncomfortable.
- Leg circles: lie on your back and circle the legs to train hip control and core tension without needing much travel space.
- Sit-through: from a bear-crawl-like position, thread one leg through as the torso rotates; keep it slow until the shoulder support feels solid.
- Shadow grappling: link shrimp, bridge, stand-up, sprawl, and sit-through into a loose flow instead of separate intervals.
- Wall-based drills: use wall sits, wall frames, or wall pummeling patterns when floor space is tight; RollBliss describes wall adaptations for limited-space jiu-jitsu training.[7]
Shadow grappling is the one to treat carefully. It can become creative and athletic, or it can become vague flopping. Pick two or three movements and give the flow a rule. For example, sprawl, technical stand-up, shrimp left, shrimp right, bridge, then repeat. That keeps the session measurable enough to progress.
How to progress without pretending this is belt training
Progression for this workout is simple: more control first, more volume second, more speed last. If you cannot place your hand safely during a technical stand-up, adding rounds is not progress. If every sprawl lands like a dropped suitcase, the hard version is not helping.
| Week | Circuit target | Progression focus |
|---|---|---|
| Week 1 | 3 rounds, 30 seconds work / 30 seconds rest | Learn positions and protect joints |
| Week 2 | 4 rounds, 30 seconds work / 30 seconds rest | Add total volume without rushing |
| Week 3 | 4 rounds, 45 seconds work / 15 seconds rest | Increase conditioning demand |
| Week 4 | 4 rounds plus one add-on drill or one shadow-grappling finisher | Add complexity only where form holds |
Infighting’s 4-week at-home plan is built around progressive solo training rather than one random session, which is the right idea to borrow here.[5] You are not trying to collect drills. You are trying to make the same few movement patterns cleaner under fatigue.
Kingz estimates that BJJ drilling can burn roughly 300-500 calories per hour at moderate intensity, but that is a broad orientation point, not a promise about your living-room session.[4] A new beginner moving carefully will land at a different output than a strong athlete doing fast sprawls and continuous stand-ups. Use calories and heart rate as feedback, not as proof that the workout “worked.”
When to make it easier
The best scaling choice is usually obvious from the rep that gets ugly first. Wrists complaining during technical stand-ups? Elevate the posted hand on a sturdy low surface or reduce the number of reps. Knees irritated by sprawls? Step back instead of jumping. Neck uncomfortable during rolling? Do not roll. BJJ has enough useful solo movements that there is no need to force the one your body rejects.
- Swap full sprawls for step-back sprawls.
- Swap diagonal bridges for standard glute bridges.
- Swap continuous shrimping for single reps with a reset.
- Swap Granby rolls for leg circles or dead bugs.
- Shorten intervals before you shorten the warm-up.
A useful rule: if the drill gets more dangerous as you get tired, regress it. If it only gets slower, keep working.
How often to do it
Two or three sessions per week is a sensible starting point; Kingz gives 2-3 times per week as programming guidance for BJJ strength workouts without equipment.[4] That frequency leaves room for walking, cycling, zone 2 cardio, mobility, or separate bodyweight strength training on other days. If this circuit is your hardest workout of the week, keep the intensity honest. If it is an accessory session, use the beginner format and treat it as movement practice with a sweat.
The routine works best when it stays compact. Warm up, run the circuit, cool down if you need it, and stop. If you can clear roughly 6 by 6 to 8 by 8 feet, tolerate floor movement, and keep the intervals purposeful, BJJ-inspired solo drills can function as a full-body home workout. No gi is not a compromise here. For this kind of training, it is the point.
References
- The Ultimate Guide To BJJ Solo Drills, Grapplearts
- BJJ Solo Drills Routine: No Mats Needed. No Equipment Needed., BJJEE
- 7 BJJ Solo Drills You Can Do at Home, JiuJitsu.com
- BJJ Strength Workouts You Can Do Without Equipment, Kingz
- 4 Week BJJ At Home Workout Plan, Infighting
- BJJ Solo Drills: The Ultimate Guide for At-Home Training, Digitsu
- How to Train Jiu-Jitsu with Limited Space at Home, RollBliss


Comments
Join the discussion with an anonymous comment.