
Gymnastics-inspired training does not require a handstand, a tumble track, or a desire to become a gymnast. If what you want is cleaner core control, steadier shoulders, and a routine you can do on a mat in a spare room, the useful part is the shapes, not the costume.
At a glance, keep the constraints tight:
- 4 weeks of progressive work [1][3]
- 3 sessions a week [1][2][3]
- 20-30 minutes each session [1][2][3]
- Mat and floor space to start; optional pull-up bar later [1][3]
- No gymnastics skills required [2][3]
Why hollow and arch matter
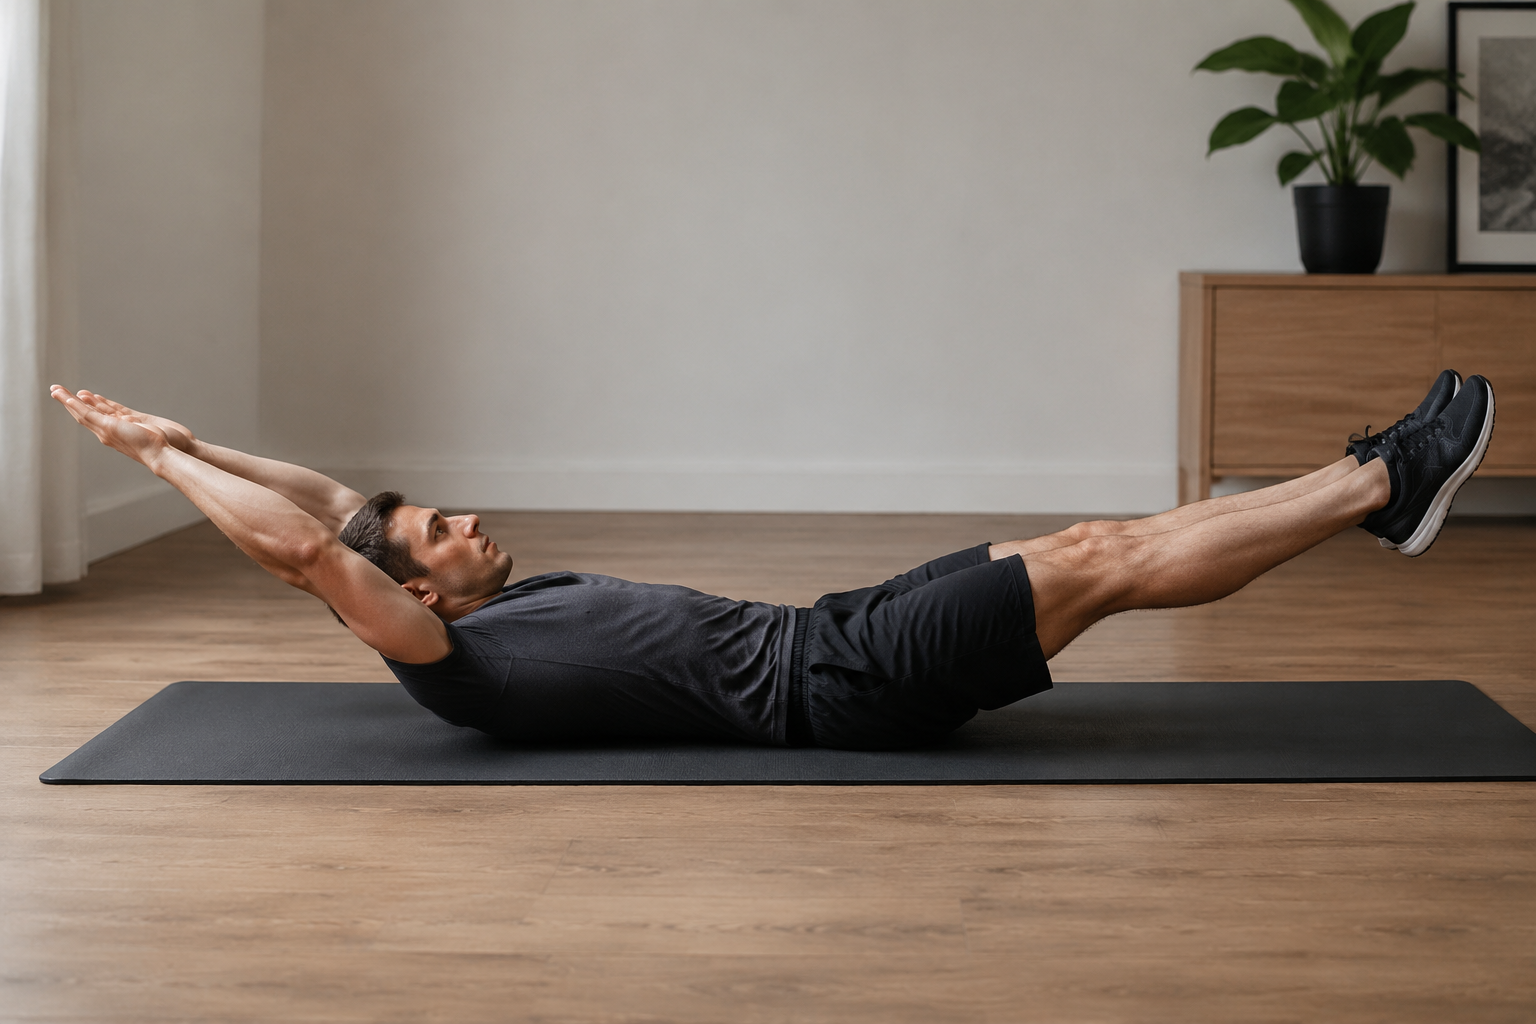
The hollow body hold and the arch rock are the two shapes that keep showing up because they teach the trunk to stay organized while the limbs move away from it. Hollow work teaches the rib cage, pelvis, and legs to stay locked into one line; arch work asks the same control from the opposite side. Together they are not just abs work — they are the positions many gymnastic strength drills keep returning to [1][2].
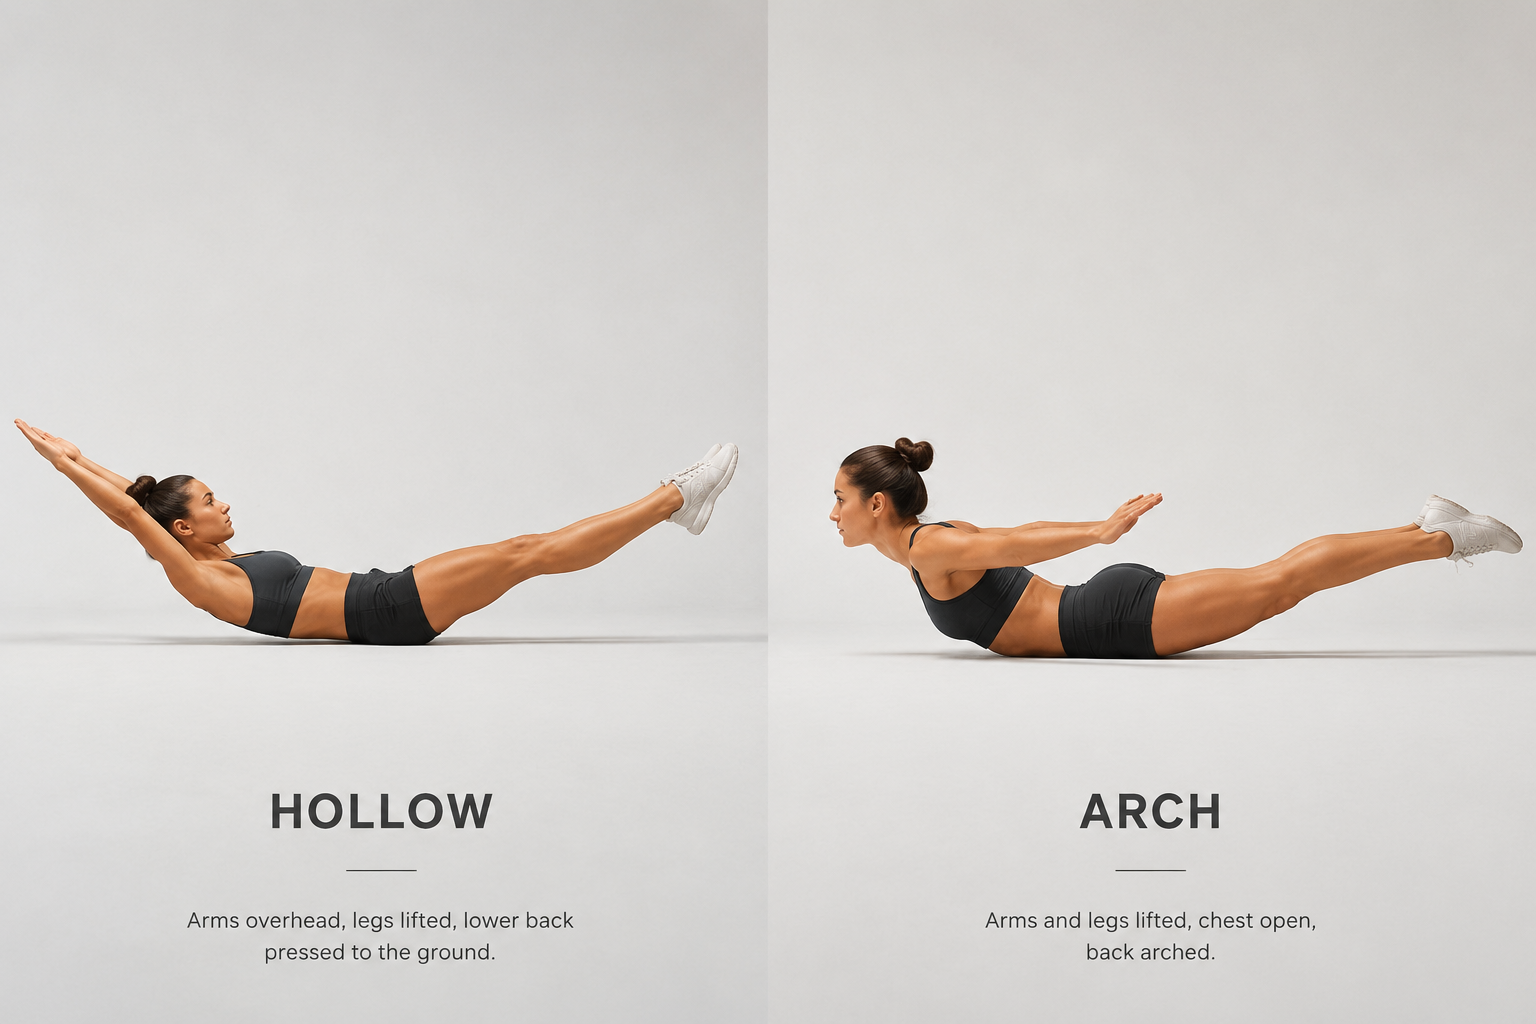
Beginner plans usually do not jump straight to moving skills. They start with static holds, then add motion, then make the leverage harder once the shape is stable [1][3].
The 4-week progression
Use the same session shape each week and change only the demand. That keeps the plan easy to follow while still asking the core, shoulders, and hips to do more work over time.
| Week | Main focus | Session emphasis | Move up when |
|---|---|---|---|
| Week 1 | Own the floor | 2 rounds. Keep hollow holds, plank work, and arch rocks short; use easy push-ups and squats; finish with simple pike and straddle stretches. | You can keep the lower back flat in the hollow hold and finish every rep without losing line. |
| Week 2 | Add clean volume | 2-3 rounds. Hold shapes a little longer, add a rep or two to push-ups and squats, and begin bent-knee L-sit support work. | The hold stays crisp for the full time and the reps still look smooth. |
| Week 3 | Add motion | 3 rounds on the main circuit. Introduce hollow rocks, arch rocks, leg raises, or V-ups, and slow the compression work down. | You can move without letting the trunk collapse or the neck take over. |
| Week 4 | Increase leverage | Keep the same session shape but choose the hardest clean version you can own: longer hollow holds, deeper compression, one-leg or full L-sit attempts, and optional hanging knee raises if you have a bar. | The shape stays the same from the first rep to the last. |
What each session looks like
The beginner guides behind this kind of plan all point toward the same session skeleton: a short warm-up, a bodyweight strength block, a core-compression block, and a flexibility finisher. Kept inside a 20-30 minute window, that is enough time to train the shapes without turning the session into a random ab circuit [1][2][3].
- Warm-up, 5 minutes: wrists, shoulders, cat-cow, inchworms, and bodyweight squats.
- Strength circuit, 10-12 minutes: hollow hold, push-up, plank variation, squat, and arch rock.
- Compression block, 4-5 minutes: V-ups, leg raises, seated pike lifts, and an L-sit progression.
- Flexibility finisher, 2-3 minutes: pike stretch, straddle stretch, and shoulder opening.
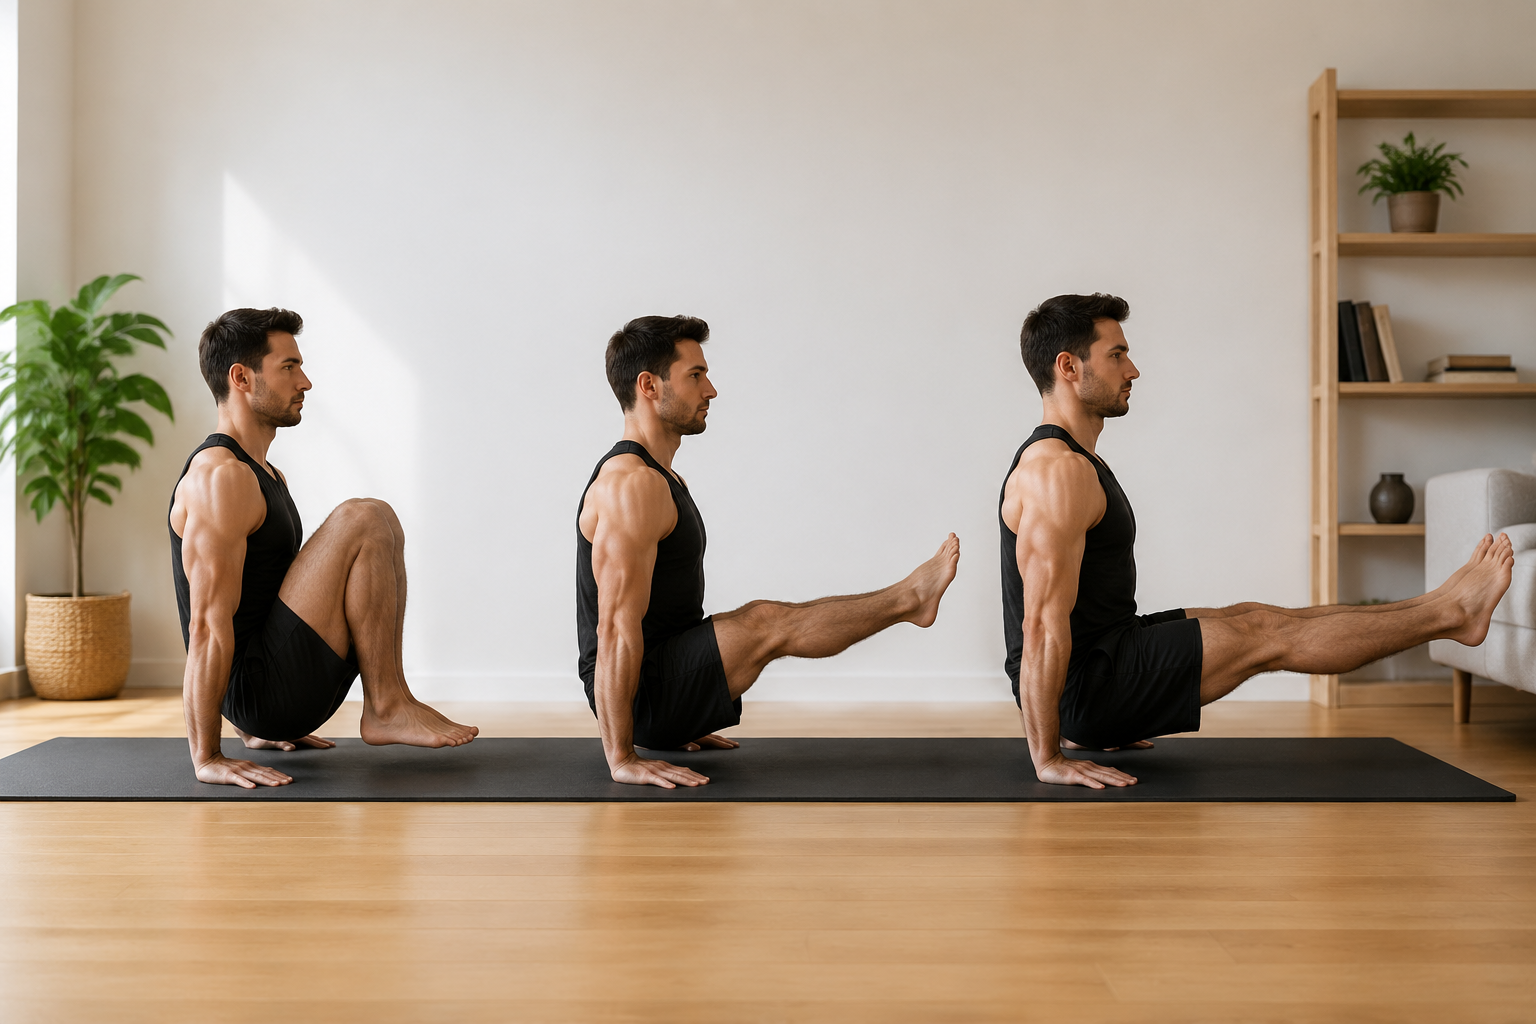
The L-sit progression is where the plan stops feeling like ordinary floor work and starts asking for real compression. Bent knees come first, one leg out comes next, and the full hold comes last. If the shoulders shrug or the pelvis tucks so hard that the lower back rounds and the legs drop, stay one step earlier.
How to scale the work
- Hollow hold: bend the knees before the lower back lifts off the floor.
- Arch rock: keep the lift small and smooth; do not force the low back into an exaggerated curve.
- Push-up: elevate the hands or use knees until the ribs stay tucked.
- Squat: slow the descent instead of chasing depth.
- L-sit: keep one foot down, then one leg out, then both legs only when the line holds.
- Optional pull-up bar later: add hanging knee raises or dead hangs only after the floor work feels stable.
Two simple rules keep the progression honest: do not advance a week if the hollow shape disappears, and do not chase range of motion when the rep quality is already slipping. A cleaner smaller rep is worth more here than a bigger ugly one.
Where this fits with the rest of home training
If 20-30 minutes still feels like too much, the 7-Minute Workout as a Complete Beginner gives a shorter on-ramp. If you want a low-impact companion on off-days, the Beginner's 4-Week Weighted Vest Walking Plan keeps the same adoption mindset without more floor work. For leg progression logic, the Home Leg Workout Progression Guide is the better companion, and the Complete Guide to Cardio at Home helps if you are still deciding whether this routine or a cardio block fits the space and schedule you actually have.
After week 4
If the final week feels clean, repeat week 4 for another cycle and change only one variable at a time: longer holds, a harder L-sit variation, slower push-ups, or the optional bar work. If you want actual gymnastics skills, move into a skill plan instead of trying to make this routine do that job.
References
- GymnasticsHQ — At-Home Gymnastics Workout Plans (Free PDFs) — GymnasticsHQ
- Train Like A Gymnast — Beginner's Guide to Gymnastics Workouts at Home — Train Like A Gymnast
- KangarooHoppers — Gymnastics At Home Workout Plans Guide for Beginners — KangarooHoppers


Comments
Join the discussion with an anonymous comment.