
Home meniscus tear recovery starts with a boring rule that saves a lot of knees: the exercise is only appropriate if your symptoms stay calm while you do it and over the next day. Calm means no sharp pain, no increase in swelling, no new catching, and no loss of the ability to fully straighten the knee. If the knee locks, catches mechanically, gives way, or will not straighten, stop treating this as a home-program problem and get evaluated.
This guide is for education, not a diagnosis or a substitute for an in-person exam. Meniscus tears are not all the same. Many degenerative tears and stable traumatic tears can do well with structured exercise, but bucket-handle tears, root tears, locked knees, and persistent mechanical symptoms need surgical or sports-medicine consultation rather than another variation of a bridge or squat.
First, Find Your Phase
The dates are useful for orientation, not permission. A mild tear may settle in roughly 4–6 weeks, while more complex tears can take 3–6 months, and individual recovery varies widely.[1] The knee’s response matters more than the week number.
| Phase | Usual Timeframe | Main Goal | You Can Move Forward When |
|---|---|---|---|
| Acute | 0–2 weeks | Calm swelling, regain full knee extension, activate the quadriceps | Walking is improving, swelling is not increasing, and you can straighten the knee fully |
| Subacute | 2–6 weeks | Restore comfortable range of motion and controlled daily movement | Range improves without catching, and light loading does not cause next-day swelling |
| Strengthening | 6–12 weeks | Build hip, thigh, and calf strength without deep loaded knee flexion | Squats, step-ups, and single-leg control stay pain-free and stable |
| Return-to-activity | 3+ months | Rebuild tolerance for longer cardio, faster movement, and sport demands | Strength and movement quality are close side-to-side, with no swelling or instability |
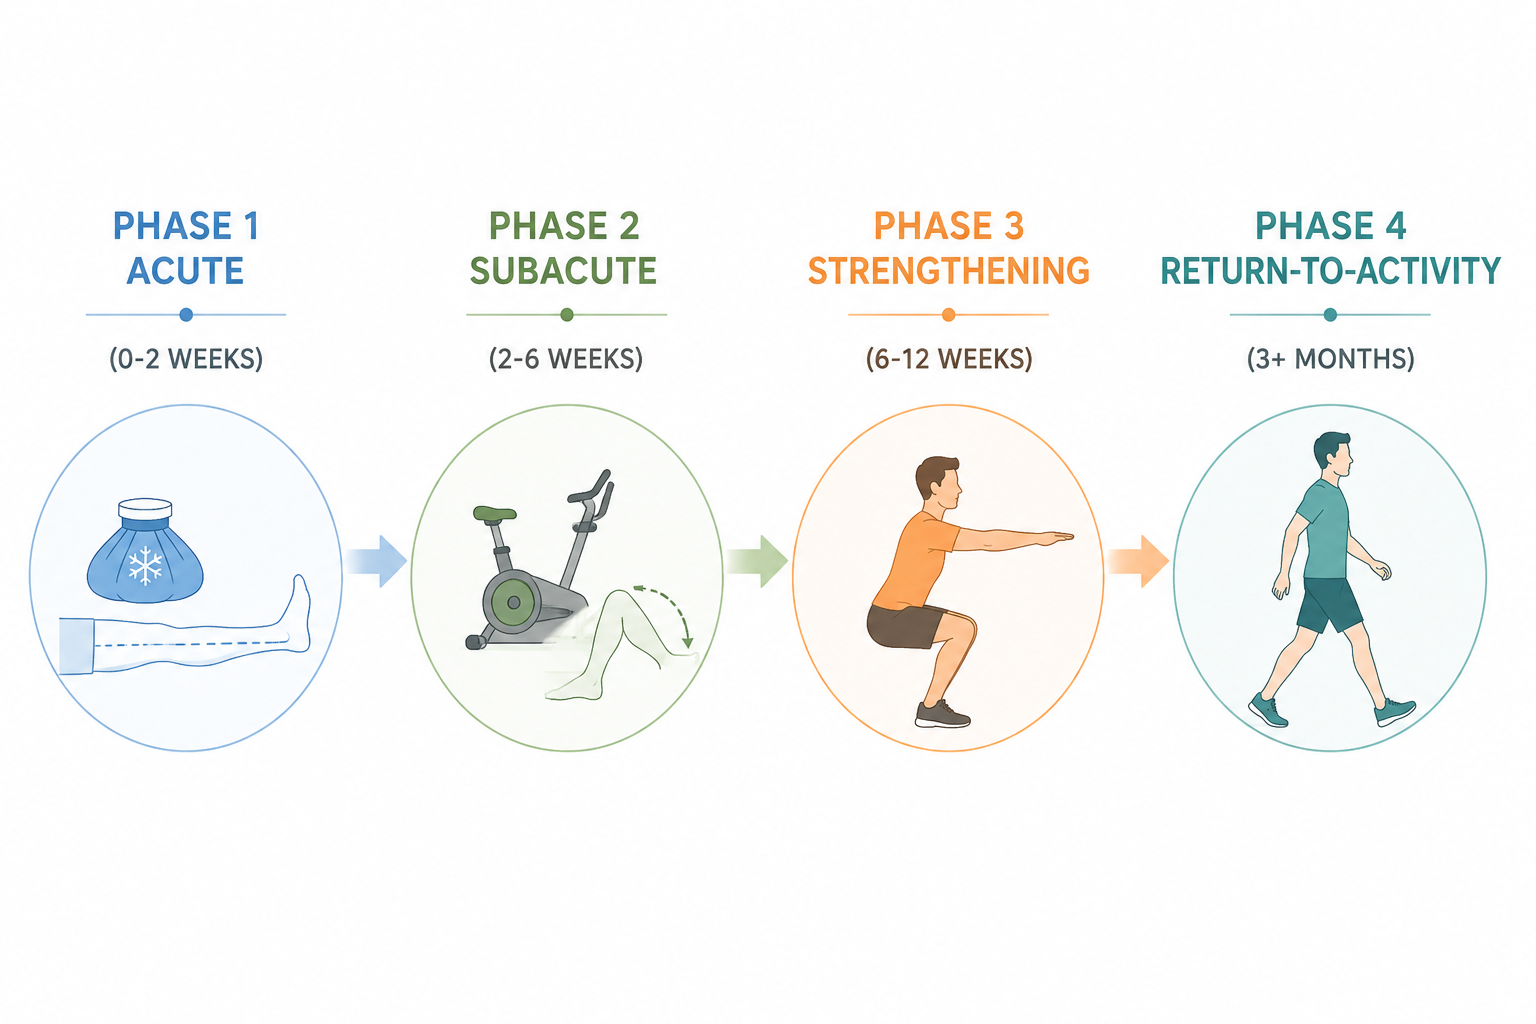
The reason to use phases and criteria instead of a rigid calendar is not caution for caution’s sake. The 2024 EU-US Meniscus Rehabilitation Consensus recommends criterion-based rehabilitation over time-based protocols and identifies non-operative care, including physical therapy, as first-line treatment for degenerative meniscus lesions.[2] In plain terms: the knee earns the next step.
The Safety Rules That Govern Every Exercise
- Pain rule: mild discomfort or effort is acceptable; sharp joint-line pain is not.
- Swelling rule: if the knee is puffier later that day or the next morning, the dose was too high.
- Motion rule: do not force deep bending early, and do not ignore loss of full knee extension.
- Mechanical rule: catching, locking, clunking with pain, or true giving way changes the plan from home progression to clinical evaluation.
- Loading rule: controlled partial squats are different from deep loaded squats; the meniscus usually tolerates the first much earlier than the second.
A good home program should feel almost underwhelming at the beginning. That is not a lack of ambition. Early meniscus recovery is about reducing irritation enough that the quadriceps wakes up and the knee can straighten, because limping around a half-bent knee is a fast way to make every later exercise uglier.
Phase 1: Acute Exercises for the First Irritated Stage
Use this phase when the knee is swollen, reactive, newly painful, or hard to trust. It may be the first few days after injury, or it may be a flare after doing too much. Your job is not to stretch the meniscus into submission. Your job is to restore full knee extension, reduce swelling, and get the quadriceps to contract cleanly.
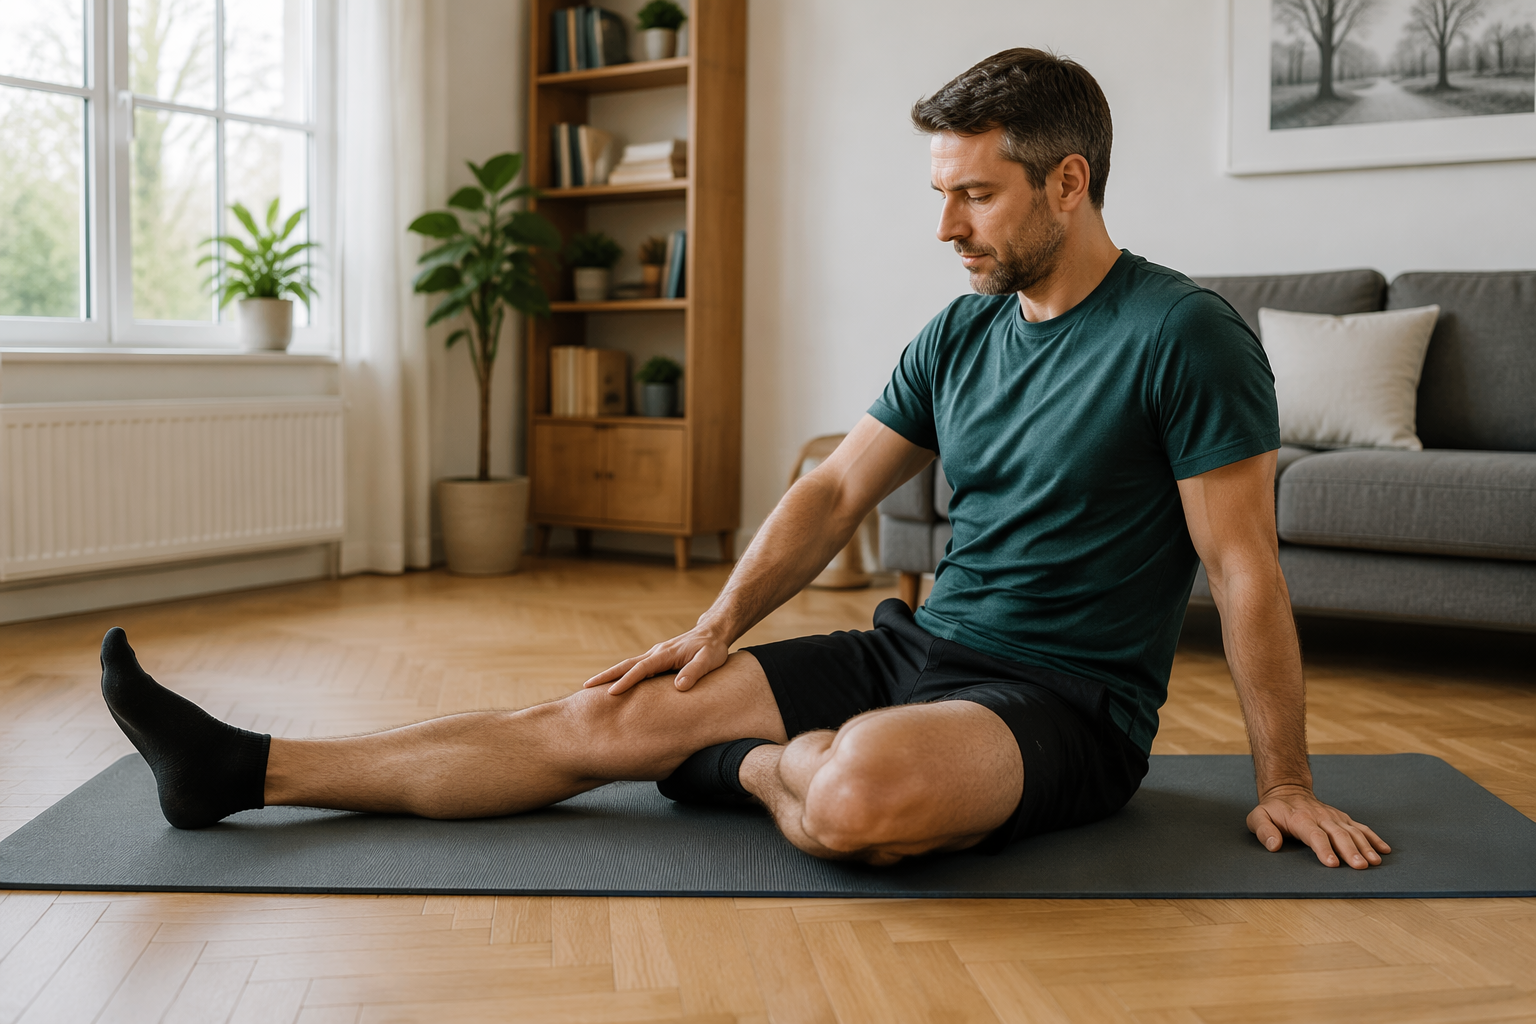
Heel Prop for Knee Extension
Lie on your back or sit with the injured leg straight. Place the heel on a pillow or rolled towel so the knee is unsupported. Let the knee relax toward straight for 2–5 minutes. Do not place a heavy weight on the thigh or force the knee down.
This is often the least glamorous exercise in the program and one of the easiest to skip. Do not skip it. If you cannot fully straighten the knee, your walking, stair climbing, and later strengthening all start from a compromised position.
Quad Sets
Sit or lie with the leg straight. Tighten the front thigh muscle as if you are gently pressing the back of the knee toward the floor. Hold for 3–5 seconds, then relax. Start with 2–3 sets of 10 repetitions.
The kneecap should glide slightly upward as the thigh contracts. If all you feel is hip gripping or calf tension, reduce the effort and try again. The point is a clean quadriceps contraction, not a maximal strain.
Straight Leg Raise
Do this only if you can keep the knee fully straight. Lie on your back with the injured leg straight and the other knee bent. Tighten the thigh, lift the straight leg to about the height of the opposite knee, pause, and lower slowly. Try 2 sets of 8–10 repetitions.
If the knee bends during the lift, go back to quad sets. A bent-knee straight leg raise is a sign the quadriceps is not controlling the joint well enough yet.
Heel Slides, But Not Forced
Lie on your back and slowly slide the heel toward your hips until you feel a mild stretch or the first hint of knee discomfort, then slide back out. Start with 10 slow repetitions. Keep the motion easy and shallow at first.
Early heel slides are for comfortable motion, not proving how far the knee can bend. Deep forced flexion can irritate a meniscus tear, especially when swelling is still present.
Ankle Pumps and Short Walks
Pump the ankle up and down several times per day, especially if you are resting more than usual. Walk short distances on flat ground if you can do so without limping heavily. A supportive brace or crutches may be appropriate if recommended by a clinician, but do not use them as permission to push through sharp pain.
Exercise libraries from E3 Rehab and Kaiser Permanente use similar early priorities: restore comfortable range, activate the quadriceps, and build gradually with simple movements before heavier loading.[3][4]
- Stay in Phase 1 if the knee swells after routine walking.
- Stay in Phase 1 if you cannot fully straighten the knee.
- Stay in Phase 1 if heel slides cause catching or sharp joint-line pain.
- Move toward Phase 2 when swelling is controlled, walking is smoother, and basic motion does not provoke symptoms.
Phase 2: Subacute Exercises When the Knee Is Calmer
This is where many people get themselves into trouble. The knee feels better, so they test it with stairs, deep squats, kneeling, yard work, or a “light” jog. Better is not the same as ready. In Phase 2, you add range and load while watching for next-day swelling.
Stationary Bike With Low Resistance
Set the seat high enough that the knee does not bend deeply at the top of the pedal stroke. Begin with 5–10 minutes at low resistance. If you cannot make a full revolution without pain, rock the pedals forward and back through a comfortable arc instead of forcing it.
Biking is useful here because it gives the knee repeated motion without impact. If you are considering buying equipment for this phase, use a basic, stable bike and prioritize adjustability over intensity features; this stationary bike guide can help with that choice.
Mini Squat to 15–30 Degrees
Stand with feet about hip-width apart, hands on a counter or chair for support. Bend the knees slightly, as if starting to sit down, then return to standing. Keep the movement shallow: about 15–30 degrees of knee bend. Try 2 sets of 8–12 repetitions.
The knee should track over the middle toes, not collapse inward. The depth should look unimpressive. That is the point. A controlled partial squat and a deep squat past 90 degrees under load are not interchangeable exercises for a recovering meniscus.
Glute Bridge
Lie on your back with knees bent and feet flat. Tighten the buttocks, lift the hips until the body forms a straight line from shoulders to knees, then lower slowly. Start with 2–3 sets of 8–12 repetitions.
Keep the feet close enough that the hamstrings do not cramp, but not so close that the knees bend deeply. If bridging causes joint-line pain, reduce the height or return to Phase 1 work for a few days.
Standing Hamstring Curl
Hold a counter. Bend the injured knee to bring the heel gently toward the buttock, stopping well before pain or catching. Lower slowly. Start with 2 sets of 10 repetitions.
This should feel like controlled muscle work behind the thigh, not a pinch inside the knee. Keep the motion smooth and avoid snapping the lower leg up.
Side-Lying Hip Abduction
Lie on the uninjured side with the top leg straight. Lift the top leg slightly backward and upward without rolling the hips open, then lower slowly. Try 2 sets of 10–15 repetitions.
Hip strength matters because poor hip control often shows up as knee collapse during stairs, squats, and landing. This exercise should not stress the knee directly, which makes it a useful way to train around a still-sensitive joint.
- Progress by adding time or repetitions first, not depth or resistance.
- Keep biking easy until the knee tolerates 15–20 minutes without swelling.
- Do mini squats shallow enough that you could stop at any point with control.
- Back off for 24–48 hours if symptoms increase after a session.
Why Exercise Therapy Deserves to Be Taken Seriously
Exercise is not a consolation prize for every meniscus tear, and it is not a moral victory over surgery. It is a legitimate treatment path for many knees when the tear is stable and the symptoms match a non-operative plan.
In the DREAM trial, adults with traumatic meniscus tears in stable knees had similar 12-month outcomes after supervised neuromuscular and strength training plus education compared with surgery.[5] That does not mean every traumatic tear should avoid surgery. It means a stable knee without locking or major mechanical symptoms can reasonably treat structured rehabilitation as real treatment, not just something to do while waiting.
For degenerative meniscal tears, the long-term argument is also strong. The OMEX randomized trial 10-year follow-up found no significant difference between exercise therapy and arthroscopic partial meniscectomy over a decade.[6] That finding supports patience with progressive strengthening when symptoms allow it, especially for adults whose meniscus findings are part of a broader degenerative knee picture.
Quadriceps strength is one practical place to put that patience. A review citing Mangione et al. reported that quadriceps-strengthening exercises performed 3 times per week for 10 weeks improved knee function by approximately 35% in patients with osteoarthritis-related meniscal changes.[7] Your result may not match that number, but the direction is useful: stronger thigh muscles can meaningfully change how the knee behaves.
Phase 3: Strengthening Without Deep Loaded Flexion
Enter this phase when daily walking, light biking, shallow squats, and basic range of motion are not provoking swelling or catching. The work now becomes more demanding, but the same rules remain. Load increases gradually. Knee bend stays controlled. Movement quality matters more than finishing the set.
Sit-to-Stand
Sit on a firm chair with feet flat. Stand up without pushing off if possible, then sit down slowly. Use a higher chair if the knee feels compressed or painful. Start with 2–3 sets of 8–10 repetitions.
Control the descent. Dropping into the chair teaches the knee nothing useful. If the knee dives inward or the painful side unloads, use your hands lightly or raise the seat height.
Step-Up
Use a low step. Place the injured-side foot on the step, press through the whole foot, and stand up without pushing hard from the back leg. Step down slowly. Begin with 2 sets of 6–10 repetitions.
Start lower than your pride wants. A low, clean step-up is better than a high step that turns into a hip hike, knee wobble, and railing pull.
Wall Sit in a Shallow Range
Stand with your back against a wall and slide down slightly into a shallow squat. Hold 10–20 seconds, then stand back up. Keep the knee bend modest at first. Repeat 3–5 times.
Do not chase the deep wall-sit position you remember from gym class. Past 90 degrees of knee bend, especially under fatigue or added load, is a different demand on the recovering meniscus.
Calf Raise
Hold a counter and rise onto both toes, then lower slowly. Start with 2–3 sets of 10–15 repetitions. When that is easy and symptom-free, shift slightly more weight to the injured side before progressing to single-leg versions.
Balance Drill
Stand near a counter and balance on the injured leg for 10–30 seconds. Keep the knee softly unlocked and aligned over the foot. Add difficulty by turning the head or reaching the free foot lightly in different directions only after the basic version is stable.
Balance work is not filler. It shows whether the knee can accept body weight without the hip, foot, or trunk inventing a workaround.
- Use a pain-free range before adding resistance.
- Keep squats and wall sits shallow until the knee has tolerated several weeks of progressive loading.
- Avoid kneeling, twisting under load, deep lunges, and heavy deep squats if they reproduce joint-line symptoms.
- Let next-day swelling decide whether the previous session was too much.
If you want recovery habits around these sessions, keep them simple: easy walking, gentle range of motion, and enough time between harder days for the knee to settle. This at-home recovery routine is a better fit than aggressive stretching or random soreness-chasing.
Phase 4: Return to Activity Without Pretending the Meniscus Forgot
Return-to-activity is not the first day the knee feels normal while walking. It is the stage where strength, control, and symptom response are good enough to tolerate longer sessions and more variable movement.
Start with low-impact cardio: longer walks, easy cycling, or elliptical-style motion if available. Increase one variable at a time—duration, then pace, then resistance. If you are comparing cardio options for home training after symptoms have settled, this cardio-at-home guide lays out the tradeoffs.
Cutting, pivoting, and landing deserve special respect. The 2024 Consensus identifies these activities as increasing meniscal injury risk with Grade A support.[2] That does not mean you can never return to tennis, basketball, soccer, trail running, or group fitness. It means those movements should come after controlled strength work, balance drills, and straight-line conditioning are boringly successful.
A Simple Return Sequence
- Walk briskly on flat ground without swelling or limping.
- Add longer low-impact cardio sessions.
- Add faster straight-line movement before any direction changes.
- Add gentle agility only if cutting and pivoting are part of your real activity demands.
- Return to sport-specific drills before full games, races, or classes.
For general training after the meniscus symptoms have resolved, choose routines that keep impact and knee flexion manageable at first. A low-impact knee-friendly workout is a better bridge than jumping straight back into squat jumps, burpees, or lateral shuffles.
How to Know You Are Ready to Progress
Advancement is a symptom test, not a confidence test. If the knee feels good during exercise but swells that night, the knee has answered. If the first set looks clean and the third set turns into a limp, the dose is too high.
| Progress If | Hold or Reduce If | Get Evaluated If |
|---|---|---|
| Pain stays mild and dull, not sharp | Pain increases during the set | Pain is sharp at the joint line or does not settle |
| No extra swelling later or next day | The knee feels puffy after new exercises | Swelling is recurrent or significant |
| You can fully straighten the knee | Extension feels tighter after activity | The knee cannot fully straighten |
| Movement is smooth and controlled | You limp, wobble, or unload the injured side | The knee locks, catches, or gives way |
| Daily activities are easier week to week | Stairs or walking worsen after training | Mechanical symptoms persist despite backing off |
Optional tools can make home rehab more comfortable, but they do not change the rules. Ice, compression, a foam roller used away from the painful joint line, or simple massage can support recovery habits. If you are deciding what is worth buying, start with tools that help swelling control or consistency, not gadgets that promise to fix cartilage; this home recovery tools guide can help separate useful support from clutter.
When Home Exercises Are the Wrong Next Step
Do not keep progressing at home if the knee locks, cannot fully straighten, catches repeatedly, gives way, or swells after ordinary activity. Those are not signs that you need a more creative exercise. They are signs that the tear pattern or joint irritation may need direct assessment.
This is especially important when a bucket-handle tear or root tear is suspected. Those tear patterns can behave differently from stable degenerative tears and may require surgical consultation. Exercise may still be part of the eventual plan, but it should not be used to delay evaluation when the knee is mechanically blocked.
For everyone else, the usable rule is simple: if the knee stays calm, straightens fully, moves more smoothly, and tolerates the current dose without swelling, progress gradually. If sharp pain, swelling, catching, locking, or instability appears, back off and get qualified guidance.
References
- Meniscal Injuries, StatPearls, NCBI Bookshelf
- The Formal EU-US Meniscus Rehabilitation 2024 Consensus, ESSKA-AOSSM-AASPT, PMC, 2025
- Meniscus Tears, E3 Rehab
- Meniscus Tear: Rehabilitation Exercises, Kaiser Permanente
- Supervised Exercise Therapy and Patient Education Versus Surgery for Traumatic Meniscal Tears in Young Adults: The DREAM Trial, Journal of Orthopaedic & Sports Physical Therapy, 2024
- Exercise Therapy Versus Arthroscopic Partial Meniscectomy for Degenerative Meniscal Tear: 10-Year Follow-up of the OMEX Randomised Controlled Trial, British Journal of Sports Medicine, 2025
- Physical Therapy and Exercise Interventions in the Treatment of Meniscal Lesions: A Review, Cureus, PMC




Comments
Join the discussion with an anonymous comment.