
How to Learn MMA Leg Kick Technique at Home
Learn correct MMA leg-kick technique at home without a gym, partner, or heavy bag — from shadow rounds and improvised targets to a freestanding bag, with technique checklists and renter-safe setup guidance.
- Equipment tier required
- none
- Duration
- 30 min
- Difficulty
- beginner
- Target area
- legs
- Space footprint needed
- small clear floor area
- Noise level
- low for no-equipment; higher with bag
Yes, you can start learning MMA leg kick technique at home without a gym, partner, or heavy bag. The useful starting point is not “how hard can I kick?” It is whether you can repeat the shape of the kick slowly, stay balanced on the support leg, hit the right line in the air, and do it without turning your floor into a drumhead.
That matters because a leg kick is a technical strike before it is a power strike. For an outside leg kick, one beginner-friendly sequence taught by Evolve MMA is to jab, step the front foot outside, kick with the rear leg, connect with the middle part of the shin, aim repeatedly at the same point on the thigh, and let the weight of the leg come down through the kick. The same source separates the inside leg kick and calf kick by different stepping lines and targets, which is exactly the kind of distinction home training has to preserve if you do not want all your “leg kicks” to become the same vague swing. [1]
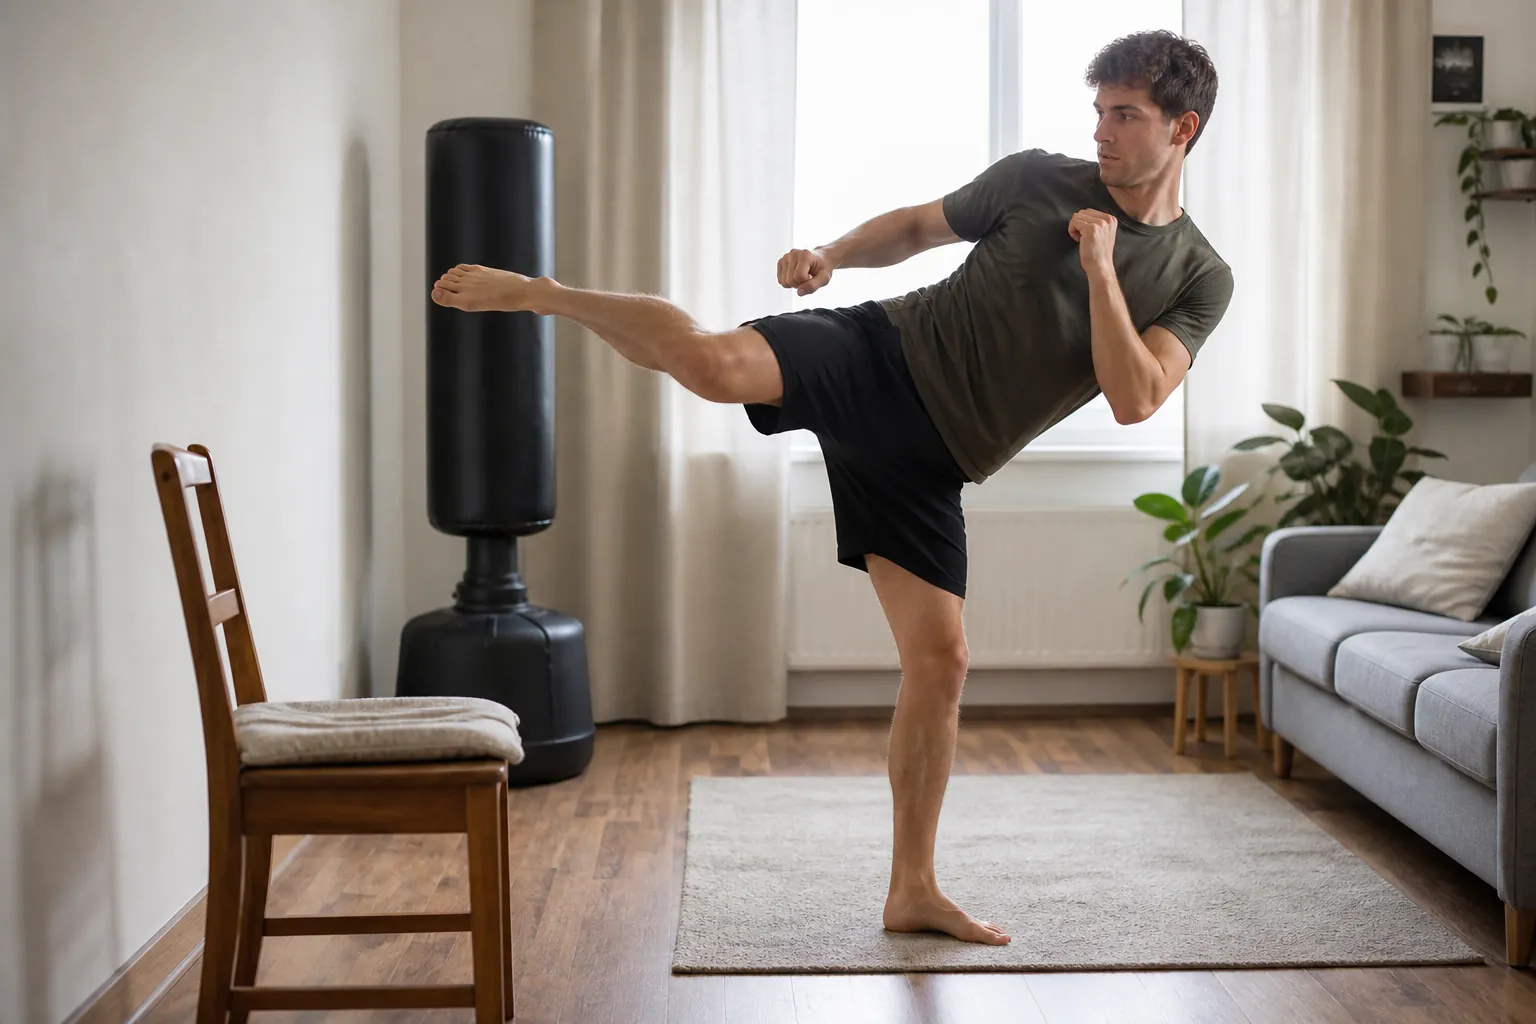
The safest home progression is simple: shadow the mechanics first, then check them against a soft stable target, then consider a freestanding bag only if your room, floor, and neighbors can absorb it. If you skip that order, the usual consequence is not cinematic failure. It is a sore shin, a twisted support foot, a dented floor, or a bag you avoid using because every kick sounds like furniture being dropped.
| Tier | What you use | Best for | What it cannot prove |
|---|---|---|---|
| Zero equipment | Tape line, mirror or phone camera, open floor | Stance, step, pivot, hip turn, target line, balance | Real impact tolerance or whether the kick lands well on a moving opponent |
| Improvised target | Wall reference, chair, armchair, cushion, folded mat | Distance checks, light shin placement, repeatable contact angle | Fight-level power or heavy impact conditioning |
| Freestanding bag | Bag with weighted base and floor protection | Harder contact, rhythm, combinations, repeatable target height | Quiet training in every apartment or partner-level feedback |
Start with the no-equipment version
A zero-equipment session should feel almost too controlled at first. You are not trying to impress the phone camera. You are trying to make the same leg kick appear on video ten times in a row: same stance, same step, same hip turn, same recovery, same guard.
Keep one technical focus per session. Evolve’s solo-training guidance is blunt on this point: work one technical focus, start slowly before adding power, film yourself to catch errors before they become muscle memory, and shadowbox with realistic range instead of throwing random strikes into empty space. [2] That is better apartment advice than most apartment advice, because it does not require buying anything or pretending the living room is a full gym.
For the round structure, borrow only what helps. Ritchie Yip’s published at-home kickboxing plan uses a zero-equipment format of four four-minute rounds with one-minute rests, after a 10-minute warm-up and stretch block, three sessions per week for four weeks. [3] You do not need to copy the whole program to learn leg kicks, but that structure is a useful guardrail: long enough to practice, short enough that your technique does not dissolve into tired swinging.
A leg-kick-specific home session can look like this:
- Warm up for 8–10 minutes: ankle circles, hip circles, slow squats, light marching, stance switches, and easy shadowboxing.
- Round 1: stance, guard, and stepping line only. No full kicks yet.
- Round 2: outside leg kick mechanics at half speed.
- Round 3: inside leg kick or calf kick mechanics, not both unless they already stay distinct.
- Round 4: one combination into one chosen leg kick, filmed from the front or side.
- Cooldown: review the clip before you forget what the kick felt like.
Put a strip of painter’s tape on the floor for your center line. If you rent, use tape that comes up cleanly; if you are unsure, test a tiny piece somewhere hidden first. Stand in your fighting stance with the tape between your feet. The tape gives you a cheap way to see whether your step actually moved you outside the line or whether you just leaned your upper body and called it footwork.
Outside leg kick: the rear-leg version to build first
Shadow this as if an opponent is standing in front of you with their lead leg available. The jab is not decorative. It gives your hands a job, hides the step, and keeps you from loading the kick like a slow baseball swing. From stance, send the jab down the center, step your lead foot slightly outside the opponent’s lead foot line, then swing the rear leg into the outside thigh line.
- Jab first, even if the jab is light.
- Lead foot steps outside instead of straight forward.
- Support foot pivots enough for the hip to turn, without wrenching the knee.
- Rear shin travels toward the outer thigh line, not the knee.
- Hands stay useful: one hand may counterbalance, but your face should not be abandoned.
- The kicking leg returns under you, so the round ends in stance instead of a stumble.
The support leg deserves more respect than it usually gets in home videos. A 2026 narrative review of 23 studies on combat-sport lower-limb injuries notes that pivoting helps hip rotation and impact power, but it also increases rotational stress at the support-leg knee and ankle, including ACL and meniscal strain concerns. The authors recommend beginning with a minimal pivot of about 30 degrees and progressing as control improves; that is a practical recommendation, not proof that one angle is perfect for everyone. [4]
On video, check the boring things. Is the standing leg slightly bent? Is the kicking leg bent around impact rather than locked straight? Is the upper shin traveling horizontally toward the thigh line? GLORY’s low-kick cues describe a slightly bent standing leg, a kicking leg bent about 90 degrees at impact, and the upper part of the shin landing horizontally on the thigh. [5] In the air, you will not feel the landing, so you need the camera to catch the shape.
Inside leg kick: do not let it become a lazy foot slap
The inside leg kick changes the line. Evolve’s beginner guide describes stepping out with the back leg and using the front leg to kick the lower thigh. [1] At home, this is where people often cheat: they stand too square, flick the instep, and tell themselves they are working speed. That may be a movement, but it is not yet a controlled MMA inside leg kick.
Mark the imagined opponent’s lead leg with a small object on the floor, kept well away from your actual kicking path. Step your rear foot out first. Then bring the lead leg through the inside-thigh line. Keep the kick low and repeatable. If your toes whip around before your shin line appears, slow down. The point is to teach the hip and step to cooperate, not to practice making contact with the weakest part of your foot.
Calf kick: smaller target, stricter angle
The calf kick is not just a low outside thigh kick. Evolve’s calf-kick cues are to step off the center line, keep the hips back, and aim for the top meaty part of the calf. [1] That “hips back” detail matters at home because it stops you from drifting your head and chest too far over the lead foot.
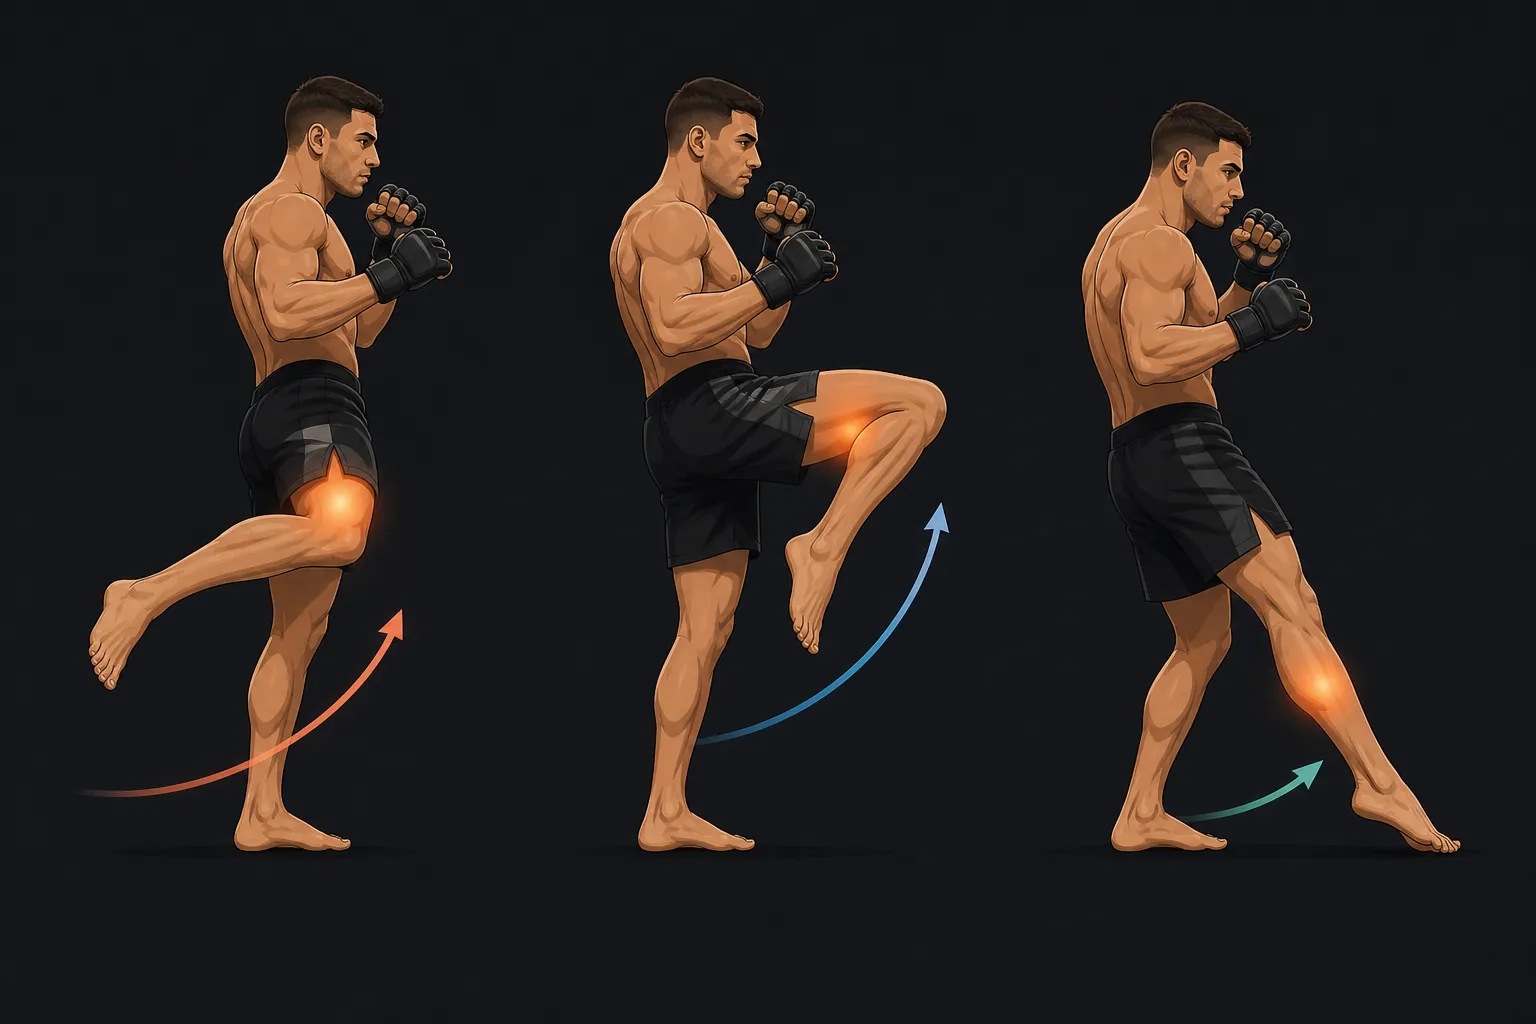
For shadow work, aim lower than the thigh but not at an imaginary ankle. The target is the upper calf area. Use the tape line to step off center, turn the hip, then recover. Film this one from the side at least once. If your head falls past your knee, if the support foot stays glued forward, or if the kick travels like a soccer toe-poke, you are not ready to add a target.
Add solo checking before you add harder kicking
Learning to kick without learning how a checked kick feels is a good way to become overconfident. You do not need a partner to start the defensive shape. You do need to respect the position.
Paul Banasiak’s checking cues at Muay Thai Guy are specific enough to use in a small room: strong upright posture, shin perpendicular to the ground, hip turned out with the knee at about 45 degrees, and glutes contracted. The common mistakes he flags are bending the shin, crunching the body, and pulling the leg straight up. [6]
Make it a slow drill. From stance, lift the lead leg into a check and freeze for two seconds. Put it down in stance. Then lift the rear leg and freeze. Do not hop. Do not fold over. Do not make the check higher every rep just because the camera is on. The shin should look like a shield, not a dangling foot.
- If your torso crunches toward the knee, lower the check and rebuild posture.
- If your planted foot spins or skids, slow the lift and check your floor surface.
- If your knee points straight forward, turn the hip out before adding speed.
- If you cannot hold the position for two quiet seconds, you do not need a harder kick yet.
Use an improvised target only as a truth check
The first target in an apartment should not be something that invites you to blast away. It should be something that tells you whether your distance, shin angle, and recovery are honest. A wall, chair, armchair, folded cushion, or mat can help, but each one can also teach bad habits if you let the furniture decide the technique.
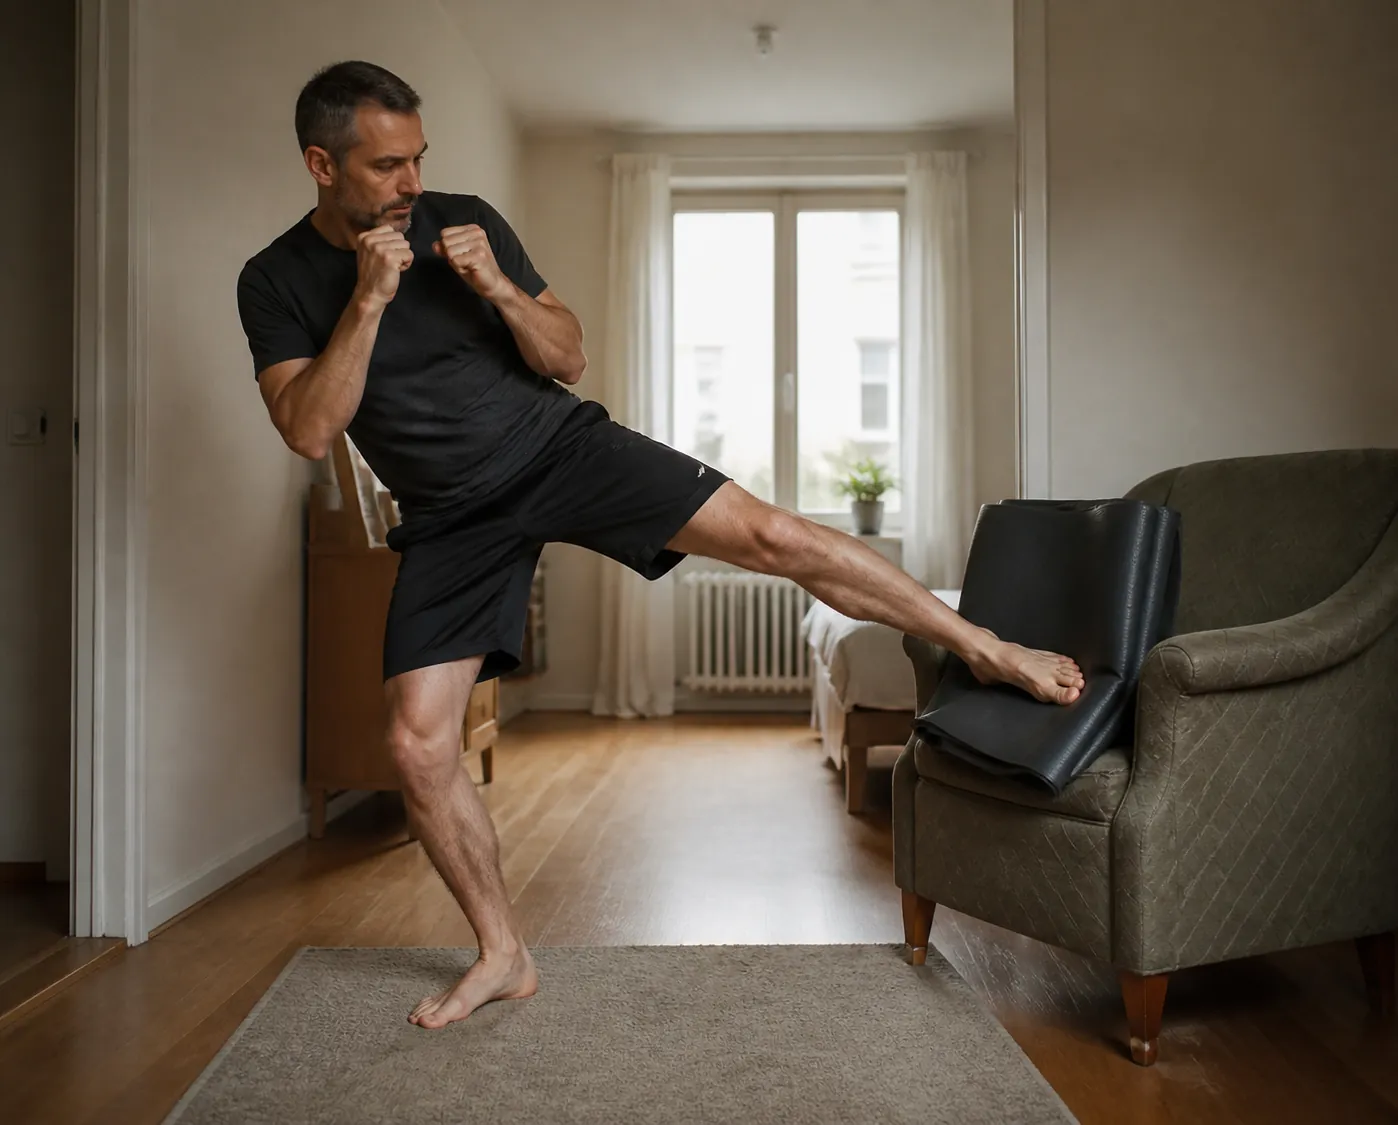
A wall is best used as a range reference, not a thing to kick. Stand in stance with enough distance that your shin would land where an opponent’s leg might be, then stop the kick short. If you keep bumping the wall with toes or instep, you are probably too close, too square, or swinging from the knee instead of turning the hip.
A chair or armchair gives better feedback, but only if it is stable and padded. Do not kick a hard chair leg. Drape a folded exercise mat or thick cushion over the contact area, set the chair so it cannot slide into anything breakable, and work at touch contact first. The goal is to place the shin on the same line you shadowed, not to find out how much your downstairs neighbor can tolerate.
For the outside kick, set the padded target roughly where an outer thigh would be and land the middle-to-upper shin lightly. Step outside first. Pivot modestly. Let the hip turn. Then recover. If the target rocks backward because you shoved it, you probably drove forward more than you rotated. If your foot slaps the side before the shin arrives, your distance is off.
For the inside kick, lower the contact and make the step with the rear foot obvious. This version is easy to fake because the front leg can flick quickly from almost anywhere. Slow it down until the step creates the line and the shin follows. If your ankle is the first thing that touches the padding, stop counting the rep.
For the calf kick, keep the target low and keep the power even lower. A chair is usually a poor calf-kick target unless you can pad it safely and avoid hard edges. A cushion against the side of a heavy sofa may be more forgiving, but it still needs to be treated as a line check, not a conditioning tool.
This is also where contact choice matters. The 2026 review notes that shin contact can maximize momentum transfer but carries tibial contusion and stress-fracture risk, while instep contact may promote speed but exposes the foot and ankle to sprains and fractures. [4] That does not mean you should fear the shin. It means you should not treat a random piece of furniture as a heavy bag or a bone-conditioning device.
Build the leg kick with bodyweight strength, not a separate fitness detour
Strength work helps when it makes the kick cleaner. It becomes noise when it turns into a generic sweat session that leaves your hips tired and your next technique round sloppy. Put the strength work after technique or on a separate day, especially while the kick is still new.
Evolve’s bodyweight kicking-power list gives useful purposes for several exercises: Hindu squats for tendon and ligament strength and shoulder-hip connection, calf raises for balance and kick initiation, jumping squats for explosive posterior-chain work, single-leg Romanian deadlifts because every kick lands from one leg, and tactical pull-ups for core bracing. [7] For apartment leg kicks, the single-leg and calf-raise pieces are the easiest to justify immediately because they show up in the support leg on every rep.
| Exercise | How to use it for leg kicks | Apartment note |
|---|---|---|
| Calf raise | Rise slowly, pause, lower slowly; keep the ankle from rolling | Quiet and floor-friendly |
| Single-leg RDL | Hinge on one leg while keeping hips square; use a wall touch if needed | Good balance drill in a narrow room |
| Hindu squat | Use a controlled range and smooth breathing | Keep reps quiet; no heel stomping |
| Jumping squat | Use only if you can land softly and your floor allows it | Often the first one to remove in an apartment |
| Tactical pull-up | Use only if you already have a safe bar setup | Do not improvise on door trim or furniture |
If you already follow a broader home conditioning plan, keep this leg-kick work narrow. A general MMA-style session can live elsewhere in the week; this practice is for the kick itself. For conditioning that does not pretend to replace contact skill, use a separate program like this no-equipment MMA-style home workout and keep the leg-kick sessions technical.
When a freestanding bag is worth adding
A freestanding bag is an upgrade, not a prerequisite. It gives you a repeatable target, lets you feel more contact, and makes combinations more honest. It also takes up floor space, rocks on its base, transmits noise through the floor, and can punish bad mechanics faster than air does.
MMA Warehouse’s small-space bag guidance is useful because it refuses the fantasy that every “compact” bag fits every small room. It recommends marking stance and movement on the floor with tape, accounting for the base or swing, treating a freestanding base as a noise-transmission risk rather than a guarantee of quiet, and accepting that for genuinely constrained spaces, the best bag may be no bag. [8]
Before buying, tape out the base diameter or footprint where the bag would live. Then mark where your stance starts and where your support foot lands for outside, inside, and calf-kick entries. Walk the combination around the imaginary bag. If your back foot hits the sofa, if the base would block your pivot, or if the only usable angle points the kick toward a shared wall, the bag is not solving the right problem.
Floor protection is not just about scratches. It is also about vibration and base movement. A mat can help stabilize the training area, but it cannot make impact disappear. If you are deciding between freestanding, doorway, wall-mounted, or no bag in a rental, compare the trade-offs in this renter-focused home boxing setup guide. For the floor layer itself, use a practical guide like this home gym flooring budget guide before you put a heavy base on wood, laminate, or thin carpet.
If the bag passes the room test, keep the first sessions technical. Jab, step outside, outside low kick. Reset. Rear-foot step, inside low kick. Reset. Step off center, calf-kick line at controlled power. Reset. If every rep becomes a full-power thud, you bought feedback and turned it into noise.
Shin conditioning: less dramatic, more useful
Do not roll bottles on your shins, kick table legs, or try to “harden” the bone by irritating it every night. That kind of advice travels fast because it sounds tough. It is also exactly the sort of thing that leaves a home trainer limping around an apartment with no coach watching the damage accumulate.
Adam Taylor’s overview in The Conversation notes that tibia cortical thickness is roughly 4–6 mm in males and 3–5 mm in females, and that bone adapts to loading through Wolff’s law. The practical line is the one worth keeping: “slow and steady is the safest way to go.” [9]
For this program, shin conditioning means gradual exposure: air first, light padded contact second, bag contact later if your setup allows it. Pain that changes your gait, sharp tenderness on the bone, ankle pain from instep contact, or knee discomfort on the support leg is not proof that the training is working. It is a reason to reduce load and review the mechanics.
A simple weekly progression
There is no reliable source here that proves a universal timeline for learning a good leg kick, so treat weeks as organization, not a guarantee. Move forward when the video and your joints agree, not when a calendar says you deserve the next tier.
| Phase | Main work | Advance when |
|---|---|---|
| Week 1-style focus | Shadow outside leg kick, stance, step, pivot, recovery | You can film repeated reps without losing balance or crossing your feet |
| Week 2-style focus | Add inside leg kick and checking drills | Inside and outside kicks show different steps and target lines |
| Week 3-style focus | Add calf-kick line and light improvised target checks | You can touch the target lightly with shin alignment, not foot slapping |
| Week 4-style focus | Combine jab-entry, selected leg kick, recovery, and defense check | You finish in stance and can repeat without rushing |
| Optional upgrade | Freestanding bag at controlled power | Your room layout, floor protection, and noise tolerance make it realistic |
A small-space footwork day can help if your stance keeps collapsing before the kick. The useful overlap is not fancy movement; it is being able to step, pivot, and recover in a marked area. If you need that base first, use home boxing footwork drills or quiet apartment boxing drills as the non-kicking support work instead of turning the leg-kick session into general cardio.
The buying decision
Buy nothing if you cannot yet shadow the kick slowly, film it, and tell outside, inside, and calf-kick mechanics apart. A bag will not fix that. It will only let you hit something while repeating the same mistake louder.
Use improvised targets if you need distance feedback and can keep the contact light. A padded chair, armchair, or cushion setup is enough to check whether the shin lands where your shadow work says it should. It is not enough for full-power rounds, and that boundary is what keeps it useful.
Consider a freestanding bag only after the room passes the tape test, the floor has a protection plan, and the noise will not create a household or lease problem. The right home setup is the one you can train on repeatedly without apologizing after every round.
Correct MMA leg-kick technique can be learned at home, but the order matters: shadow mechanics first, controlled solo checks second, light target contact third, and a bag only when the space can actually handle impact.
References
- The Beginner’s Guide To Leg Kicks In MMA — Evolve MMA
- Essential Solo Muay Thai Drills For All Levels — Evolve MMA
- 4 Week Kickboxing At Home Workout Plan — InFighting
- Combat Sport-Related Lower Limb Injuries: A Narrative Review — Healthcare, 2026
- The Art of Low Kicks — GLORY Kickboxing
- The Dos And Don’ts Of Checking Leg Kicks In Muay Thai — Muay Thai Guy
- 5 Bodyweight Exercises To Increase Kicking Power For Muay Thai — Evolve MMA
- Punching Bags for Small Spaces — MMA Warehouse
- Hardening the body: the science behind martial arts conditioning — The Conversation
What a small equipment investment adds
We don't have a build tagged to this exact tier yet. Browse all builds.
How often should you repeat this?
See our recovery and rest reference for citation-anchored rest-interval guidance.
Spot something off?
Tell us if a movement, tier assumption, or duration didn't match your experience.