Most bad home gym flooring purchases start with the wrong question. People ask whether rubber is better than foam, then end up putting soft puzzle tiles under a squat rack or buying heavy stall mats for a room where they only stretch and use resistance bands. The better question is simpler and less glamorous: how much impact, load, moisture, odor, noise, and installation hassle can this room actually tolerate?
For home gym flooring, thickness does more of the real work than the product name. Material matters, format matters, and budget definitely matters, but the floor fails when it is too thin for the workout. A light cardio corner, a mixed dumbbell room, a garage rack, and a barbell drop zone should not be shopping from the same mental shelf.

Start with workout load, not flooring material
Caine Wilkes, an Olympian cited by Garage Gym Reviews, gives a useful thickness path: 6mm for light cardio, 8mm or about 5/16 inch as the best all-around choice for mixed cardio and strength, 3/8 inch for heavy strength training, 1/2 inch as the minimum for frequent barbell drops, and 3/4 inch for dedicated drop zones.[1] That is the decision frame I would use before comparing brands, colors, edge styles, or sale prices.
| Primary use | Practical thickness target | What that usually means |
|---|---|---|
| Stretching, mobility, yoga, light bodyweight work | Foam or thin low-load surface can be enough | Comfort matters more than impact protection |
| Light cardio | Around 6mm rubber | Works for movement without heavy dropped load |
| Mixed dumbbells, kettlebells, cardio, machines | 8mm rubber | The most practical default for many home gyms |
| Heavy strength training | 3/8 inch rubber or thicker | Better resistance to compression and point load |
| Frequent barbell drops | At least 1/2 inch, with thicker protection where drops happen | The drop area should drive the design |
| Dedicated drop zone | 3/4 inch | Often handled with stall mats or a platform-style zone |
The important part is not that every room needs the thickest floor. It is that the heaviest, most violent thing you do in the room should set the minimum protection for that specific area. If the only dropped object is an occasional dumbbell set down a little too quickly, 8mm rubber may be perfectly sensible. If bumper plates are hitting the floor every session, treating the entire room as if it were a yoga studio is how you buy the same floor twice.

Why 8mm rubber is the default for mixed home gyms
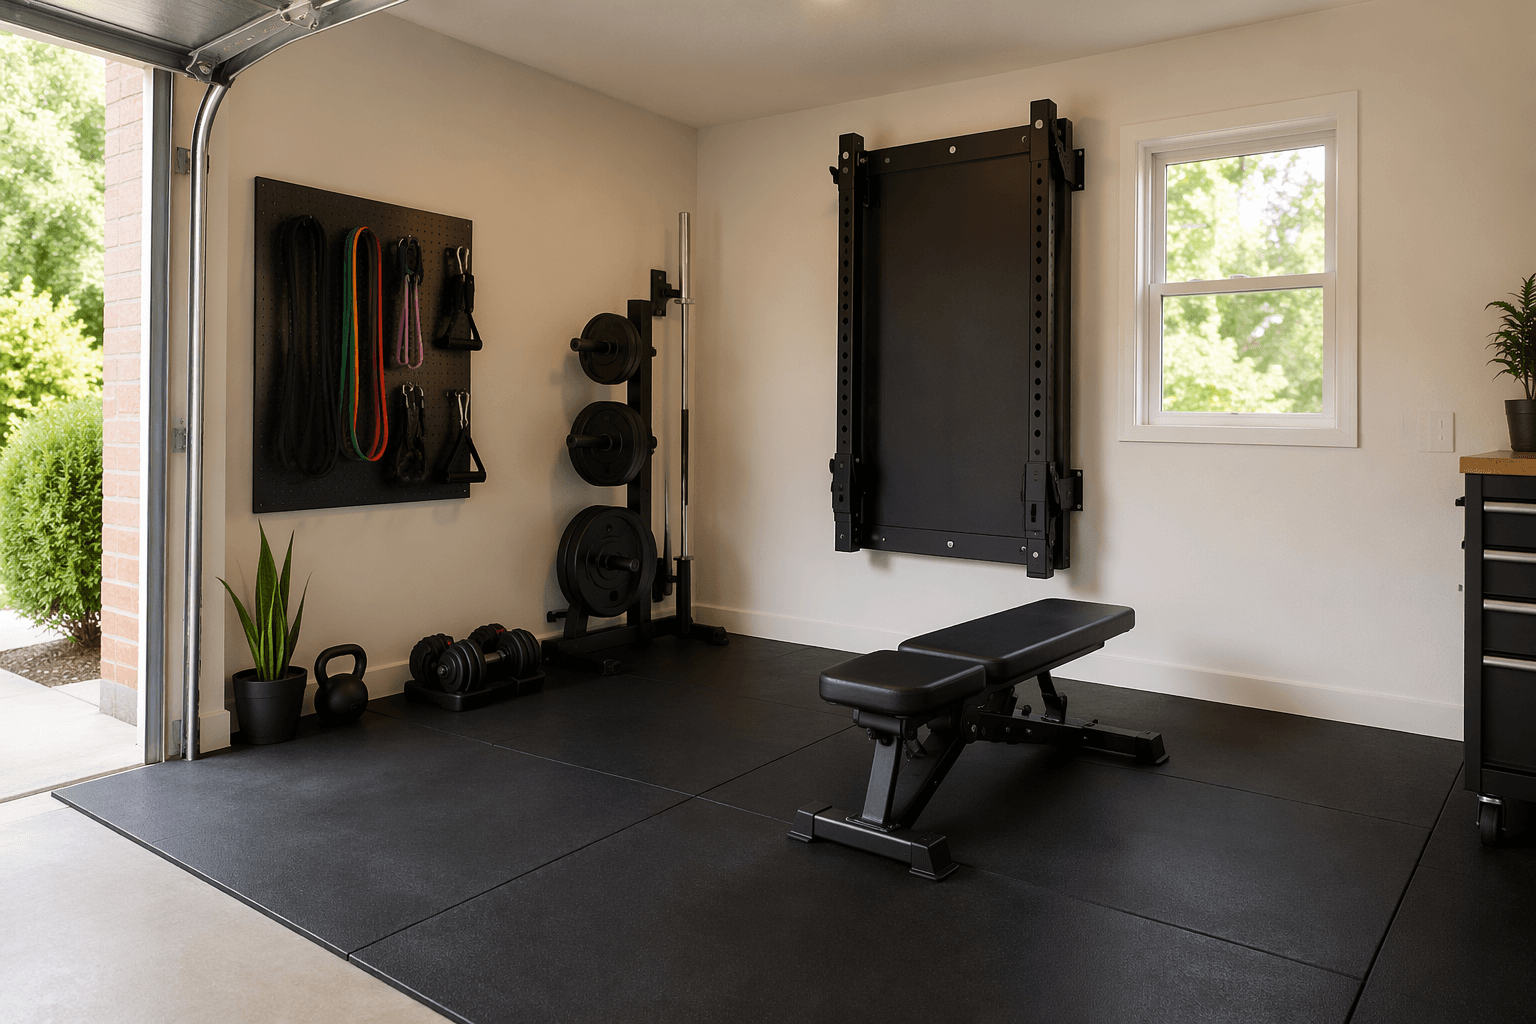
A mixed home gym usually has competing demands. You want enough firmness to lift on, enough grip for conditioning, enough protection for dumbbells, and enough durability that a bench, treadmill, or rack does not chew through the surface. That is why 8mm rubber keeps showing up as the boring-but-right answer for many spare rooms, basements, and compact garage setups.
It is thick enough to be more than cosmetic protection, but not so thick that you pay to treat a whole room like a weightlifting platform. It also avoids one of the common beginner traps: choosing foam because it looks simple. Foam can feel nice under knees and hands, but under loaded equipment it compresses. IRON COMPANY’s buyer guidance warns against foam tiles under heavy weights because they can permanently compress and create an unstable lifting surface.[2] That instability matters when your foot position, bench angle, or rack placement depends on the floor staying flat.
Foam still has a narrow valid lane. If the space is temporary, low-load, and mostly for stretching, mobility, Pilates-style work, or light bodyweight training, foam can be a cheap comfort layer. The mistake is asking it to behave like rubber when a loaded dumbbell, rack foot, or adjustable bench concentrates force into one spot.
Heavy lifting changes the flooring problem
Once heavy strength training enters the room, flooring stops being only a comfort purchase. Rack feet, bench legs, loaded plates, and repeated foot pressure all create point loads. The concern is not just whether the top surface scuffs. It is whether the floor underneath is protected, whether the lifting surface stays stable, and whether noise and vibration travel into the rest of the building.
For heavy strength work without regular drops, 3/8 inch rubber is a more appropriate baseline than thin rubber or foam.[1] For frequent barbell drops, the guidance moves to at least 1/2 inch, and for a dedicated drop zone it moves to 3/4 inch.[1] That does not always mean the whole room needs 3/4-inch flooring. In a small room, a thick lifting zone paired with more moderate flooring elsewhere is often smarter than spending the entire budget on overbuilt coverage under storage shelves and walkways.
This is where stall mats earn their reputation. A common 4-by-6-foot stall mat at 3/4 inch gives a lot of thickness for the money, which is why garage lifters keep using them even when purpose-made gym flooring looks cleaner. The trade-off is real: they are heavy, they have seams, they can need trimming, and they may smell strongly at first. That is not a deal-breaker in a ventilated garage. It can be a very different experience in a spare bedroom with one window.
Then let the room decide the format
After thickness, the next useful filter is room shape and location. Rolls, interlocking tiles, and stall mats can all be rubber, but they solve different problems.

Rubber rolls for large, rectangular rooms
Rubber rolls make sense when the room is mostly rectangular and you want fewer seams. Living.Fit identifies rubber rolls as a strong fit for larger rectangular rooms, while interlocking rubber tiles are better for irregular layouts and renters because they do not require adhesive.[3] Rolls are especially appealing in basements, garages, and dedicated rooms where you are covering a broad area and do not expect to pull the floor apart often.
The annoying part is installation. Rolls are awkward to move, need careful cutting around walls and posts, and usually need seam tape if you want the edges to behave. REP Fitness lists seam tape, typically around $20 to $40, and a utility knife among the practical installation requirements for rolled flooring.[4] That is not complicated work, but it is work. Measure twice around door casing, baseboards, floor drains, and rack placement before you start slicing.
Interlocking rubber tiles for renters and awkward layouts
Interlocking rubber tiles cost more, but they solve problems that rolls and stall mats do not. If you are renting, working around closets, covering a strange corner, or expecting to move the gym later, the ability to click pieces together without adhesive has real value. A floor you can disassemble is not just convenient; it can be the difference between taking your gym with you and leaving behind a torn-up compromise.
Tiles also make spot replacement easier. If one section gets damaged, stained, or cut badly around a column, you are not necessarily replacing a full roll. That flexibility is part of the price. For a permanent square garage, it may be unnecessary. For an apartment or odd spare room, it can be exactly what keeps the project from becoming a weekend of regret.
Stall mats for budget-heavy garage lifting
Stall mats are the value play when the room is a garage or utility space and strength training is the priority. The Final Floor’s 2026 pricing anchors put Tractor Supply stall mats at about $2.38 per square foot, with a 4-by-6-foot mat around $57, making a 10-by-10-foot room roughly $238 in mat cost before any small accessories or waste adjustments.[5] That is a lot of 3/4-inch material for the money.
The catch is that stall mats behave like agricultural rubber because that is essentially what they are. They are heavy enough to stay loose-laid in many setups, but trimming them takes patience and a sharp blade; REP Fitness notes that stall mats may need trimming with a razor knife and may need tape at seams.[4] If the garage floor slopes, has cracks, or gets damp at the edges, the seams and underside deserve more attention than the product listing usually gives them.
Foam for light, temporary, low-load rooms
Foam tiles are not useless. They are just overassigned. In a kids’ movement corner, a stretching space, a temporary beginner setup, or a room where comfort matters more than load, foam can be perfectly reasonable. It is light, cheap, easy to cut, and easy to pull up.
Do not put a power rack on it and expect it to act like gym rubber. Do not drop dumbbells on it and act surprised when the dents stay. Do not use it to solve apartment impact noise from heavy lifting. Foam is a comfort surface for low-load training, not a structural answer for strength equipment.
Budget looks different when you include lifespan
For a 10-by-10-foot room, the upfront numbers can make foam look like the obvious budget winner. The Final Floor’s 2026 cost breakdown places foam around $112 for that room size, stall mats around $238, rubber rolls around $224 to $300, and interlocking rubber tiles around $500 to $1,000.[5] Those are useful anchors, not exact quotes for your cart; shipping, retailer, region, waste, thresholds, tape, and cuts can move the final number.
| Flooring choice | Approximate 10×10 room cost | Reported lifespan | Budget interpretation |
|---|---|---|---|
| Foam tiles | About $112 | 2–5 years | Cheapest upfront, weak under load |
| Stall mats | About $238 | 10–20 years | Best value-per-thickness for garage lifting |
| Rubber rolls | $224–$300 | 15–20 years | Strong long-term value for rectangular rooms |
| Interlocking rubber tiles | $500–$1,000 | Varies by product, generally bought for flexibility | Higher upfront cost, easier to move or replace in sections |
The lifespan numbers change the story. The same source reports rubber lasting 15 to 20 years, stall mats 10 to 20 years, and foam 2 to 5 years.[5] Over a decade, the cheap foam floor may need to be replaced more than once, especially if it is asked to support loads it was never meant to handle. Rubber and stall mats cost more on day one, but they are often cheaper than replacing a dented, shifting floor after the room is already full of equipment.
Indoor rooms need an odor plan
Rubber smell is not a tiny footnote if the gym is in a bedroom, basement office, or apartment. Recycled rubber tends to off-gas more than virgin rubber, and Garage Gym Reviews and Living.Fit note that the odor commonly dissipates in a few days to 2 weeks with ventilation.[1][3] In a garage with the door open, that may be mildly annoying. In a basement with poor airflow, it can decide whether the room is usable during the first week.
This does not mean rubber is unsafe by default or that every recycled rubber product will be intolerable. It means you should not install a full room of fresh rubber the night before you plan to work there, sleep nearby, or host guests. Unbox it early if possible, ventilate aggressively, and be more cautious with thick recycled rubber in enclosed rooms.
Noise deserves the same practical treatment. Dense rubber helps reduce impact and vibration, and Living.Fit references a 2025 impact-noise study supporting rubber’s density advantage for sound dampening.[3] That does not make any floor magic. In an upstairs apartment, a dropped barbell is still a building problem, not just a mat problem. If you are training heavy above someone else, flooring should be part of a larger plan that includes load selection, controlled eccentrics, platforms or pads where appropriate, and a realistic sense of what your lease and neighbors can tolerate.
A practical installation check before you buy
Before ordering, mark the actual training footprint. Include rack depth, bench travel, dumbbell storage, treadmill clearance, door swings, closet access, baseboards, floor vents, and any place where a mat edge could become a trip point. A 10-by-10 room is not always a 10-by-10 training surface once doors, trim, heaters, and storage are involved.
- For rolls: plan for cutting, seam tape, and awkward handling. They are best when you can cover a clean rectangle.
- For interlocking rubber tiles: check edge pieces and transition strips so the finished floor does not creep into a doorway.
- For stall mats: expect weight, smell, trimming, and visible seams. Dry-fit before taping anything.
- For foam: keep it away from rack feet, heavy benches, and dropped weights.
- For concrete garages and basements: check moisture before trapping it under rubber.
If your garage floor sweats, slopes toward a drain, or gets wet near the door, solve that before treating flooring as a finished surface. Rubber can protect the concrete from equipment, but it does not make moisture disappear. For that branch of the project, the related guide The Garage Gym Environmental Checklist: Temperature, Moisture, Flooring, and Electrical is the better next stop.
Choose by situation
For most mixed home gyms, choose 8mm rubber. It is the practical middle for dumbbells, machines, conditioning, and general strength work without turning the entire room into a drop platform.
For budget-heavy garage lifting, choose 3/4-inch stall mats if you can live with the weight, seams, trimming, and initial odor. The value-per-thickness is hard to beat.
For frequent drops, build a thicker drop zone instead of overbuilding every square foot. Protect the impact area first, then use more moderate flooring where you walk, store plates, or set accessories.
For renters, apartments, or odd rooms, interlocking rubber tiles can justify the higher price because they install without adhesive, adapt to awkward layouts, and can move with you. If your bigger concern is training heavy without upsetting neighbors or losing a deposit, read Your Compact Home Gym in an Apartment: Train Heavy Without Losing Your Deposit before buying the floor.
For light cardio, stretching, or temporary low-load use, foam is fine. Keep it in that lane.
If you are still unsure because the whole room plan feels unsettled, start with Compact Home Gym Buyer’s Guide: 8 Questions to Answer Before Buying a Single Piece of Gear. If you already chose a direction and want to avoid the usual expensive surprises, go to Home Gym Flooring Mistakes That Cost You Money, Space, and Peace With Your Neighbors. If the floor budget is competing with racks, benches, cardio, and storage, use What Your Home Fitness Budget ($50 to $1,000+) Actually Buys to decide what deserves the next dollar.
References
- How Thick Should Gym Flooring Be, According to Home Gym Experts (2026) — Garage Gym Reviews, 2026.
- Home Gym Flooring: The Complete 2025 Buyer’s Guide — IRON COMPANY, 2025.
- Rubber vs Foam Gym Flooring — Living.Fit.
- How to Install and Maintain Gym Flooring — REP Fitness.
- How Much Does a Gym Floor Really Cost? A Square Foot Breakdown (2026) — The Final Floor, 2026.

Comments
Join the discussion with an anonymous comment.