
The No-Equipment Zone 2 Cardio Routine Beginners Need
Learn what Zone 2 cardio is, why it matters for building aerobic fitness, and how to do it at home with zero equipment—using six bodyweight exercises calibrated to keep you in the right intensity zone without a heart rate monitor.
- Duration
- 20 min
You can do Zone 2 cardio at home as a beginner with no treadmill, bike, rower, or heart rate monitor. The part that takes practice is not working harder. It is going slowly enough that you can keep moving for 20 minutes, speak in full sentences, and finish feeling like you could have continued.
That is the useful version of Zone 2 for a living room workout. Not a perfect number. Not a lab test. A repeatable pace you can return to tomorrow without dreading it.
The Target Feeling Comes Before the Formula
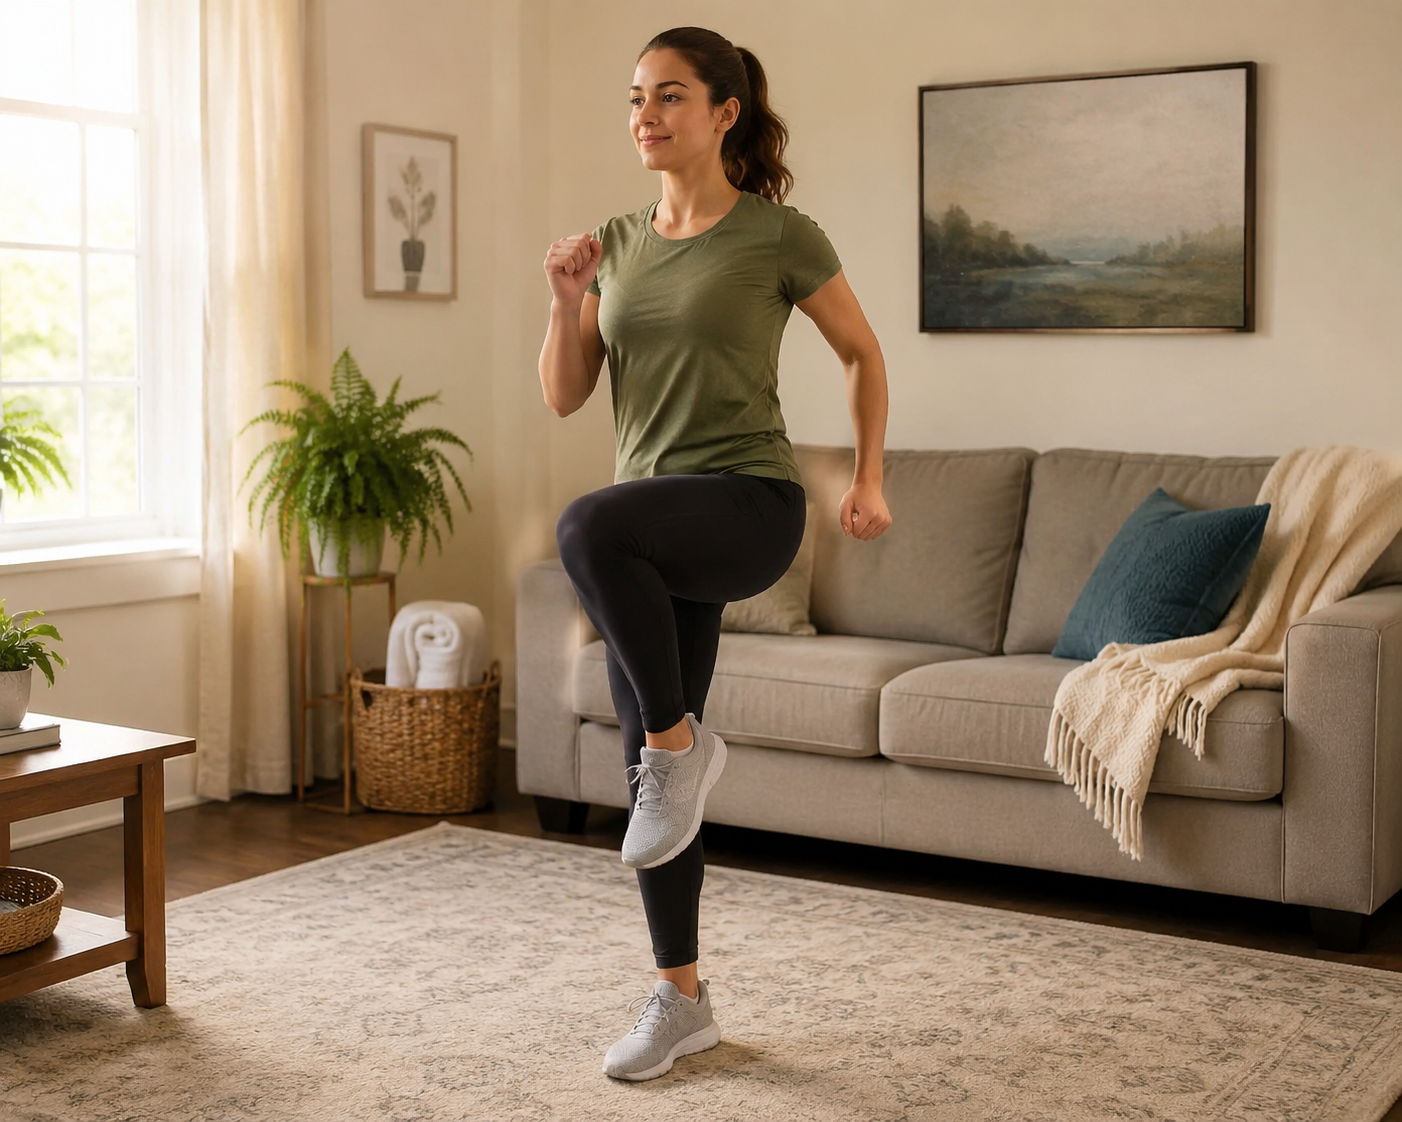
For this workout, your main control system is the talk test: you should be able to speak in full sentences without gasping. You are breathing more than you would while sitting still, but you are not fighting for air. On a 1-to-10 effort scale, that usually lands around RPE 3 to 4: easy to moderate, steady, and slightly warm.
The formal definition is helpful, but it should not boss the session around. Zone 2 is commonly described as about 60% to 70% of estimated maximum heart rate, often using the rough 220-minus-age estimate, and it is associated with aerobic work where lactate remains relatively low and fat oxidation is emphasized.[1][2]
That formula is a blunt tool. The 220-minus-age estimate can be off by roughly 10 to 12 beats per minute, which is more than enough to make a beginner think they are doing the workout wrong when they are simply using an imprecise estimate.[1][2] If your watch says one thing and your body says you can barely talk, believe your breathing first.
A useful first-month rule: if you are choosing between a slightly imperfect Zone 2 session and quitting because the numbers feel confusing, do the session. Precision can come later. Consistency has to come first.
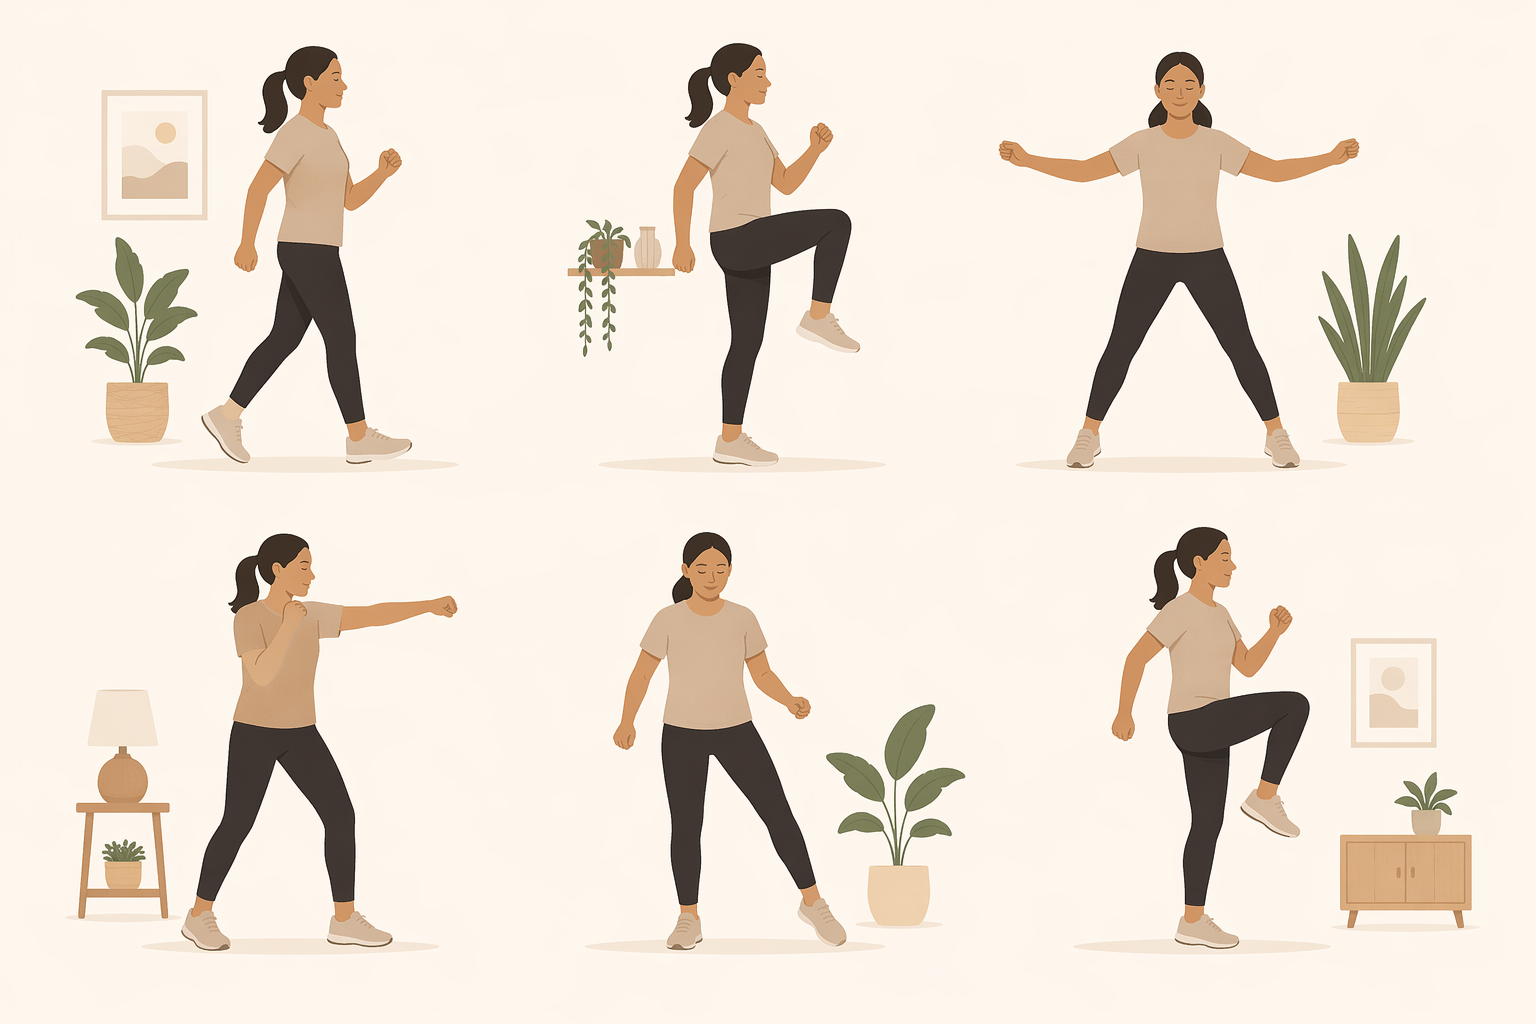
A 20-Minute No-Equipment Zone 2 Routine
Start with 20 minutes, three times per week. That is a modest enough dose to repeat, and it gives you enough time to learn what steady, conversational cardio feels like before chasing longer sessions.[3]
| Time | Movement | Zone 2 instruction |
|---|---|---|
| 0:00-3:00 | Brisk walking in place | Ease in; arms relaxed, feet light |
| 3:00-6:00 | Marching in place | Lift knees only as high as you can while talking |
| 6:00-9:00 | Slow jumping jacks | Use 40-50% speed or half range of motion |
| 9:00-12:00 | Light shadow boxing | Loose punches, no power shots |
| 12:00-15:00 | Step taps | Side to side, steady and quiet |
| 15:00-18:00 | Slow high knees | Controlled knee lifts, not a sprint drill |
| 18:00-20:00 | Walking in place | Settle your breathing but keep moving |
This routine uses the same basic idea found in beginner bodyweight Zone 2 templates: simple movements, continuous motion, and enough variety to avoid staring at the clock.[3][4] The important piece is intensity control. Some bodyweight combinations can turn into interval training quickly, especially if they add kicks, double punches, or large arm swings. That is not a failure; it just means the movement needs to be made smaller, slower, or simpler.
1. Brisk Walking in Place
Walk in place as if you are trying to stay warm while waiting for someone, not as if you are racing through an airport. Keep your feet close to the floor. Let your arms swing naturally. Your shoulders should stay down, your jaw should stay unclenched, and your steps should feel rhythmic rather than punchy.
To make it easier, shorten the step and soften the arm swing. To make it slightly harder, pick up the cadence while keeping the same relaxed posture. The warning sign that you have drifted too high is usually the arms: once they start pumping aggressively, your breathing often follows.
If walking in place feels too easy, do not immediately jump to burpees or fast jacks. Add just enough speed that you notice your breathing, then check whether you can still say a full sentence. That small adjustment is the difference between cardio exercise and the Zone 2 version of cardio exercise.
2. Marching in Place
Marching raises the demand slightly because the knees come higher. Think low, steady parade march. Lift one knee, place the foot down quietly, then lift the other. Keep the torso tall and avoid leaning back to yank the knees upward.
The beginner mistake is turning marching into high-knee running. You do not need that here. If your breathing jumps within 20 or 30 seconds, lower the knees and slow the tempo. If you can sing comfortably, lift the knees a little more or add a gentle arm swing.
A good march has a boring quality to it. That is not a problem. Zone 2 often feels almost too easy in the first few minutes, then quietly becomes work around the middle of the session.
3. Slow Jumping Jacks
Jumping jacks are where many beginners accidentally leave Zone 2. The standard gym-class version is often too fast and too bouncy for this purpose. Use about 40% to 50% of your normal speed, and reduce the range of motion if needed.[3]
The gentlest version is a step jack: step one foot out while the arms lift partway, bring it back, then switch sides. The feet do not need to leave the floor. The arms do not need to clap overhead. If raising both arms spikes your breathing, lift them only to chest or shoulder height.
Use the sentence test during this movement, not after it. Say something ordinary out loud, such as, “I could keep doing this for a while.” If that sentence comes out chopped into pieces, you are doing a conditioning drill, not beginner Zone 2. Slow the feet first, then reduce the arms.
4. Light Shadow Boxing
Shadow boxing can be excellent at home because it uses little space and keeps the upper body involved. The Zone 2 version is light and loose. Stand with soft knees, shift your weight gently, and throw easy jabs and crosses at about conversational speed.
Do not punch as if you are trying to win a round. No hard hooks, no explosive slips, no rapid combinations. Power changes the workout quickly. The goal is continuous movement, not impact or aggression.
If your shoulders tense up, open and close your hands between punches. If your breathing climbs, stop the footwork and keep only the arms moving. If it still feels too intense, switch to walking in place for 30 seconds and then return with smaller punches.
5. Step Taps
Step taps are one of the safest-feeling ways to keep a beginner in the right range. Step one foot to the side, tap the other foot in, then reverse. Keep the step narrow at first. Your head should not bob dramatically, and your feet should land quietly.
To increase the work, widen the step slightly or add a gentle reach with the arms. To decrease it, remove the arms and make the step smaller. If you are in an apartment, this is also one of the easiest movements to keep low-impact and neighbor-friendly.
This is a good movement to return to whenever another exercise gets away from you. Instead of stopping completely, step tap until your breathing comes back to full-sentence pace.
6. Slow High Knees
High knees have a reputation as a hard interval move, so the word “slow” matters. Lift one knee toward hip height only if you can do it without bracing, bouncing, or holding your breath. Place the foot down before lifting the other knee. This should look more like controlled marching than sprint practice.
If hip-height knees are too much, aim lower. If the knee lift feels fine but your breathing rises too fast, pause the arms at your sides. If you feel your face tightening or your steps getting loud, you have probably crossed the line.
Slow high knees are useful near the end of the routine because they show you whether your pace has been honest. A movement that felt easy at minute two may feel different at minute sixteen. Adjust there, not after you are already gasping.
How to Know You Are Too High, Too Low, or Just Right
| What you notice | What it probably means | What to do |
|---|---|---|
| You can speak full sentences, but singing would be annoying | You are likely close to the right beginner Zone 2 effort | Keep the pace steady |
| You can only say a few words at a time | You are probably above Zone 2 | Slow your feet, lower your arms, or switch to step taps |
| You are barely breathing harder than at rest | You may be below the target effort | Increase cadence slightly or add gentle arm movement |
| You feel warm and steady after 8-12 minutes | The session is settling into aerobic work | Stay patient; do not chase a harder feeling |
| You want to stop because it feels frantic | The movement is too intense or too complex | Simplify the exercise before quitting |
Beginners often overshoot because most home cardio advice rewards visible effort: higher knees, faster arms, bigger jumps, more sweat. Zone 2 asks for the opposite skill. You are trying to find the highest easy pace you can repeat, not the hardest pace you can tolerate.
This is why a heart rate monitor is optional, not required. A tracker can teach you patterns over time, especially if you eventually want to understand the full five-zone model in a heart rate zone training guide. But for the first few weeks, the talk test is often clearer than a bouncing wrist reading during arm-heavy movements.
Why This Counts Even Without Equipment
Zone 2 is not defined by the machine. It is defined by intensity. A bike can be Zone 2, but so can walking in place if the effort lands in the right range. A treadmill can be too hard, and a living room march can be exactly right.
The reason people care about this zone is that it supports the foundations of aerobic fitness: better use of oxygen, improved fat oxidation, more capillary support, and changes in the mitochondria that help muscles produce energy during sustained work.[2] For a beginner, the practical benefit is simpler: stairs, errands, long walks, and future workouts tend to feel less punishing when the aerobic base improves.
It is still worth keeping the claims modest. A 2025 Sports Medicine review discussed in the exercise physiology literature does not strongly support the idea that Zone 2 is uniquely superior to higher intensities for mitochondrial adaptations.[5] The better beginner argument is not that Zone 2 is magic. It is that it is repeatable, low-friction, and easier to recover from than hard intervals.
How to Progress Without Turning It Into HIIT
Progress this routine by adding time before adding intensity. If 20 minutes feels manageable for a full week, move to 22 or 25 minutes. If that still feels steady, add a fourth weekly session before making the movements bigger.
- Weeks 1-2: 20 minutes, three times per week, using the talk test throughout.
- Weeks 3-4: Add 2-5 minutes to one or two sessions if recovery feels easy.
- After that: Work toward longer sessions or an additional weekly session, not faster jacks or harder punches.
- Any week that feels unusually tiring: Return to the 20-minute version and keep the habit intact.
A common public-health benchmark is 150 minutes per week of moderate-intensity activity. Five 30-minute sessions or three 50-minute sessions can get you there, but a beginner does not need to start there. The first job is to become the kind of person who can begin, continue, and stop before the workout turns into a test.
If you eventually want guidance on pacing, reminders, or simple workout timers, a free exercise app by training style can help. If you decide later that you want a watch, compare the features that actually matter for home workouts before buying one, then learn how to use smartwatch data for fitness results without letting it override your body.
When to Add Gear, and When Not To
You do not need equipment for this routine. A clear patch of floor, supportive shoes if you prefer them, and a timer are enough. If your home setup grows later, let the reason be convenience rather than guilt.
A walking pad, stationary bike, or basic step can make Zone 2 easier to repeat because the movement is more uniform. They are not prerequisites. Before buying anything, it is reasonable to think through your budget, space, and goal with a first-time home gym decision framework or compare which type of home gym actually fits your living situation.
The same goes for structured plans. If bodyweight cardio starts to feel too repetitive, a tiered home gym workout plan can help you add strength work or equipment gradually. But today’s workout does not need a shopping list.
The Beginner Standard for a Good Session
A successful beginner Zone 2 session is not the one with the highest calorie number or the sweatiest shirt. It is the one where you keep moving, speak in full sentences, adjust before you are gasping, and finish with the honest feeling that you could continue for a little longer.
If marching in place beside the couch gets you there, it counts.
References
- Zone 2 Cardio, Cleveland Clinic
- Zone 2 cardio: What is it and why is it trending online?, Mayo Clinic Press
- Zone 2 Cardio at Home, FitCraft, 2026
- Beginner Zone 2 Cardio Workout: Bodyweight, No Equipment, 20 Minutes, Sunny Health & Fitness
- Zone 2 Training: Why It’s So Hard + How to Actually Make It Work, Doc Lyss Fitness
What a small equipment investment adds
We don't have a build tagged to this exact tier yet. Browse all builds.
How often should you repeat this?
How Whoop and Oura Ring track recovery for home workouts
For home exercisers deciding between WHOOP and Oura Ring, the better sleep and recovery tracker depends on training style: WHOOP's strength-aware tracking fits dumbbell and grip-heavy sessions, while Oura's sleep-first scoring suits yoga and indoor cycling. The verdict hinges on how each builds its daily recovery score, their home-workout tracking gaps, and who pays for hardware versus subscription.
Spot something off?
Tell us if a movement, tier assumption, or duration didn't match your experience.