
If your inner elbow is sore and you suspect a UCL sprain or partial tear, the safest first answer is not a harder exercise. It is eligibility. This at-home plan is for a diagnosed or strongly suspected grade 1–2 UCL sprain or partial tear without elbow instability. It is not a home substitute for a complete tear, a high-grade partial tear, or symptoms that suggest nerve involvement or loss of function.
Get medical evaluation before starting or continuing home rehab if the injury came with an audible pop, numbness or tingling into the ring or pinky finger, a feeling that the elbow is loose or unstable, inability to make a fist, pain at rest, or worsening pain after light daily use. Those are not “work through it” symptoms. They change the decision from home progression to clinical assessment.

For low-grade injuries, recovery is usually measured in phases, not in bravery. Mass General Brigham describes mild UCL tears as healing in a few weeks to 2 months, while Rothman Orthopaedics describes a structured non-surgical UCL program as taking about 3–4 months.[1][2] Those ranges are not a contradiction. A mild sprain that settles quickly is not the same thing as a partial tear that needs a full loading progression before throwing, overhead work, or repetitive gripping is safe again.
The four-stage flow
| Stage | Main job | What belongs here | Gate before moving on |
|---|---|---|---|
| 1. Protected motion | Calm the elbow and restore easy range without loading the ligament | Pain-free elbow bending and straightening, forearm rotation without resistance, swelling control, rest from throwing and heavy gripping | Daily use and protected motion do not increase inner-elbow pain during or the next day |
| 2. Isometrics | Wake up supporting muscles without moving the joint under load | Gentle wrist flexion, wrist extension, pronation, supination, and grip isometrics | All isometrics are pain-free and do not cause next-day soreness at the UCL |
| 3. Progressive strengthening | Build wrist, forearm, grip, shoulder, and scapular capacity | Light wrist curls, wrist extension, pronation/supination, grip work, band external rotation, scapular retractions, prone Y/T/W | Strength work feels controlled, pain-free, and repeatable before volume or resistance increases |
| 4. Return-to-activity loading | Reintroduce the real demand gradually | Work-simulation, overhead progression, interval throwing only when appropriate, later plyometric or sport-specific loading | No instability, no nerve symptoms, no pain during the session, and no symptom flare afterward |
The rule is simple, and it is also the part people skip: you advance because the elbow tolerated the current phase, not because a date arrived. Pain-free means during the exercise, after the exercise, and the next day. If the inside of the elbow complains afterward, that is useful information, not a challenge.
Stage 1: protected motion before resistance
The first stage is deliberately boring. The ligament has been irritated or partially injured, and the goal is to keep the elbow from stiffening while you stop feeding it valgus stress, heavy gripping, and “let me just see if I can throw” tests.
For a suspected grade 1–2 UCL injury, this usually means no throwing, no heavy overhead lifting, no aggressive push-ups, no loaded carries that make you clamp down hard through the hand, and no resistance exercises for the wrist or forearm until protected motion is comfortable. Rothman describes non-operative care for partial UCL tears as a structured program that progresses through phases, rather than an immediate strengthening plan.[2]
- Elbow bend and straighten: move slowly through a comfortable range, stopping before sharp inner-elbow pain.
- Forearm turn: with the elbow bent near your side, rotate palm up and palm down without holding weight.
- Hand open and close: gently make a fist and relax it, as long as making a fist is fully possible and not painful.
- Shoulder posture resets: sit or stand tall and lightly draw the shoulder blades back without pinching hard.
Do not add a soup can here just because the motion feels too easy. Easy is the point. The early job is to see whether the elbow tolerates motion without the ligament being asked to resist load.
If elbow extension gets stubbornly stiff, the post-surgical rehabilitation literature describes low-load, long-duration stretching as 10–15 minutes at a time, 4 times daily, for about 60 minutes total per day.[3] That does not mean forcing the elbow flat on the table. It means a gentle, sustained stretch that stays below a pain response. If this kind of stiffness follows a non-surgical partial tear, it is worth having a clinician confirm that the stretch direction and dosage are appropriate for your elbow.
Safe to advance from protected motion
Move toward isometrics only when daily tasks are settling, protected motion is pain-free, and the elbow does not feel worse later that day or the next morning. If symptoms are spreading into the hand, if the elbow feels loose, or if resting pain is present, stop the home progression and get assessed.
Stage 2: isometrics, the bridge between rest and strengthening
Isometrics are muscle contractions without visible joint movement. In the Wilk and Ellenbecker rehabilitation framework summarized in the UCL rehabilitation literature, isometrics come before light resistance and progressive isotonic work; that framework is described for post-surgical rehab, but the exercise categories are useful for organizing non-surgical recovery too.[3] The timeline should be adjusted to the injury and clinician guidance, not copied from a surgical protocol.
This phase matters because doing nothing for too long can leave the wrist, forearm, grip, and shoulder underprepared, while adding moving resistance too soon can irritate the healing ligament. Isometrics give you a controlled middle step: the muscles work, but the elbow is not being repeatedly moved under load.
- Wrist flexion isometric: rest the forearm on a table, palm up. Use the other hand to resist as you gently try to bend the wrist upward. Hold without pain, then relax.
- Wrist extension isometric: turn the palm down. Resist with the other hand as you gently try to lift the back of the hand.
- Pronation isometric: with the elbow at your side, resist as you gently try to turn the palm downward.
- Supination isometric: resist as you gently try to turn the palm upward.
- Grip isometric: squeeze a soft towel or ball lightly enough that the inner elbow stays quiet.
Keep the effort modest. A home UCL plan should not turn isometrics into a max-strength contest. If you have to brace your shoulder, clench your jaw, or hold your breath, the effort is probably too high for this stage.
The elbow should feel the same or better after these drills. A mild working sensation in the forearm is different from a sharp pull at the inner elbow. A next-day flare tells you the dose was too much or the elbow was not ready.
Safe to advance from isometrics
Advance when wrist flexion, wrist extension, pronation, supination, and light grip isometrics are all pain-free and repeatable, with no inner-elbow soreness afterward. Do not move into resistance because ordinary daily pain has faded; ordinary daily use does not prove the elbow is ready for loaded forearm work.
Why the forearm work is in the plan
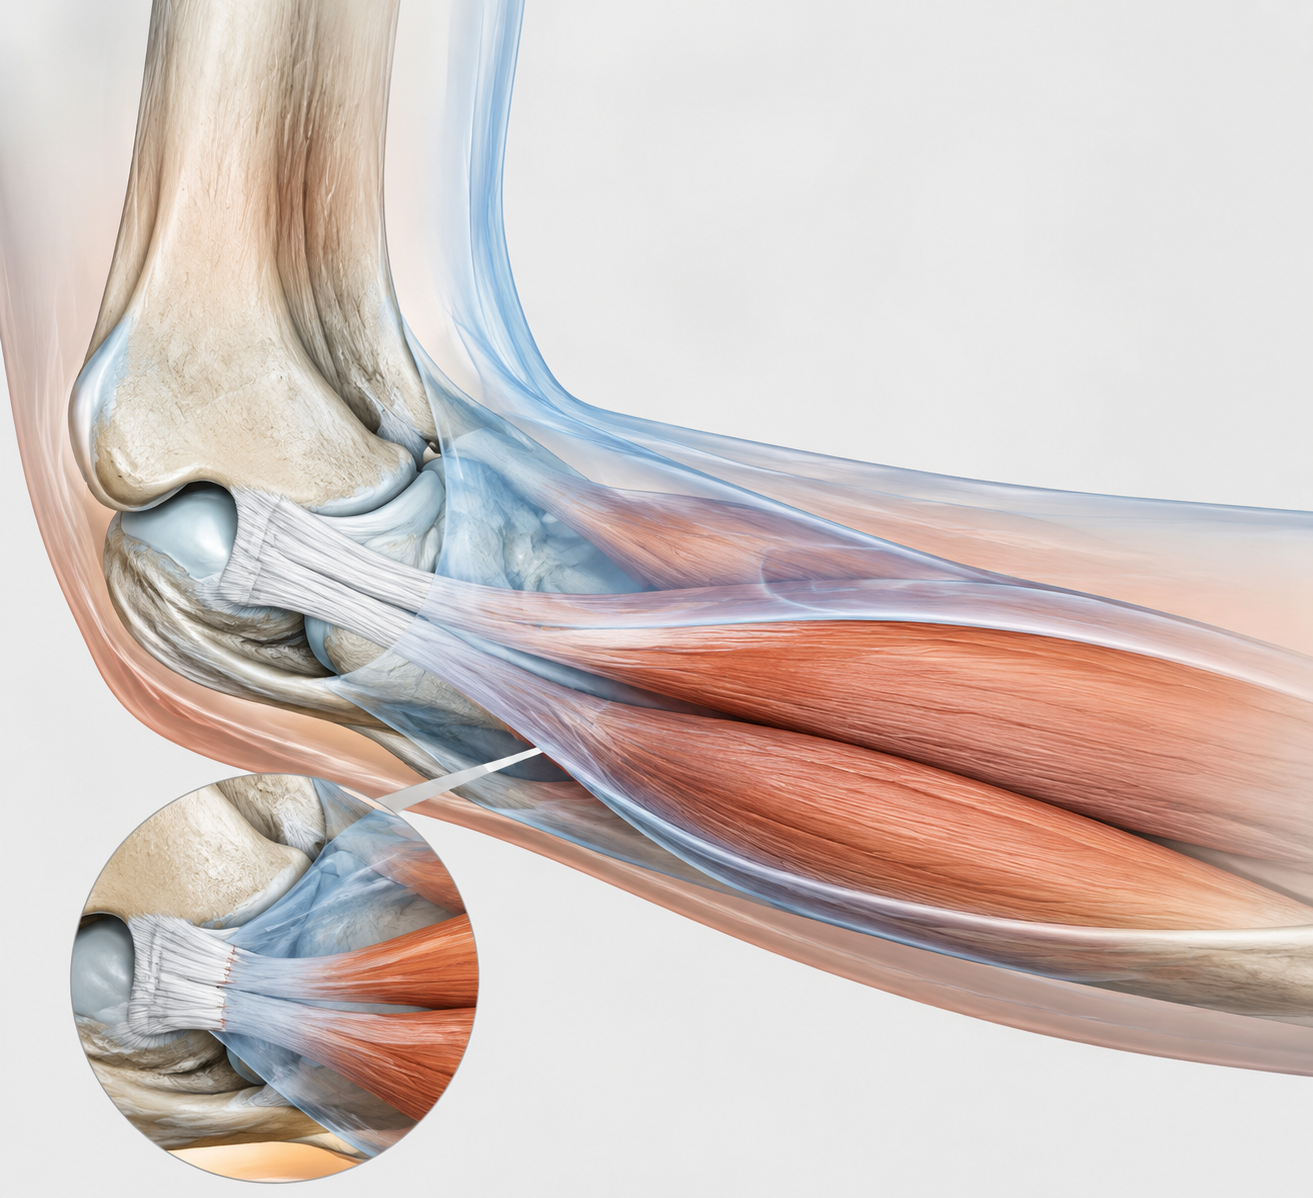
The UCL sits on the inner side of the elbow and helps resist valgus stress, the opening force that challenges the inside of the joint during throwing and other loaded arm positions. The forearm flexor-pronator muscles are not decoration around it. Davidson and colleagues’ functional anatomy work, discussed in a UCL rehabilitation review, found that the flexor carpi ulnaris and flexor digitorum superficialis overlay the anterior bundle of the UCL and can provide dynamic valgus stabilization.[3]
That is a good reason to train them. It is not a promise that stronger forearm muscles “fix” a torn ligament. The anatomical relationship is real, but the practical conclusion should stay narrow: a better-prepared flexor-pronator mass may help share stress that would otherwise land more directly on the ligament.
There is also a sport-specific clue here. Professional baseball pitchers have been reported to average 15–35% greater wrist flexion and forearm pronation strength on the dominant arm, which is useful context for why wrist flexion and pronation are treated as core pieces of elbow rehab rather than accessories.[3] That finding does not mean every injured elbow should chase pitcher-level strength. It means the wrist and forearm are part of the load system.
Stage 3: progressive strengthening without skipping the gates
This is where the soup can finally earns a place on the table. Victory Physical Therapy’s home protocol describes wrist flexion and extension, pronation and supination, and grip strengthening, including the use of a household item such as a 1 lb soup can for light loading.[5] Start lighter than your ego wants. The first goal is clean tolerance, not fatigue.
- Wrist flexion: forearm supported, palm up, curl a very light weight through a comfortable range, then lower with control.
- Wrist extension: forearm supported, palm down, lift the back of the hand gently, then lower without dropping.
- Pronation and supination: hold a light object with the elbow near your side and rotate palm down and palm up through a small, controlled range.
- Grip strengthening: squeeze a soft ball or towel at a level that does not reproduce inner-elbow pain.
- Eccentric emphasis later: once basic reps are easy, spend more time on the lowering phase of wrist flexion and extension rather than jumping quickly to heavier load.
Choose PT’s guide notes that eccentric training for the wrist flexors and extensors improves muscle resilience, and its UCL injury guidance also emphasizes shoulder and scapular strengthening as part of rehabilitation.[4] Eccentrics belong later in strengthening, after light isotonic work is quiet. They are not the first thing to try when the elbow is still deciding whether a soup can was too much.
A sensible loading rule is to change one variable at a time: range, repetitions, sets, resistance, or speed. If you increase the weight and the number of repetitions on the same day, you will not know which part the elbow objected to. Keep the wrist neutral where the exercise calls for it, keep the shoulder relaxed, and stop before the movement becomes a whole-arm workaround.
What should make you back up
- Pain directly on the inner elbow during a rep
- Soreness that shows up later and lasts into the next day
- Tingling or numbness into the ring or pinky finger
- A sense that the elbow is shifting, loose, or unreliable
- Loss of grip confidence or new trouble making a fist
Backing up does not mean you failed rehab. It means the gate worked. Return to the last pain-free version for several sessions, or pause and get guidance if symptoms do not settle quickly.
Do not rehab the elbow as if it works alone
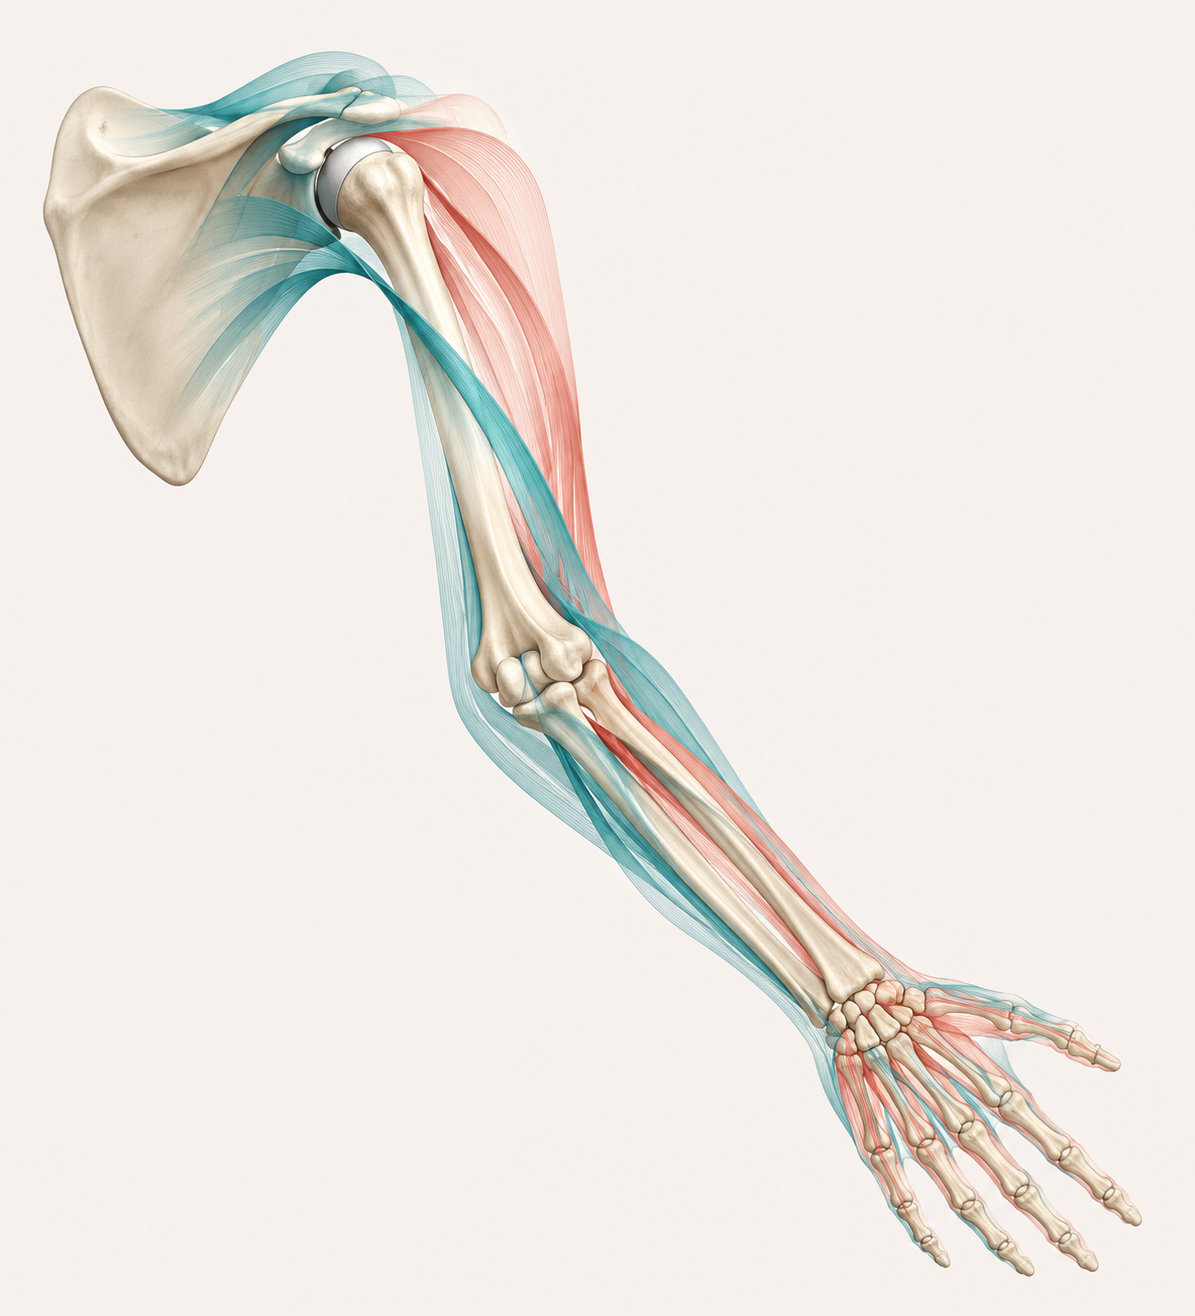
The shoulder blade and shoulder are part of UCL recovery because the elbow often pays for force the rest of the arm failed to manage. Choose PT identifies scapular stabilizer weakness as a risk factor for elbow injury, and the UCL rehabilitation literature includes shoulder and scapular strengthening in the broader progression.[4][3]
This matters for throwers, but not only throwers. A mechanic reaching overhead, a parent lifting a car seat, a lifter returning to pressing, and a recreational player making a casual throw all ask the elbow to accept force through a chain. If the shoulder blade is poorly controlled, the inner elbow can end up acting like the last brake in the system.
- Scapular retractions: gently draw the shoulder blades back and slightly down, then release without arching the low back.
- Band external rotation: keep the elbow near your side, rotate the forearm outward against a light band, and keep the wrist quiet.
- Prone Y: lying face down, lift the arm in a Y shape only as high as you can control without shrugging.
- Prone T: lift the arms out to the side with the shoulder blades guiding the motion rather than the neck.
- Prone W: bend the elbows and draw the shoulder blades together lightly, keeping the motion smooth.
These should not reproduce inner-elbow pain. If a shoulder drill makes you grip hard, lock the elbow, or feel strain at the UCL, modify the position or leave it out until a clinician can watch it. The point is to reduce elbow demand, not sneak elbow stress in through a shoulder exercise.
Stage 4: return-to-activity is a loading phase, not a celebration
Normal daily use, overhead work, and throwing are different loads. Being able to carry groceries or type without pain does not mean the UCL is ready for a hard throw, a long work shift overhead, or repeated gripping under fatigue.
For throwers, the boundary is especially strict. Cleveland Clinic’s discussion of partial UCL tears notes that even a low-grade 1A partial tear requires 6 weeks of rest from throwing followed by 6 weeks of return-to-throw progression.[6] A season, tournament, or job deadline does not make the ligament safer. It only makes the temptation louder.
Return-to-activity should start with the least provocative version of the task. For a non-thrower, that may mean light work simulation, short overhead reaches, or controlled carries before longer shifts or heavier loads. For a thrower, it means a formal interval throwing progression, preferably supervised, after strength and symptom gates have been met.
- Before return loading: protected motion, isometrics, forearm strengthening, grip work, and shoulder/scapular drills are all pain-free.
- During return loading: no sharp inner-elbow pain, no looseness, no nerve symptoms, and no need to change mechanics to protect the elbow.
- After return loading: no symptom increase later that day and no next-day UCL soreness.
- If symptoms return: drop back to the last tolerated stage instead of testing harder to “confirm” the problem.
This is also the point where a broader recovery plan can help, as long as it does not compete with the elbow gates. General late-phase recovery work, such as a gentle post-workout recovery routine at home, belongs after the elbow is tolerating its specific loading, not as a shortcut around it. If you are comparing timelines across injuries, a broader injury recovery timeline can give context, but the UCL still gets the final vote through symptoms and function.
When a home plan is no longer the right plan
A grade 1–2 UCL tear can often recover without surgery, and Rothman Orthopaedics notes that non-surgical treatment for partial UCL tears can work for both athletes and non-athletes when it follows a structured progression.[2] The important word is structured. A handful of wrist curls performed whenever the elbow feels okay is not the same thing as rehab.
Seek clinical help if you cannot pass from one stage to the next without flares, if the elbow feels unstable, if nerve symptoms appear, if pain at rest persists, or if your work or sport requires high-volume throwing or overhead loading. A clinician can grade the injury, check the ulnar nerve, watch your mechanics, and decide whether imaging or a different treatment path is needed.
For the right injury profile, UCL tear recovery exercises at home can be useful. They need to stay in order: protected motion, isometrics, progressive forearm and shoulder strengthening, then return-to-activity loading. The ligament does not care that the soup can is light or the band is thin. It cares whether the load arrived before the elbow was ready for it.
References
- UCL Injuries, Mass General Brigham, link
- Non-Operative Ulnar Collateral Ligament (UCL) Tear, Rothman Orthopaedics, link
- Rehabilitation of the Overhead Athlete’s Elbow, PMC, link
- Physical Therapy Guide to Ulnar Collateral Ligament Injury, Choose PT, link
- UCL Strain Recovery: The Best Exercises for Elbow Rehabilitation, Victory Physical Therapy, link
- Partial UCL Tears: Advancements in Treatment Strategies, Cleveland Clinic Consult QD, link



Comments
Join the discussion with an anonymous comment.