
Yes — if a physician or PT has cleared the injury and the player is in a general return-to-throwing pathway, this can be followed at home with resistance bands, light dumbbells, a medicine ball, and a mat. If you want the broader recovery framing first, How Long Does Injury Recovery Take? A Timeline for Returning to Sport is the companion piece.
A structured plan matters because college baseball has reported a 45.6% rotator cuff injury rate, and youth baseball injury trends show overuse accounts for nearly half of injuries, with UCL surgeries doubling at some centers between 2010 and 2020 [1][2].
The route should be earned in order: Phase 1 settles pain and motion, Phase 2 rebuilds the base, Phase 3 moves through the interval throwing ramp, Phase 4 adds the mound, and Phase 5 brings back competition with maintenance. The throwing ramp from 45 ft to 60 ft to 90 ft to 120 ft is the spine of the plan [3].
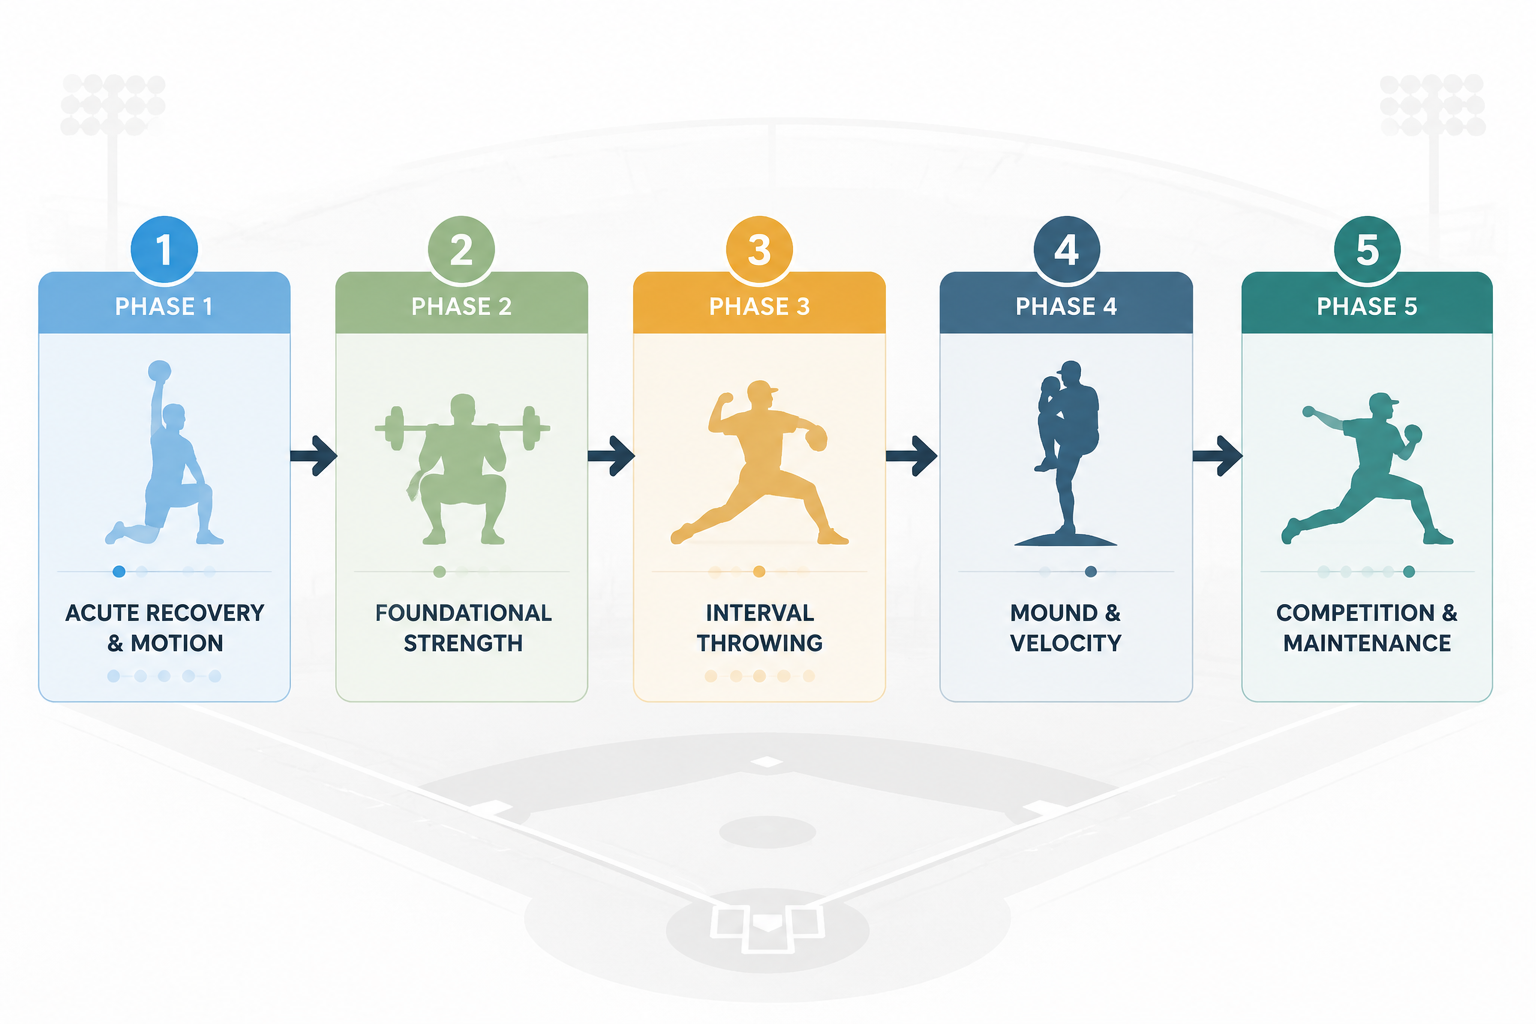
| Phase | What it covers | Advance when |
|---|---|---|
| Phase 1 | Pain control and motion | Daily movement is tolerable and a clinician says tissue tolerance is ready |
| Phase 2 | Foundational strength | Band, trunk, and lower-body work is tolerated without a next-day flare |
| Phase 3 | Interval throwing | The current distance is tolerated during the session and the next day |
| Phase 4 | Mound work and velocity checks | Flat-ground throwing is stable and mound throws do not spike symptoms |
| Phase 5 | Competition and maintenance | Controlled pitch counts are tolerated with normal recovery between outings |
Phase 1: Pain Control and Motion
Phase 1 is not about getting strong yet. It is about calming the injury, restoring comfortable range of motion, and avoiding the mistake of using throwing as a test before the tissue is ready. If basic daily tasks still light up the shoulder or elbow, the load is too early.
- Use only the pain-free motion drills your physician or PT has cleared.
- Keep effort light enough that symptoms do not climb later that day or the next morning.
- Do not use easy catch or long toss as a test of whether the injury is 'better.'
- Advance only when swelling, guarding, and motion limits are settling instead of reacting.
If you are still trying to understand the broader medical timeline, the injury recovery article linked above is the better place for that context. This plan assumes the baseball-specific return-to-throwing decision has already been made.
Phase 2: Foundational Strength
Throwing is not an arm-only event. Motion analysis commonly puts only 30% to 40% of throwing velocity in the arm and shoulder, while 51% to 55% comes from the hips, pelvis, and trunk, which is why this phase spends so much time below the belt line [1].
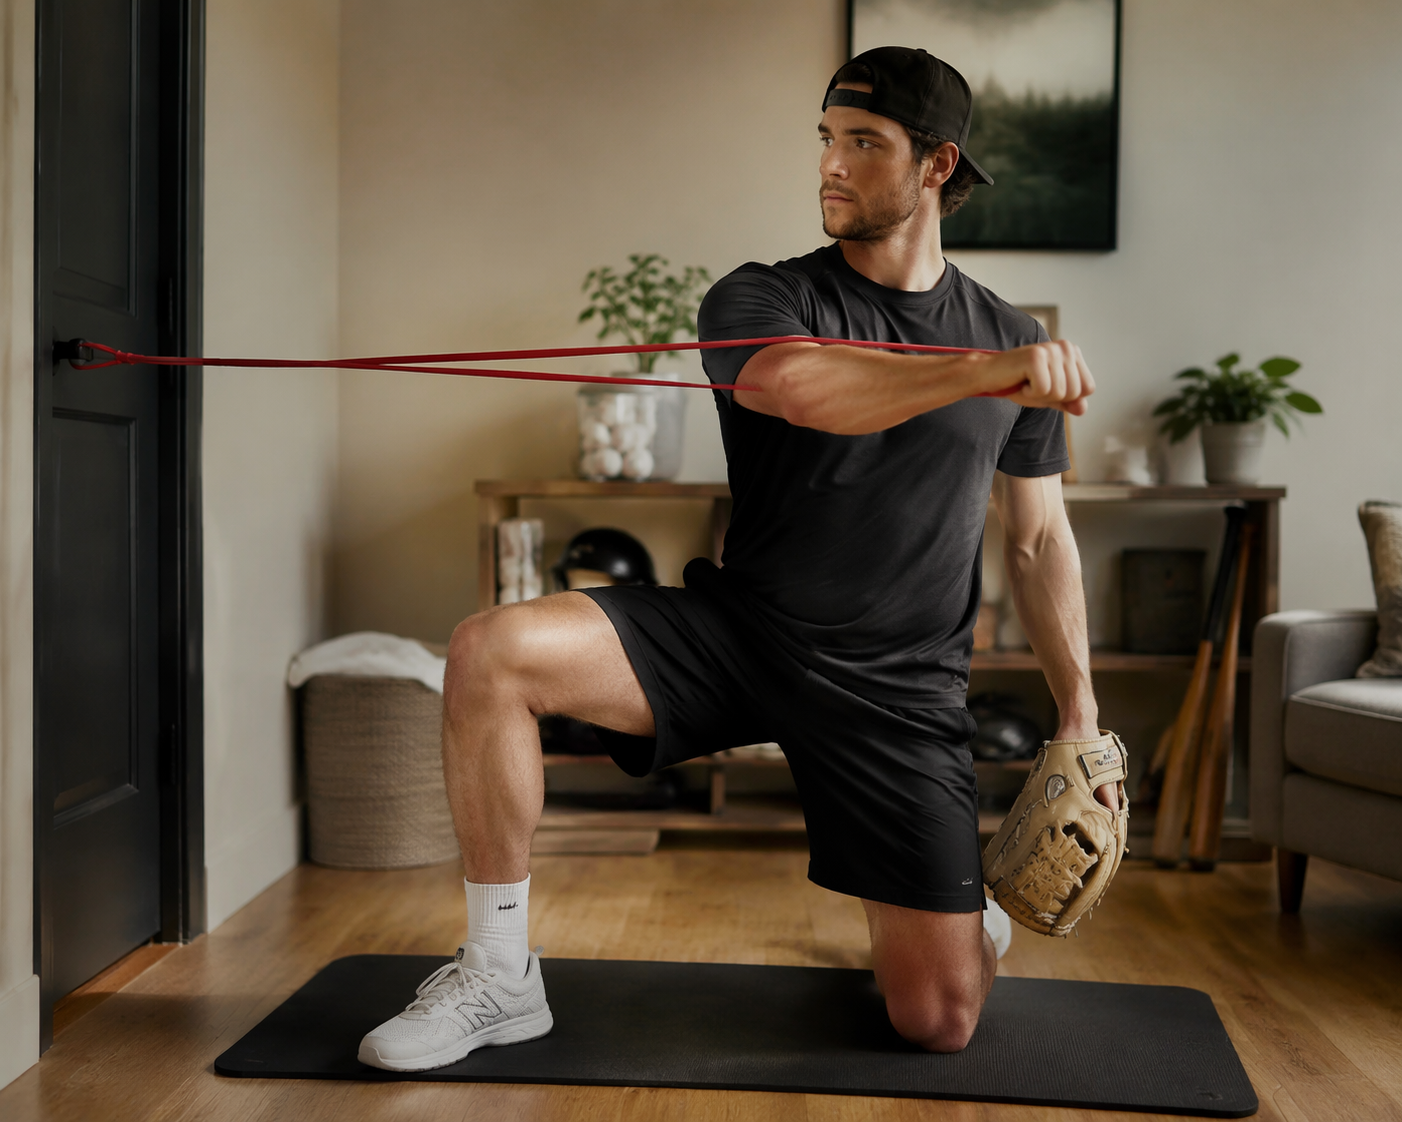
The home setup can stay simple. If the corner of the garage is still coming together, How to Safely Use a Resistance Band Door Anchor is worth checking first, and Upper Body Workout Equipment Compared can help if you are deciding whether to buy bands, pulleys, or light dumbbells.
- Band external and internal rotation
- Rows, scapular control, and serratus work
- Split squats, hinges, bridges, and trunk anti-rotation work
- Light medicine-ball patterns only if they are cleared and stay symptom-free
If the injury was a full UCL reconstruction, some strength-training protocols begin about 3 to 4 weeks after surgery with full-body work that leaves the injured arm protected, but that benchmark is a surgical reference point, not a universal timer for bracing or partial repairs [4].
The point of this phase is not to chase fatigue. It is to make the shoulder, trunk, and legs reliable enough that the throwing phase has something to build on.
Phase 3: Interval Throwing
This is the stretch where a lot of comeback plans get sloppy. Published interval throwing programs commonly move from 45 ft to 60 ft to 90 ft to 120 ft [3], and non-operative shoulder injuries often need an approximate 10- to 16-week return-to-throwing window before this phase starts, depending on injury severity and symptom response [1].
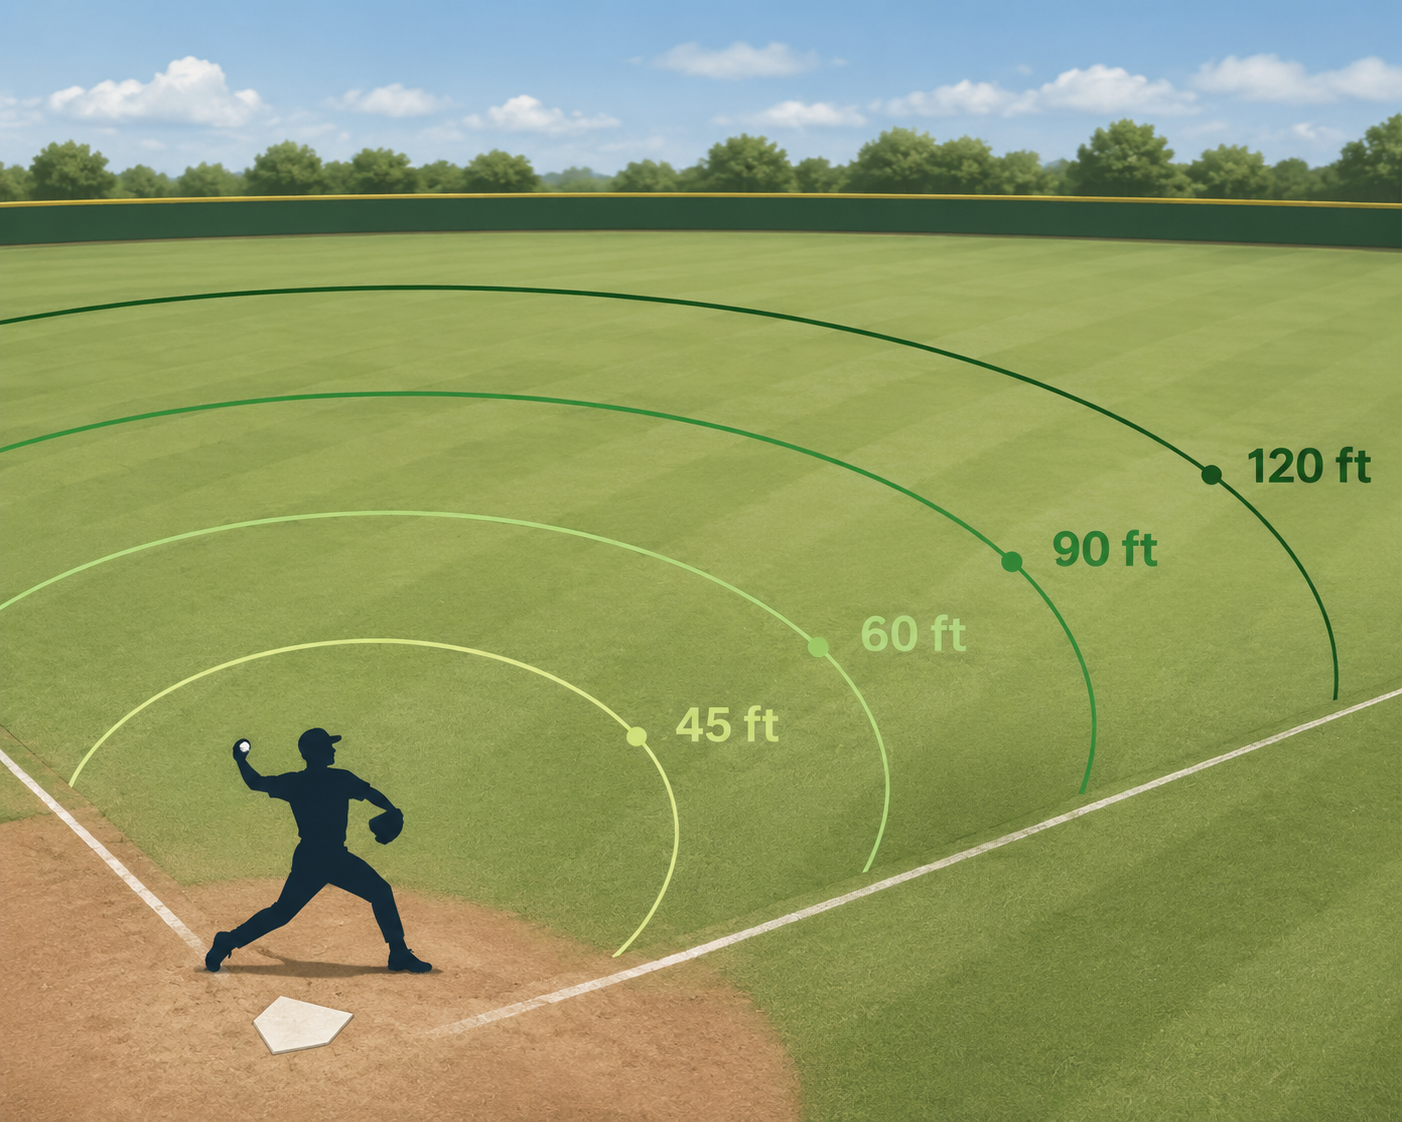
- 45 ft: short catch or toss at the current tolerated workload.
- 60 ft: only after 45 ft is tolerated during the session and the next day.
- 90 ft: keep mechanics, recovery, and soreness stable before moving on.
- 120 ft: the last flat-ground checkpoint before mound work.
Do not let perceived effort call the shots. In one commonly cited throwing analysis, pitchers working at 60% perceived effort still generated 76% of max forces and 84% of max ball speed, which is why distance and next-day response are safer guides than the number in the athlete's head [1].
The cleanest rule here is simple: if the current distance is still provoking soreness, stiffness, or a mechanics change, stay there until it settles. Effort cues can come later; tissue tolerance comes first.
Phase 4: Mound Work and Velocity Checks
Once flat-ground throwing is steady at 120 ft, the mound adds a different stress pattern. Keep the first mound sessions short, let command and recovery matter more than ego, and treat any pain spike or mechanics breakdown as a reason to step back to flat ground.
- Start with short, controlled mound sessions after flat-ground work is stable.
- Keep velocity changes modest rather than trying to jump fast.
- Use pain, command, and next-day soreness as the main stop signals.
- If the mound leaves the shoulder or elbow more irritated, step back instead of pushing through.
Phase 5: Competition and Maintenance
Return to competition means controlled exposure, not a free pass to ignore the rehab work. Pitch counts, rest days, and in-season maintenance still matter, especially for a shoulder or elbow that just earned its way back.
- Use controlled pitch counts and the stricter of the league or team limits.
- Keep band work, trunk work, and lower-body strength in the weekly routine.
- Track soreness and stiffness across the next 24 hours after outings.
- Stay in contact with the medical team if symptoms change instead of waiting for them to settle on their own.
References
- The Complete Pitcher Shoulder Rehabilitation Protocol — True Sports Physical Therapy
- Youth Baseball Injury Trends 2020-2025: A Wake-Up Call for Safer Play — Princeton Medicine
- Interval Throwing Programs — International Journal of Sports Physical Therapy, 2020
- Strength Training After TJ Surgery — Rockland Peak Performance


Comments
Join the discussion with an anonymous comment.