
If you are about to buy Pilates equipment for home workouts, the useful question is not “What is the best gear?” It is “What should earn floor space first?” A good Pilates at home equipment checklist should work like a buying order: start with the smallest setup that lets you practice well, add variety only when your workouts start asking for it, and treat a reformer as a commitment purchase rather than the entrance fee.
| Budget | Buy first | Best for | Wait if |
|---|---|---|---|
| $40–$100 | Thick non-slip mat, light and medium bands, Pilates ring, small Pilates ball | Beginners, small spaces, consistent mat practice | You are still trying to decide whether you like Pilates |
| $100–$400 | Sliders, 2–5 lb dumbbells, ankle or wrist weights, foam roller | Intermediate variety, more resistance, reformer-style gliding work | You have not used the starter props regularly |
| $400–$8,000+ | Portable board, foldable reformer, or studio-grade reformer | Committed reformer-style training at home | You have not checked clearance, storage, parts, and your actual class habits |
Start Under $100: The Mat-and-Props Setup That Actually Gets Used
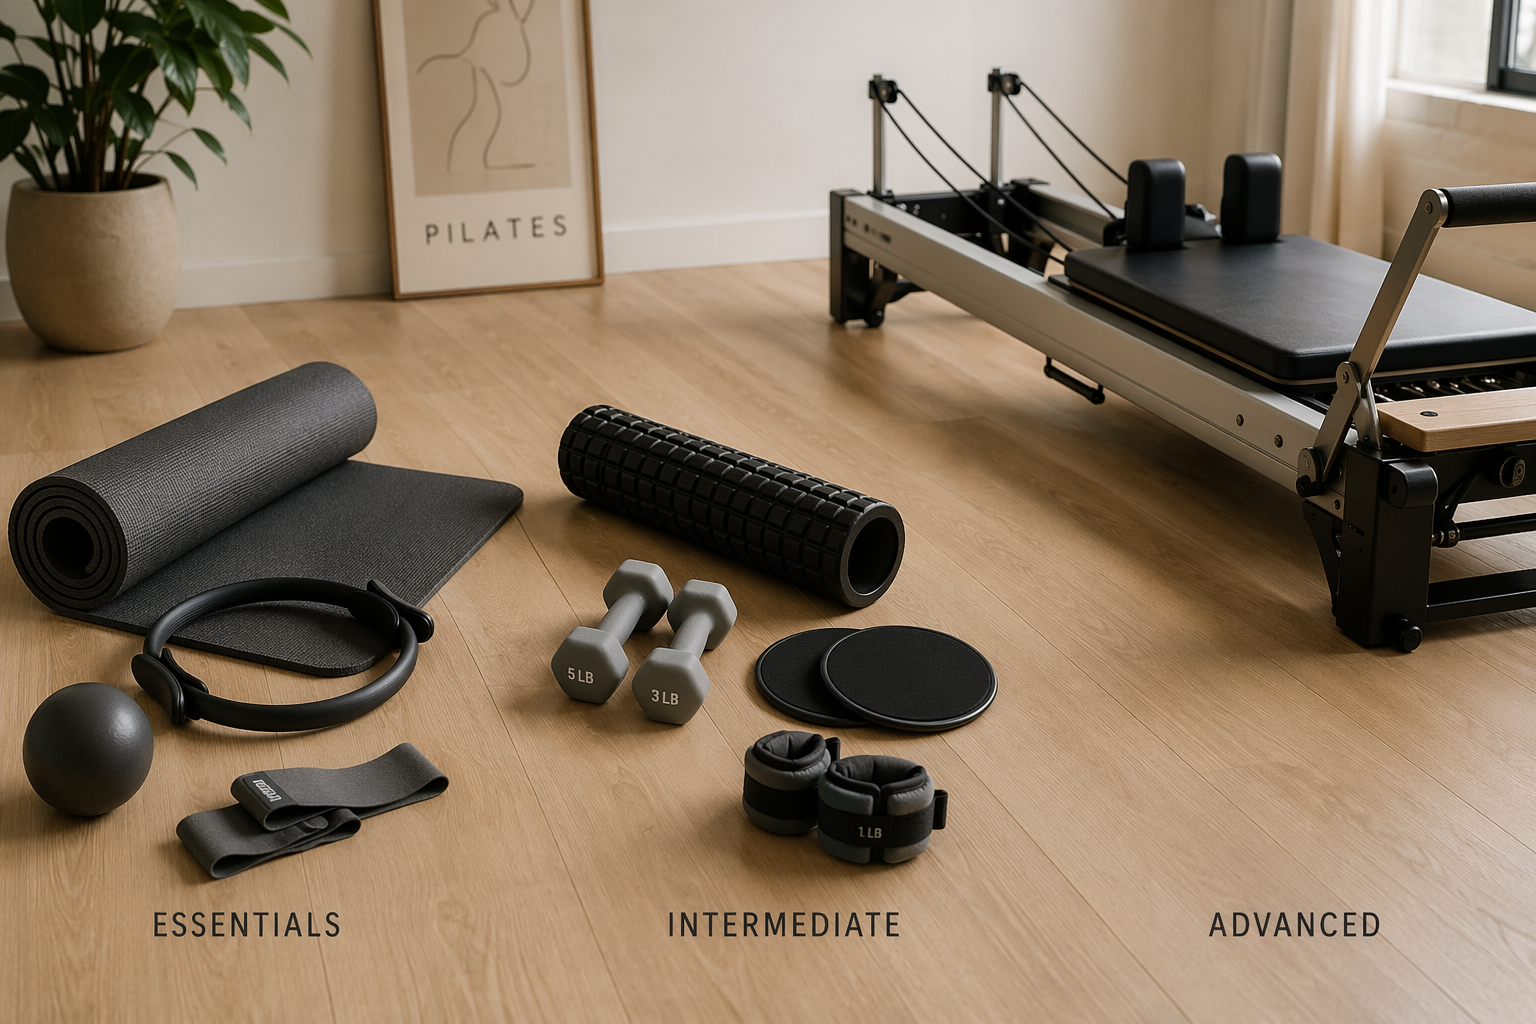
For most home workouts, the first purchase should be boring in the best possible way: a thick, non-slip mat, two resistance bands, a Pilates ring, and a small Pilates ball. This starter tier is not a “lite” version of Pilates. Mat work is a complete practice, and these compact props are enough to support the classical mat repertoire while making exercises clearer for beginners.
Look for a mat that is at least 0.5 inches thick, non-slip, and made from closed-cell PVC or TPE. That combination matters more than a pretty color. A too-thin mat makes side-lying hip work and kneeling exercises unpleasant; a slippery one changes how you hold planks, bridges, and roll-downs. Complete Pilates, Aeromats, and Fluidform all identify the mat, resistance bands, ring, and small ball as core home Pilates equipment rather than decorative extras.[1][2][3]
- Mat: Choose cushioning and grip first. If your wrists, knees, or tailbone complain, you will shorten the workout before the equipment has a chance to help.
- Light and medium resistance bands: Use the light band for shoulder placement, footwork, and control; use the medium band when leg work or pulling patterns need more feedback.
- Pilates ring or magic circle: Add it between the thighs, hands, or ankles when you need to feel midline connection instead of guessing whether anything is working.
- Small Pilates ball: Place it behind the pelvis, between the knees, or under the upper back to adjust range, support control, or add a balance challenge.
This is the tier that saves most people from overbuying. A beginner does not need a machine to learn how to breathe into a rib cage without flaring, keep the pelvis steady during toe taps, or stop gripping the hip flexors through every abdominal exercise. Bands, a ring, and a ball make those lessons easier to feel. They also fit in a basket, under a couch, or beside a dog bed, which is not a small detail when the workout space is also the living room.
A simple starter session can include footwork with a band, half roll-backs with the ball behind the pelvis, bridges with the ring between the thighs, side-lying leg work, swimming prep, and a short stretch. Nothing in that sequence requires a large footprint. If you want a more skill-stage version of this progression, the phased Pilates home equipment guide is a good next stop.
$100–$400: Add Variety Only When the Basics Feel Familiar
The middle tier is where home Pilates can become more interesting, but it is also where small clutter starts multiplying. Add one or two tools because they solve a specific training problem, not because your prop drawer has room for one more matching accessory.
Light dumbbells in the 2–5 lb range, core sliders, ankle or wrist weights, and a foam roller are common next-step additions for home Pilates. WIRED and Gaiam both place these kinds of tools in the practical expansion tier: sliders can mimic some reformer-style gliding patterns, ankle weights increase resistance in leg work, and small hand weights add load to arm series without turning the session into a strength circuit.[4][5]
| Add-on | What it unlocks | Best time to buy |
|---|---|---|
| Core sliders | Gliding lunges, plank variations, reformer-inspired control work | When you can already stabilize shoulders and pelvis on the mat |
| 2–5 lb dumbbells | Arm series, standing balance work, light upper-body endurance | When bodyweight arm work feels too easy but heavy strength work is not the goal |
| Ankle or wrist weights | More challenge in side-lying, quadruped, and standing leg work | When form stays clean without swinging or gripping |
| Foam roller | Mobility, balance challenge, spinal awareness, recovery work | When you want both movement prep and exercise variation |
Sliders are usually the most “Pilates-feeling” upgrade because they make friction part of the exercise. A slow slider lunge asks for the same kind of control people often associate with machines: the moving piece will expose whether the standing hip, ribs, and foot are organized. That does not make sliders a reformer replacement, but it does make them a smart bridge before buying anything with a carriage.
Weights need more restraint. Two- to five-pound dumbbells are plenty for long-lever arm work, especially if you are maintaining posture and breath instead of powering through reps. Ankle and wrist weights should be the last of this group for most beginners because they can quietly turn controlled leg work into momentum. If you cannot keep the pelvis still without them, they are not an upgrade yet.
Before Anything Large, Measure the Workout, Not Just the Equipment
The footprint on a product page is not the same as usable workout space. A mat needs space for arms and legs to reach. A slider needs room to travel. A reformer needs space around it for getting on, changing springs, using straps, and stepping off safely when the room is not perfectly staged.
Before upgrading, do one unglamorous test: lay out your mat where you actually plan to practice, open nearby doors, move the coffee table only as much as you are willing to move it three times a week, and check whether the setup still works. If the answer depends on rearranging the whole room every time, the equipment is already negotiating against your routine. For space-specific decisions, use the small-apartment Pilates equipment guide or the broader room-type gym equipment guide.
$400–$8,000+: When a Reformer Starts to Make Sense
A reformer can be wonderful at home for the right person. It can also become the most expensive laundry rack in the house. The difference is rarely motivation on the day it arrives; it is whether you already have a repeatable practice, enough clearance, and a plan for maintenance.
Several certified instructors quoted by Gaiam and WIRED recommend spending at least three months with mat work before adding a reformer.[5][4] Treat that as expert consensus, not a scientific deadline. The point is not that something magical happens on day 91. The point is that a few months of mat practice shows whether you like the method, whether your schedule can hold it, and whether your body understands enough basic control to use a moving carriage well.
Portable Boards
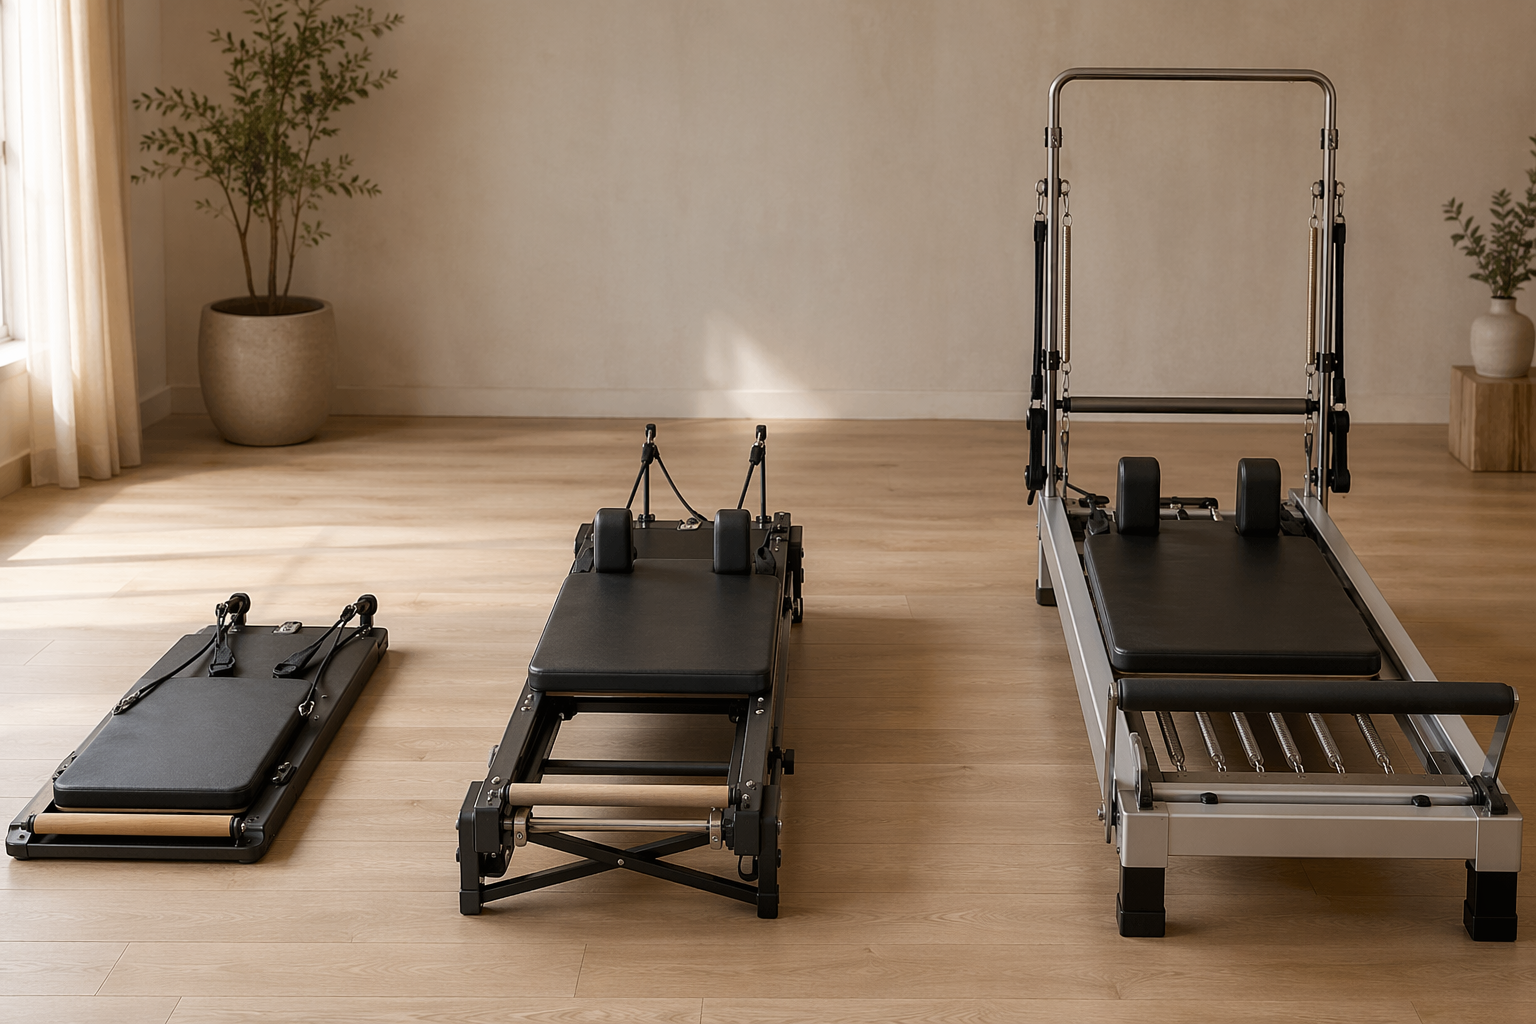
Portable Pilates boards sit at the lower end of machine-style home equipment, roughly in the $95–$280 range. They are compact, light, and often marketed as a way to get reformer-inspired movement without a full frame. HEROBOARD, for example, lists a 10 lb board with a 19×13×6 in size.[6]
This category is useful for people who want gliding, bands, and guided tracks in a small package, but the word “reformer” can stretch too far here. A board does not usually give the same carriage travel, spring feel, pulley path, or body support as a studio machine. Buy it as a compact variation tool, not as proof that you now own the full studio experience.
Foldable Reformers
Foldable reformers usually sit in the $300–$800 range, though the line between a sturdy portable board and a low-end foldable reformer can be blurry. Women's Health UK tested foldable models and reported specs that show why storage claims need close reading: even folded equipment still has real length, width, and weight to manage.[7]
This is the tier to consider if you already take reformer classes, know the exercises you want to repeat, and can leave the machine partly accessible. If every session starts with dragging the frame from a closet, clearing furniture, unfolding it, checking straps, and then reversing the whole process, your actual barrier is not fitness. It is setup friction.
Studio-Grade Reformers
Studio-grade reformers can run from about $1,000 to $8,000 or more. The higher price usually reflects a smoother carriage glide, stronger frame, more refined spring resistance, and a feel closer to what regular studio clients expect. This is the one category where premium gear can be entirely reasonable — but only for someone who already knows they want reformer Pilates often enough to justify dedicating money and space to it.
Before choosing any machine, check replacement parts: springs, ropes, straps, wheels, footbar components, and warranty terms. Springs are wear items. Straps fray. Wheels can get noisy or uneven. A cheaper machine with hard-to-source parts may not stay cheap if one small component turns the whole thing into a waiting project.
The Honest Breakeven Math
A $2,000–$3,000 home reformer can roughly equal the cost of 60–120 studio classes if classes are about $25–$35 each.[8] That math is useful, but only after one uncomfortable correction: the reformer pays for itself only when you actually use it instead of the classes you would otherwise attend. It does not pay for itself by existing in the spare room.
Breakeven also leaves out instruction. If studio classes are where you get corrections, progression, and accountability, a machine at home replaces only part of the service. Some people are happy pairing a home reformer with occasional private sessions or online classes. Others discover that the appointment was the thing keeping them consistent. For a deeper cost breakdown, use the home Pilates machine cost comparison.
A Simple Buying Verdict
Buy the under-$100 setup first unless you have already proven that you want machine-based Pilates at home. A thick non-slip mat, light and medium bands, a ring, and a small ball can support a complete, compact practice with very little storage penalty. That is the safest starting point for beginners, renters, small apartments, and anyone trying to build a routine around real furniture and real schedules.
Move into the $100–$400 tier when your workouts become predictable enough that you know what is missing: more glide, more resistance, more balance challenge, or more mobility work. Sliders, light dumbbells, ankle or wrist weights, and a foam roller are useful because they expand a practice you already do.
Consider a reformer only after consistency, clearance, and maintenance have had their say. If you are choosing between staying with mat-and-props or buying a machine, the reformer vs. mat-and-props comparison will help narrow that final decision. For most people, the right checklist is progressive: start small, practice often, and let the next purchase be earned by the workout you are already doing.
References
- Types Of Pilates Equipment, Complete Pilates
- What Equipment Do You Need for Pilates, Aeromats
- Essential Home Pilates Equipment: What You Need for a Complete Routine, Fluidform Pilates
- The Best Pilates at Home Equipment, WIRED
- Should You Do Pilates on a Mat or on a Reformer?, Gaiam
- HeroBoard Fitness, HeroBoard Fitness
- Best Pilates Reformer Machine, Women's Health UK
- Studio vs Home Pilates, NordicTrack


Comments
Join the discussion with an anonymous comment.