
The first few days after a sports injury are where a lot of home rehab either gets set up well or quietly goes off the rails. A mild ankle sprain, calf strain, cranky tendon, or shoulder tweak does not need panic, but it also does not need the old routine of disappearing onto the couch for two weeks and hoping stiffness means healing. For mild-to-moderate injuries, the early job is usually protection, swelling control, pain-limited movement, and a clear decision about whether this is safe to manage at home at all.
That last part matters. Home rehabilitation after sports injury is for the gray zone: you can bear weight or use the area with tolerable symptoms, there is no obvious deformity, symptoms are improving or stable, and you are willing to progress by function rather than ego. If you have severe pain, major swelling, numbness, visible deformity, inability to bear weight, loss of joint motion, symptoms that worsen instead of settle, or any concern for fracture, dislocation, rupture, concussion, infection, or nerve injury, get assessed instead of trying to “rehab through it.” NIAMS advises medical evaluation for severe pain, swelling, numbness, inability to move a joint, inability to put weight on the area, or symptoms that do not improve with home care.[1]
The useful version of home rehab is active, phased, and a little boring. It asks you to do the right amount of work before you feel fully ready, but not so much that soreness becomes a setback. Movement commonly starts within the first 1–5 days after the acute protection period when symptoms allow, while prolonged immobilization beyond that window can contribute to stiffness and muscle loss that drags recovery out.[1][2] That does not mean rushing. It means replacing vague rest with controlled loading.
The Four-Phase Map
Most home plans make more sense when they are divided into phases instead of calendar promises. Sports medicine sources commonly describe rehabilitation as a sequence that moves from acute protection into mobility and activation, then strength rebuilding, then sport-specific function.[2][3][4] The dates are rough guardrails, not guarantees. A tendon flare, a hamstring strain, and an ankle sprain may all pass through the same broad phases at different speeds.
| Phase | Typical window | Main job | Advance when |
|---|---|---|---|
| Acute | Days 1–5 | Protect the injury, calm pain and swelling, keep safe nearby movement | Pain and swelling are controlled, and gentle motion does not worsen symptoms |
| Subacute | Days 5–21 | Restore range of motion, begin activation, rebuild basic tolerance | Daily movements feel controlled, range is improving, and light exercises do not cause next-day flare-ups |
| Remodeling | Weeks 3–12 | Build strength, tendon and muscle capacity, balance, and eccentric control | Strength and control are close to the uninjured side, with no swelling rebound |
| Functional | Weeks 6+ | Rehearse sport demands, speed, landing, cutting, throwing, or repeated effort | Return-to-sport tests show near-symmetry and the injured area tolerates practice-like work |
The phases overlap. You might still manage swelling in week three while adding strength work, or keep mobility drills in the functional phase because they help you move better. The point is not to graduate from one neat box to another. The point is to stop using pain alone as your coach.

Phase 1: Acute Care Without Going Completely Passive
In the first few days, your goal is not fitness. It is to keep the injury from getting louder. The familiar RICE idea—rest, ice, compression, elevation—still has a place for pain and swelling management, but modern guidance has shifted toward POLICE and MEAT-style thinking: protect the area, use optimal loading, control symptoms, and begin movement when it is safe rather than defaulting to long immobilization.[2][3]
For a mild ankle sprain, that might mean short bouts of easy weight-bearing around the house if you can walk without limping badly. For a calf strain, it might mean gentle ankle pumps, pain-free knee bends, and walking only as far as your gait stays normal. For a shoulder strain, it may mean pendulum swings, supported arm movement, and grip or scapular activation while avoiding loaded overhead work.
- Protect: avoid the movement that caused sharp pain, use a brace or support if it helps you move normally, and reduce impact.
- Control swelling: use compression, elevation, and short ice sessions if they reduce pain or swelling.
- Keep nearby joints moving: move above and below the injury so the rest of the limb does not stiffen up.
- Test small doses: try gentle, pain-limited range of motion several times per day rather than one heroic session.
- Stop the test if symptoms climb during the session, your movement quality falls apart, or swelling increases later that day.
The mistake here is confusing discomfort with proof that you are doing something useful. A little stiffness or mild soreness during easy motion can be normal. Sharp pain, spreading pain, new bruising, increased swelling, limping that gets worse, or pain that is clearly higher the next morning is different. That is not toughness feedback; it is load feedback.
Advance out of the acute phase when symptoms are settling, not when a certain number of days has passed. You should be able to move the injured area through a small but improving range, perform basic daily tasks with less guarding, and finish gentle drills without a delayed flare. If that is not happening by the end of the first week, or if symptoms are escalating, it is time to get a clinician’s eyes on it.
Phase 2: Subacute Rehab Is Where Consistency Starts Counting
The subacute phase is the awkward middle. The injury may no longer feel dramatic, but it is not ready for normal training. This is where many people either overrest because they are afraid of every sensation, or jump back into workouts because walking to the kitchen feels fine. Neither tells you whether the tissue can tolerate repeated load.
Start with range of motion, then activation, then light resistance. For a lower-body injury, that could look like ankle circles, heel slides, bridges, bodyweight sit-to-stands, calf raises with both legs, and balance work near a wall. For an upper-body injury, it may be wall slides, scapular retractions, isometric external rotation against a towel, light band rows, and supported pressing patterns only if they stay controlled.
| Goal | Home exercise examples | What good response looks like |
|---|---|---|
| Restore motion | Pain-limited joint circles, heel slides, wall slides, pendulums | Range improves during the session and does not tighten more the next morning |
| Wake up supporting muscles | Isometrics, glute bridges, scapular squeezes, quad sets | You can create tension without sharp pain or compensation |
| Rebuild basic strength | Sit-to-stands, two-leg calf raises, band rows, mini-squats | Reps stay smooth, and soreness settles within about a day |
| Restore control | Single-leg balance near support, slow step-ups, controlled carries | You can keep alignment without wobbling into pain |
A simple home rule helps: increase only one variable at a time. Add a set, or add range, or add resistance, or add speed. Do not add all four because one session felt good. The injury does not care that you finally have motivation on a Saturday morning.
This is also the phase where adherence stops being a nice idea and becomes the main constraint. WebPT reports that only 35% of physical therapy patients fully adhere to prescribed home exercise programs, and research on musculoskeletal conditions has reported nonadherence rates in the 50–65% range.[5][6] Those numbers line up with real life. The exercises are not exciting, the feedback is subtle, and nobody is watching at 7 a.m.
Make the plan hard to avoid. Put the band where you make coffee. Keep the routine to a short repeatable block before adding optional work. Track only what changes your decisions: pain before and after, swelling, range, exercise load, and next-day response. If a longer plan means you skip it, the shorter plan is better.
- Advance when daily movement is easier and less guarded.
- Advance when range of motion is close to the other side or clearly improving.
- Advance when light strengthening causes no swelling rebound and no next-day pain spike.
- Advance when you can repeat the routine consistently, not just perform it once when rested.
What You Actually Need at Home
You do not need a clinic in your living room. Early rehab can be done with a sturdy chair, a wall, a towel, soup cans, water bottles, stairs, and enough floor space to move carefully. If you want a small kit, the useful pieces are basic: resistance bands, a foam roller, a lacrosse ball, ice packs, and a stability ball. Home rehab equipment guides commonly put a complete starter setup under $100, with resistance bands around $10–$20, a foam roller around $15–$25, a lacrosse ball around $5, ice packs around $10–$15, and a stability ball around $15–$25.[7][8][9]
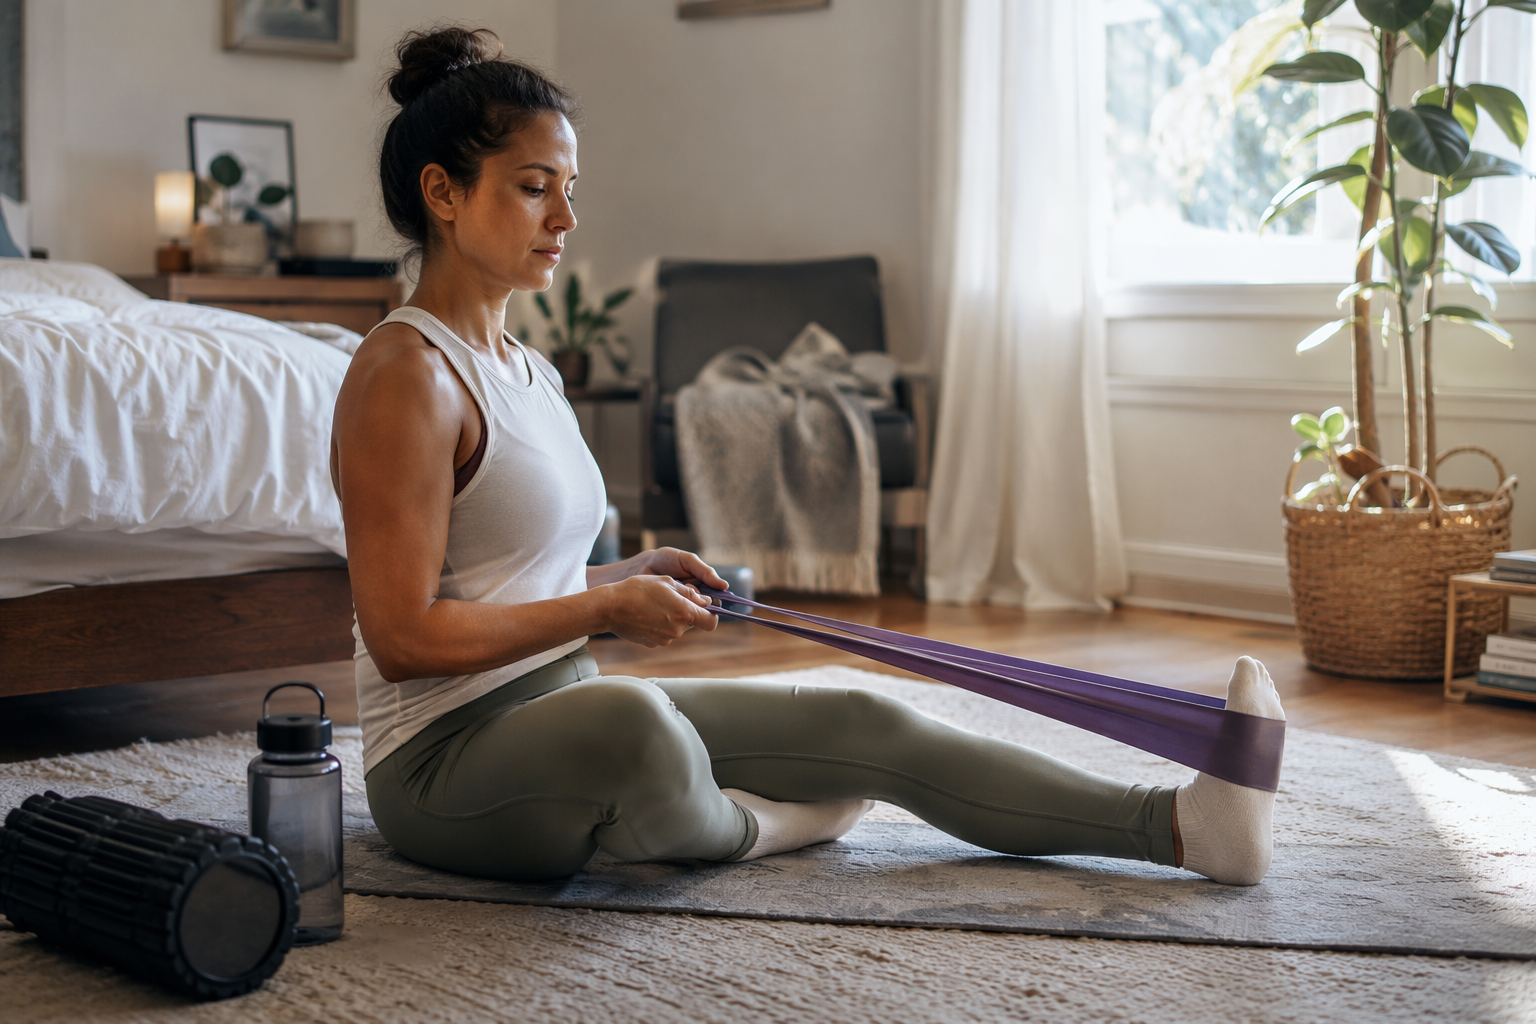
Buy equipment for the phase you are in. Bands help with activation and progressive resistance. A foam roller or lacrosse ball may help with comfort and mobility, but they do not replace strengthening. Ice packs are symptom tools, not a rehab program. If space is tight, prioritize items that let you load gradually; the broader home setup can stay simple, and a small-space home gym plan can wait until you know what movements you need to rebuild.
Phase 3: Remodeling Means Load, Not Just Motion
By weeks three through twelve, many mild-to-moderate injuries feel good enough to tempt a return to normal workouts. This is also where the tissue is still adapting. The remodeling phase is where home rehab stops being a mobility routine and starts becoming strength training with rules.
The progression usually moves from slow bilateral strength to single-limb control, then heavier resistance, then eccentric loading. Eccentric work means the muscle is lengthening while controlling load: lowering from a calf raise, slowly descending in a split squat, controlling the lowering phase of a hamstring slider, or resisting a band as it pulls the shoulder outward. Nowak Orthopedics reports that eccentric training alone can reduce hamstring and ACL reinjury risk by 50–70%, which is one reason skipping this phase is such a bad bargain.[2]
| Progression | Lower-body example | Upper-body example |
|---|---|---|
| Slow two-sided strength | Box squat, two-leg calf raise, hip bridge | Band row, wall push-up, supported external rotation |
| Single-side control | Step-up, split squat, single-leg balance reach | One-arm band row, side-lying external rotation, controlled carry |
| Eccentric emphasis | Slow calf-lower, hamstring slider lowering, slow split-squat descent | Slow band return, eccentric push-up lowering, controlled lowering from overhead if cleared |
| Elastic preparation | Low pogo hops, gentle skipping, landing holds | Rhythmic band drills, light medicine-ball-style patterns if appropriate |
Do not introduce jumping, sprinting, cutting, heavy lifting, or repeated overhead work just because ordinary strength feels fine. Add those only after slower strength is symmetrical enough to trust and the injured area tolerates repeated sessions. A single good workout is not a clearance test.
A practical remodeling session might include five to ten minutes of warm-up movement, one mobility drill that still matters, two or three strength exercises, one balance or control drill, and a short note afterward. If symptoms are quiet for twenty-four hours, progress slightly next time. If soreness lingers, swelling returns, or movement quality drops, repeat or reduce the load. If pain sharpens or keeps returning at the same point in the movement, stop guessing and get assessed.
This is also the right time to think about your actual sport without turning the rehab plan into a sport-specific rabbit hole. A tennis player may need rotational control and repeated deceleration. A runner needs impact tolerance and calf capacity. A baseball player needs shoulder and trunk sequencing. The same phased logic applies, but the final exercises should look more like the demands you are returning to. For deeper examples, see the phased guide to injury recovery exercises for tennis players or an injury-specific plan such as UCL tear recovery at home.
Phase 4: Functional Rehab Has to Prove Readiness
The functional phase starts when strength and control are good enough to rehearse the thing you are trying to return to. For many injuries, that may begin around week six or later, but the date matters less than the test. Criteria-based progression is safer than moving forward because the calendar says you should, and return-to-sport frameworks commonly use functional milestones such as 90% or greater limb symmetry before full return.[2][10]
For lower-body injuries, functional work may include brisk walking, incline walking, walk-jog intervals, landing holds, low hops, lateral shuffles, acceleration drills, and eventually cutting or sport practice. For upper-body injuries, it may include closed-chain loading, progressive pressing, pulling, deceleration drills, throwing progressions, or repeated overhead patterns. The exercise menu changes by sport; the readiness logic stays the same.
- Range: the injured side moves through the needed range without guarding.
- Strength: the injured side is close to the uninjured side, ideally meeting the 90%+ symmetry target used in many return-to-sport frameworks.
- Control: balance, landing, cutting, pressing, or throwing mechanics stay clean when you are mildly tired.
- Tolerance: symptoms do not spike during the session, later that day, or the next morning.
- Confidence: you can perform the movement without flinching, compensating, or protecting the injured side.
Do not make the first “test” a full game, hard interval session, or max-effort class. Build a return exposure. For example, a runner might progress from pain-free walking to walk-jog intervals, then continuous easy running, then strides, then hills or speed. A lifter might move from tempo bodyweight work to light bilateral loading, then single-limb control, then heavier compound lifts. A court-sport athlete might add landing, then lateral movement, then reactive drills, then limited practice.
If you want a more detailed discussion of when to advance and how return-to-play testing fits into longer timelines, use the companion injury recovery timeline. Timelines can help you stay patient, but they should not override swelling, strength, control, or next-day response.
When Home Rehab Is Not Enough
A home plan should make symptoms more predictable over time. If the pattern stays confusing, that is information. Get professional help if pain is severe, swelling is significant, you cannot bear weight, the joint feels unstable, numbness or tingling appears, motion is blocked, bruising spreads dramatically, symptoms keep worsening, or you cannot make progress across phases despite consistent work.[1]
Also get help if your sport demands high speed, contact, heavy lifting, jumping, cutting, or overhead power and you are unsure how to test readiness. A physical therapist can measure strength, compare sides, watch mechanics, and adjust loading in a way that is hard to do alone. Home rehab can carry a lot of the work, but it should not become a private guessing game when the stakes go up.
A Usable Weekly Structure
The easiest plan to follow is the one that tells you what to do before the day gets away from you. In the acute phase, that may be several short movement and swelling-control check-ins. In the subacute phase, it may be a fifteen-minute morning block most days. In remodeling, it can start to look like three focused strength sessions per week with lighter mobility or control work between them. In the functional phase, rehab blends into practice, but the same rule applies: load, observe, adjust.
| Day type | What to include | What to record |
|---|---|---|
| Rehab strength day | Warm-up, mobility as needed, strength work, control drill | Load, reps, pain during, next-day response |
| Light recovery day | Walking, easy range of motion, gentle activation | Stiffness, swelling, gait or movement quality |
| Functional exposure day | Jog intervals, landing practice, throwing progression, sport drill | Symmetry, confidence, fatigue response, delayed symptoms |
| Rest or consult day | Back off if symptoms spike or mechanics fall apart | What triggered the response and whether it repeats |
Recovery scores, wearables, and readiness tools can add context, especially if you are balancing rehab with sleep, work, and training stress. They are not clearance tools by themselves. If you use them, treat them as supporting information alongside pain, swelling, strength, and function; the guide to fitness tracker recovery scores covers that more directly.
Home rehabilitation can work well for mild-to-moderate sports injuries when it is active, phased, and criteria-driven. The hard part is not finding ten exercises online. It is choosing the right phase, doing the work often enough, adding load in the right order, and respecting the warning signs that mean you need help. Progress is measured by what the injured area can do reliably: move, tolerate load, match the other side, and handle the sport-specific work you are asking it to trust again.
References
- Sports Injuries: Diagnosis, Treatment, and Steps to Take, NIAMS, https://www.niams.nih.gov/health-topics/sports-injuries/diagnosis-treatment-and-steps-to-take
- Sports Injury Rehabilitation Guide for Athletes, Nowak Orthopedics, April 2, 2026, https://nowakorthopedics.com/2026/04/02/sports-injury-rehabilitation-guide-athletes/
- How to optimize recovery time after a sports injury, Mayo Clinic Press, 2024, https://mcpress.mayoclinic.org/nutrition-fitness/how-to-optimize-recovery-time-after-a-sports-injury/
- The 5 Phases of Rehabilitation, Isokinetic, https://isokinetic.com/en/the-5-phases-of-rehabilitation/
- Improving Home Exercise Program Adherence in Physical Therapy, WebPT, https://www.webpt.com/blog/improving-home-exercise-program-adherence-in-physical-therapy
- Patient Involvement With Home-Based Exercise Programs: Can Connected Health Interventions Influence Adherence? A Systematic Review, PMC, 2018, https://pmc.ncbi.nlm.nih.gov/articles/PMC5856927/
- Guide to Home Rehabilitation, PhysioRoom, https://www.physioroom.com/info/guide-to-home-rehabilitation/
- Guide: Physical Therapy Exercises at Home, ID Sports Medicine, https://idsportsmed.com/guide-physical-therapy-exercises-at-home/
- Building a Home Gym for Rehab: Essential Equipment on a Budget, O'Brien Physical Therapy, https://www.obrienphysicaltherapy.net/blog/building-a-home-gym-for-rehab-essential-equipment-on-a-budget
- Return to Sports After Injury: Complete Rehabilitation Timeline & Training Protocol, OSSO Care, https://osso.care/return-to-sports-after-injury-complete-rehabilitation-timeline-training-protocol/



Comments
Join the discussion with an anonymous comment.