The expensive version of home gym flooring usually starts with a safe-sounding mistake: take a 10'×12' garage gym, buy enough 3/4-inch stall mats to cover every square foot, drag them home, trim them around the walls, and call it protected.
That room is 120 square feet. Using the cited 2026 comparison data, 3/4-inch stall mats at about $2.38 per square foot put full-room coverage around $286. A mixed layout — 8mm rolled rubber over 80% of the room at roughly $2.17 to $2.24 per square foot, plus two stall mats where the barbell actually lands — comes out around $174 in the same example. That is about 39% less, before you account for local availability, taxes, delivery, or sale pricing.[1][2]
I would not treat that 39% as a coupon you are guaranteed to cash. Rubber prices move, stall mats go in and out of farm-store promos, and shipping can wreck a tidy spreadsheet. But the math is useful because it shows the real lever: not buying weaker flooring, but refusing to put heavy-drop flooring under places that only see shoes, a bench, a treadmill, or a yoga mat.
Start With the Impact Map, Not the Material
A concrete garage or basement floor does not experience your whole gym the same way. The treadmill corner creates vibration and equipment pressure. The open training area sees footwork, dumbbells being set down, and benches moving around. The rack area may see plates loaded, unloaded, and occasionally dropped. The barbell drop zone is different again: that is where one bad rep can send iron and force into the same narrow strip of floor.
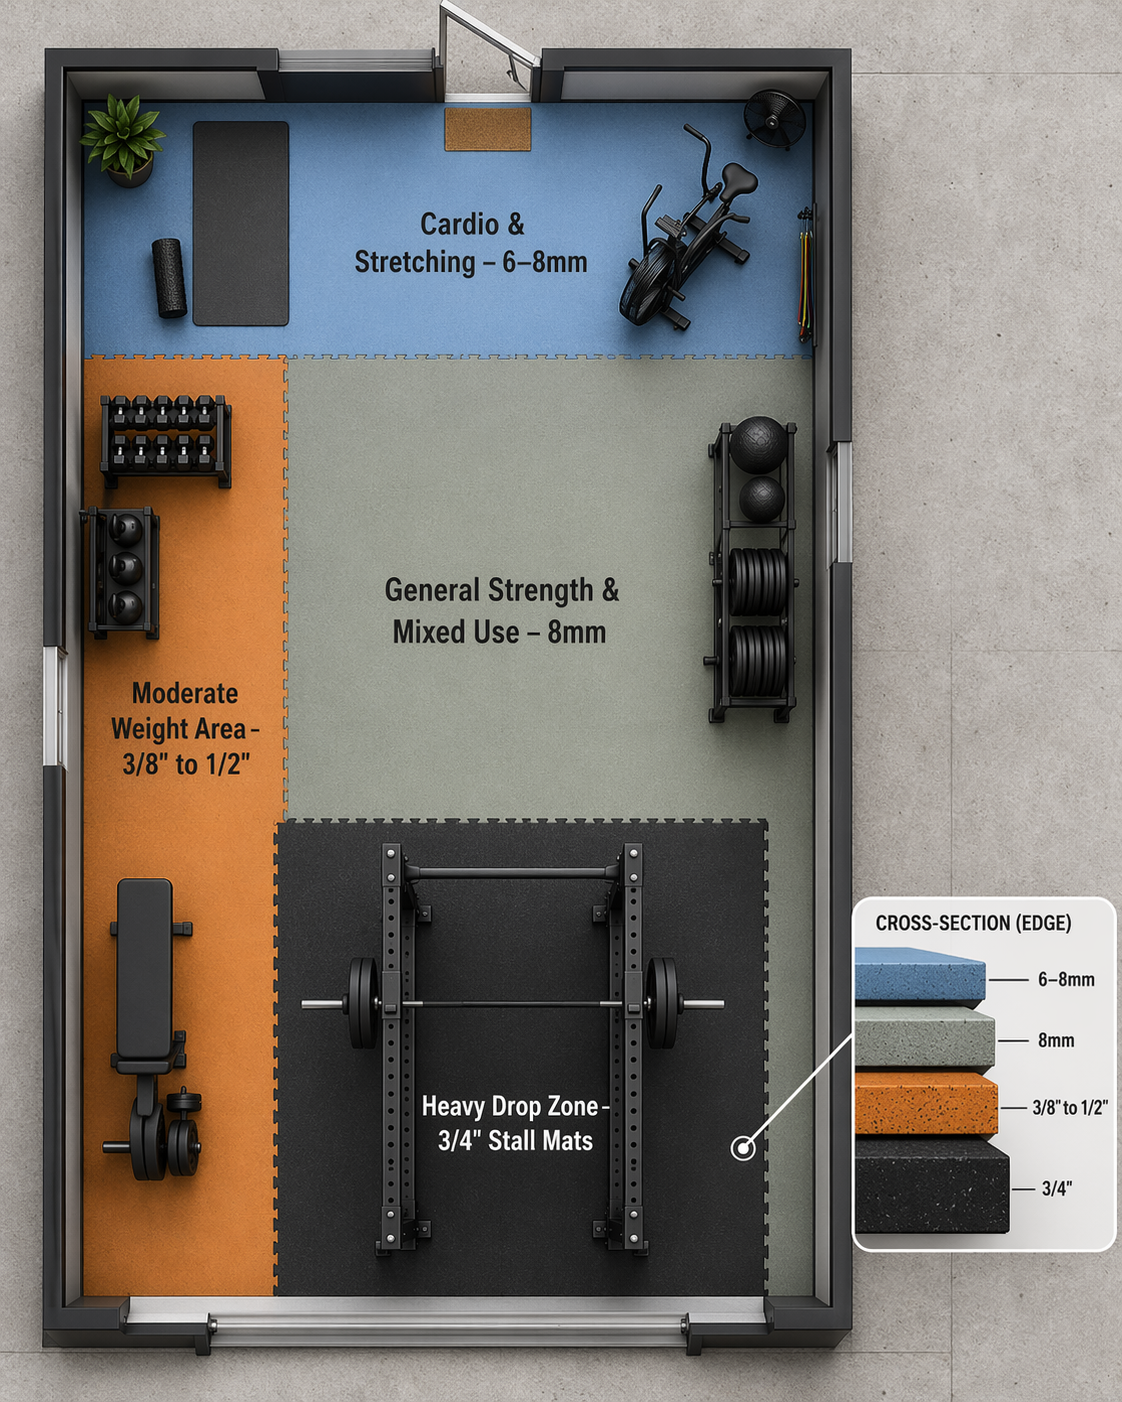
Once you see the room that way, uniform 3/4-inch coverage starts to look less like protection and more like a lot of extra cutting, smell, seams, and mat weight in places that were never asking for it. Commercial flooring suppliers do not all use identical language, but the practical guidance lines up: lighter rubber for movement and cardio, standard 8mm material for mixed use, thicker rubber for moderate weights, and full 3/4-inch protection under the true drop zone.[3][4][2]
| Zone | Typical use | Practical flooring range | Where to be careful |
|---|---|---|---|
| Cardio and stretching | Treadmill, bike, rower, mobility work, bodyweight training | 6–8mm rubber | Check equipment feet, moisture, and whether machines need a flatter surface |
| General strength and mixed use | Bench, dumbbells set down under control, kettlebells, accessory lifts | 8mm rubber | Do not treat this as a deadlift crash pad |
| Moderate weight area | Heavier dumbbells, plate loading, controlled barbell work | 3/8 inch to 1/2 inch rubber | Use more protection if weights are repeatedly dropped |
| Heavy drop zone | Power rack, deadlift lane, Olympic-lift receiving area | 3/4 inch stall mats or equivalent heavy-duty rubber | Do not economize where loaded barbells hit |
If you are still choosing the overall training style for the room, settle that first. A floor plan for steady cardio and dumbbell circuits is not the same as a floor plan for barbell strength work. The broader planning step belongs upstream in building a compact home gym around your training goal; zone-mapping works best after you know what the gym is actually for.
The 10'×12' Example, Rebuilt as Zones
Keep the same 120-square-foot room. Instead of asking, “What is the best flooring for the whole gym?” divide the floor by consequence.
- The rack and barbell lane get the thickest material because failure there is expensive.
- The bench and dumbbell area gets enough rubber for controlled strength work, not a full crash pad.
- The cardio or mobility corner gets stable, cleanable coverage without paying for unnecessary thickness.
- Walkways and storage edges get material that sits flat and does not create trip points.
In the sample layout, 80% of the room — 96 square feet — uses 8mm rolled rubber. The remaining 24 square feet is covered by two 3/4-inch stall mats for the rack or drop strip. Using the cited price ranges, that is the difference between buying 120 square feet of thick matting and buying thick matting only where the floor sees heavy impact.[1][2]
The exact savings will change with your room. A lifter who deadlifts in one fixed lane may save more. Someone with a larger Olympic lifting area may save less. If your local stall mats are deeply discounted and rolled rubber has freight charges, the gap narrows. The point is not that every mixed floor saves exactly 30–50%; it is that a zone plan gives you a defensible way to calculate the number before you order.
Cardio and Stretching: Do Not Buy a Deadlift Platform for a Treadmill
Cardio zones usually need flatness, grip, and surface protection more than impact absorption. A treadmill, bike, rower, or elliptical spreads load through equipment feet. Stretching and mobility work ask for a surface that is comfortable enough, easy to clean, and not so soft that it feels sloppy underfoot.
That is why 6–8mm rubber is usually the sensible range for this zone, according to supplier thickness guidance.[3] It protects the concrete from everyday abrasion and gives machines a rubber interface without making you wrestle 3/4-inch mats into a corner where nothing is being dropped.
For garage installs, check the boring things before you cover the slab: moisture, temperature swings, door clearance, and whether water tracks in from vehicles or weather. Those conditions affect adhesives, seams, mat movement, and odor more than another few millimeters of rubber will. If the room has known moisture or temperature issues, run through a garage gym environmental checklist before buying material.
General Strength Space: 8mm Is Often the Workhorse
Most of the square footage in a small garage gym is not dramatic. It is where you drag a bench, set down dumbbells, do lunges, use bands, move a kettlebell, or walk around the rack. This area benefits from rubber coverage, but it usually does not need the same build as the spot where a loaded barbell might land.
The common 8mm recommendation makes sense here because it handles mixed use without turning the whole room into a stall-mat project.[3][4] Rolled rubber also reduces the number of seams compared with piecing together several heavy mats, which matters more than people admit when they are planning on paper. Seams catch dust. Edges shift. Slight height changes become annoying after you roll a bench across them for the hundredth time.
This is also where the budget win usually happens. In the 10'×12' example, the general floor is most of the room. Shaving cost here by using appropriate 8mm material is different from shaving protection under the bar. One is planning. The other is gambling with the part of the floor that takes the hardest hit.
Moderate Weight Areas Need a Clear Rule
The awkward middle zone is where people get vague: heavier dumbbells, plate loading, landmine work, maybe controlled deadlifts, maybe a barbell that is supposed to be set down gently but sometimes is not. This is where 3/8-inch to 1/2-inch rubber can make sense, depending on how much load lands there and how often.[3][4]
The rule should be based on behavior, not equipment names. A pair of dumbbells set down under control is one thing. Dumbbells dropped from shoulder height after presses are another. A barbell used for Romanian deadlifts is not the same as a barbell repeatedly released from the top of a deadlift. The floor only cares about force, frequency, and where the impact lands.
If you cannot honestly predict controlled landings in that area, move the work into the heavy zone or thicken the area. Saving money by pretending your habits are neater than they are is how a budget floor becomes an expensive repair.
The Heavy Drop Zone Is Where You Overbuild
The barbell path deserves the most conservative treatment in the room. Picture the loaded sleeves, not the rack footprint. Where do the plates touch down during deadlifts? Where would the bar land if a squat was missed onto safeties? Where do plates hit when you strip the bar? That strip of floor should get the 3/4-inch material, and it should be wide enough that your normal setup does not drift off the protected area.
For a power rack, the protected area should cover the rack interior and the likely plate landing zones just outside it. For deadlifts, protect the full left-to-right path of the plates and enough front-to-back depth to account for stance changes. For Olympic lifting, the protected area is larger because receiving positions and misses are less tidy. If that is your training, the “two stall mats” shortcut may be too small; the zone method still applies, but the heavy zone expands.
This article assumes a concrete garage or basement slab. Apartments, rentals, and upper-floor rooms bring noise transfer, structural, and reversibility constraints that belong in a different decision tree. If that is your situation, start with a guide built around home gym flooring thickness rather than copying a garage slab plan.
Mixed Flooring Only Works If the Edges Behave
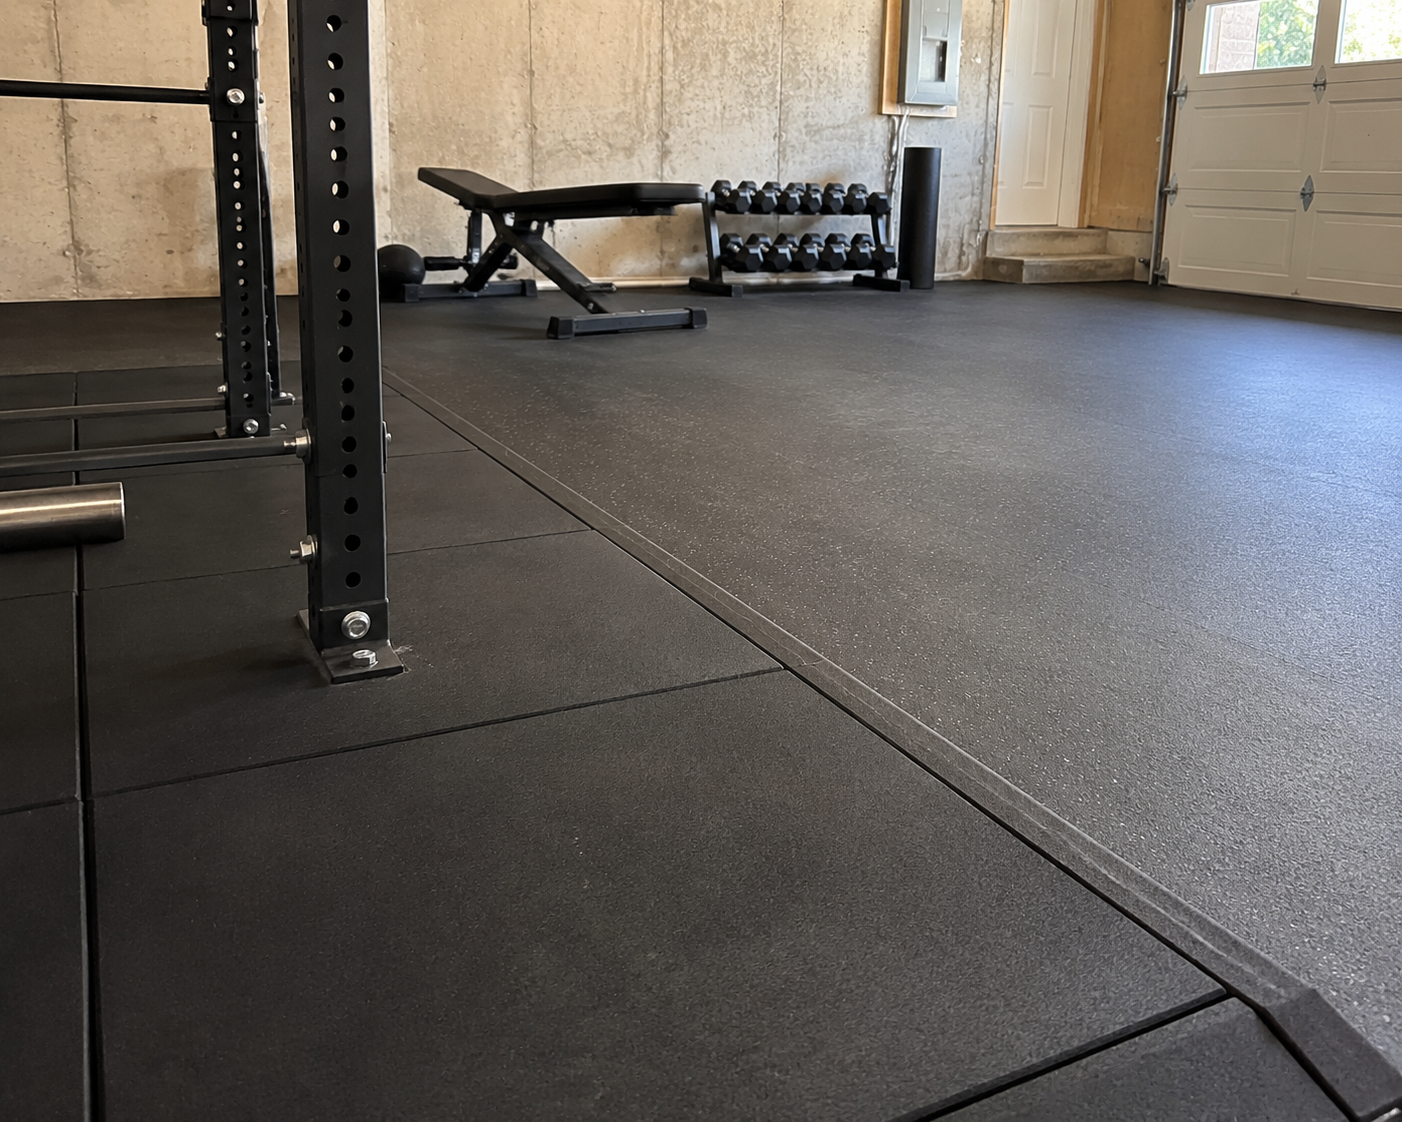
A mixed floor can be cheaper and better matched to the room, but it has one obvious penalty: transitions. An 8mm roll meeting a 3/4-inch mat creates a height change. If that edge curls, shifts, or catches a bench wheel, you will notice it every week.
Use seam tape where edges need to stay aligned, and use beveled transition strips or ramps where a thinner field meets a thicker lifting zone. Flooring suppliers specifically call out seam management and transition pieces for mixed rubber installations.[3][5] This is not decoration. It is what keeps a clever layout from feeling like a patchwork job.
- Place thickness changes away from your main walking path when possible.
- Avoid transition edges where a bench, sled, or storage cart rolls frequently.
- Dry-fit stall mats before taping because they are heavy and annoying to rework.
- Leave clean access to garage doors, floor drains, and wall storage.
For full cutting, layout, adhesive, and seam sequencing, use a dedicated home gym flooring installation guide after the zone plan is set. Installation details are easier when you are no longer changing the map.
Thickness Is Not the Same as “Better”
There is a small technical trap in the stall-mat conversation: thicker does not automatically mean better for every task. Stall mats commonly weigh about 3.9 to 4.2 pounds per square foot at 3/4-inch thickness, while a purpose-built 1/2-inch rolled rubber product such as PLAE Forge is listed around 2.7 pounds per square foot.[6][1] On a per-inch basis, that makes the rolled rubber slightly denser by derived arithmetic, even though the stall mat is physically thicker.
That matters because impact absorption, density, surface compliance, and lifting stability are related but not identical. A thicker, slightly more compliant mat can be useful where plates hit because it gives the impact somewhere to go. Under a heavy squat stance, too much squish is not a virtue. You want a firm, predictable surface.
This is not an argument against stall mats. They are popular for a reason: they are tough, widely available, and cost-effective in high-impact zones. It is an argument against treating them as the automatic answer for every square foot. If your question is only about thickness, separate from layout, the deeper breakdown is in how to choose home gym flooring thickness without overpaying.
Recalculate Before You Order
The 10'×12' example is a planning model, not a universal quote. Before buying, measure your room, sketch the rack and machine footprints, mark the actual barbell path, and price the materials available to you that week. For deeper pricing by material format, compare current numbers against a home gym flooring cost-per-square-foot guide instead of relying on one stale cart.
A simple calculation is enough:
total cost = (thin-zone square feet × thin flooring price)
           + (moderate-zone square feet × moderate flooring price)
           + (drop-zone square feet × heavy flooring price)
           + transition strips, tape, waste, tax, and delivery
Add waste for cuts and mistakes. Add transition pieces. Add delivery if rolls ship freight. If stall mats are local pickup only, add the inconvenience honestly; a 3/4-inch mat is not fun to move alone. Odor and flatness also matter with horse stall mats, and those trade-offs are noted in stall-mat-specific guides.[2][6]
The right home gym floor is not uniformly thick. It is accurately thick. Spend full-protection money where iron meets floor, use lighter material where the floor is only carrying movement and equipment, and check the current prices before turning a sensible safety decision into an oversized rubber bill.
References
- Expert-Tested: The Best Home Gym Flooring Options (2026) — Garage Gym Reviews
- Horse Stall Mats for Home Gym: Thickness, Sizing and Install Guide — RitFit Sports
- How Thick Should Gym Flooring Mats Be? Expert Guide — Fitness Floors
- Home Gym Flooring: The Complete 2025 Buyer's Guide — IRON COMPANY
- Horse Stall Mats vs. Gym Mats — What's the Difference? — Greatmats
- The Best Horse Stall Mats for Home Gym in 2026 — Garage Gym Reviews
Comments
Join the discussion with an anonymous comment.